How to create and configure a price plan
In this article, you will learn how to create and configure a pricing plan.
To get started, you will need the following:
- A systeme.io account
- A funnel
- A payment page
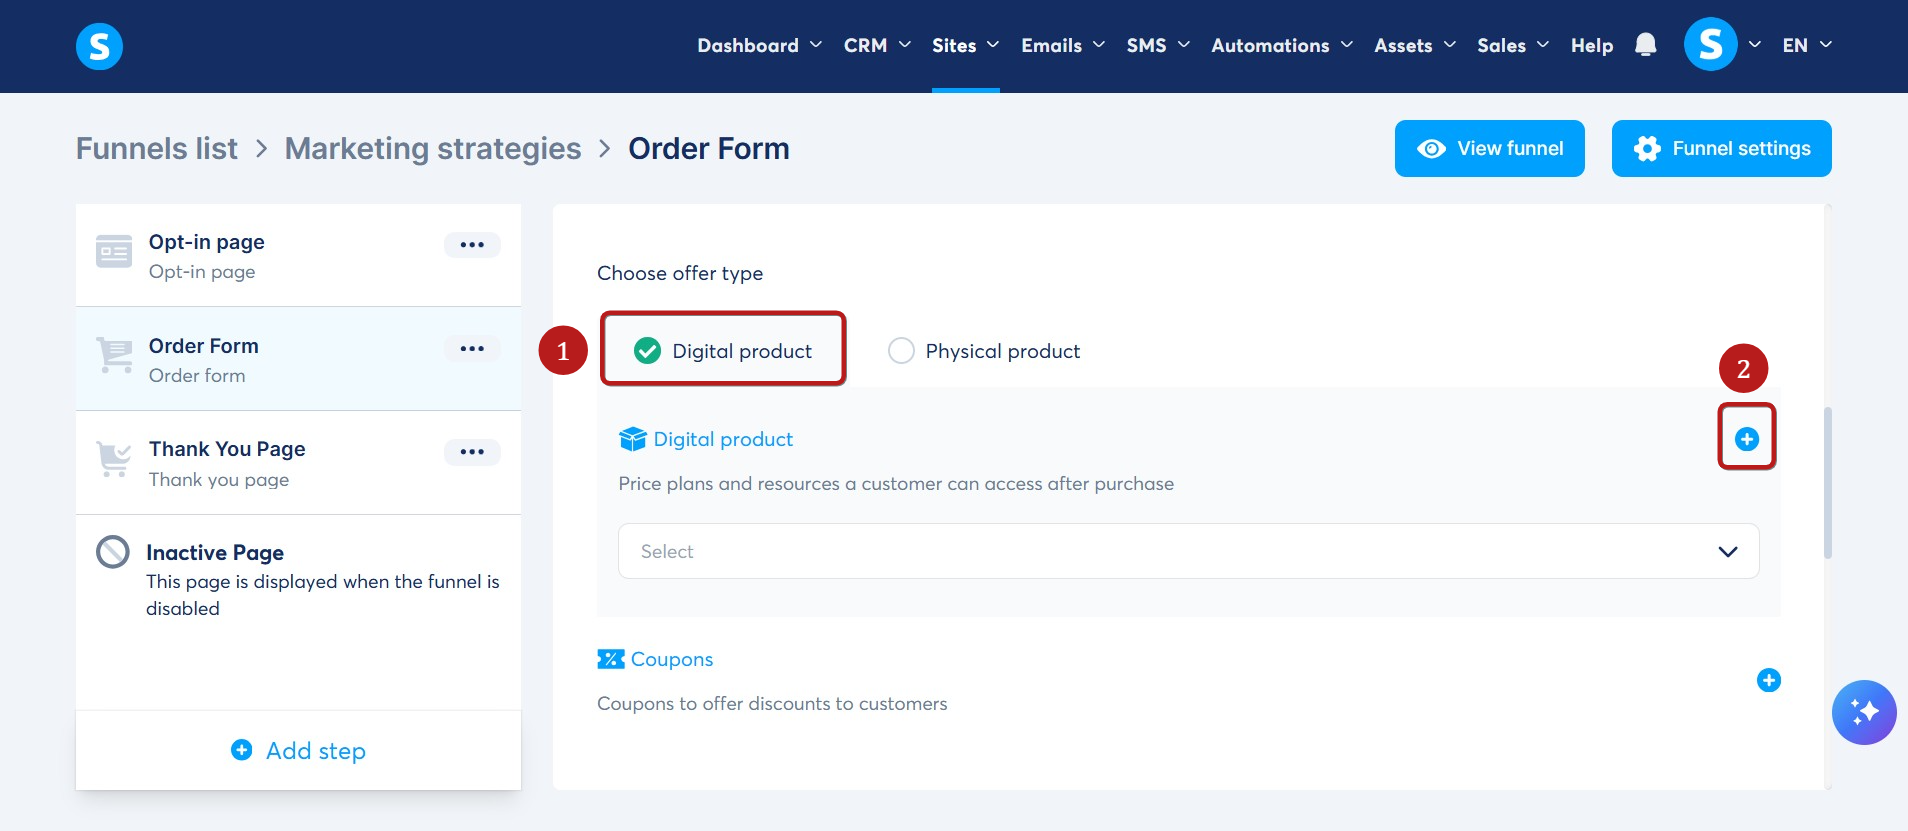
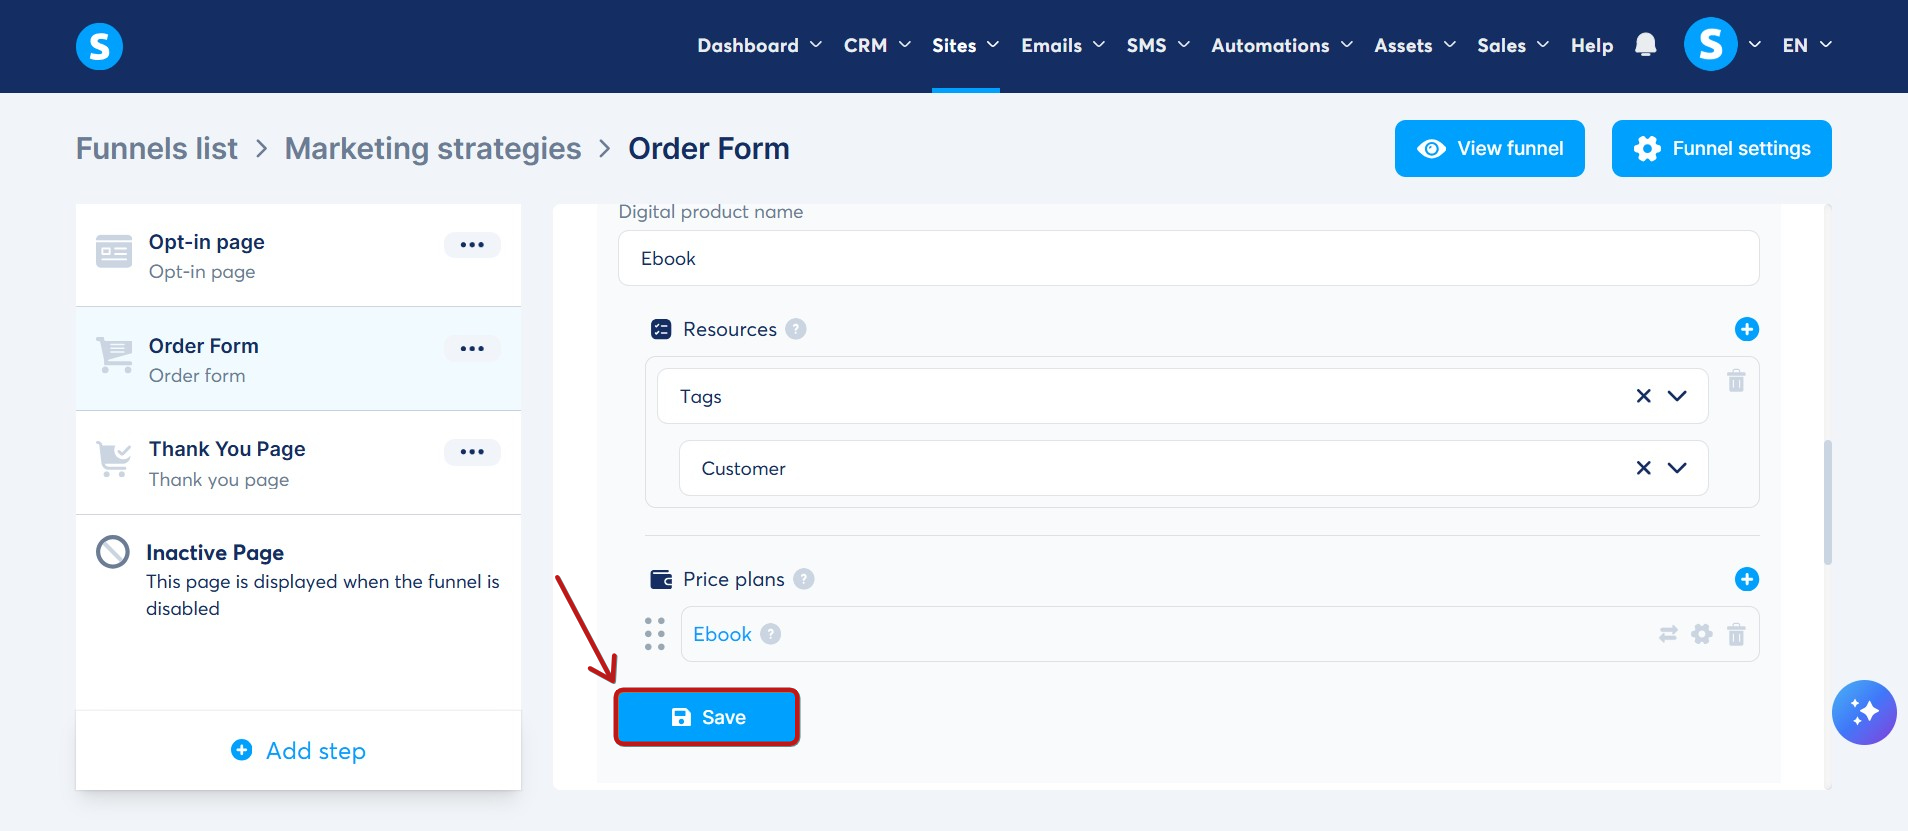
To create a price plan for your digital offer, click on your Order Form. Next, select Digital product (1) from the offer type options.
Click the plus (+) icon (2) next to Digital Product to add a new resource.
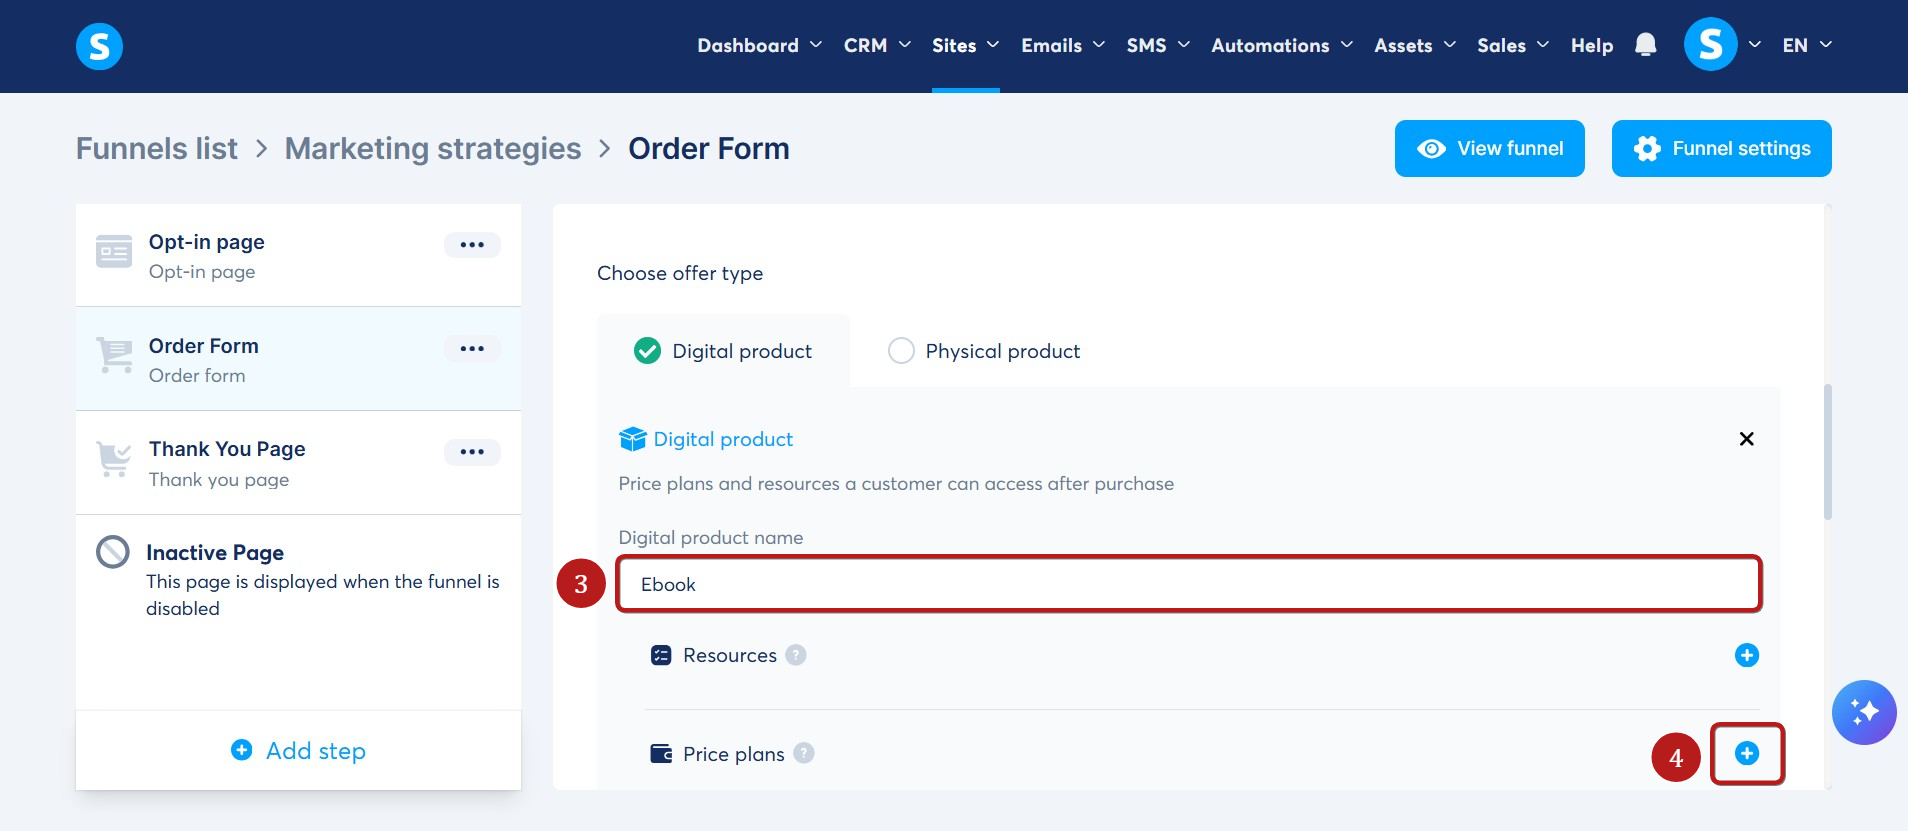
Name your new product in the Digital product name field (3). Then, click the plus (+) icon (4) to configure the price plan.
Select an existing price plan from the dropdown menu and click Save (5).
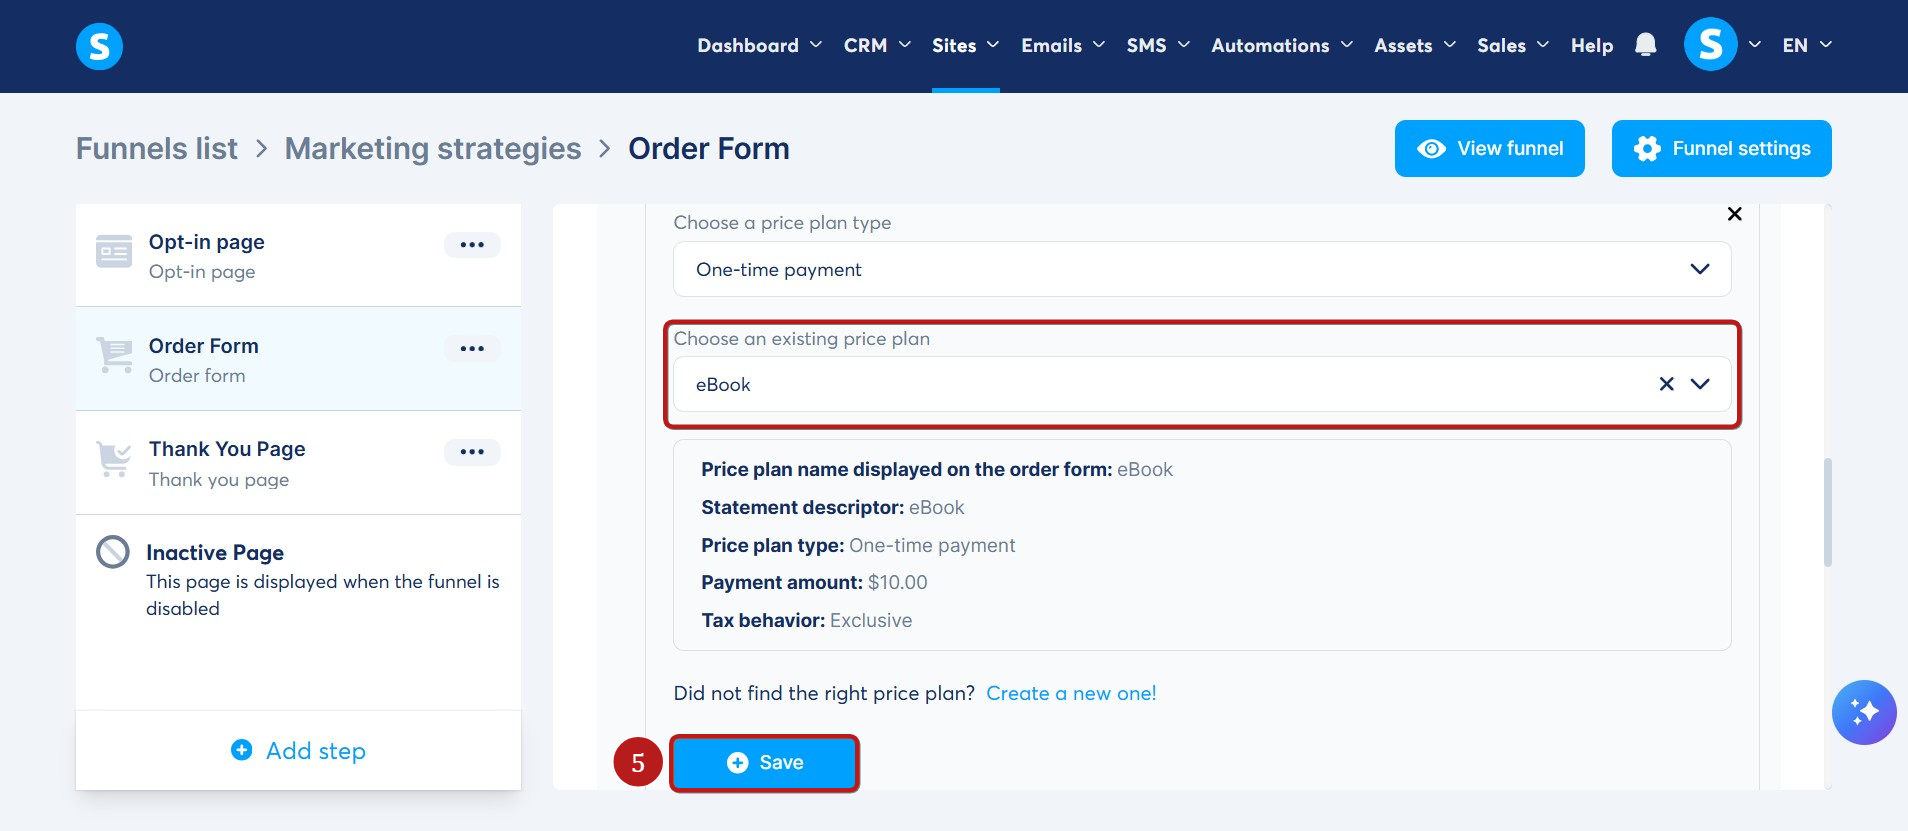
Alternatively, click Create a new one to set up a new price plan.
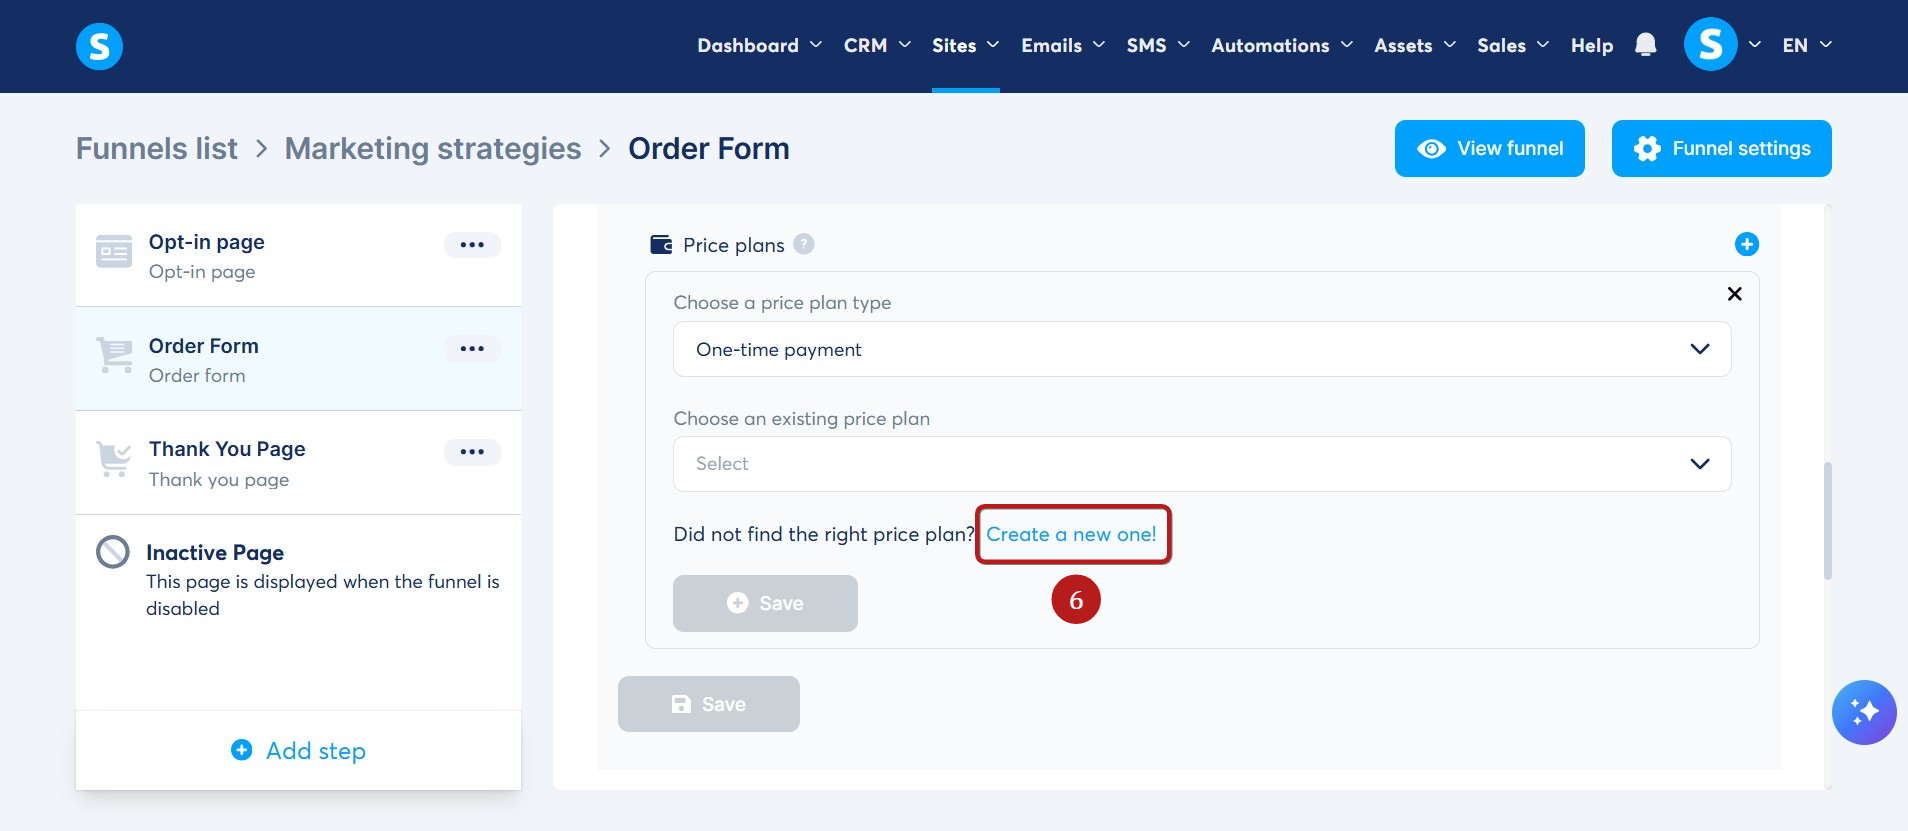
Fill in the display names for the dashboard and order form, as well as the statement descriptor.
Then select the type of price plan you want to set up.
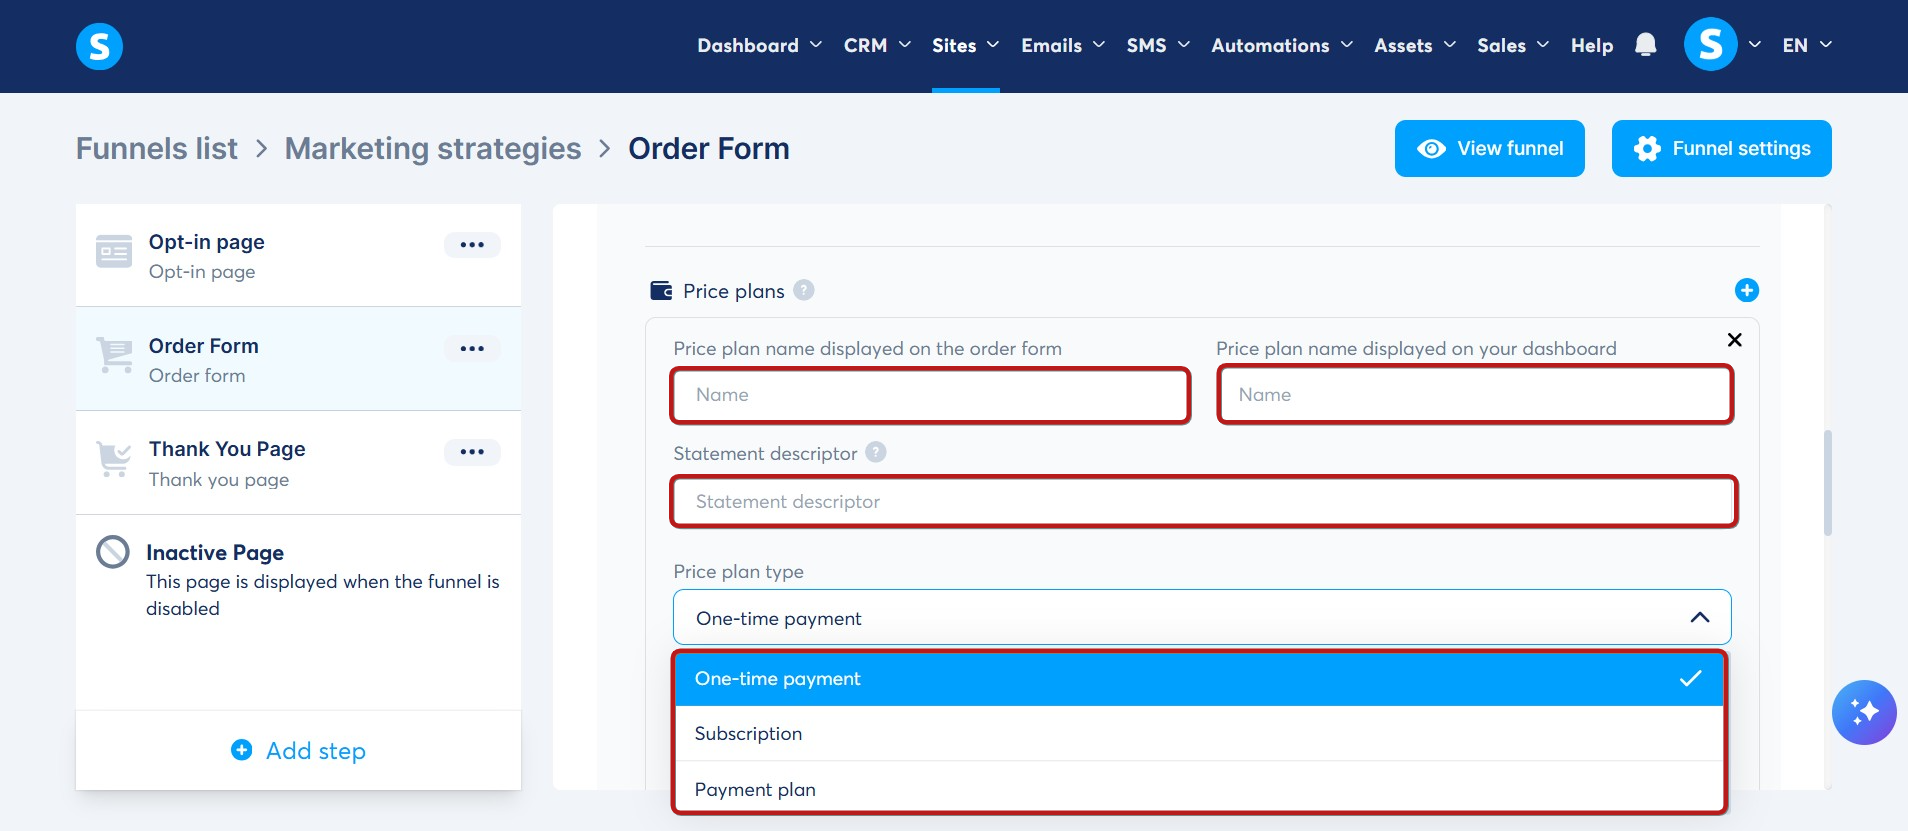
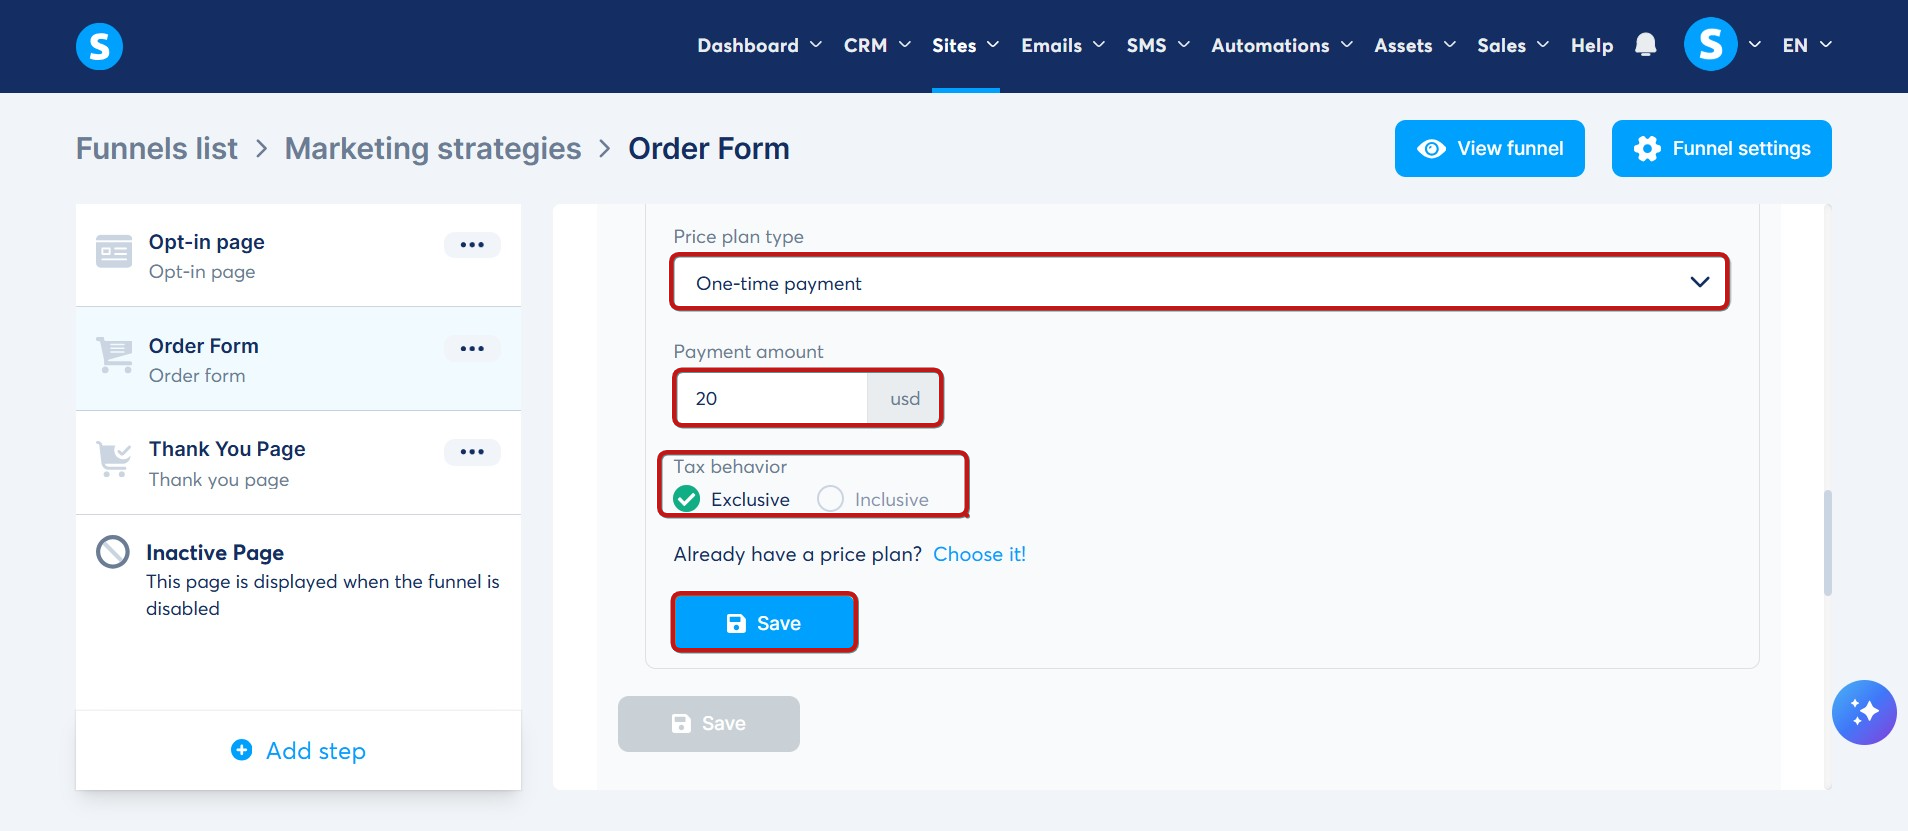
1. One-time payment:
To configure a one-time payment:
- Select One-time payment as the price plan type.
- Enter the payment amount.
- Set the tax behavior
- Click Save.
2. Subscription:
To configure a subscription:
- To offer a trial period, enter the duration and select the time unit (days, weeks, months, or years).
- If no trial period is being offered, enter "0".
- Define the subscription cost (e.g., $20/month).
- Select the interval between payments (e.g., every 1 month).
- Set the tax behavior
- Click Save.

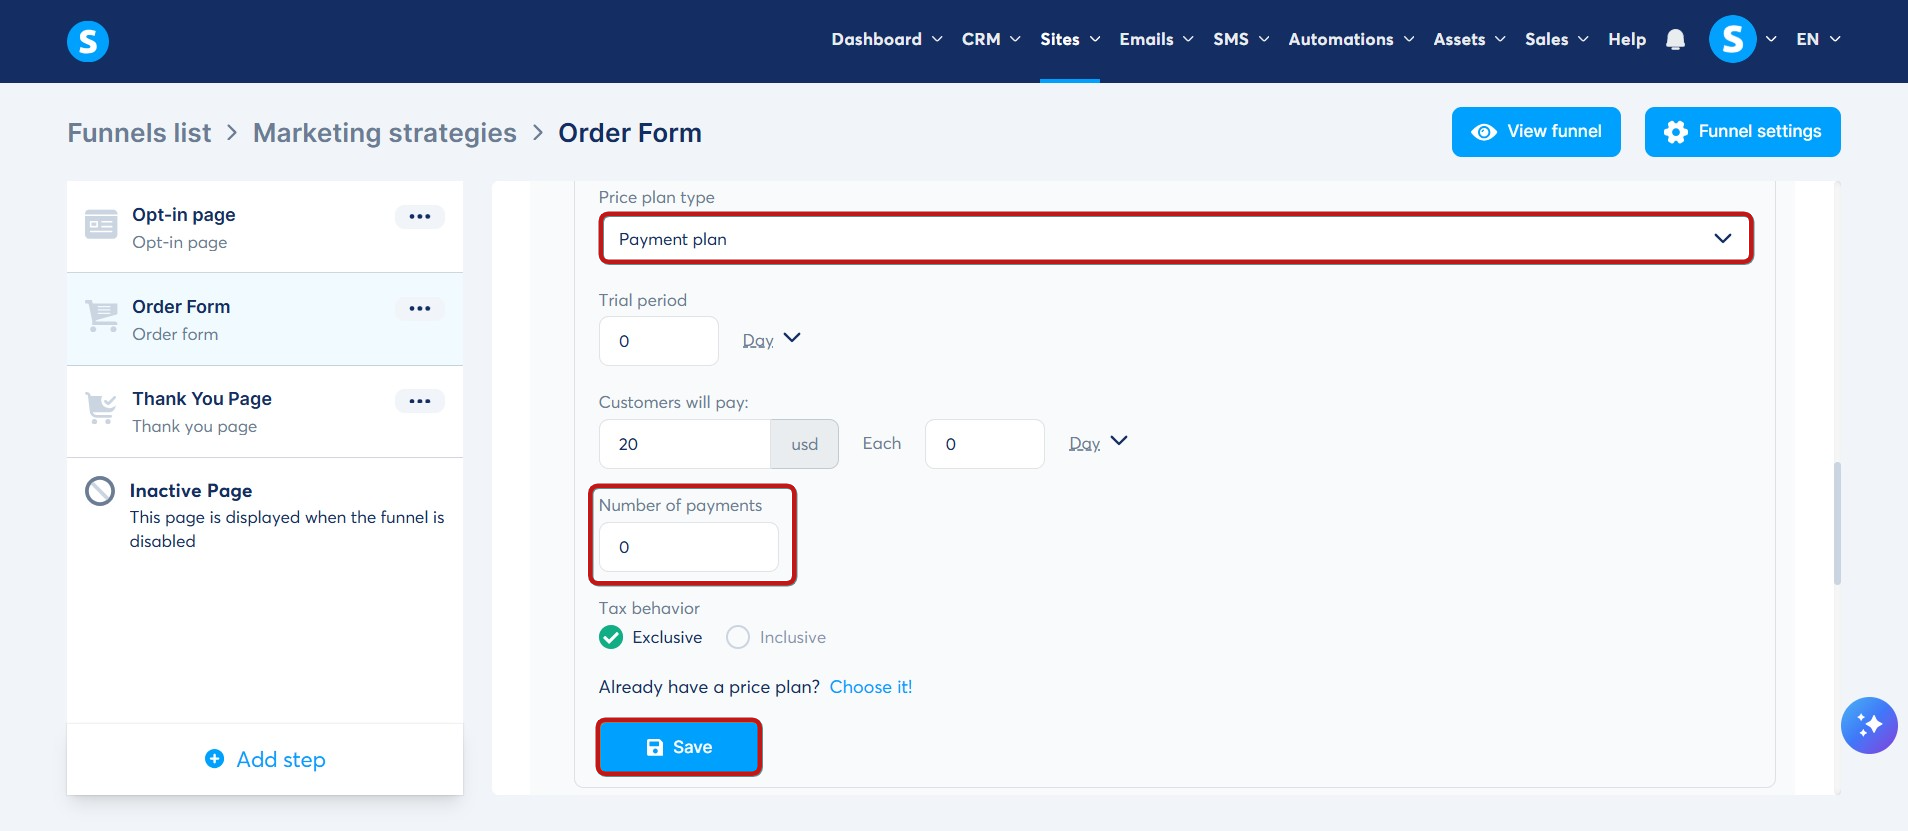
3. Payment plan:
Configuring a price plan with the type Payment plan is similar to setting up a Subscription plan. The only difference is that you must specify the total number of payments (e.g., enter '5' for 5 monthly payments). Then, click Save.
After saving the price plan, click the main Save button to finalize your digital product settings.
Note: You can only create price plans for digital products here. For physical products, you must create the price plan when adding the product itself.