How to create a deadline for a sales funnel
This guide will walk you through the process of setting a deadline for a sales funnel.
To get started, you will need the following:
- A systeme.io account
- A sales funnel (How to create a funnel)
The Deadline feature allows you to offer a special deal for a limited time. You'll need to define the access timeframe in the settings.
The deadline feature can only be used on Order Form and Sales Page funnel steps. It cannot be enabled for other types of pages, such as Opt-in pages, Inline forms, Thank-you pages, etc.
When you add a deadline to an Order Form or Sales Page, this deadline applies to each prospect. In other words, every prospect will have a predetermined access period, regardless of when they registered.
Once the deadline passes for each prospect, they will be redirected to a page of your choice. You can select any page type for redirection.
A. How to create a deadline for a sales funnel?
- Start by going to your sales funnel and click on Deadline settings (1).
- Then, click on Enable deadline feature (2).
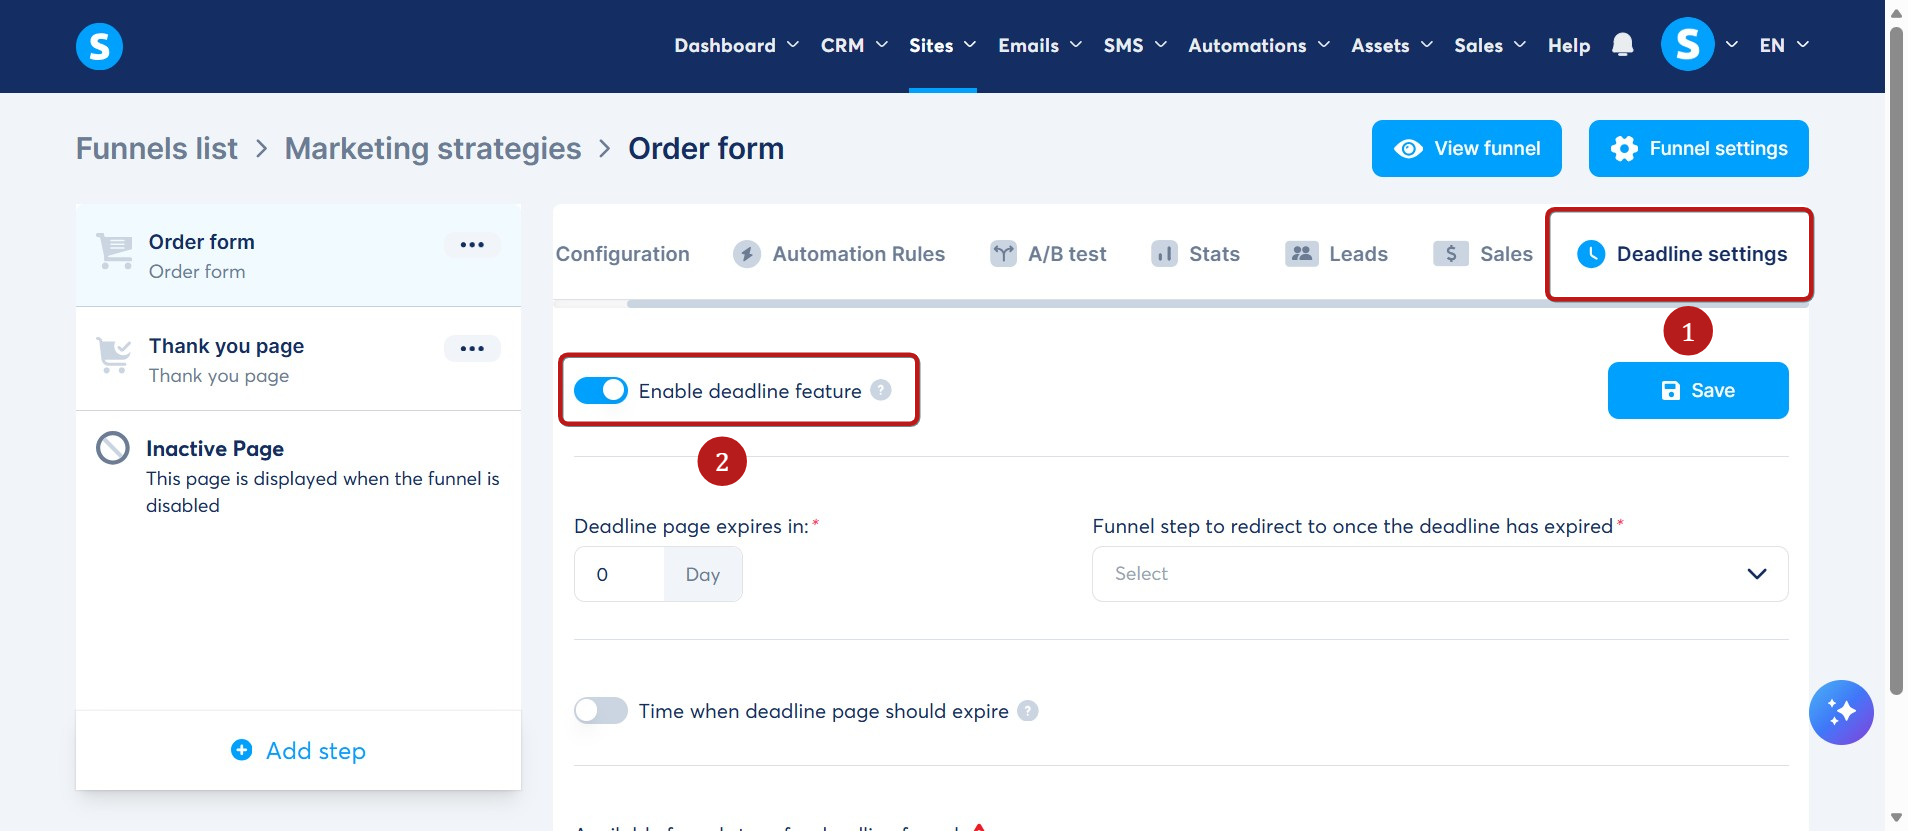
- Specify the number of days the pages will be available in the Deadline page expires in field (3).
For example, if you set the page expiration to 6 days, the funnel step will no longer be available 6 days after the contact registers.
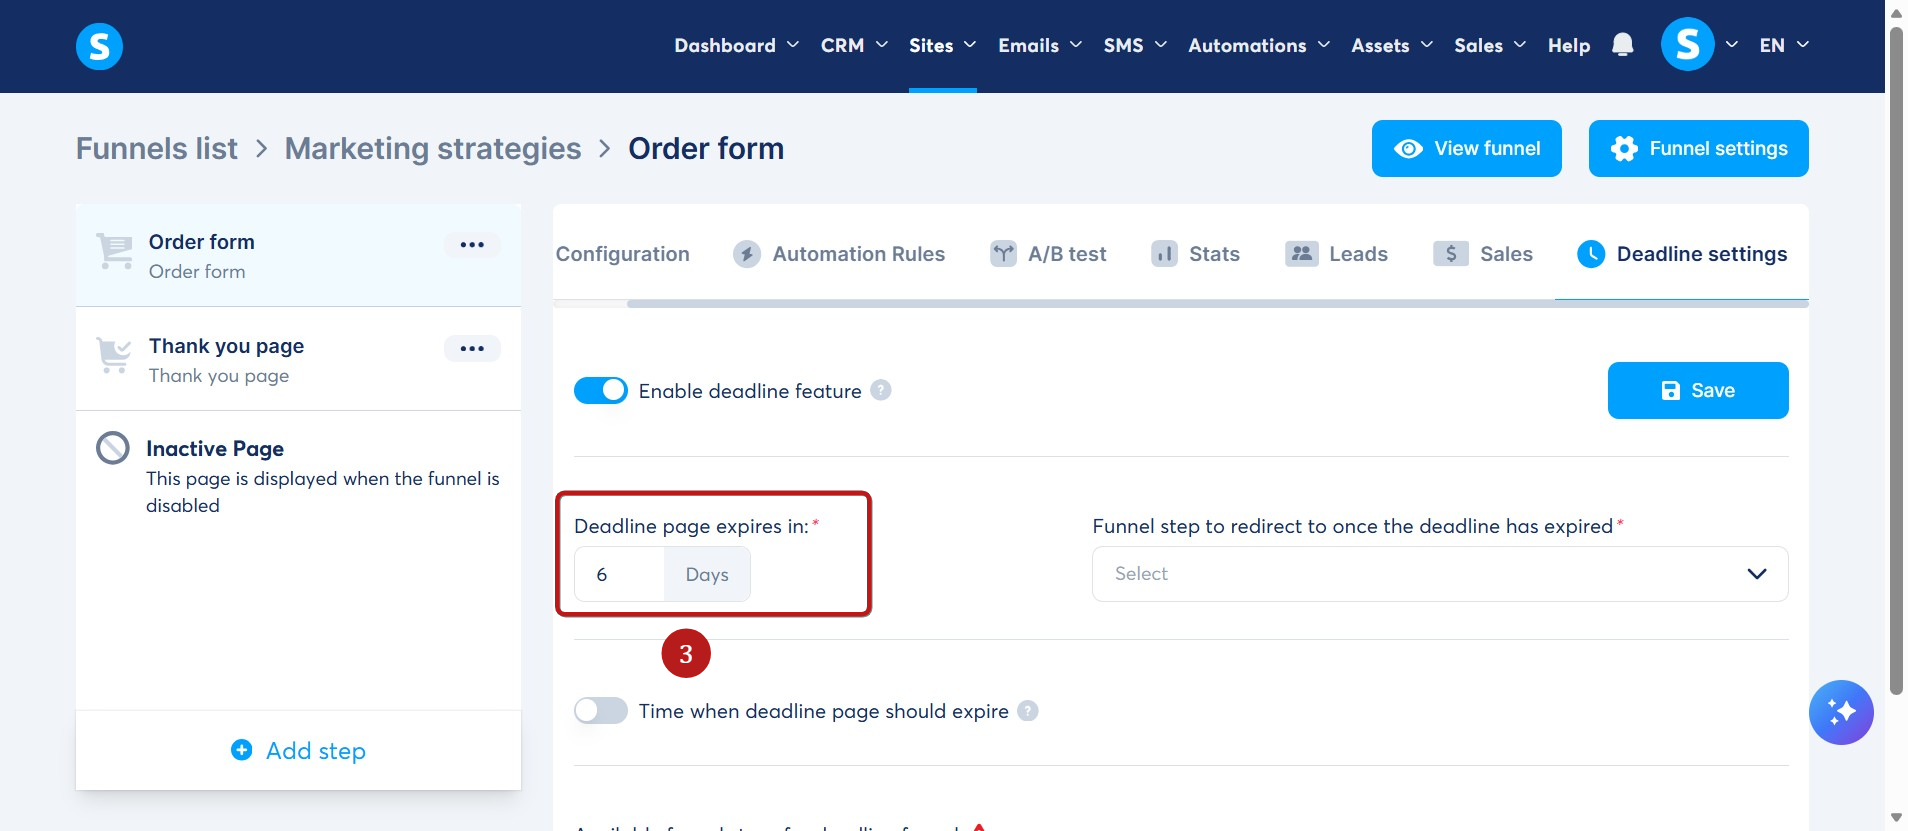
- You also have the option to specify the time when the deadline page should expire by checking the Time when deadline page should expire box and entering the specific time (4).
Note: The specified time is based on the account's time zone, not the contact's. For example, if you select 08:00, the page will expire at 08:00 on the sixth day after the lead is registered.
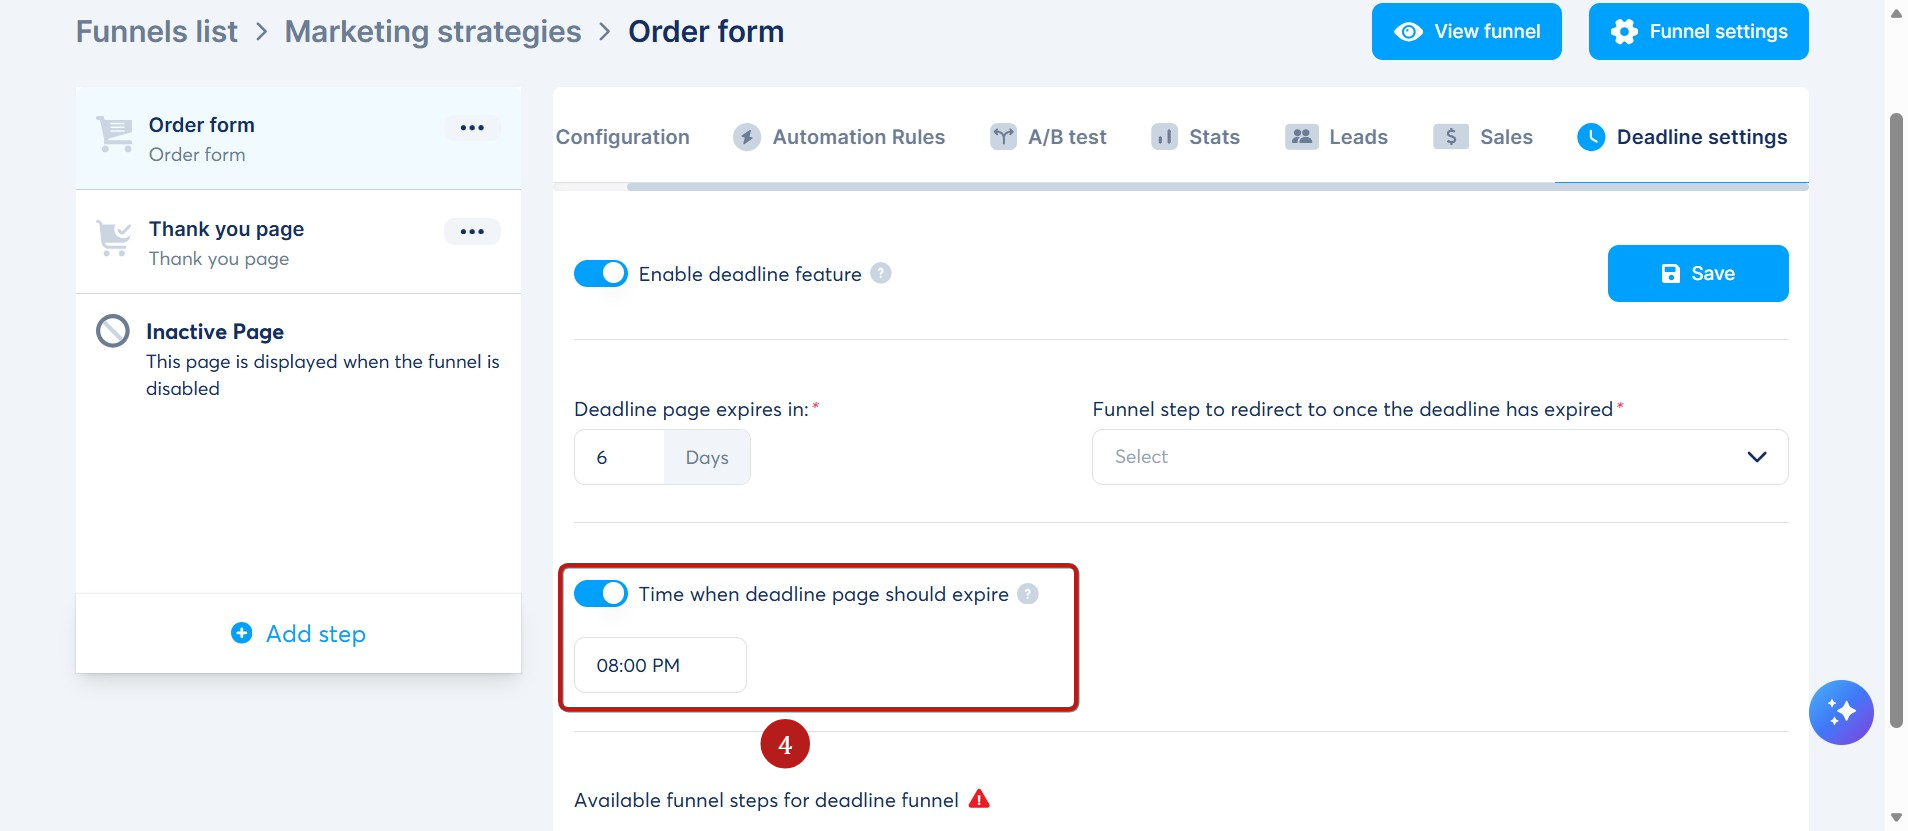
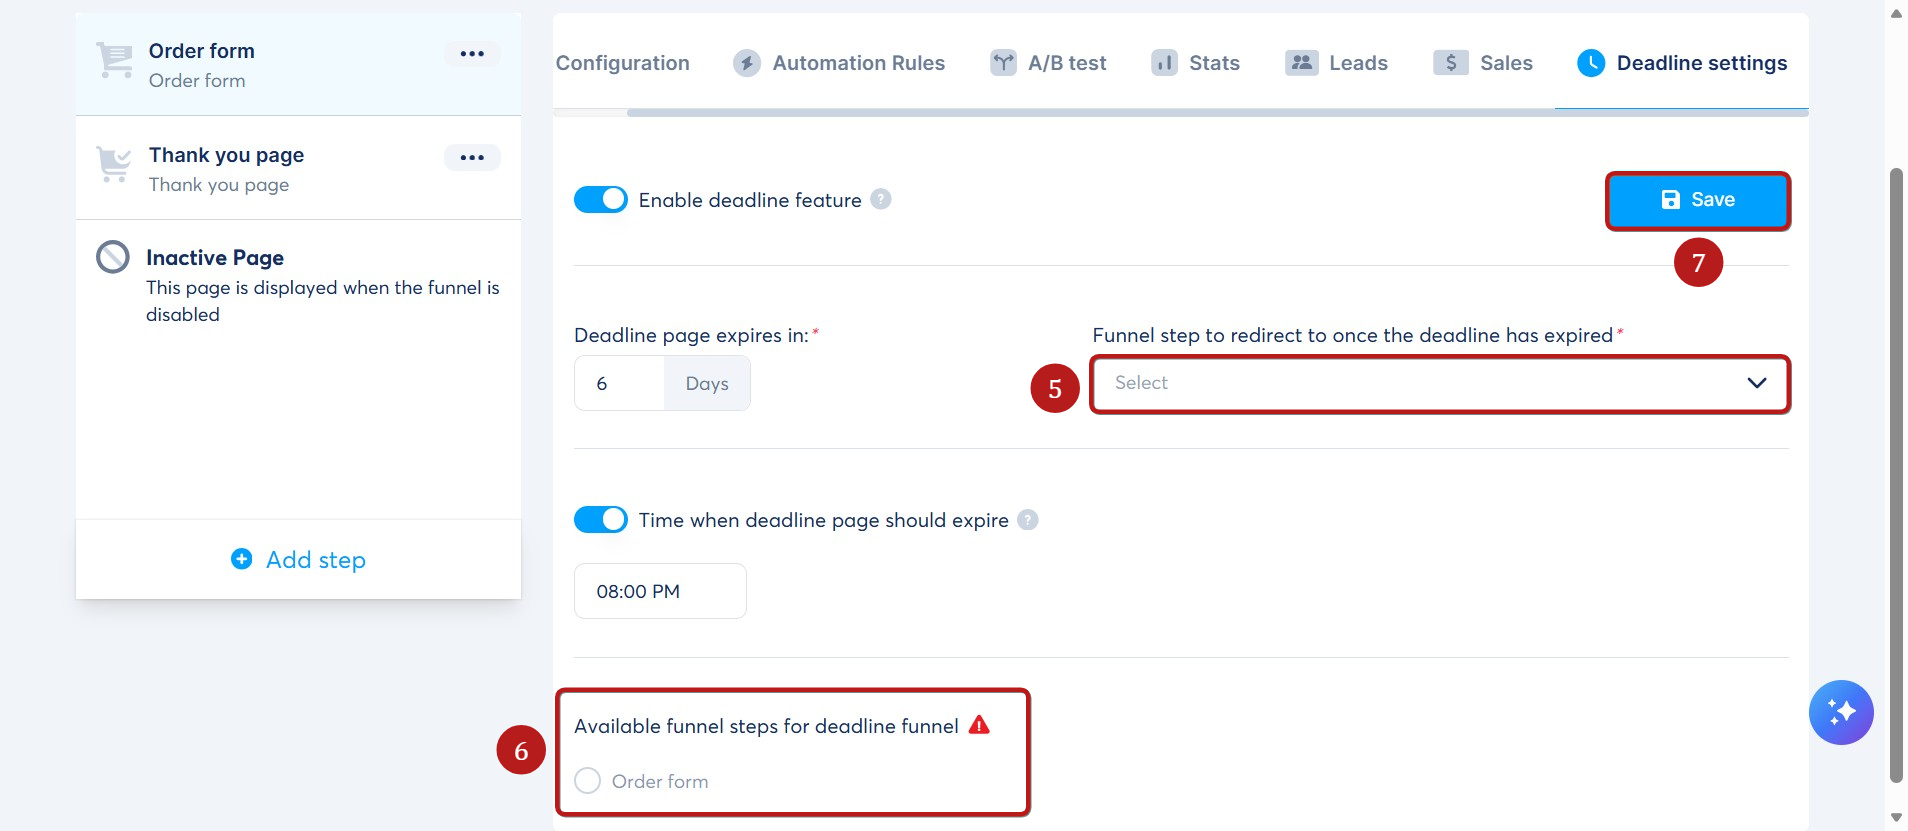
- In the field Funnel step to redirect to once the deadline has expired, select the page your leads should be redirected to after the deadline (5).
Note: Any page type can be selected for redirection.
- You can choose the page(s) you want to assign a deadline to (6)..
Remember that only order forms and payment pages can be used for deadlines.
Don't forget to save your Deadline settings when you're finished (7).
B. How to synchronize a deadline with a countdown timer on a page?
If you're using a countdown timer in your funnel, simply select the Same as the deadline funnel settings option in the page editor (8). The two features will automatically sync.
Note: You can use this feature only for the following funnel steps: Order form and Sales page.

Important: For the deadline settings to work, your prospects must have previously subscribed, and the subscription form page should link directly or indirectly to the page with the deadline. In other words, the system must have the prospect's email address to display the page with the deadline.
Below are three scenarios to help you better understand how a page with a deadline behaves:
First Scenario:
- Sales funnel with deadlines containing an opt-in page (page with an opt-in form): Pages with deadlines will no longer be available to prospects once the deadline passes.
Second Scenario:
- Sales funnel without deadlines containing an opt-in page (page with an opt-in form) ~> redirects to a funnel page with a deadline: Pages with deadlines will no longer be available to prospects once the deadline passes.
Third Scenario:
- Sales funnel with deadlines and no opt-in form: Pages with deadlines will remain available to prospects even after the deadline has passed.