How to create a course using systeme.io
In this article, you will learn how to create your own membership site using systeme.io.
Here's how it works!

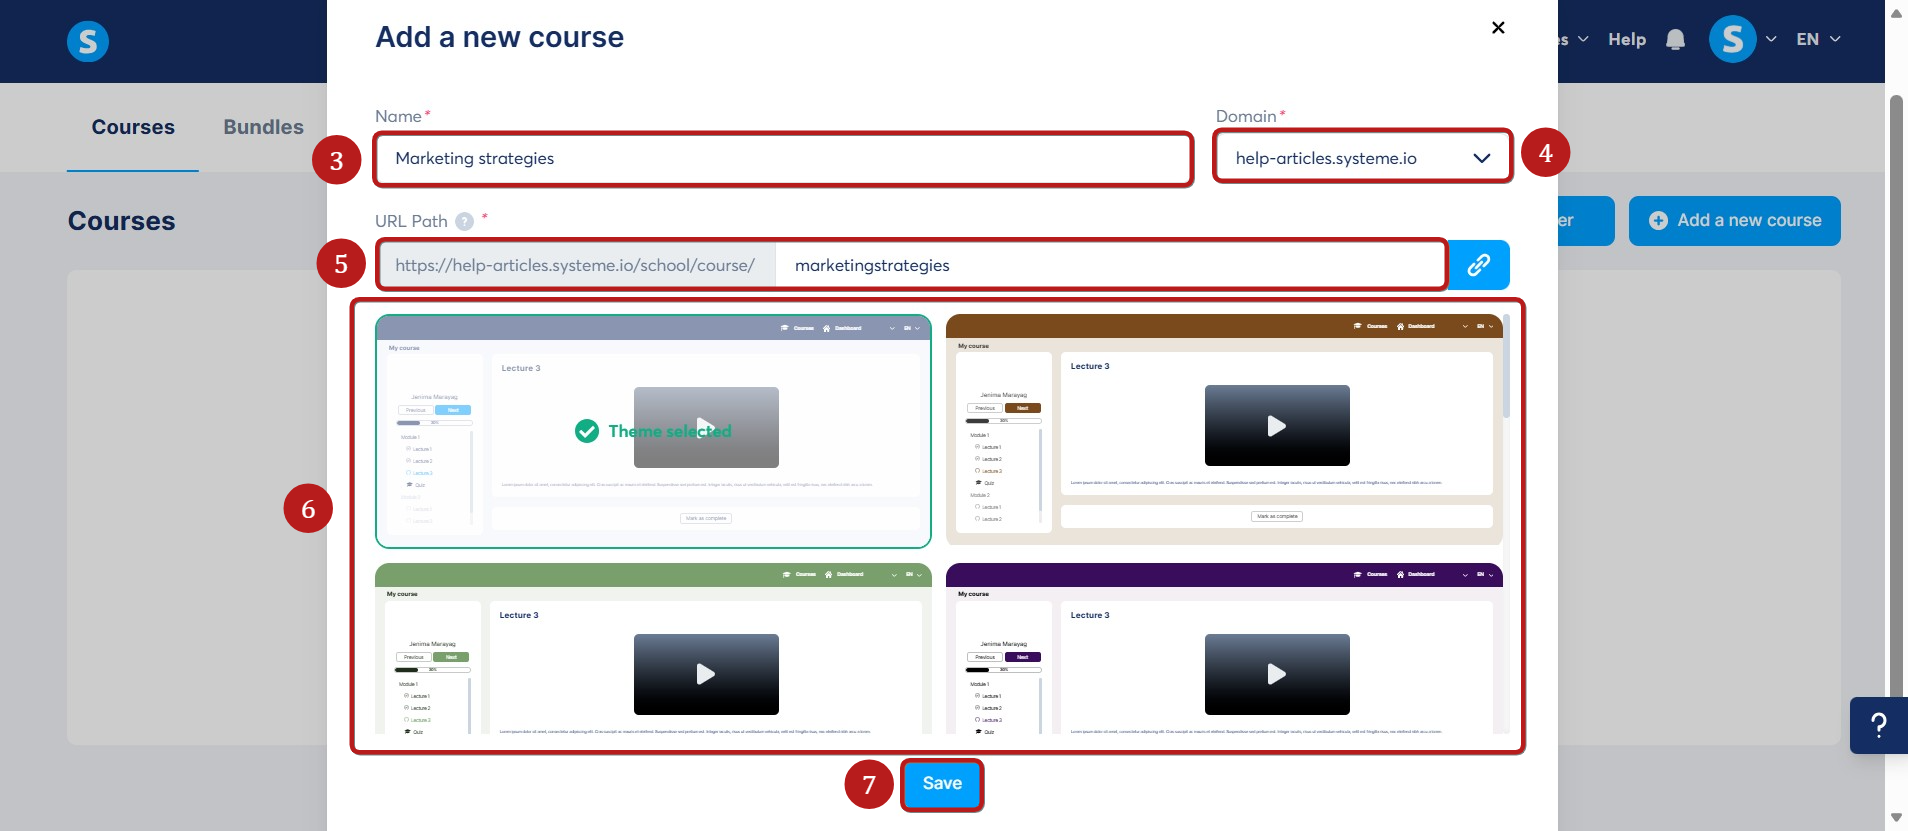
Fill in the fields below:
- Name (3)
- Domain (4)
- URL path (5)
- Choose one of the available themes (6)
Then, click Save (7) for the settings to be saved.
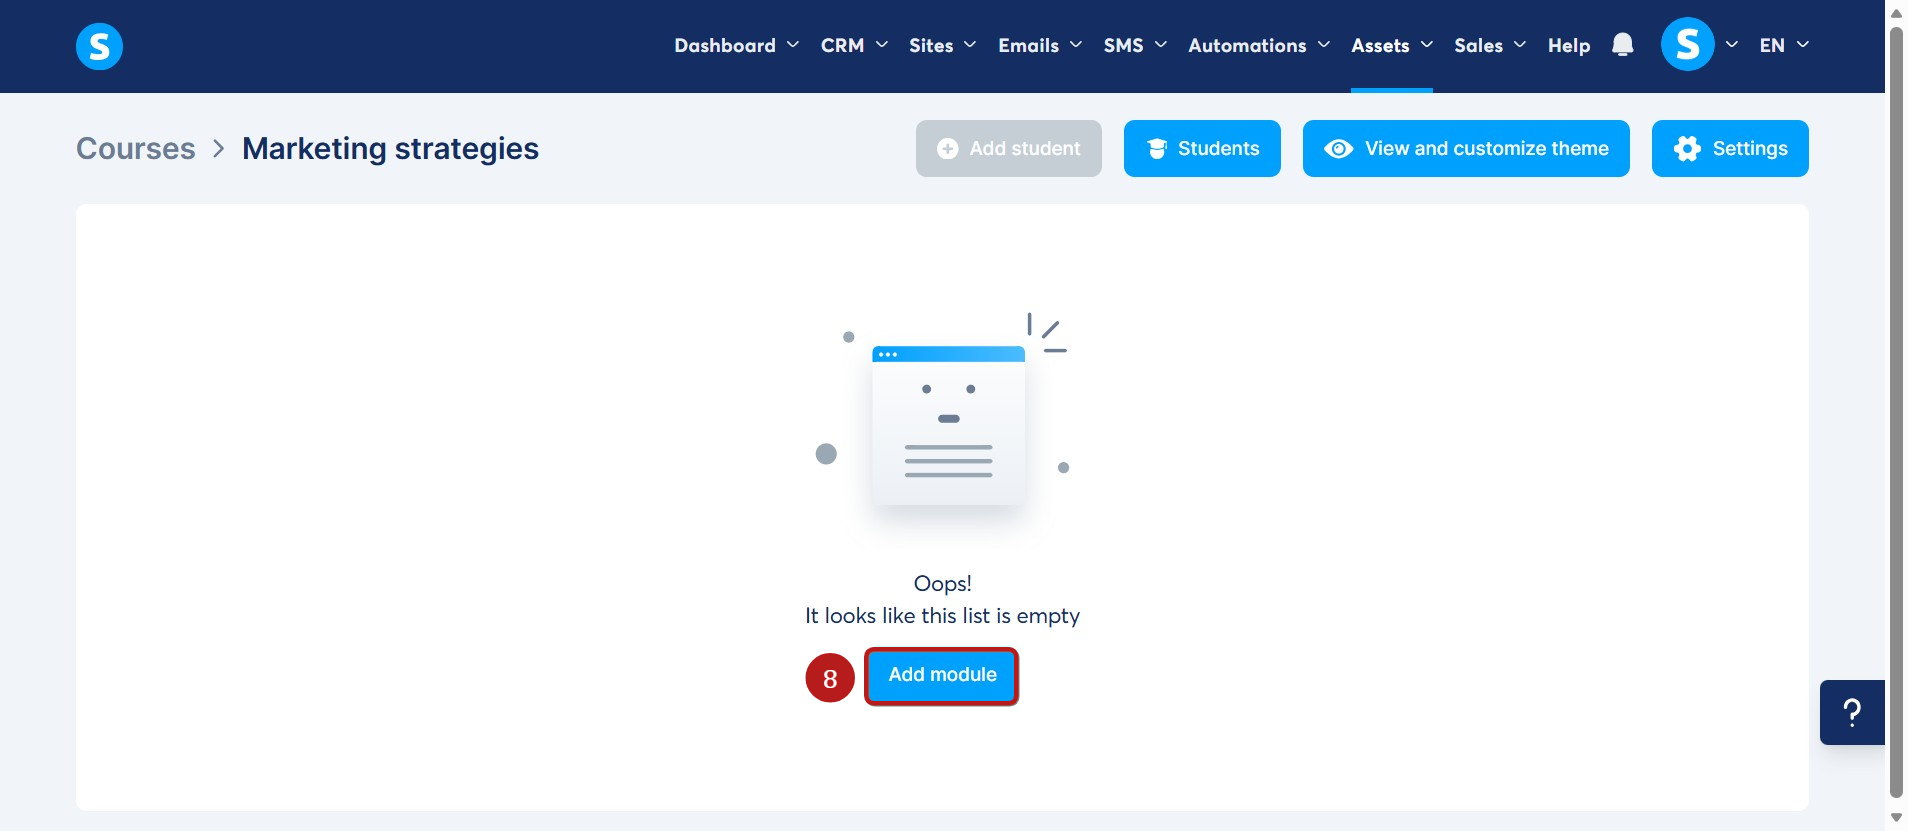
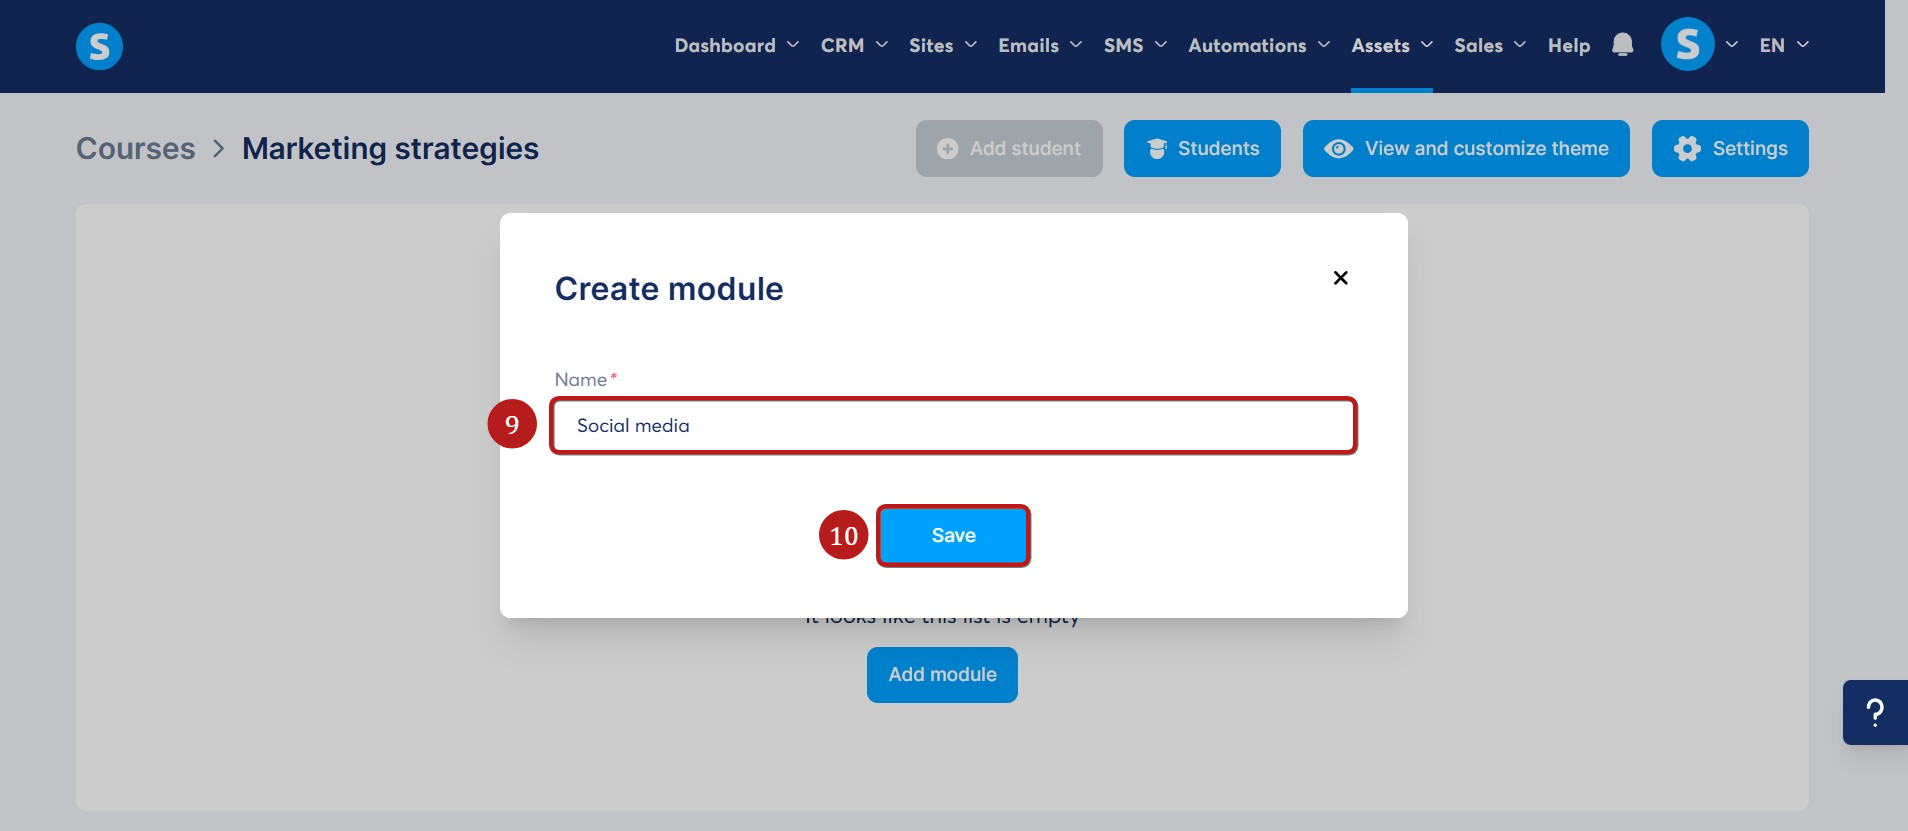
Create a course module
Now that you have your course created, it's time to create a module.
To do so, click on the Add module (8).
Create a lecture
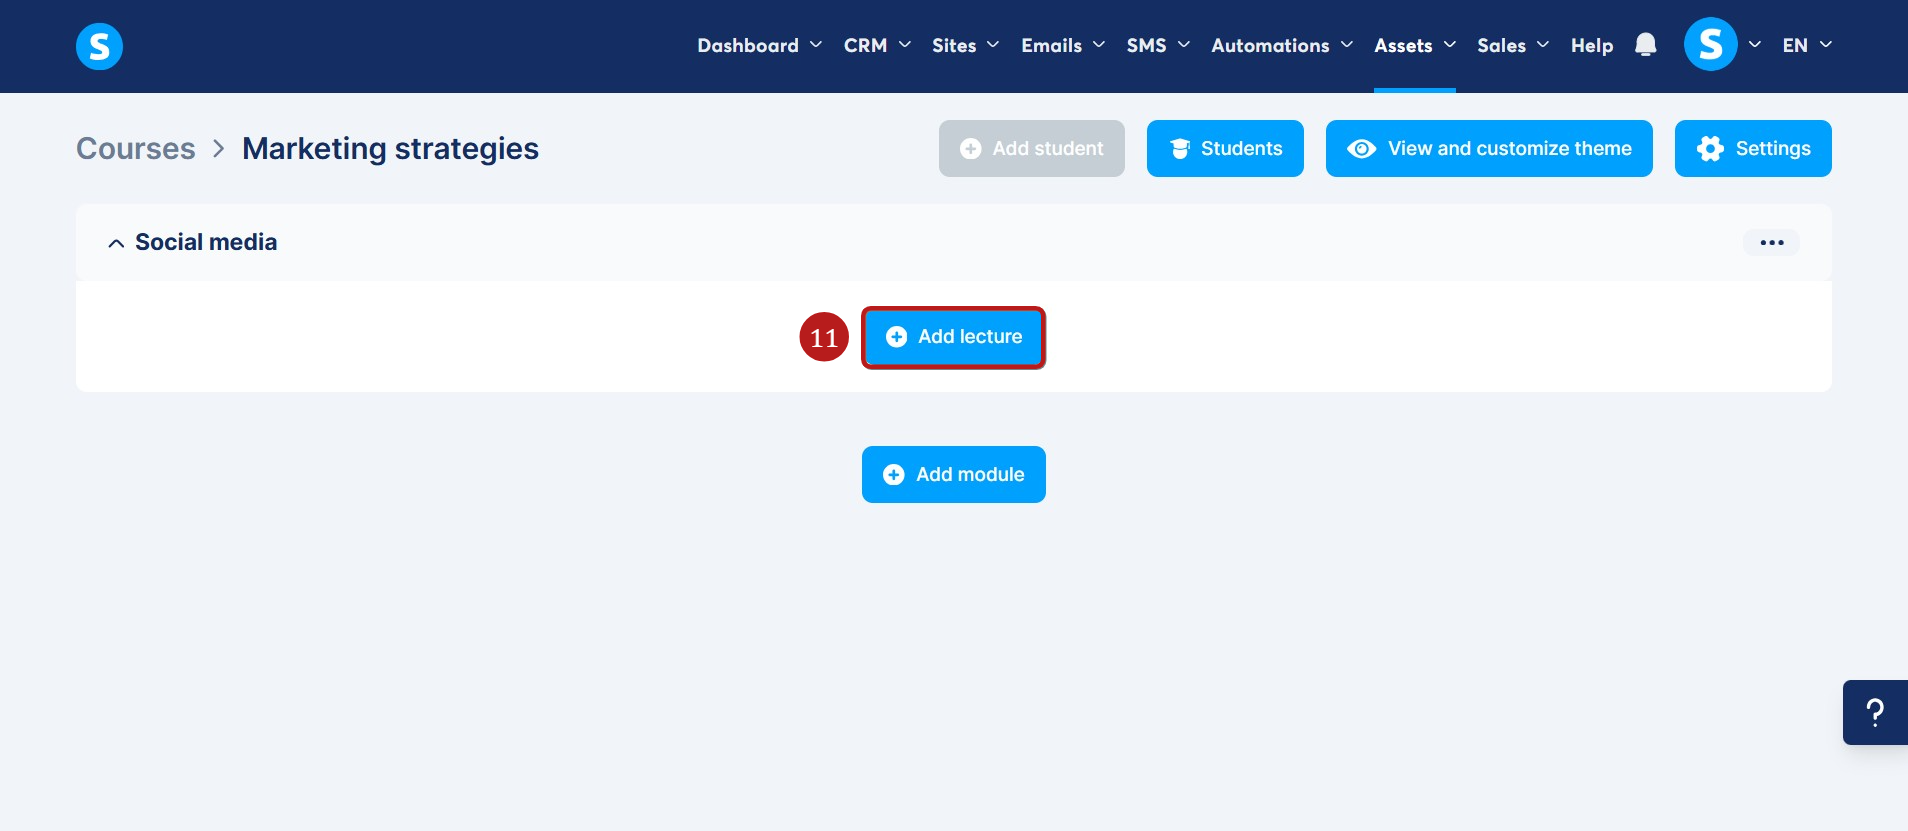
Insert the following information in the popup that appears:
- The name of the lecture (12)
- A delay after the previous lecture (13)
- Check Enable comments (14) if you want to allow students to comment on this lecture.
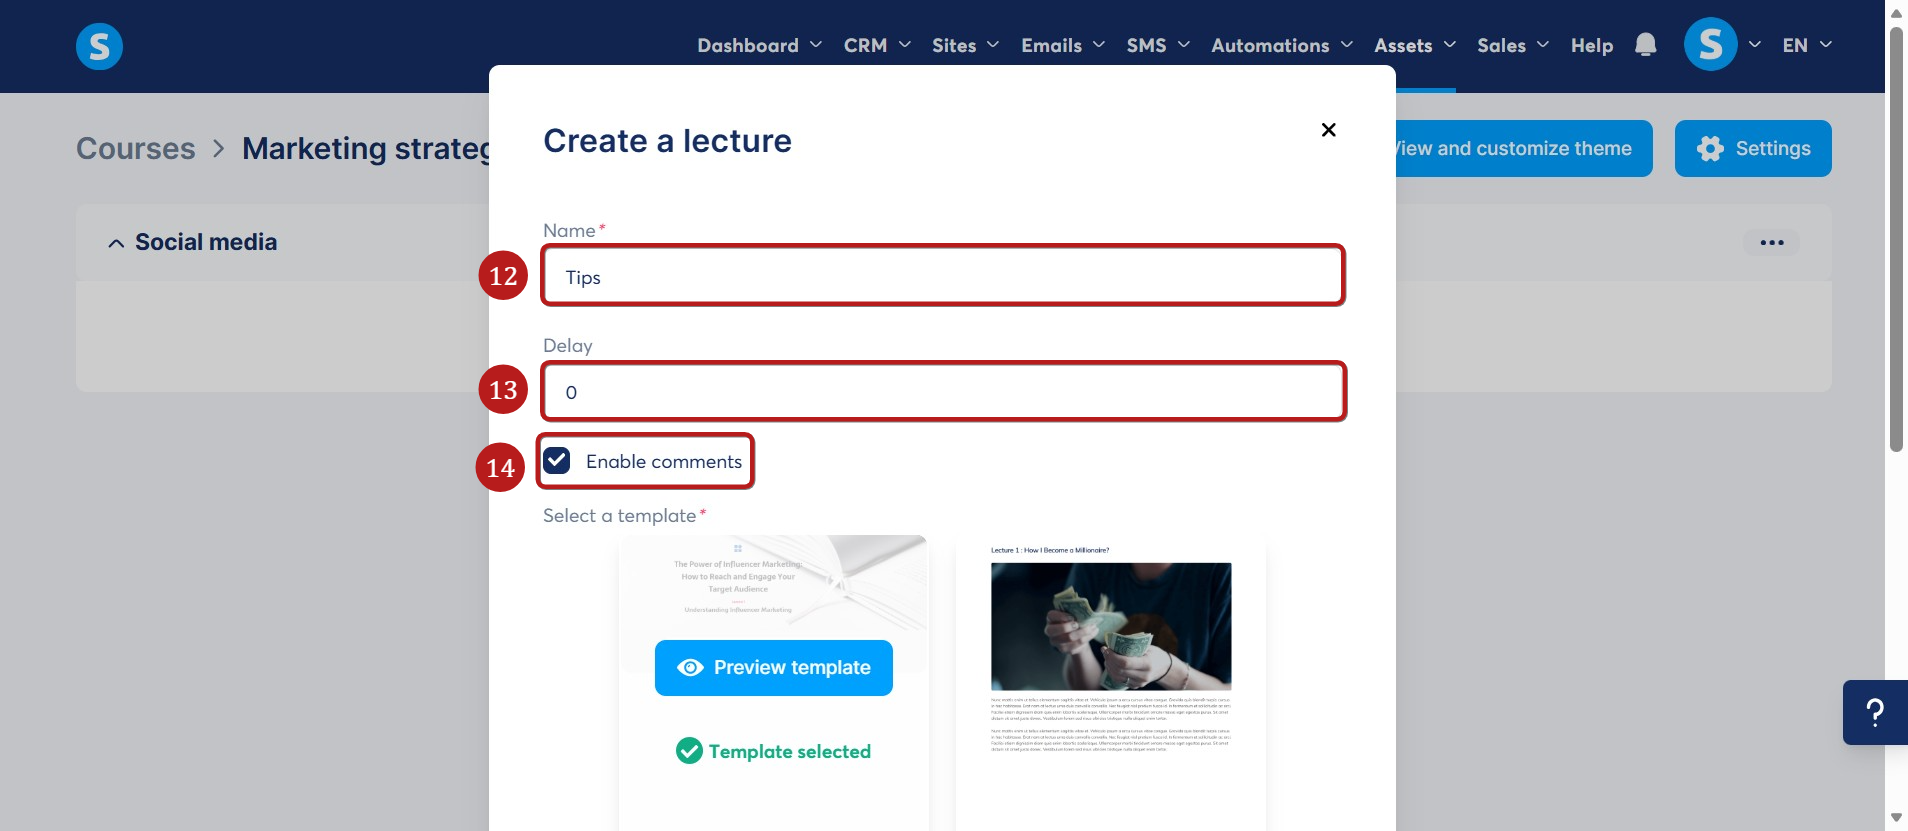
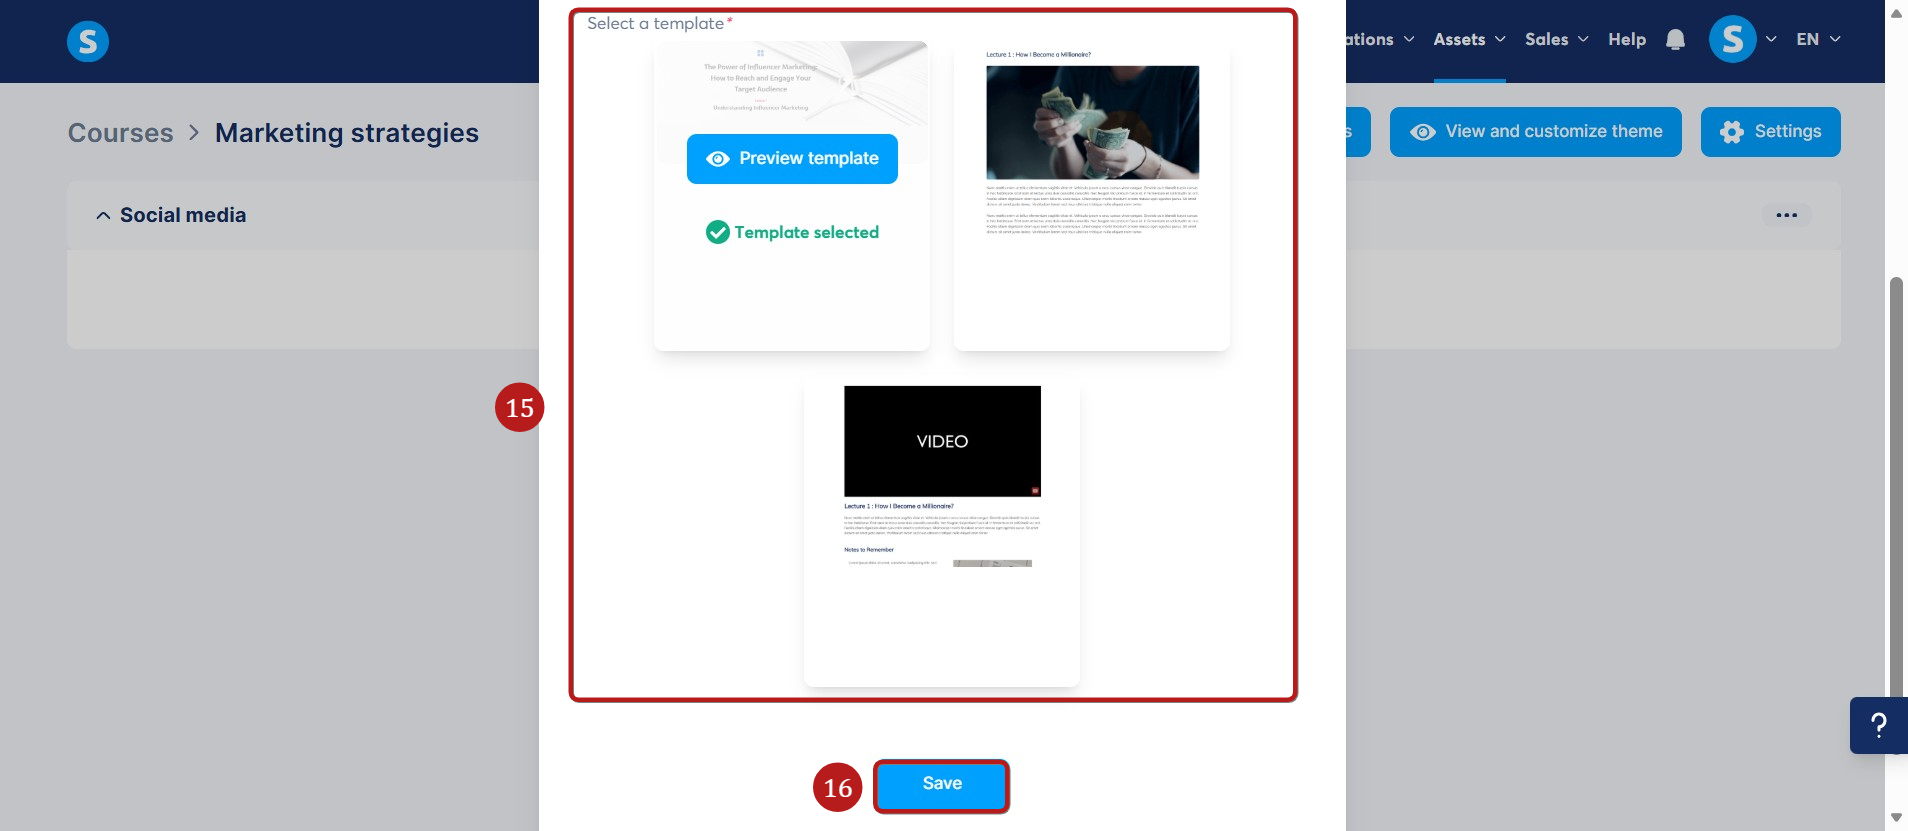
- Choose one of the page templates from those available (15)
Click on Save (16) to finalize the creation of a lecture.
Once you finish creating your modules and lectures, make sure to activate them. Learn more about how to activate a lecture here. (Same process for the course).
You can also drag and drop different lectures across different modules.
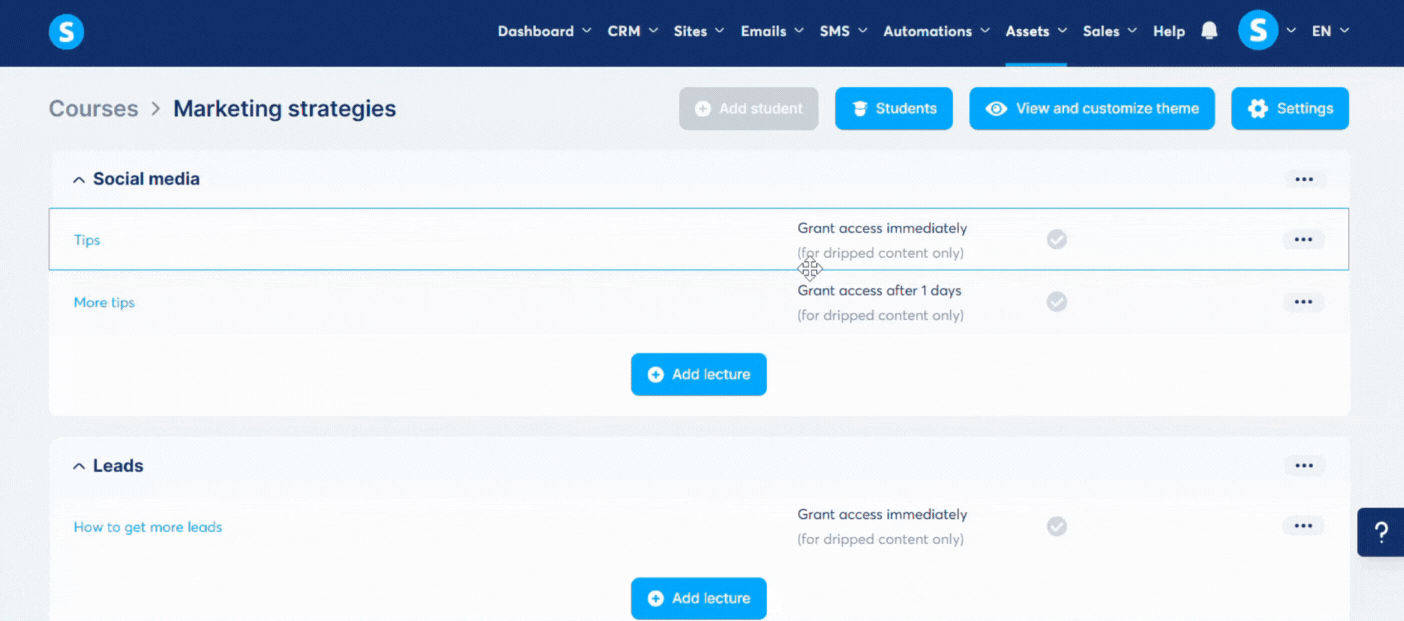
Managing your modules and lectures
To save time when building and organizing your courses, you can easily duplicate or move your existing content.
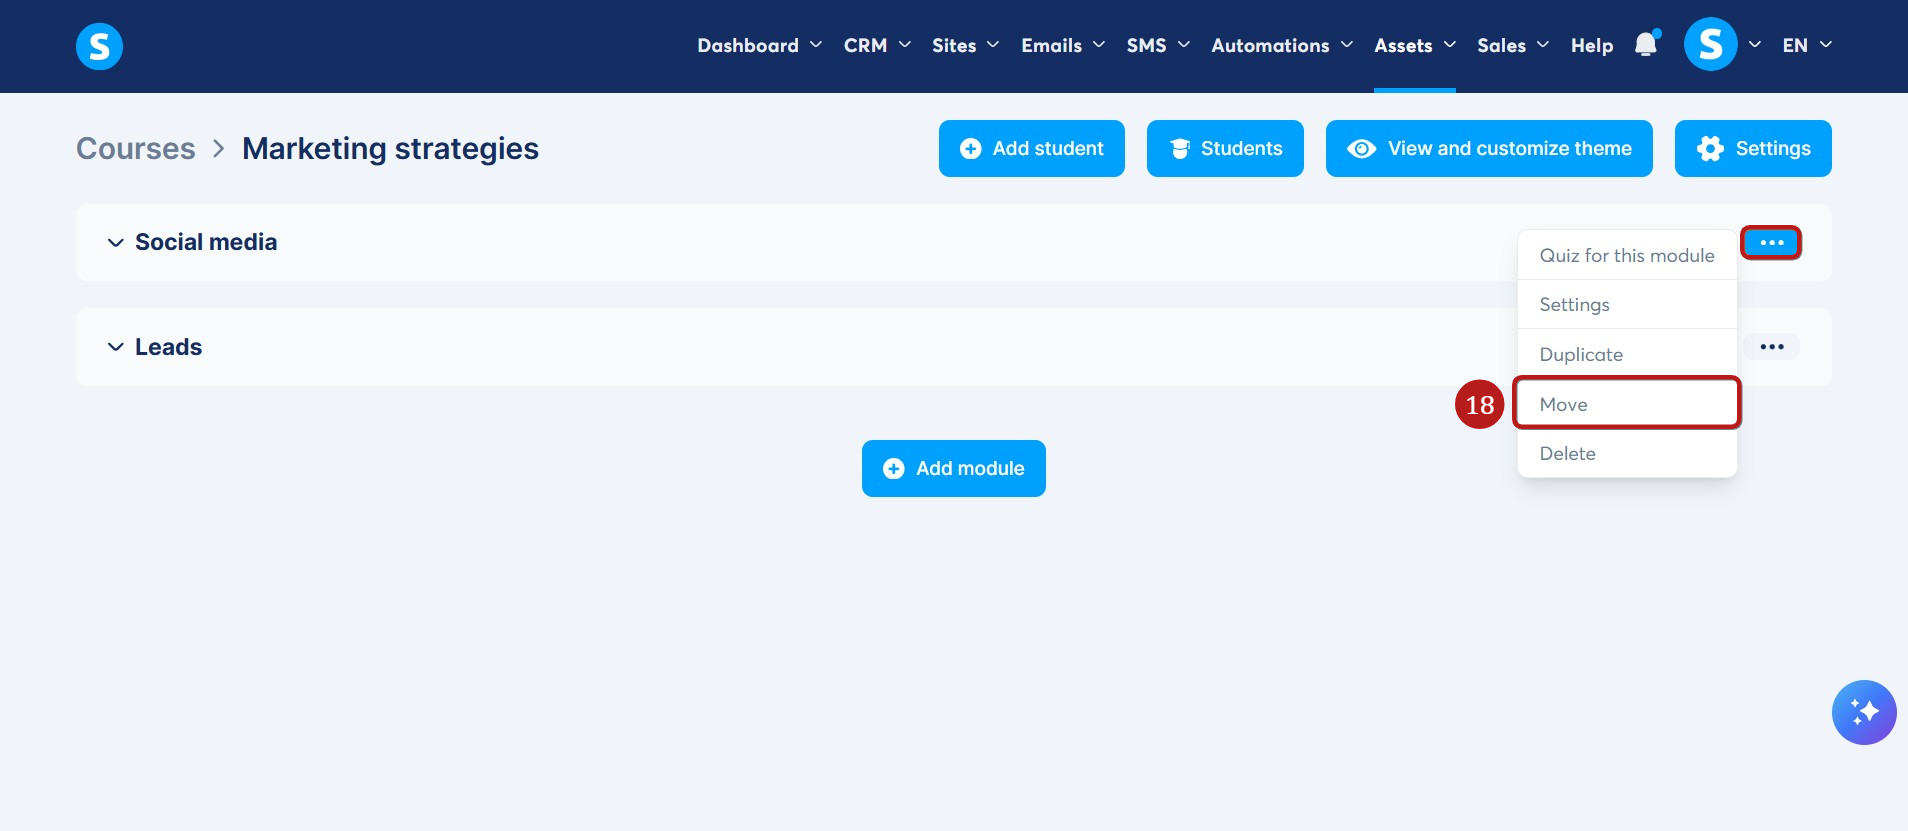
Click the three dots menu (...) next to a module or an individual lecture to access the following options:
- Duplicate (17): Creates an exact copy of the module (including all its lectures) or the individual lecture within the exact same course.
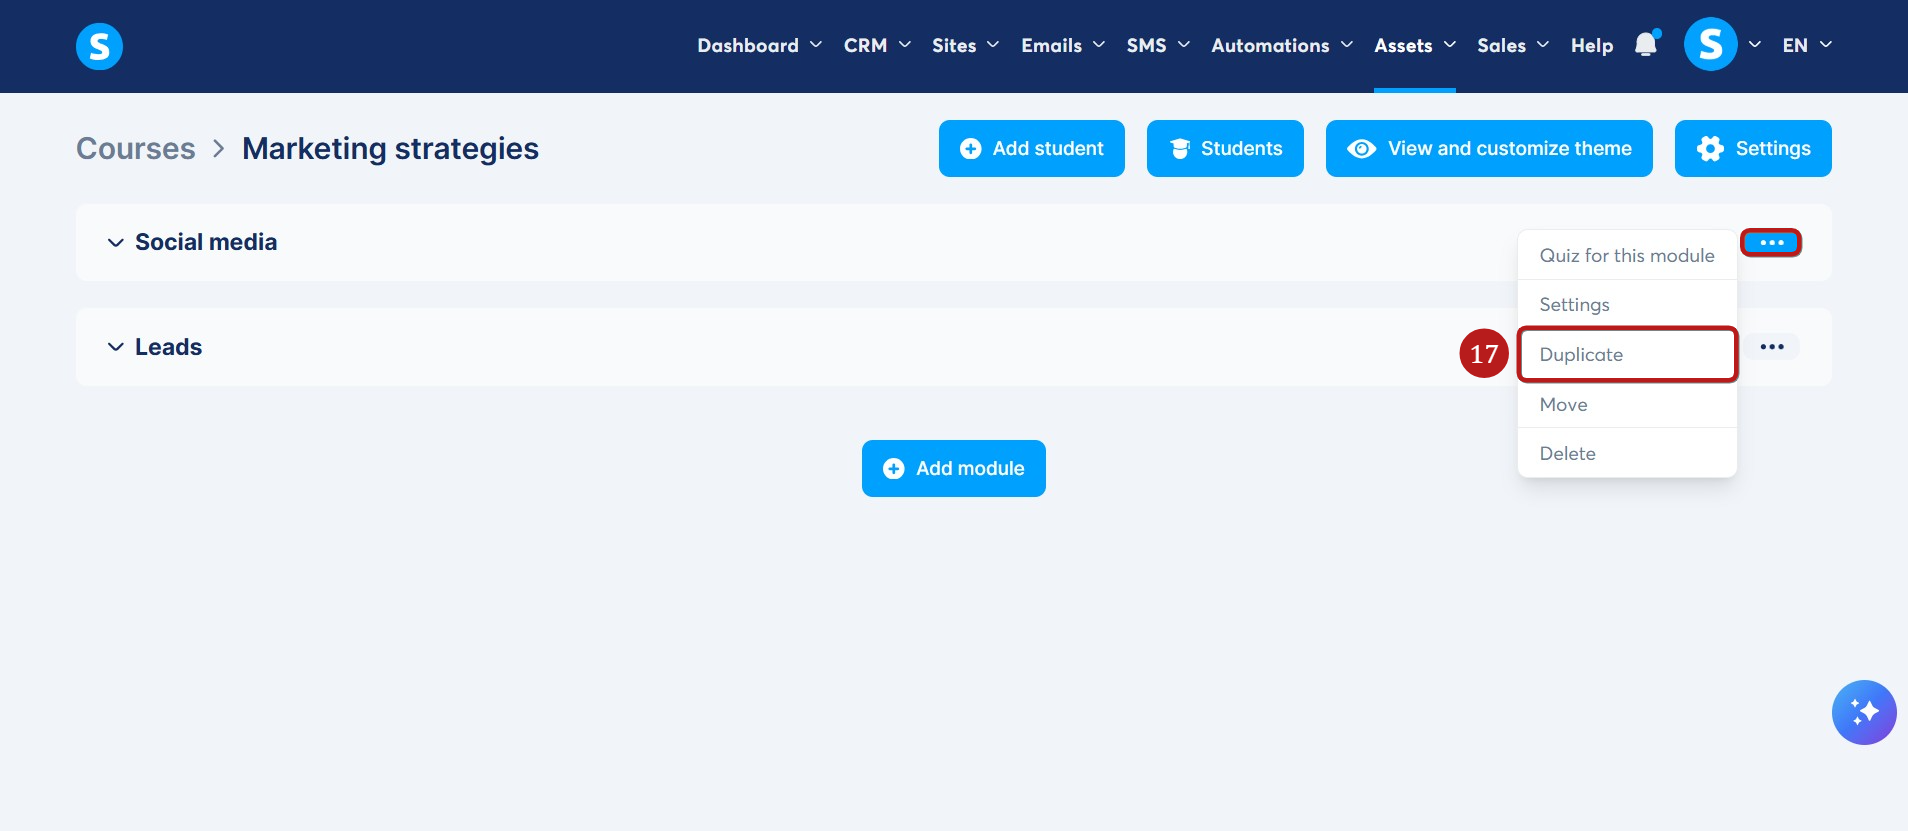
- Move (18): Allows you to transfer the module or lecture to an entirely different course.
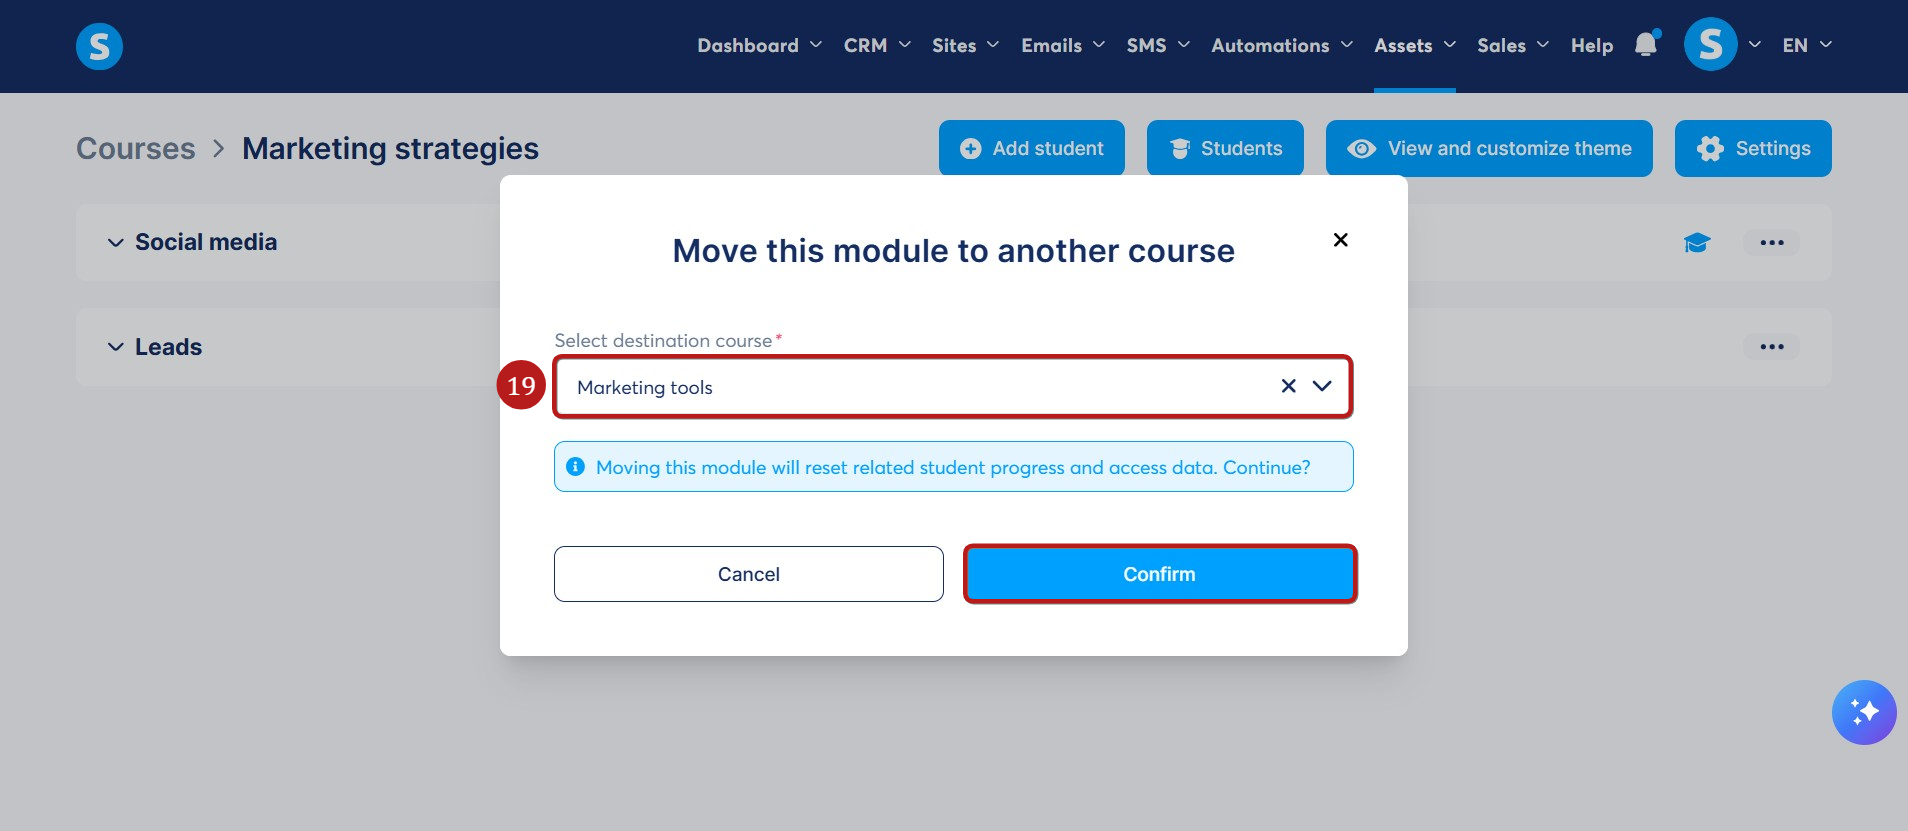
A popup will appear where you can search for and select the destination course from a drop-down list (19).
Notes:
- Modules and lectures can only be moved between courses of the same type (for example, from a classic course to another classic course).
- Any duplicated or moved content is automatically set to an inactive state in its new location. You must manually activate it for students to see it.
- When moving a module or lecture to another course, any related student progress, access rules, and automations for that specific content will be reset.
- Modules and lectures cannot be moved or duplicated while they are currently in the process of being duplicated or moved.
Here is the difference between the four types of access:
- Full access: This means that your clients will have access to all the lectures of your different modules instantly. Even if you have set a delay between lectures, this delay will not be applied.
- Drip content: This means that your clients will access your lectures progressively, according to the delay you have defined.
- Partial access: This means that your clients will only have access to a part of your course, i.e., to specific modules selected in advance by the instructor.
- Partial access with drip: This means that your clients will only have access to specific modules you select, and the lectures within them will unlock progressively according to the delay you have defined.
Note: The 'Delay after previous lecture' setting is relative to the previous lecture, not the start of the course.
For example, if you set the delay to 7 days, this lecture will unlock 7 days after the student gains access to the previous one.