How to integrate Xendit with systeme.io
In this article, you will learn how to integrate your Xendit account with your systeme.io account.
To get started, you will need:
- A systeme.io account
- A Xendit account
Set up and configuration in your systeme.io account:
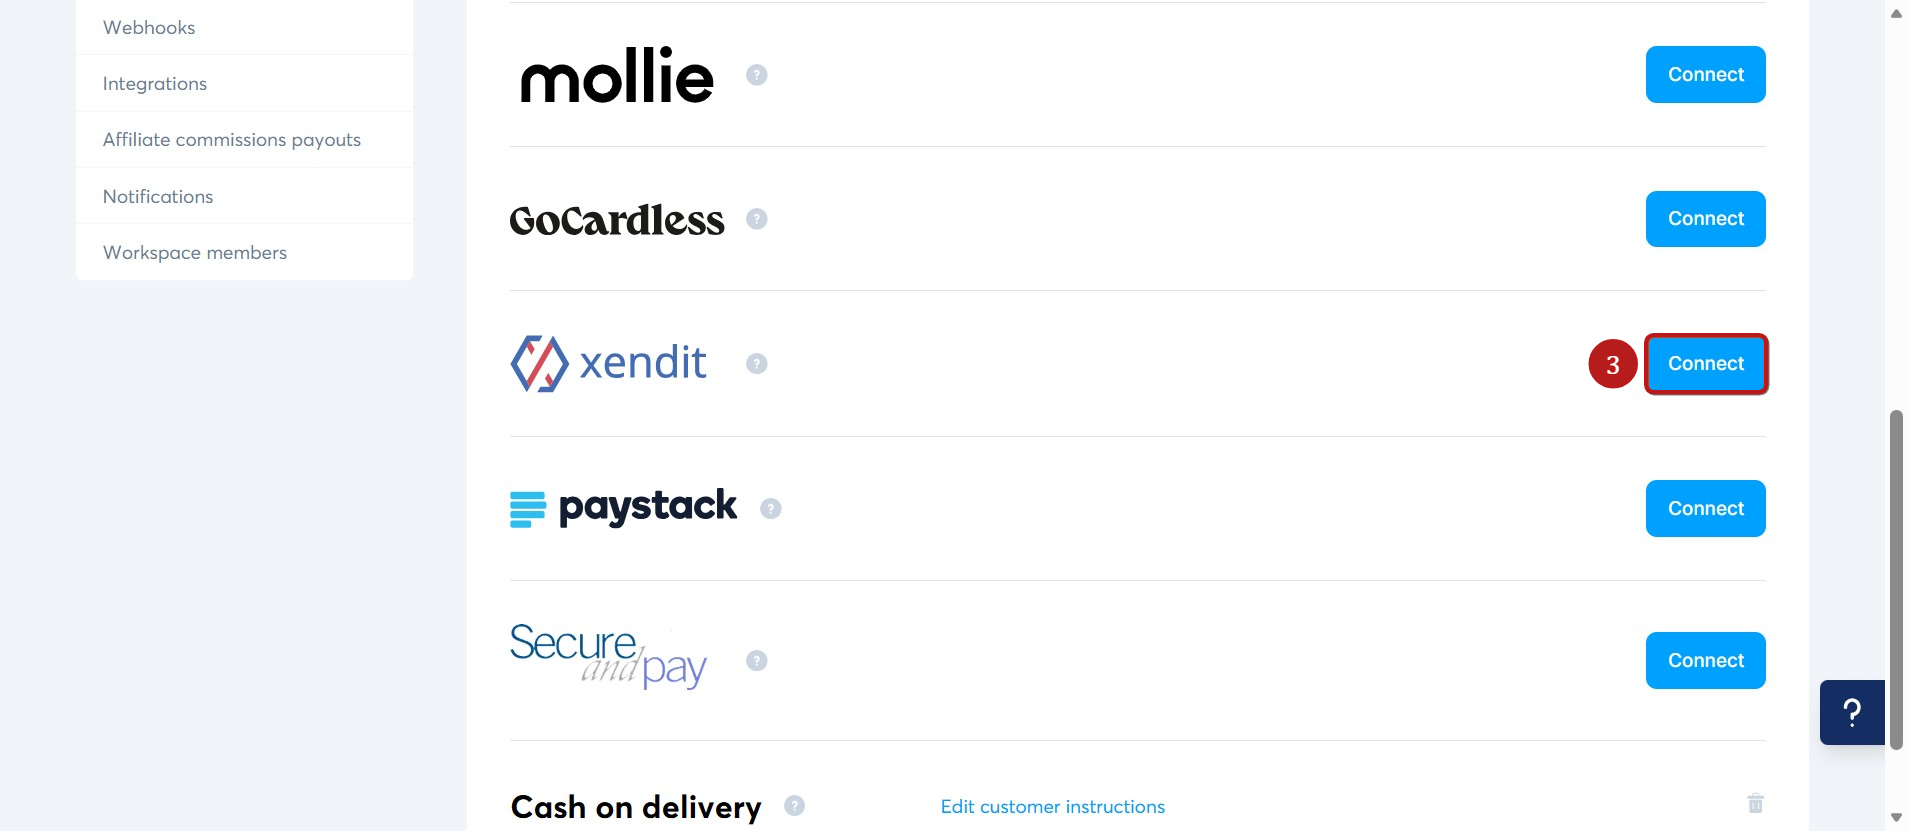
To connect your systeme.io account to your Xendit account, click on your profile picture and then Settings (1). Next, in the left-hand menu, click Payment Gateways (2).

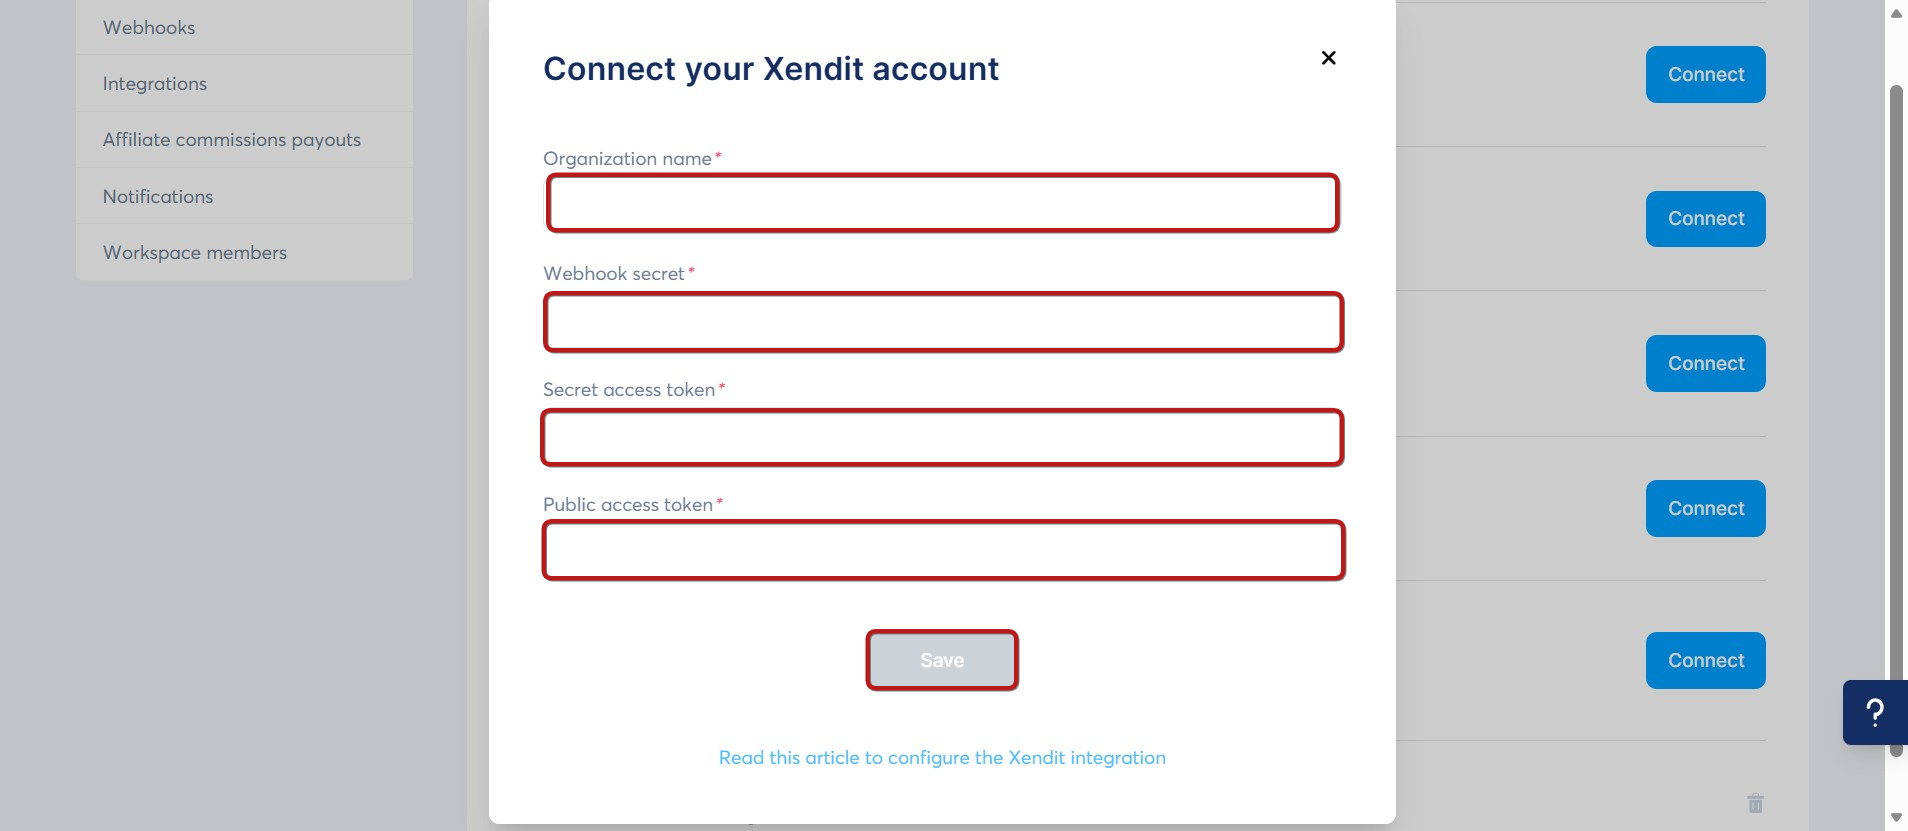
A popup window will appear. Enter your organization name, webhook secret, and public/secret access tokens.
Set up and configuration in your Xendit account:
1. API keys:
API Keys for your integration can be obtained by following the steps below:
In the left-hand sidebar, click on Settings (1).

Under the Setup & Integration section, click on Developers (2).

a. Secret API Key:
Click on + Generate secret key (3).

On the popup that appears, select the following options:


Click Generate key. You may need to enter a 6-digit code that will be sent to you. Once done, your key will be generated.
Notes:
- Your secret API Key starts with "xnd_production" for the LIVE Secret API Key.
- The generated Secret API Key cannot be viewed again. If you forgot or misplaced your Secret API Key, please delete the generated API Secret Key and generate a new one.
b. Public API Key:
Simply click Copy (4) on the blue button under Public Key.

Note: Your public API key will start with "xnd_public".
2. Webhooks
In the same developers menu where you found API Keys, scroll down to the Webhooks section.
Enable automatic retry in case of a webhook failure by clicking on Enable auto-retry for failed webhook. This ensures that failed webhook events are retried automatically.

To obtain your webhook verification token, click on View Webhook Verification Token (5).

Enter your account's password, and click Confirm (6).

Copy (7) the token and paste it into your systeme.io account integration settings.

What happens when Xendit payment fails?
In addition to the main direct debit attempt, three attempts will be made at 7-day intervals. The delay between each attempt cannot be changed.