How to create a Google Postmaster Tool account for your domain
Google Postmaster Tools helps you better understand how Gmail treats your emails and allows you to easily identify potential deliverability issues.
You can view information about your sending reputation, spam rate, delivery errors, and other essential metrics to monitor your performance with Gmail.
To allow our team to effectively assist you in diagnosing deliverability issues, we recommend configuring Google Postmaster Tools for your domain and granting us access to this data.
In this article, we explain step-by-step how to create your account, verify your domain, and share access with our team.
1. How to create a Google Postmaster Tools account and verify your domain name
To use Postmaster Tools, you must have a Google Account. If you don't have one, please create one.
Once logged into your Google Account, go to the Google Postmaster Tools dashboard. From this dashboard, you will be able to verify your domain name.
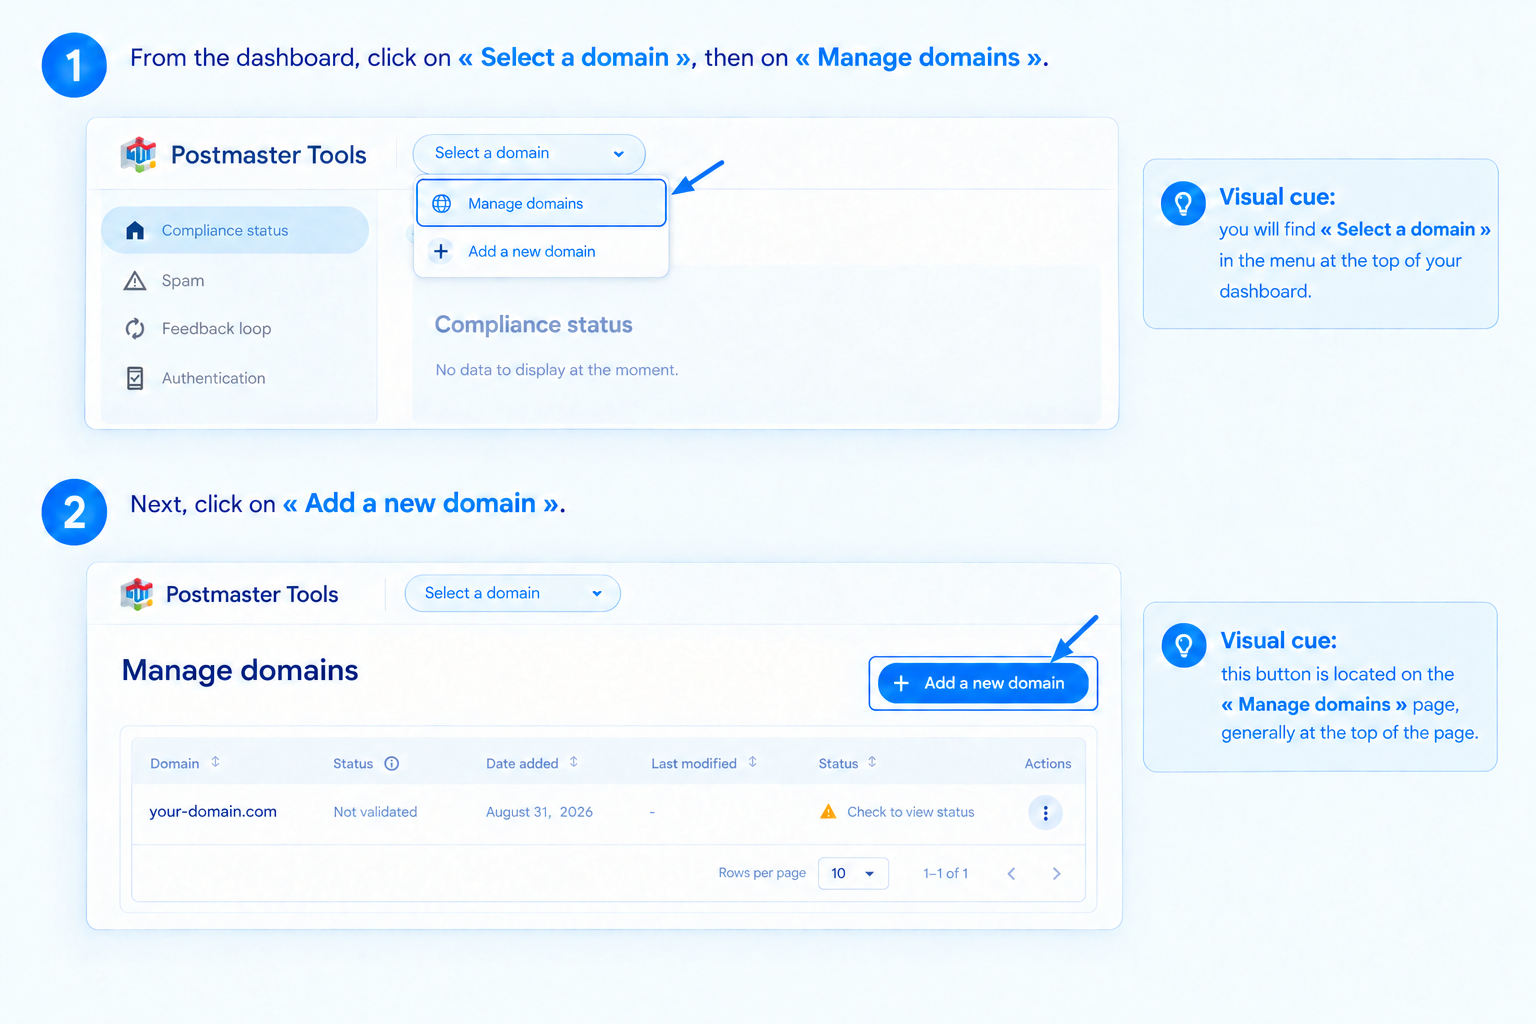
From the dashboard, click on Select a domain, then on Manage domains.
Click on Add a new domain.
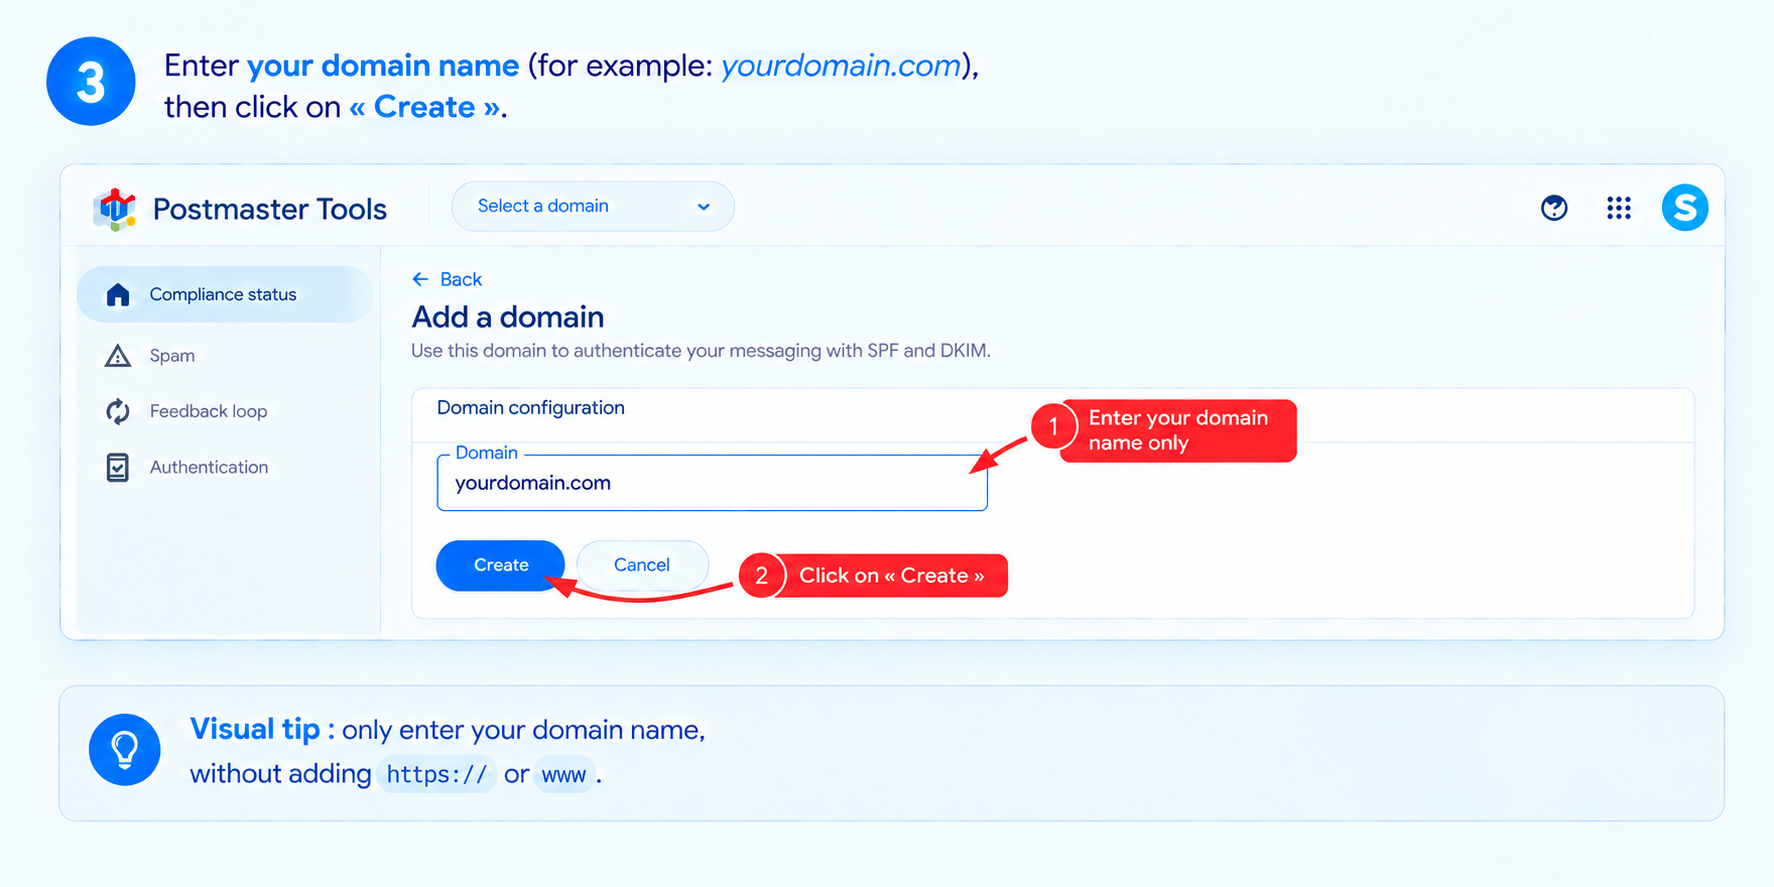
Enter your domain name (for example: yourdomain.com), then click Create. Note: Enter only your domain name, without adding https:// or www..
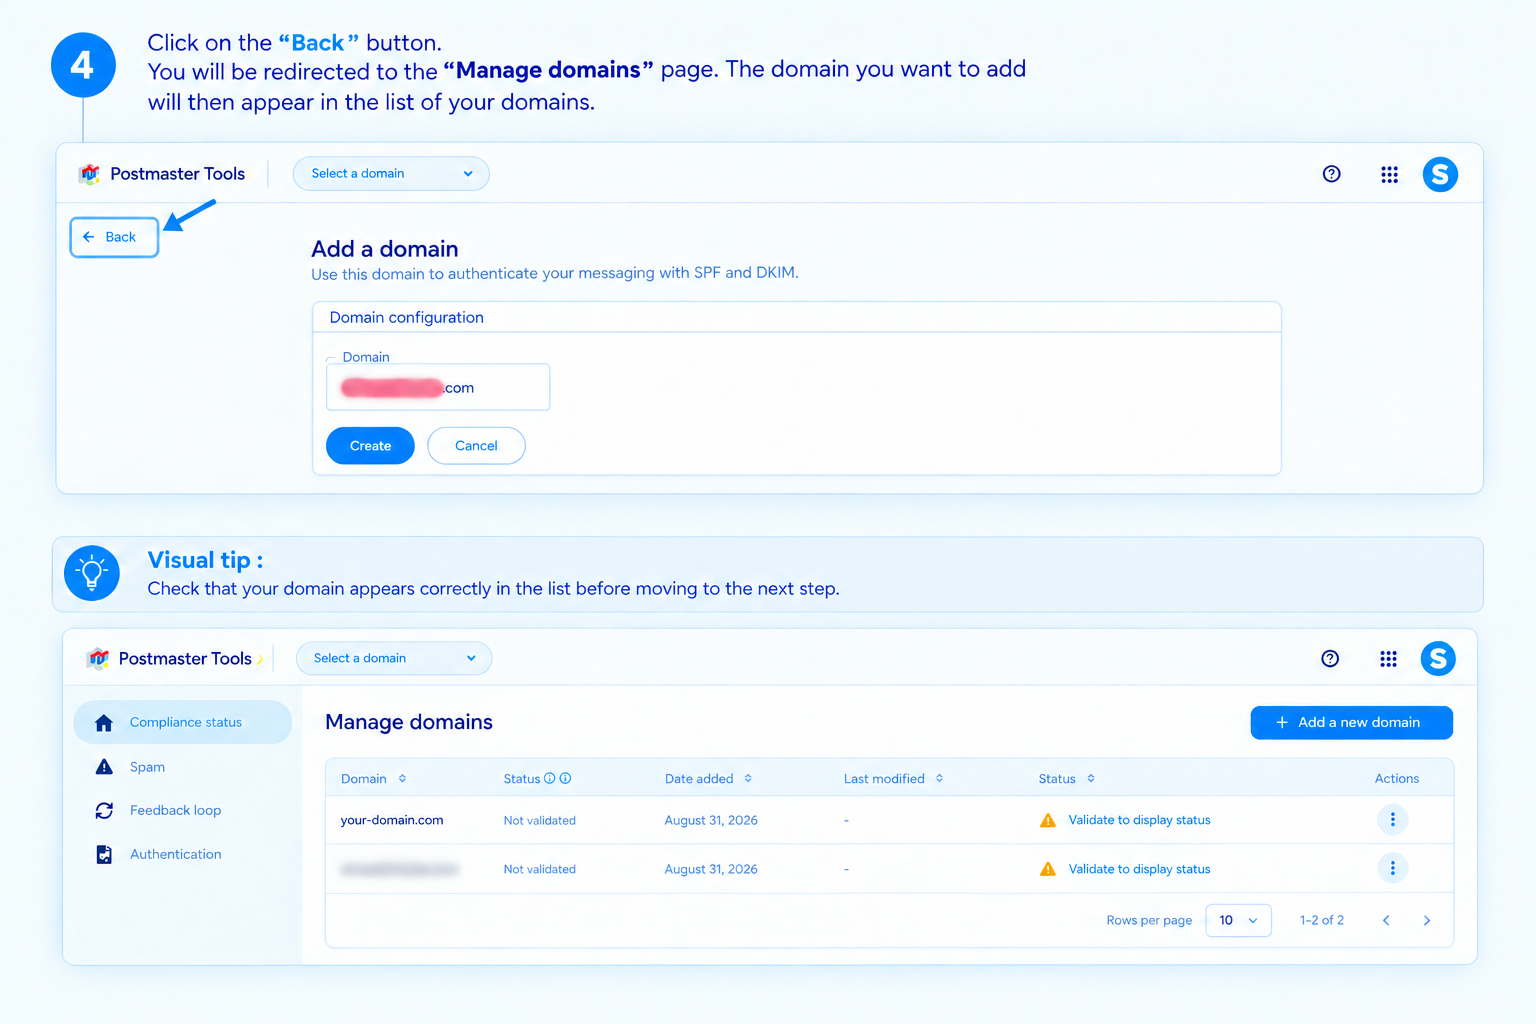
Click on Back. You will be redirected to the Manage domains page. Verify that the domain you just added appears in your list of domains before proceeding to the next step.
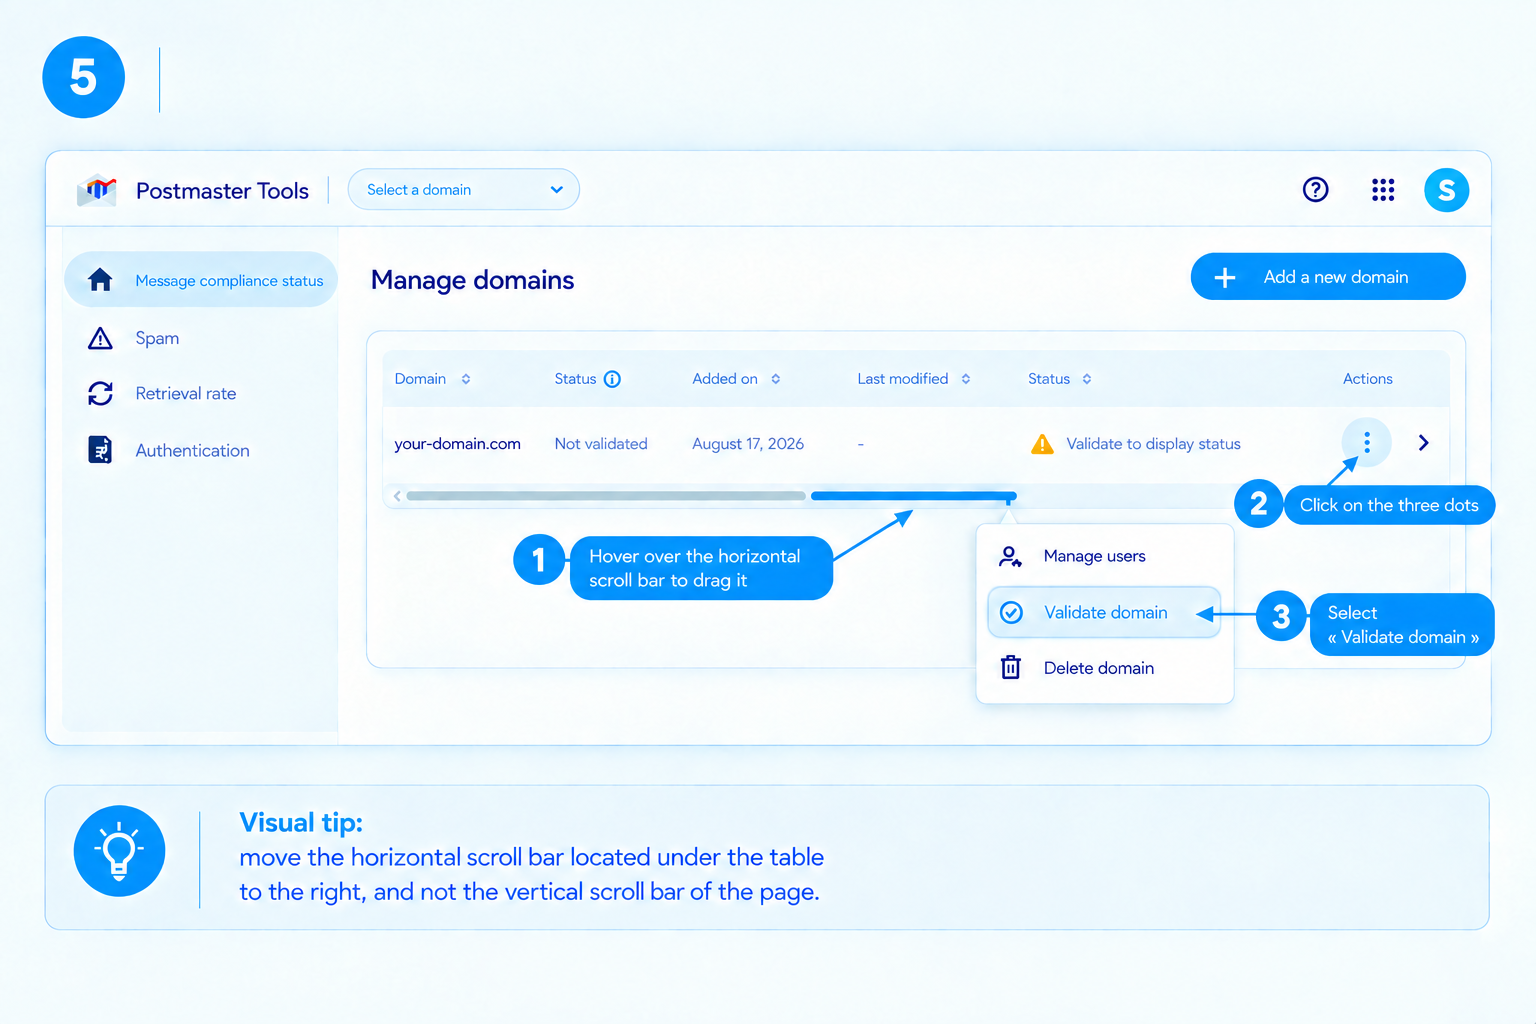
Slide the horizontal scroll bar to the right to display the options located at the end of the table. Click on the three dots, then select Validate domain.
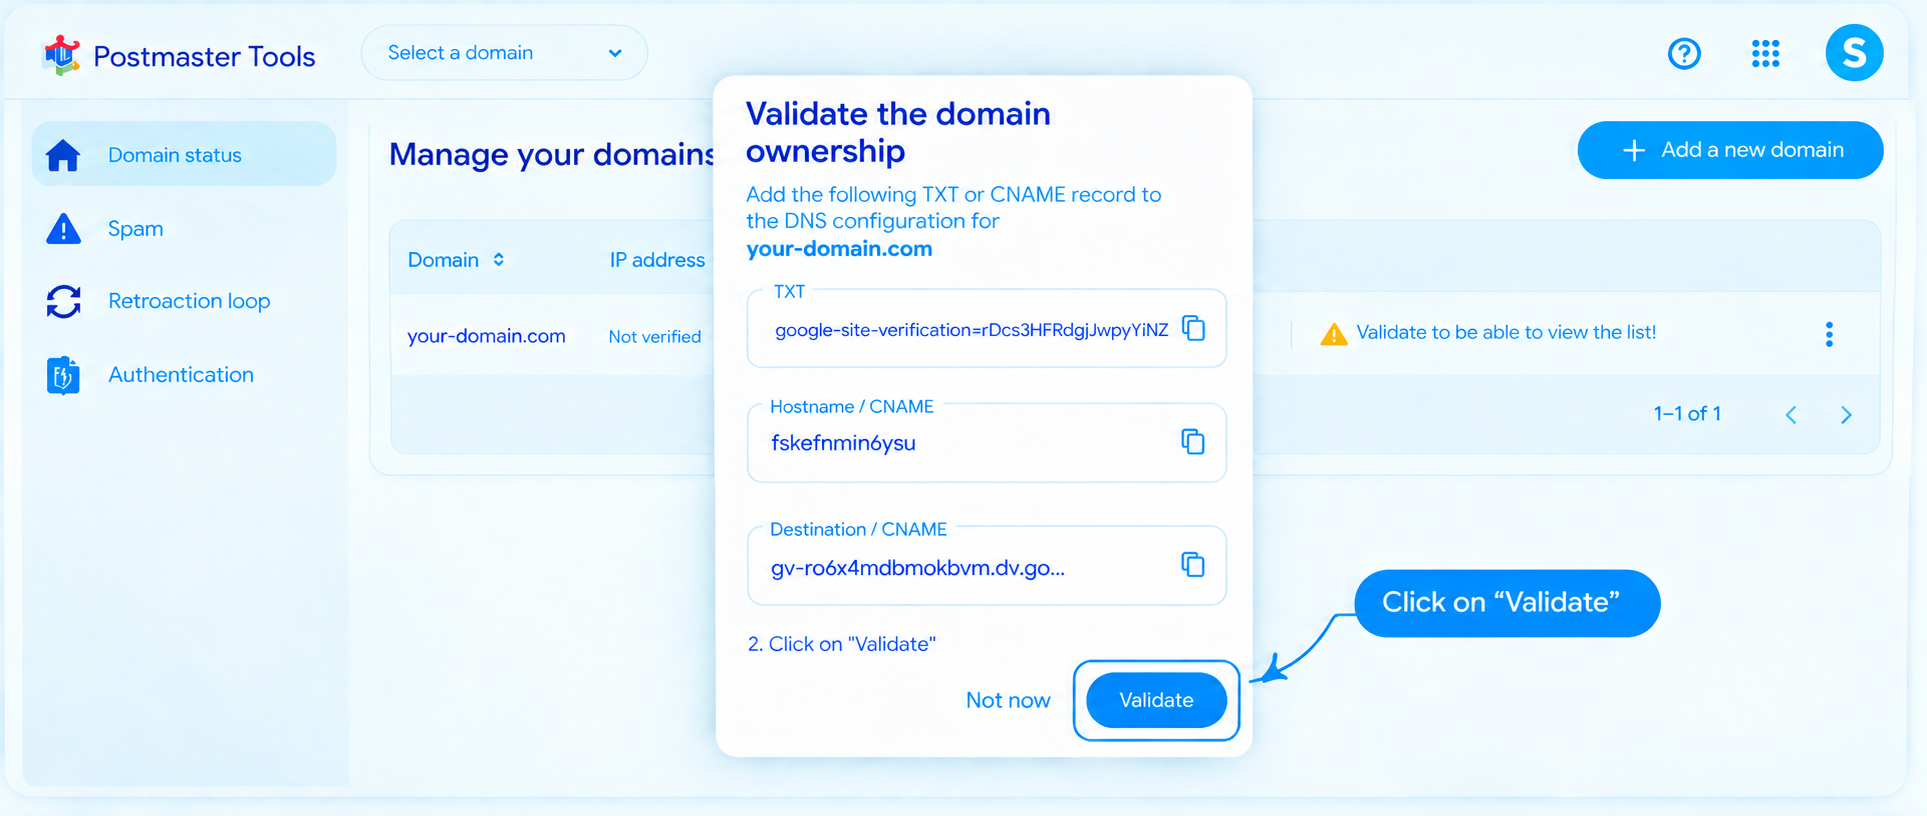
The Validate the ownership of your domain window will open. Here you will find the TXT or CNAME record to add to your domain's DNS zone.
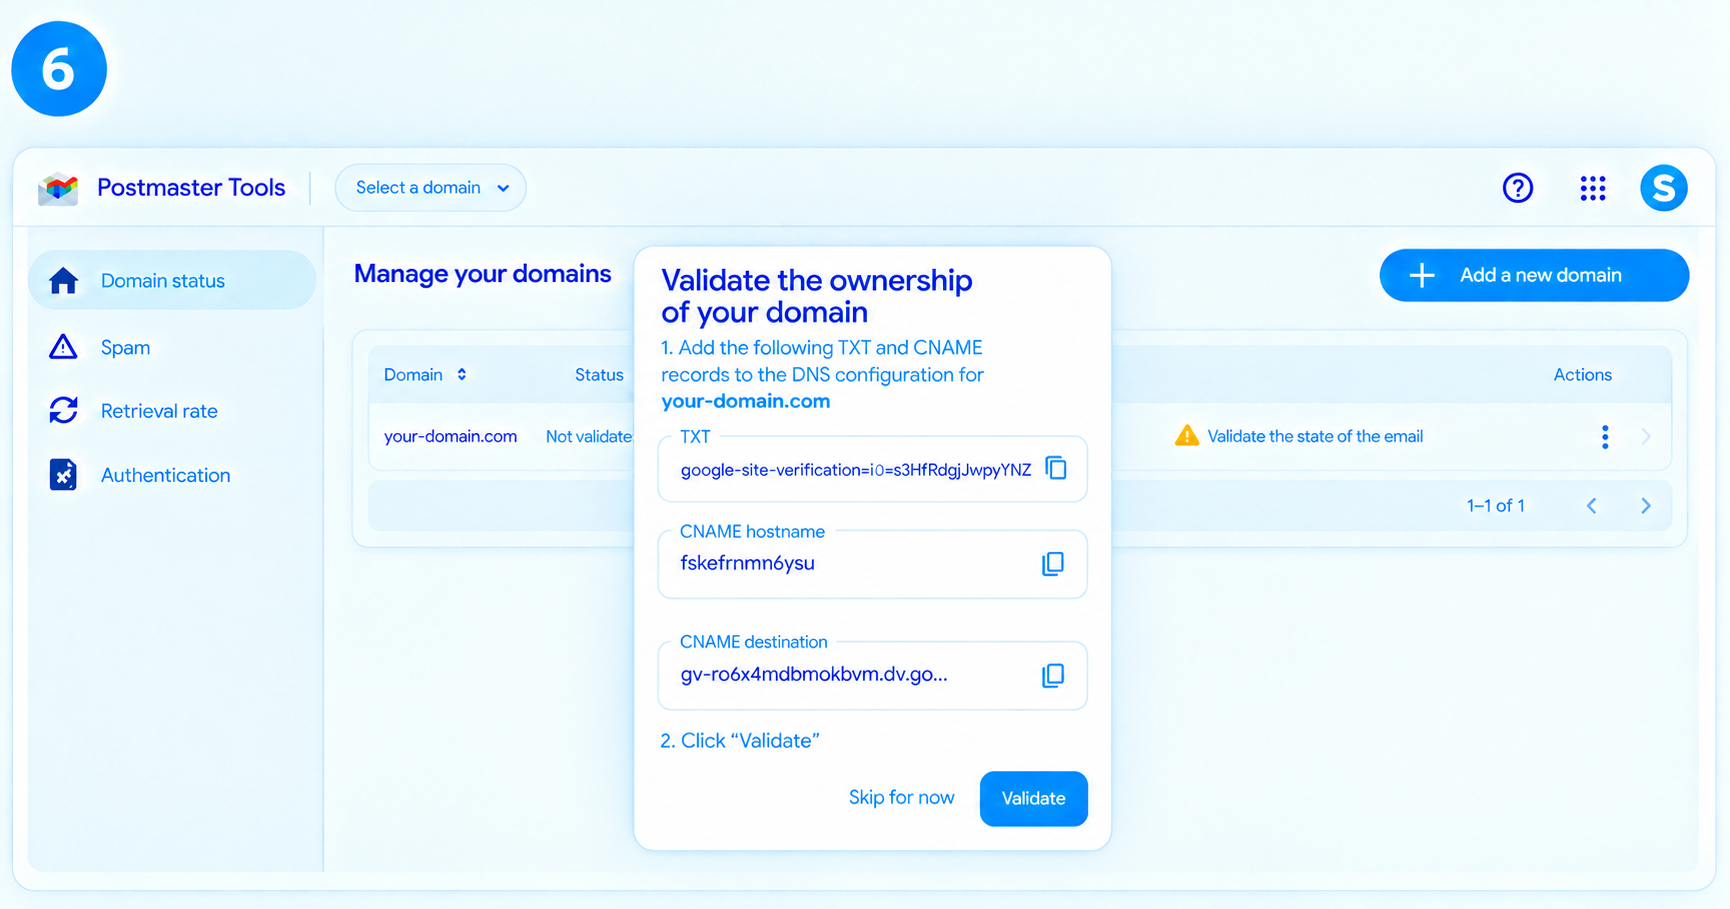
Important: It is not necessary to add both the TXT and CNAME records simultaneously. You must add one or the other, depending on your chosen configuration method.
a. Add a TXT record
Copy the value of the TXT record displayed by Google, then add it to your domain's DNS configuration.
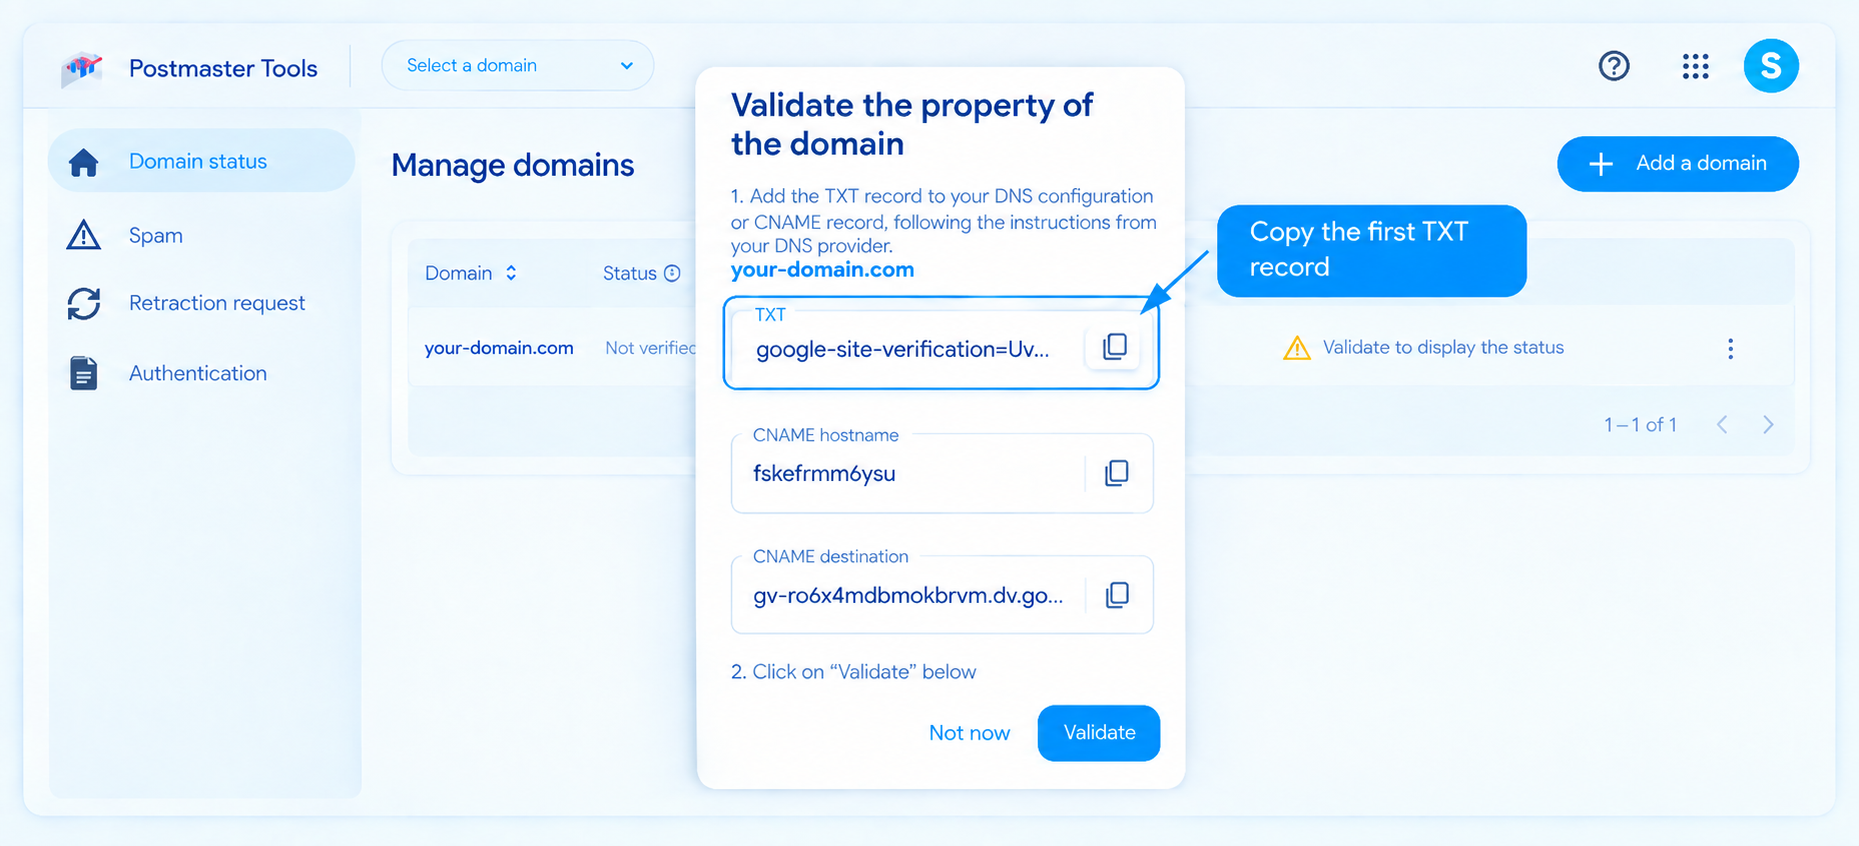
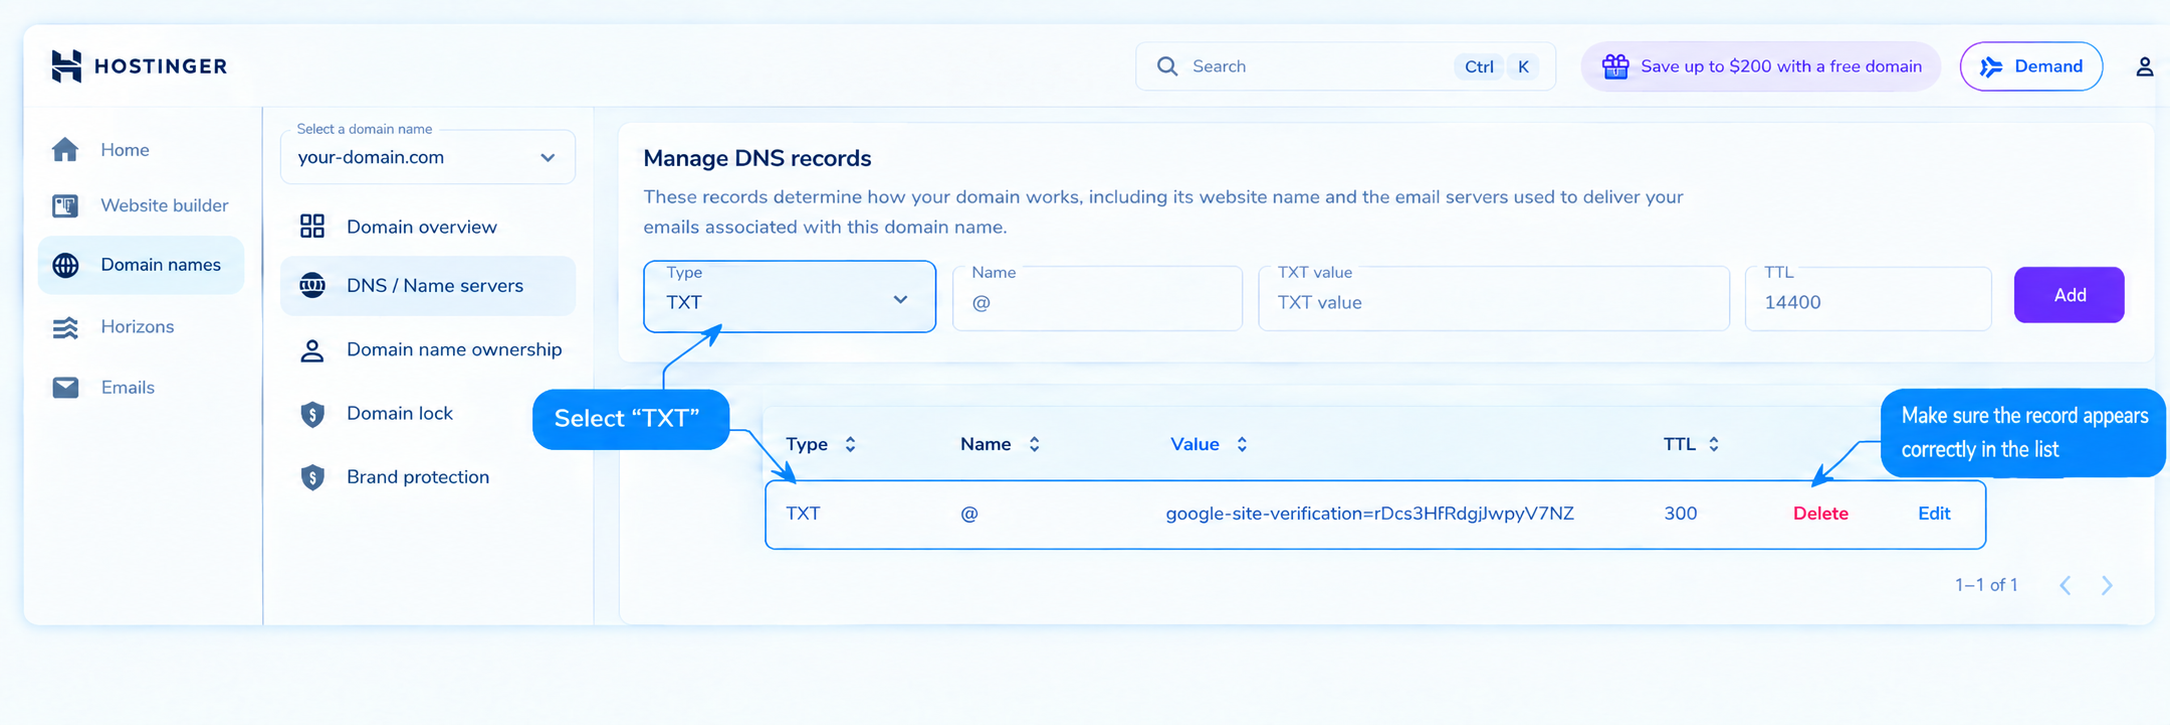
Log in to your hosting provider's DNS settings and add a new TXT record by filling in the fields as follows:
Type:
TXTName / Host:
@Value / Content: Paste the verification code provided by Google Postmaster Tools.
Once the information is filled in, click to add and save the new DNS record.
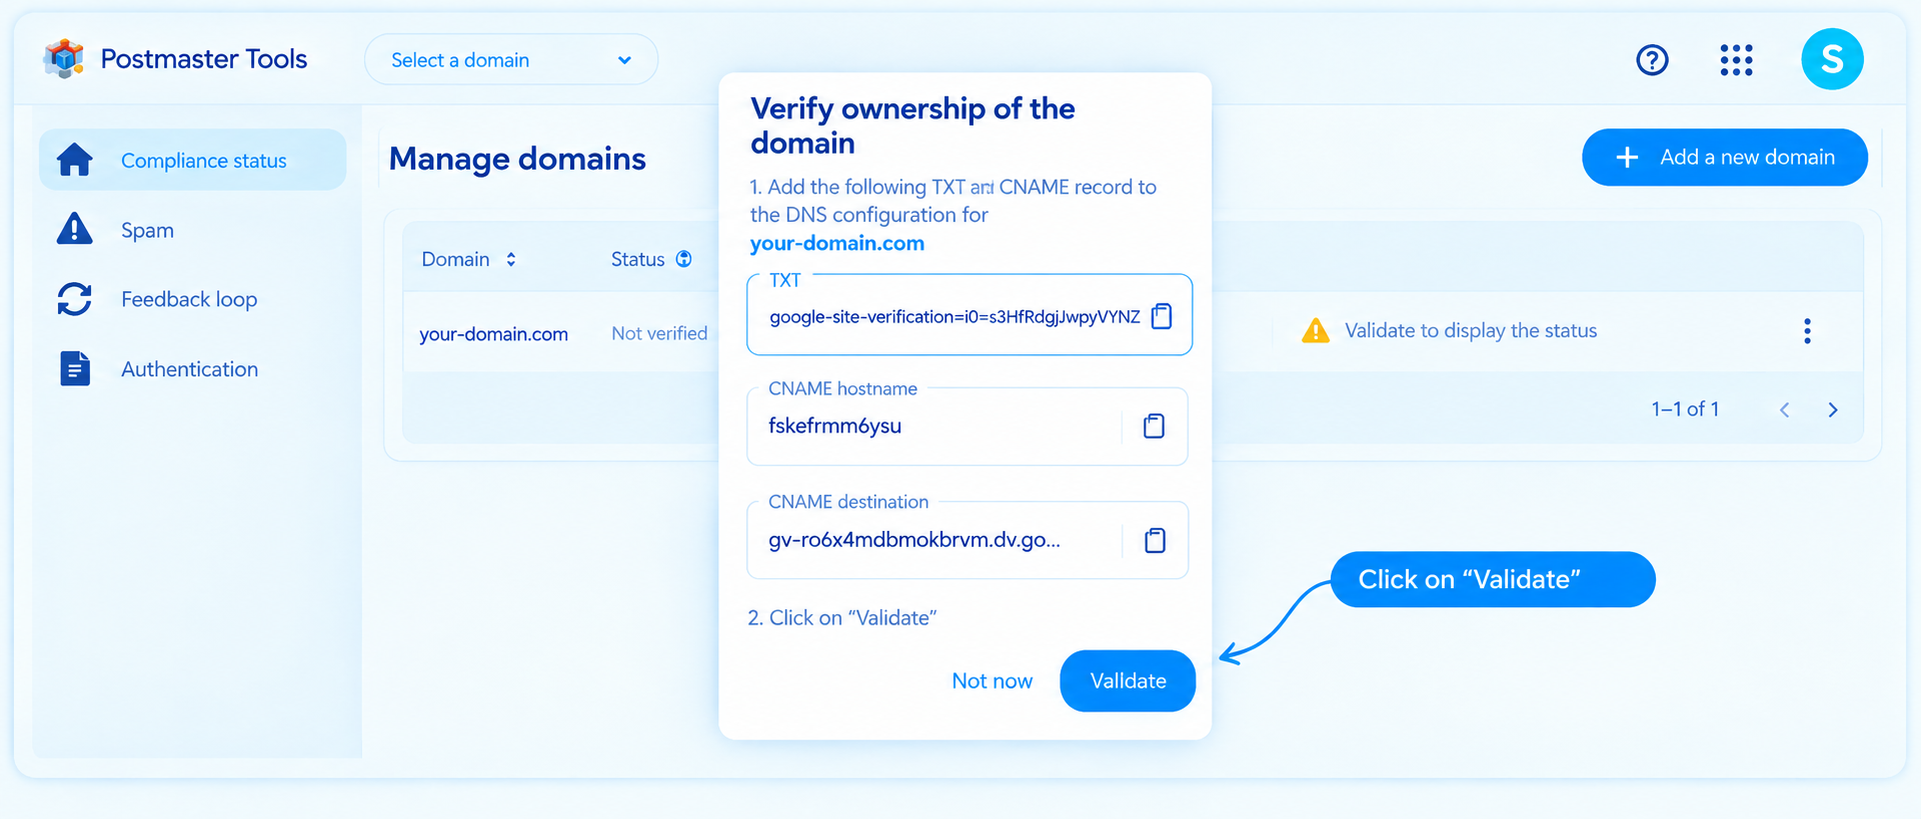
After adding the TXT record, return to the Validate the ownership of your domain window in Google Postmaster Tools and click Validate. Google will verify the TXT record added to your DNS and confirm the ownership of your domain.
b. Add a CNAME record
Google Postmaster Tools also offers verification by CNAME. To use this method, you must add this record in the DNS zone of your domain.
Log in to your hosting provider's DNS settings and add a new CNAME record using the information provided by Google in the Validate the ownership of your domain window:
Type:
CNAMEName / Host: Copy the host provided by Google.
Target / Destination: Copy the target provided by Google.
Once you have entered the information, click “Add” or “Save”, depending on your hosting provider.
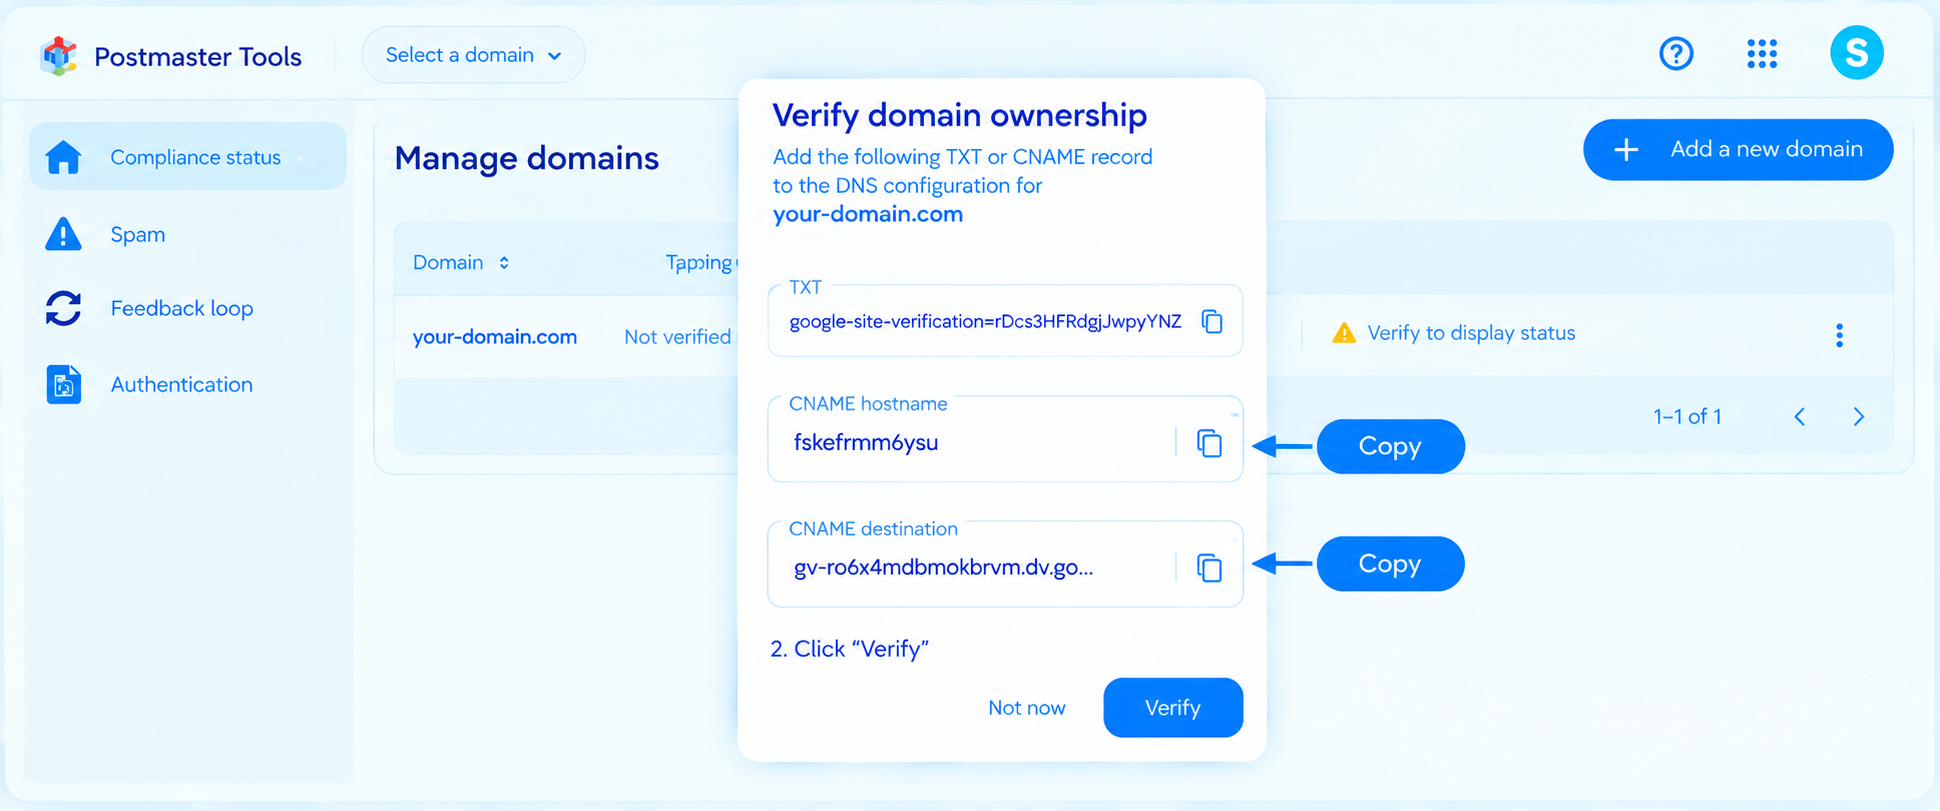
In your DNS zone, paste the host information into the Name field, and the target information into the Value field.
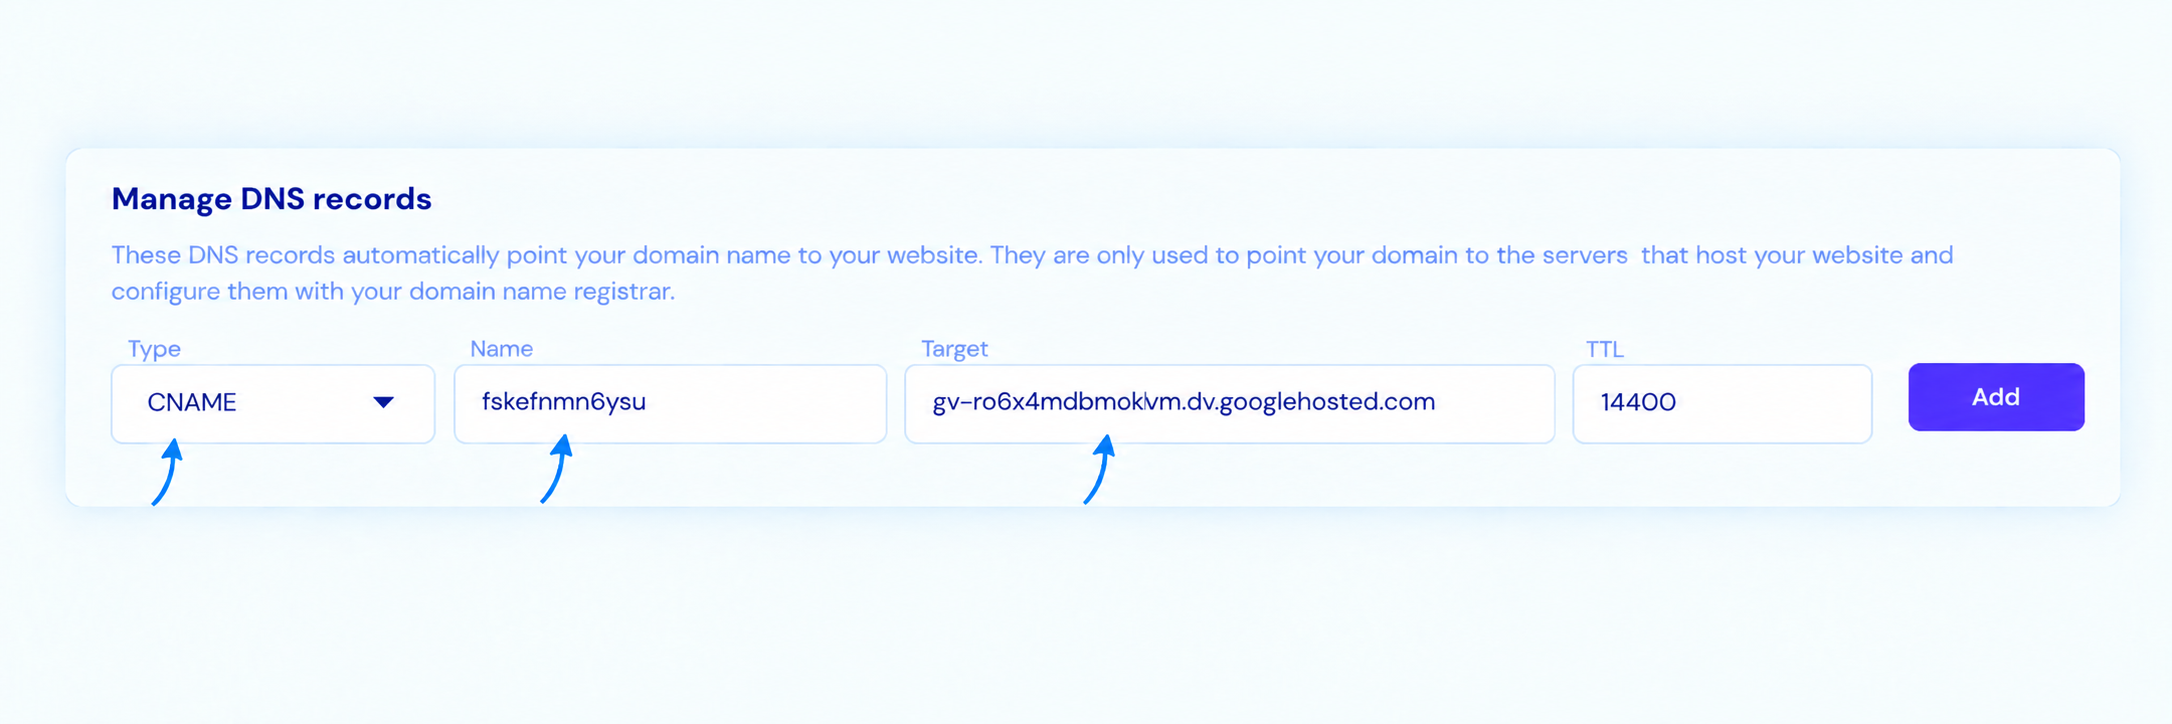
Click Add and validate the new DNS record. Once the CNAME record is added, return to the Validate the ownership of your domain window window and click Validate to finalize the verification of your domain.
2. How to grant us access to your Postmaster Tools data
To allow our team to analyze your domain data and assist you in diagnosing your deliverability issues, you must add us as a user in Google Postmaster Tools. Access must be granted for each domain individually.
Follow these steps to grant us access to your domain:
Log in to Google Postmaster Tools.
From the Manage domains page, locate the domain you want to grant us access to.
Slide the horizontal scroll bar located under the table to the right (make sure to move the horizontal bar under the table, not the vertical scroll bar of the page). Click on the three dots, then select Manage users.
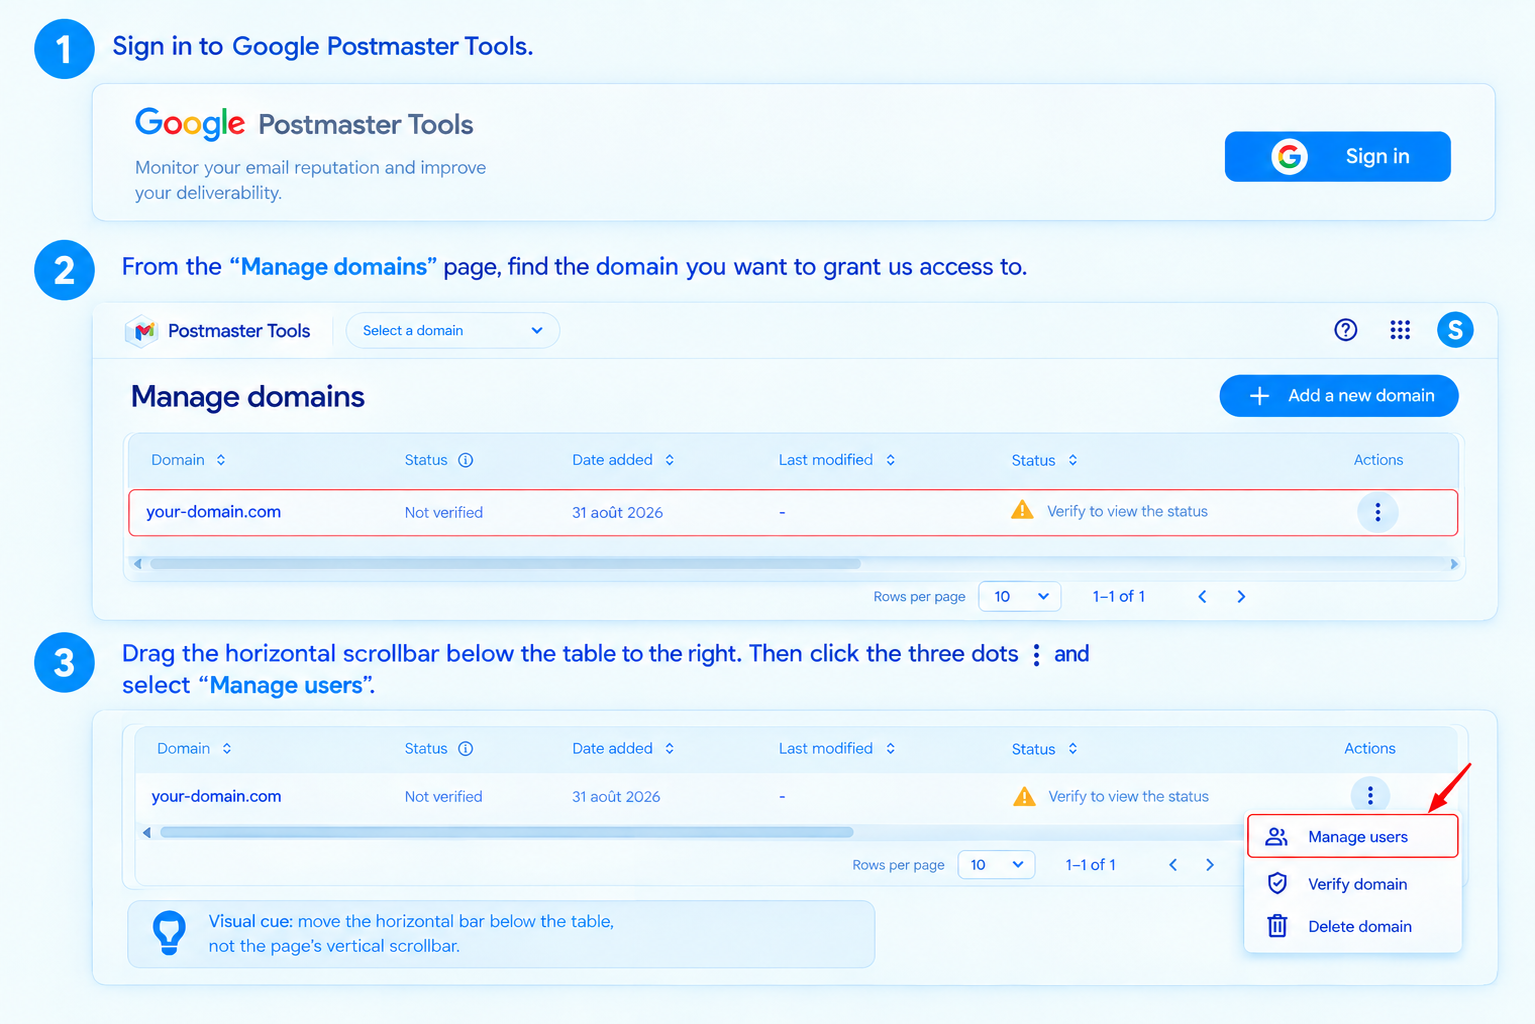
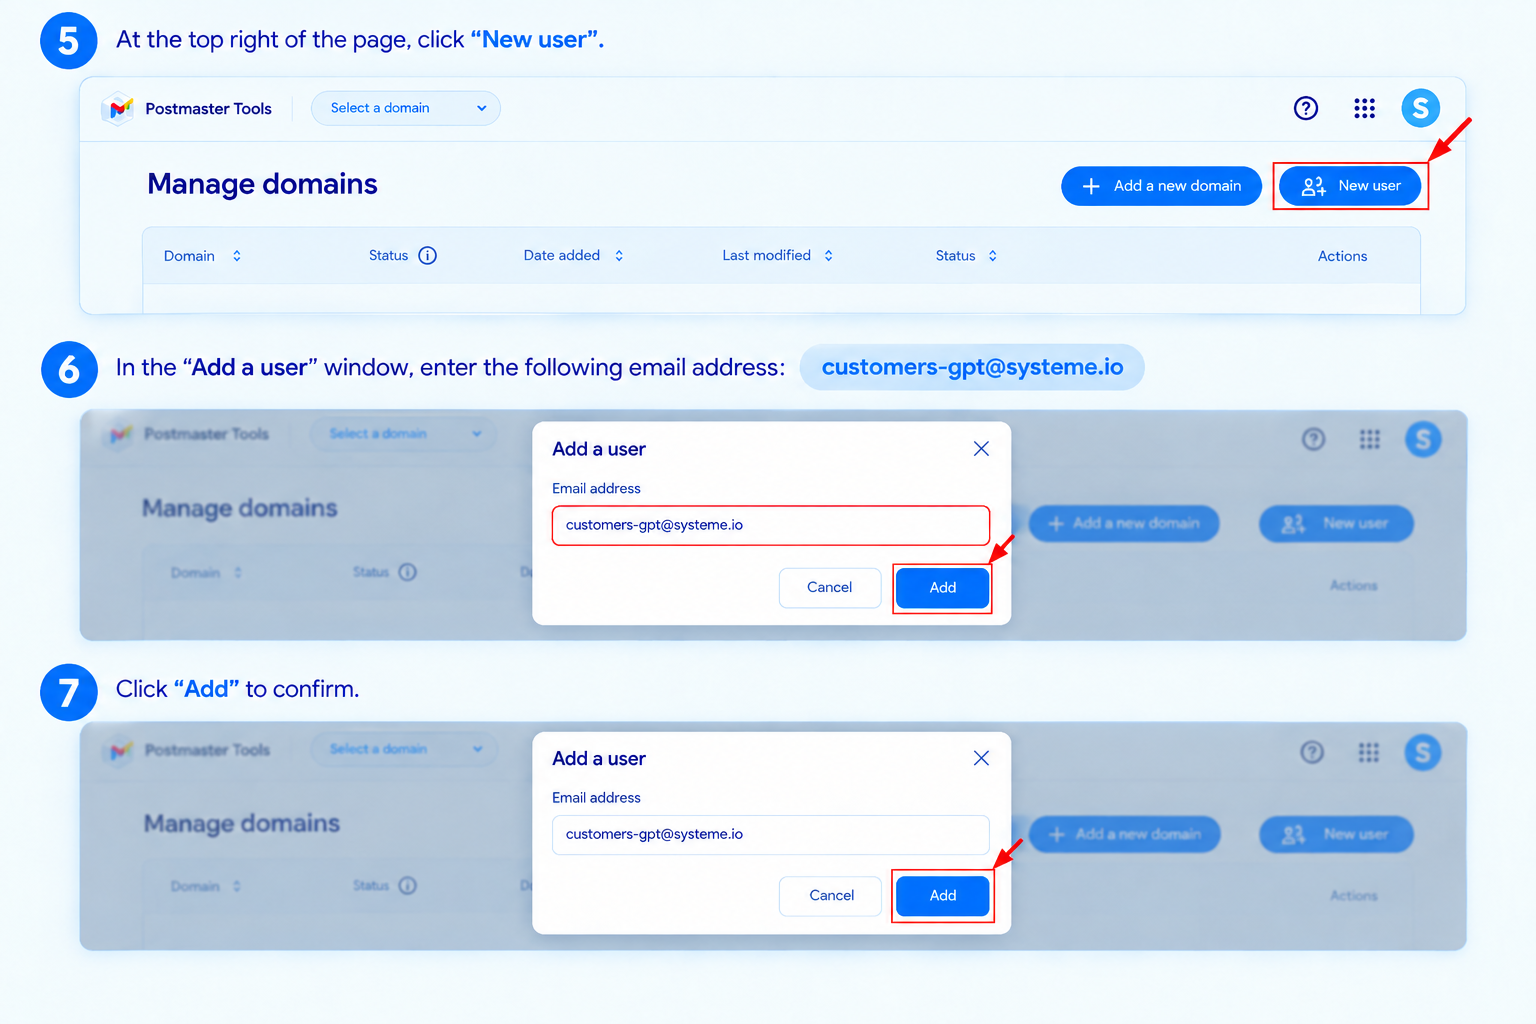
At the top right of the page, click on New user.
In the "Add a user" window, enter the following email address: customers-gpt@systeme.io
Click Add to confirm.
Last updated on October 1, 2026