Loading
In this article, you will learn how to set up an email campaign.
1. Creating a campaign
Navigate to the Campaigns section under the Emails tab (1).

Click Create (2), then, in the Create campaign popup that appears, add a name, choose a sender email address, and add a description for the campaign.
Finally, click Save to complete the campaign creation process (3).

A notification will appear once your campaign has been created successfully.

2. Creating campaign emails
First, access your campaign by clicking on its name, then click the Create button to create the first email of your campaign (4).

In the pop-up that appears, fill in the following email details:
Subject (5)
Sender name (6)
Sender email address (7)
Editor type (Classic editor or Visual editor) (8)
Select a template (9)
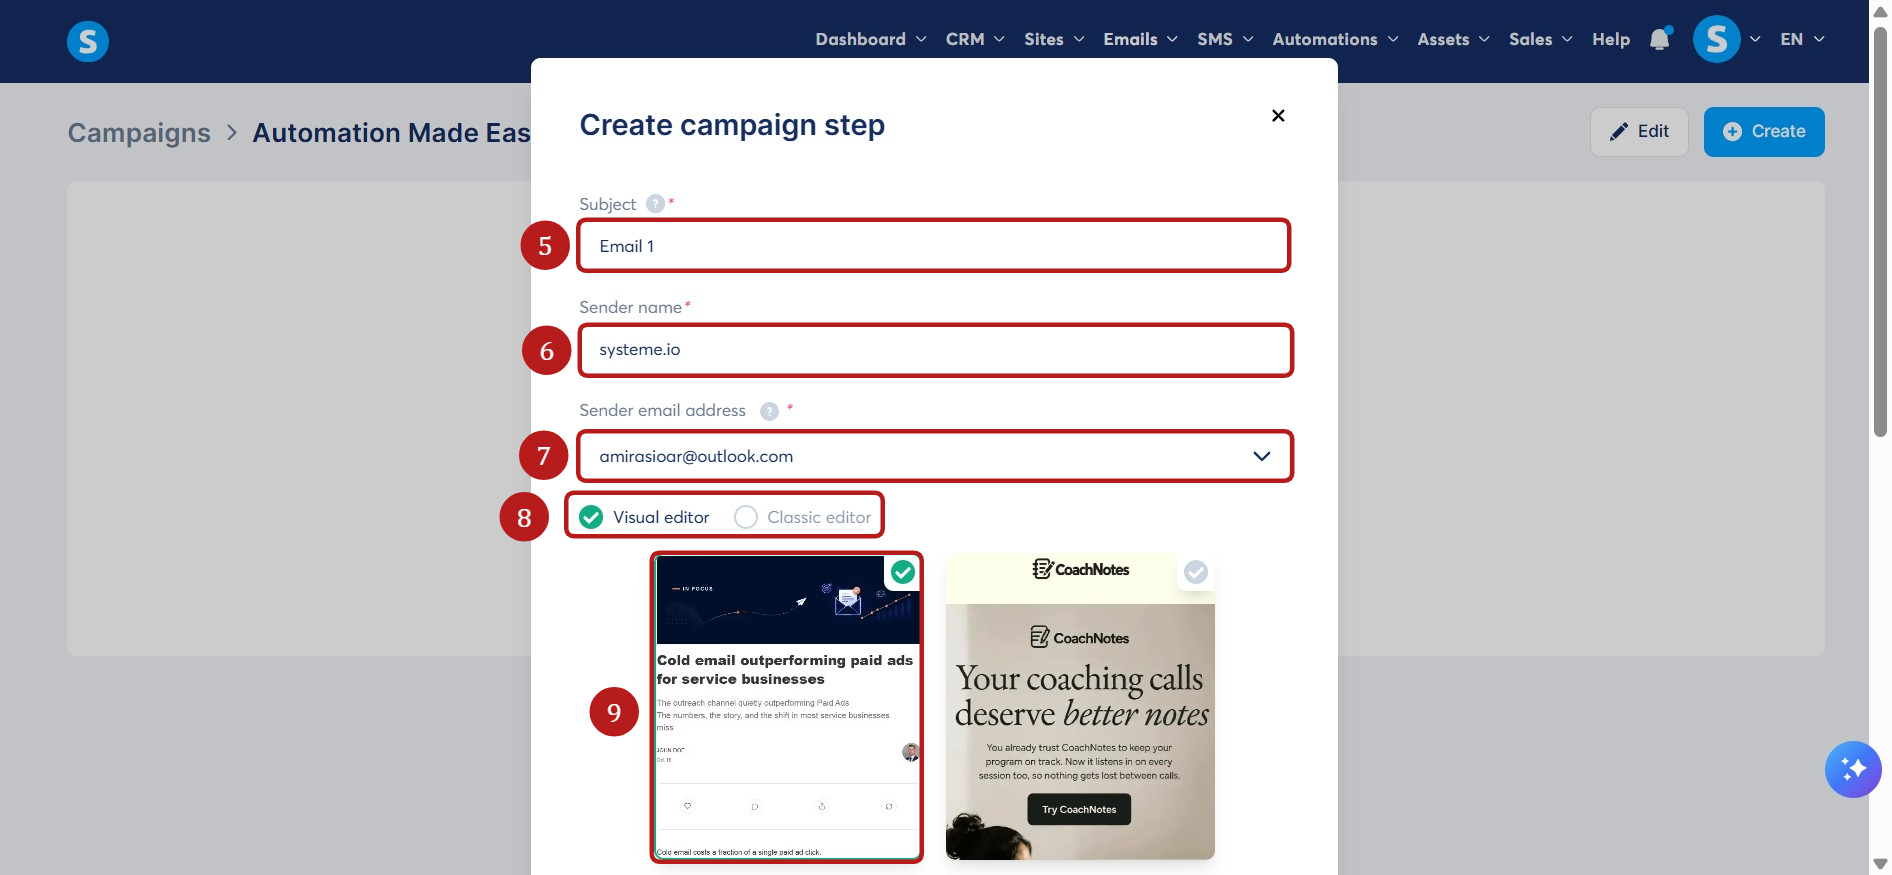
You have two options to edit your emails: A classic editor to write a simple email and a new visual editor with additional features to improve your email's style and layout.
Note: If you change editors while working on an email, the content you have been working on will be lost.
a. Classic editor
Once inside the editor, you can change the information you added in the first step.
In the panel located on the right side of the editor, you can:
Add an attachment (1)
Add substitute variables to replace information automatically (2)
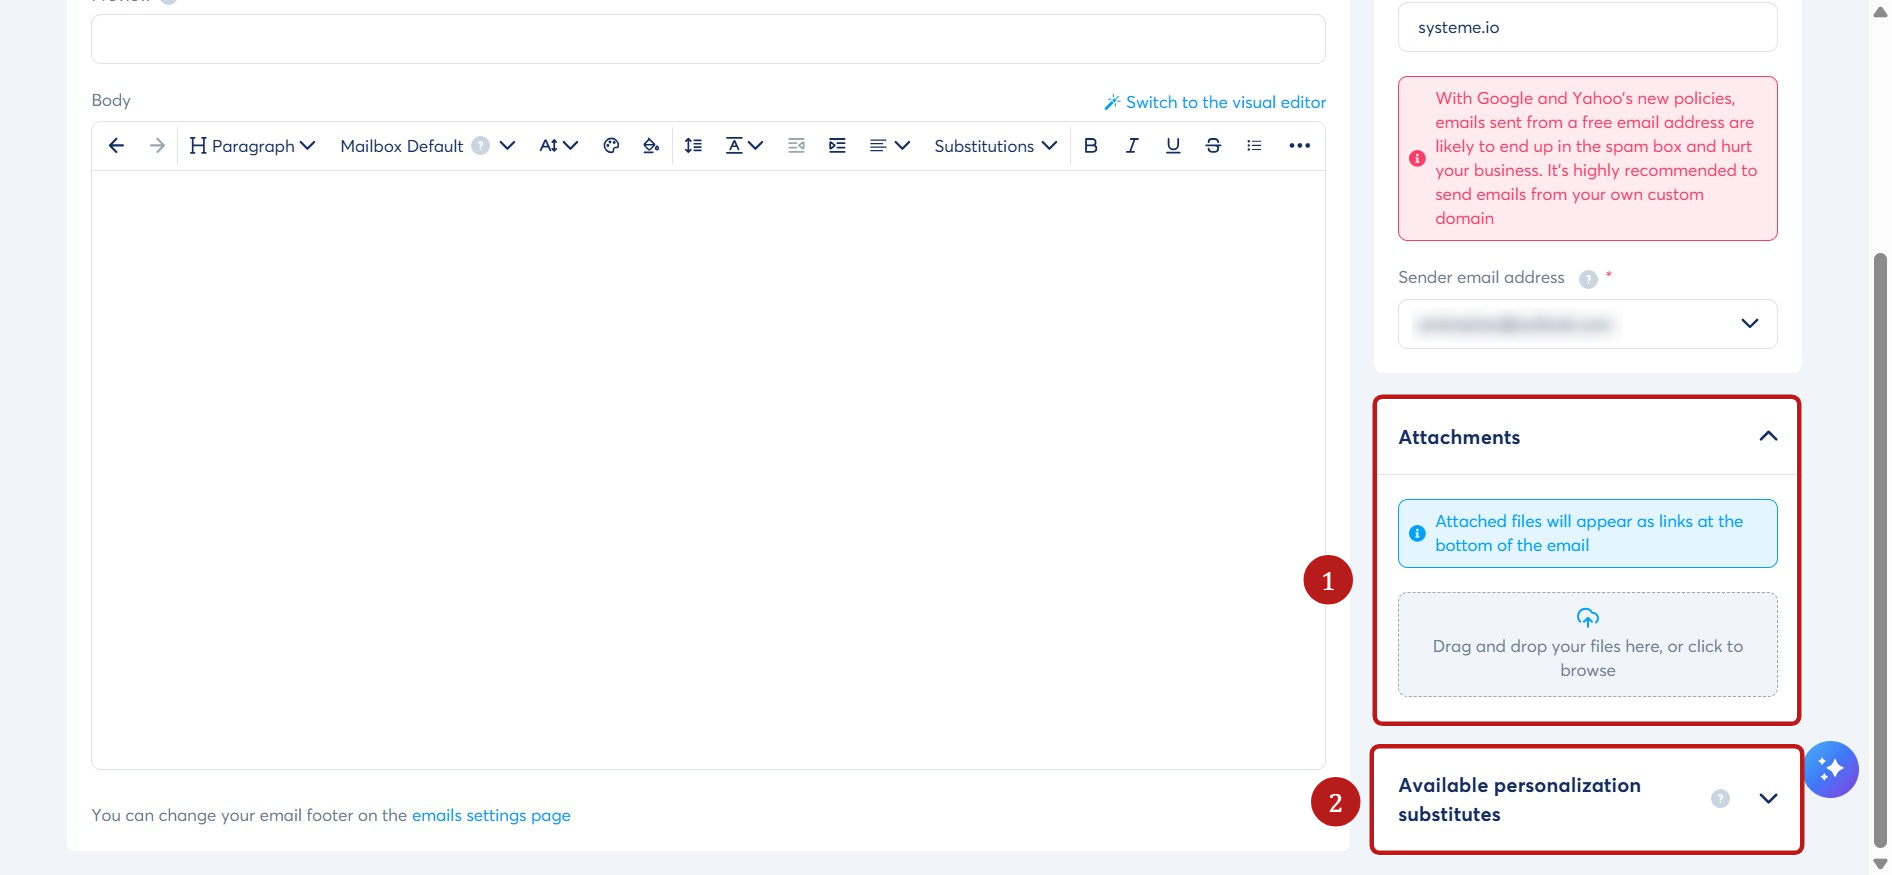
Note: You can turn these variables into clickable links by highlighting the link anchor (the text), clicking on Create a link in the editor toolbar, and then pasting the variable into the URL field.
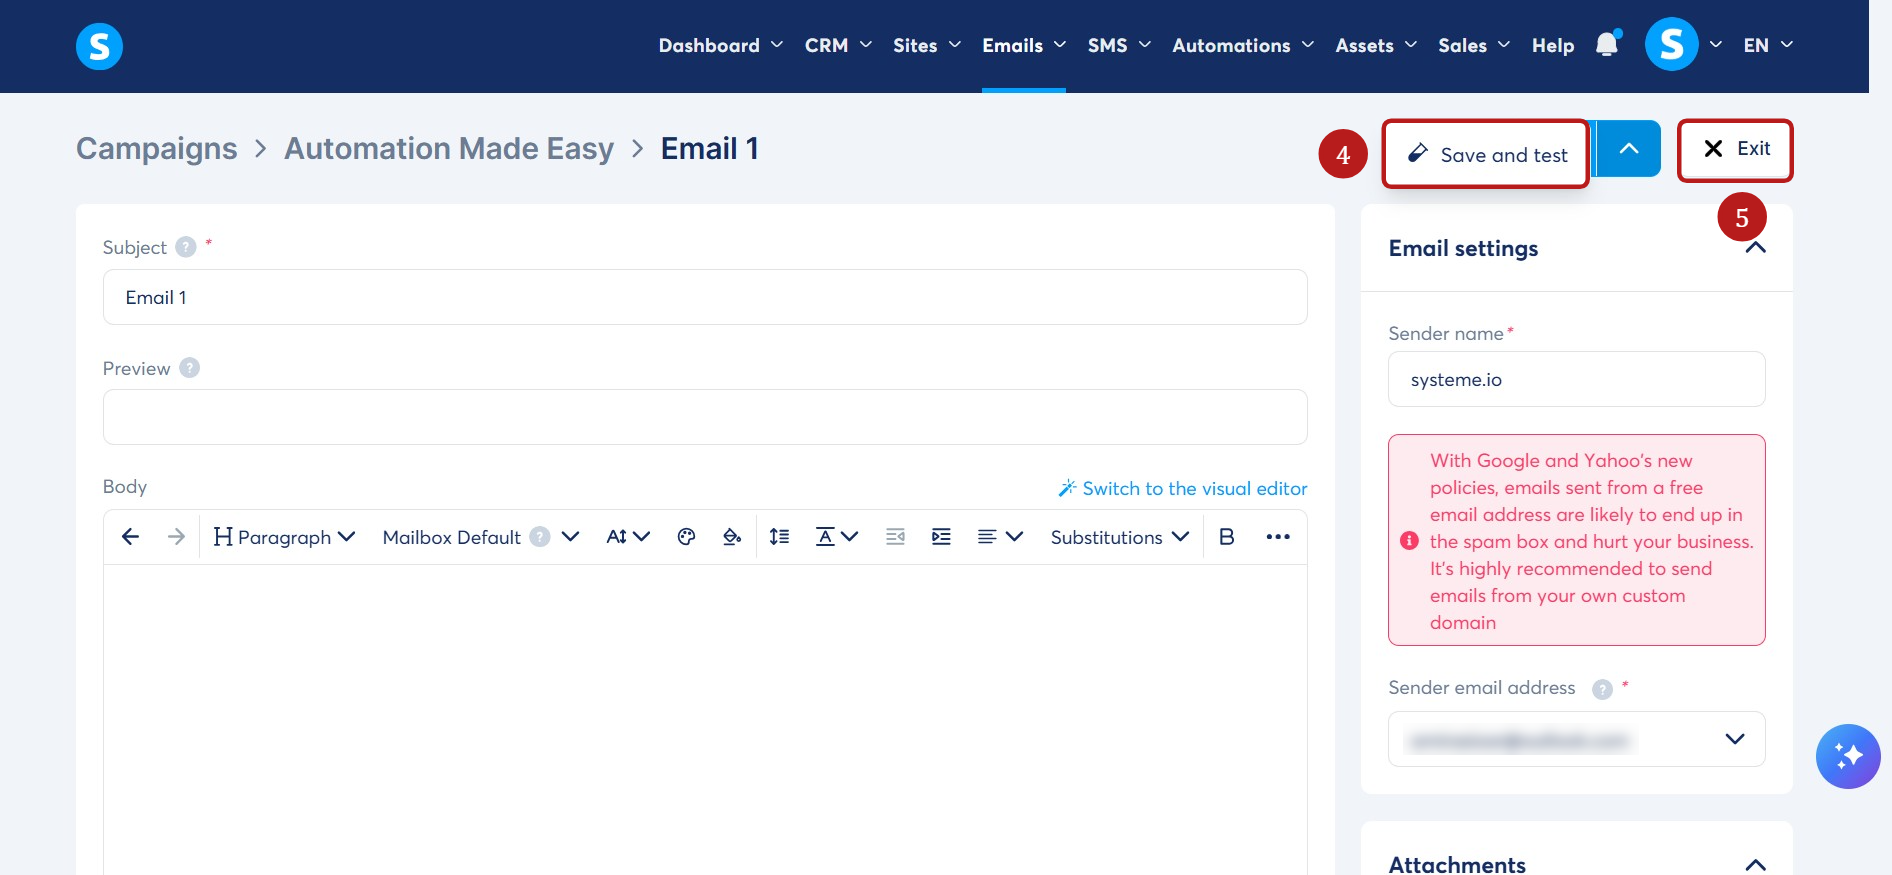
Once the email is completed and configured, you can:
Save (3): to save your email campaign
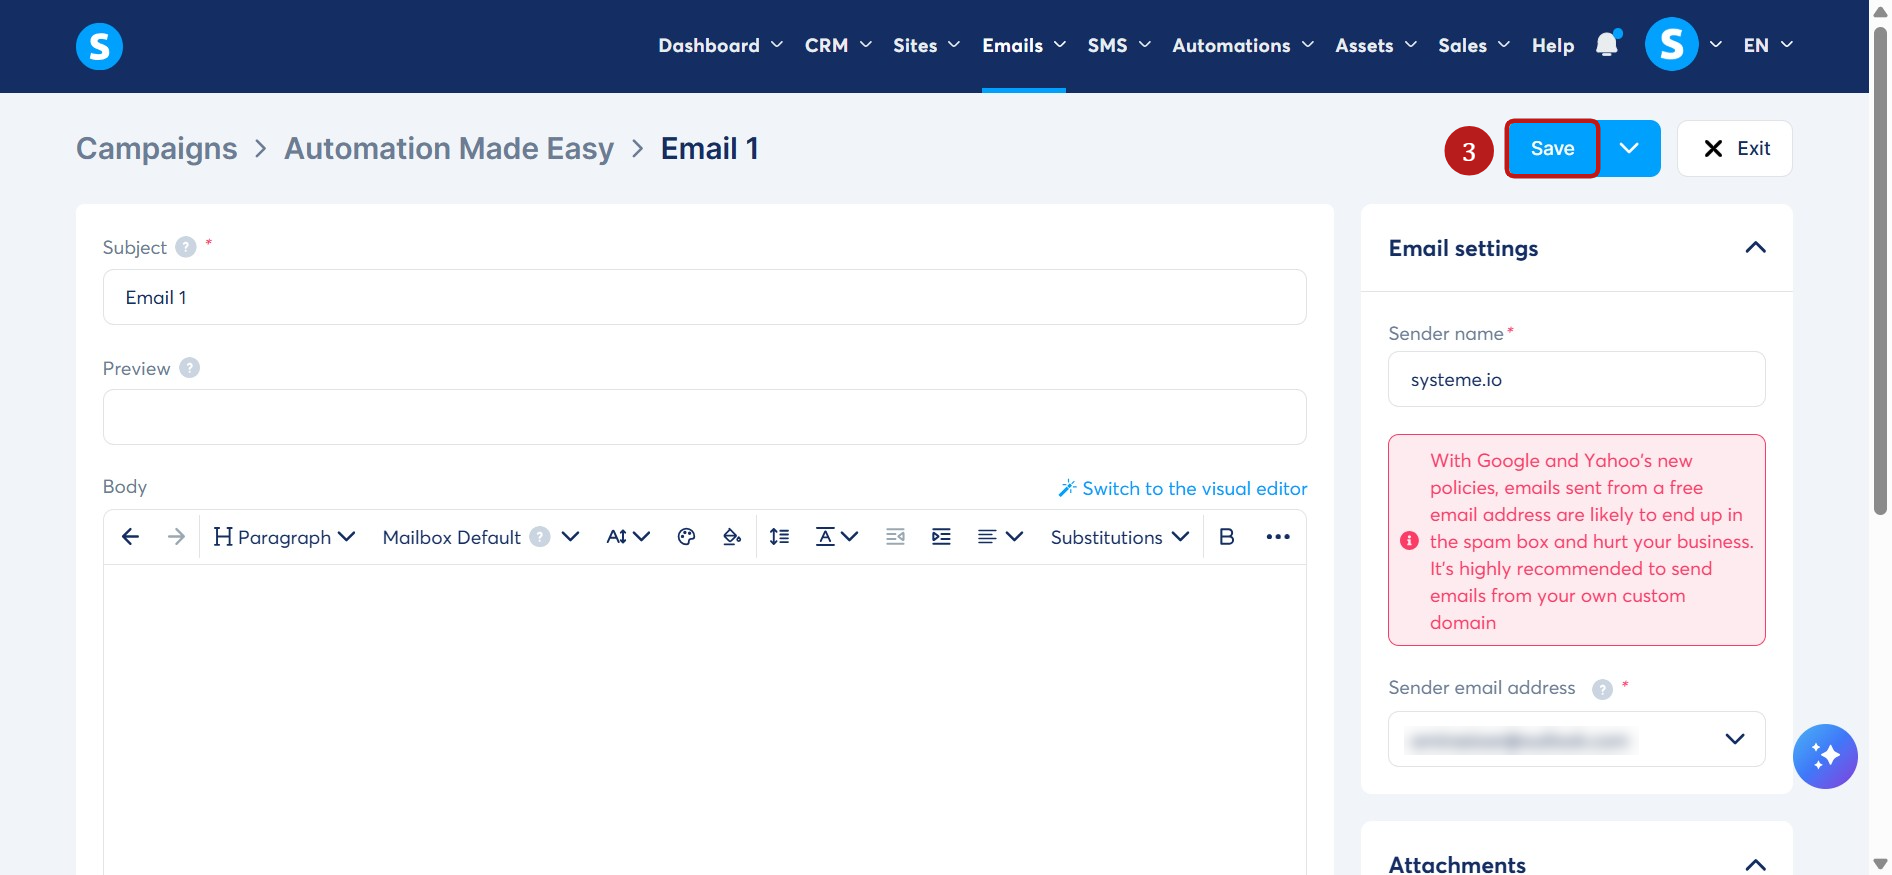
Save and test (4): to save your email campaign and receive a test email
Exit (5): to exit your email campaign
b. Visual editor
The visual editor is similar to the funnel page editor and provides a drag-and-drop canvas to visually add elements and structure the layout. As with the funnel page editor, you can add content elements such as images, text, and buttons. Additionally, you can lay out the content using sections and columns.
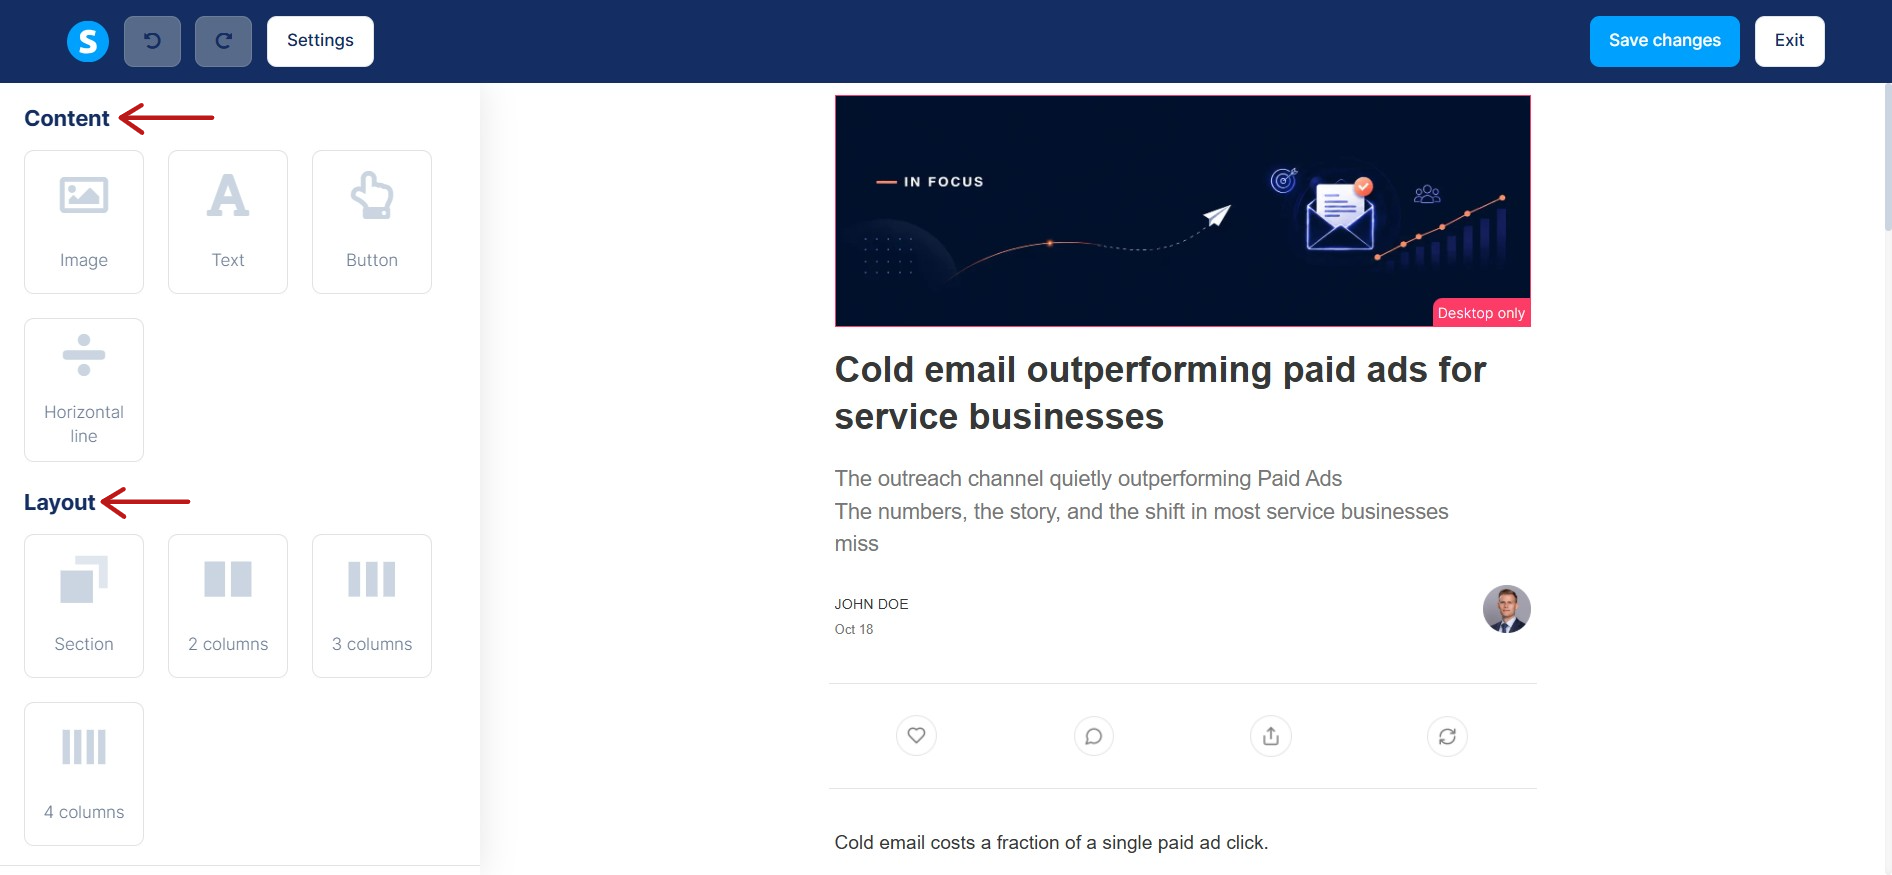
With the page editor, clicking on any element allows you to configure its options.
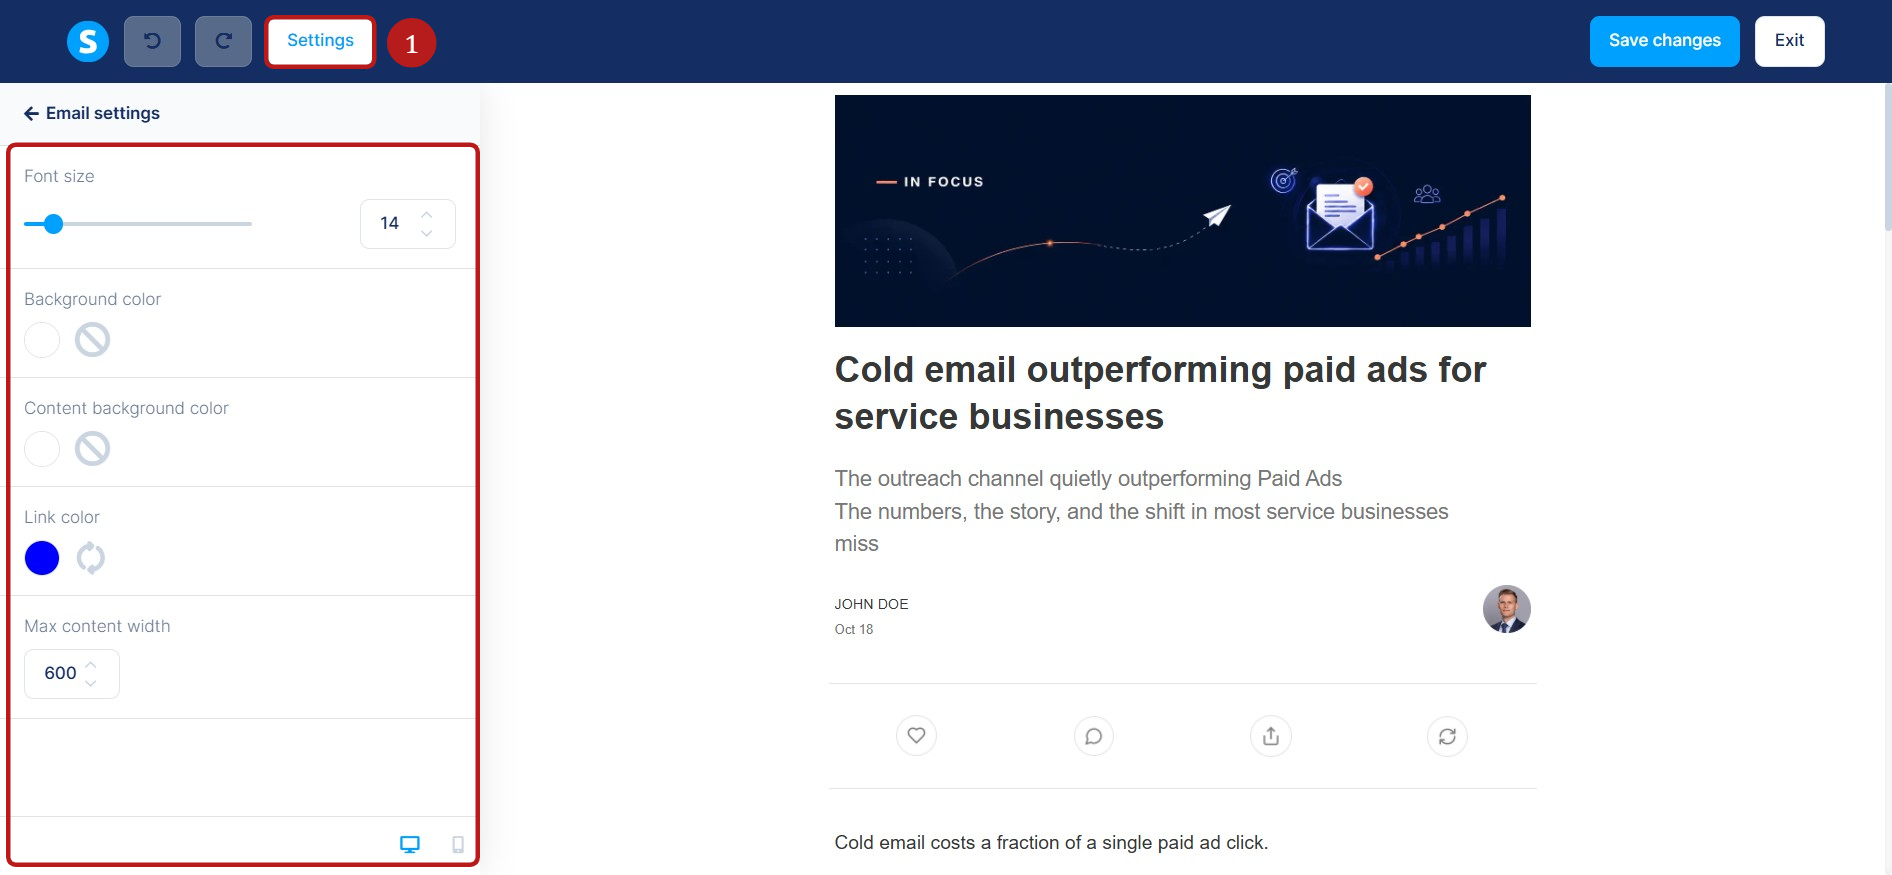
Go to the Settings (1) to adjust the font size and set background colors, content, or links. You can also increase or decrease the width of your content area.
Finally, you have the option to optimize your email for mobile devices by clicking on the phone icon.
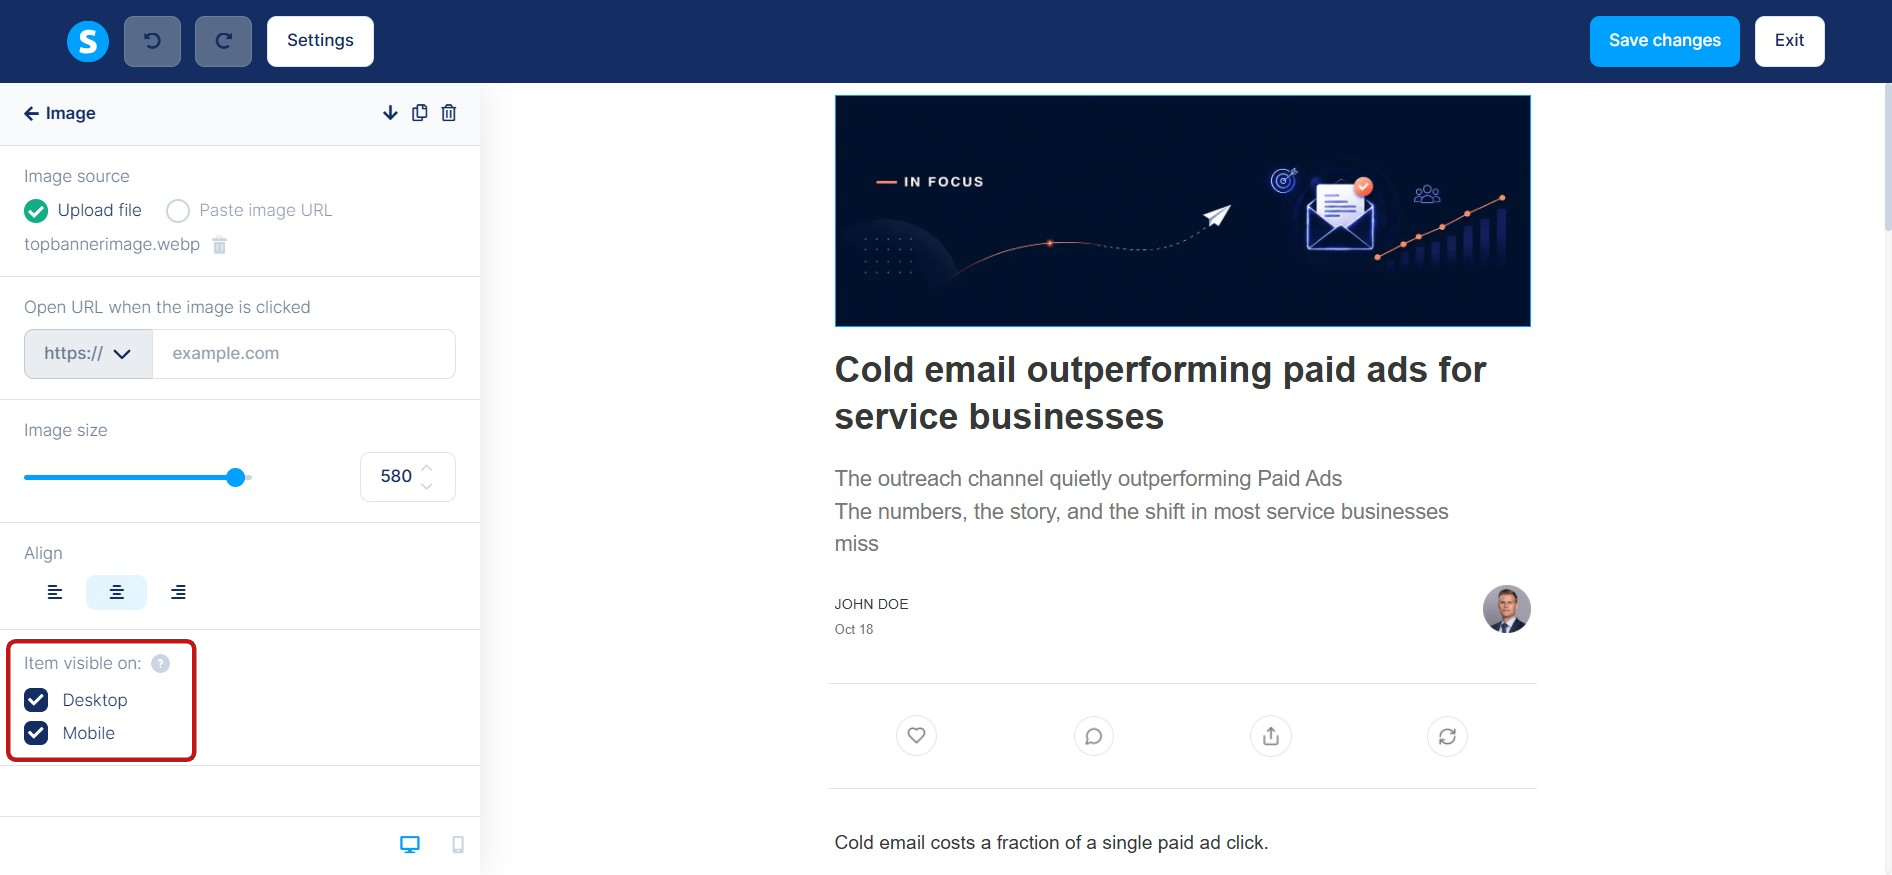
You can also control the visibility of specific elements in your emails to ensure your layout looks perfect on both desktop and mobile screens.
Click on any element (e.g., an image, text block, or signature) inside the editor to open its settings. In the left panel, scroll down to the section and check the box next to Desktop, Mobile, or both, depending on where you want the element to appear.
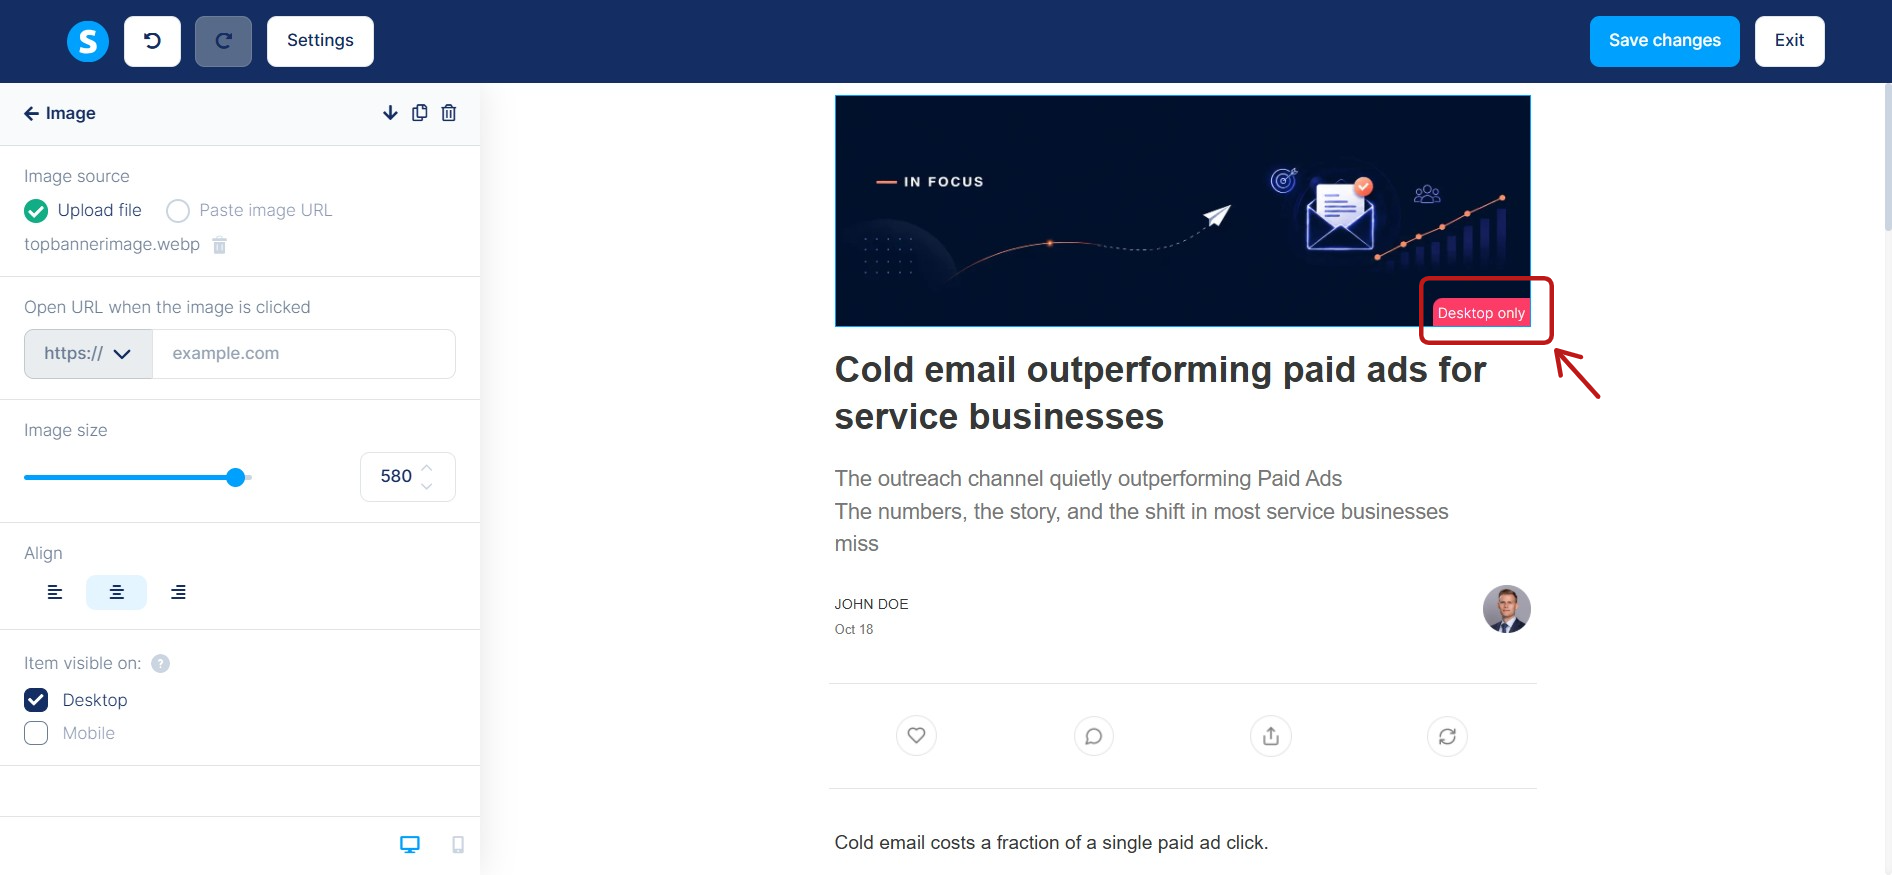
If an element is set to appear only on desktop or mobile, a label will appear on the element to indicate where it is visible.
After you have completed your email content, it is necessary to save the changes and then click on Exit and go to the next step.
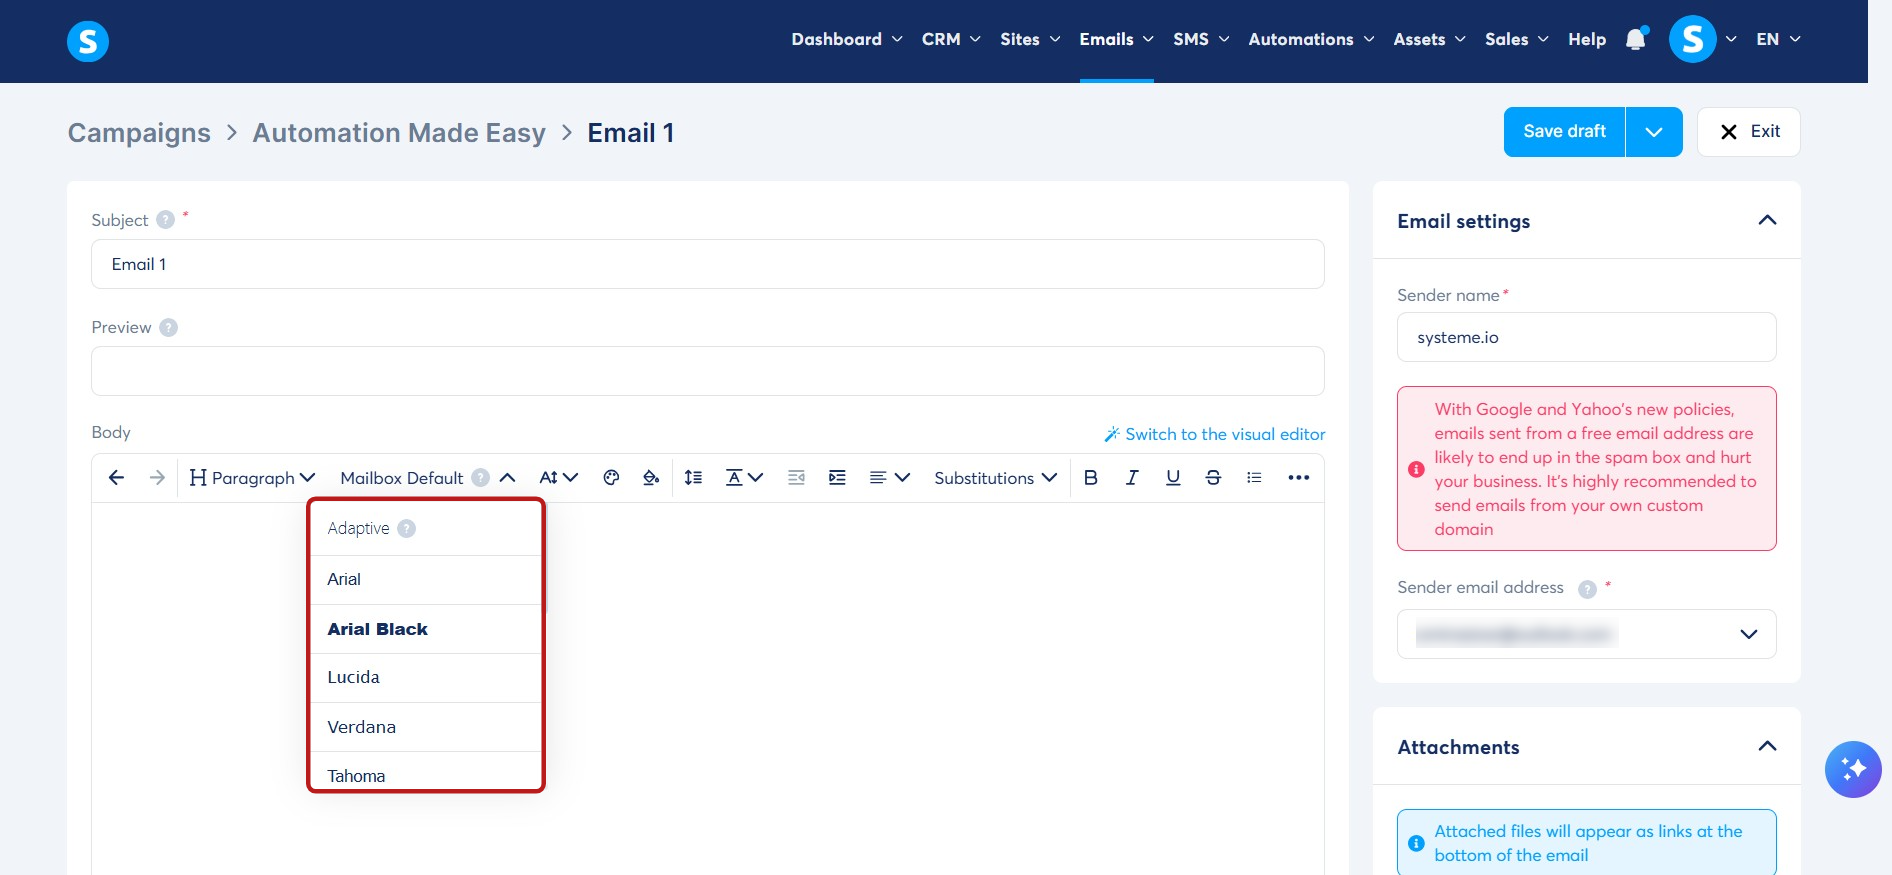
Note: When writing your emails in either the classic or visual editor, you can choose from various fonts in the text toolbar. You'll notice two specific options:
Mailbox Default: Displays your text using the recipient's email provider's default font.
Adaptive: Automatically applies the best available system font on the recipient's device (e.g., Apple system font for iOS/Mac, Segoe UI for Windows, or Roboto for Android). This ensures optimal readability, faster loading, and a consistent, professional look across all environments.
Once the email campaign is completed and configured, and same as on the Classic editor, you have the options to Save, Save and test, and Exit.
2. Configuring sending delays
Once your email is saved, you must activate it to configure its delivery timing.
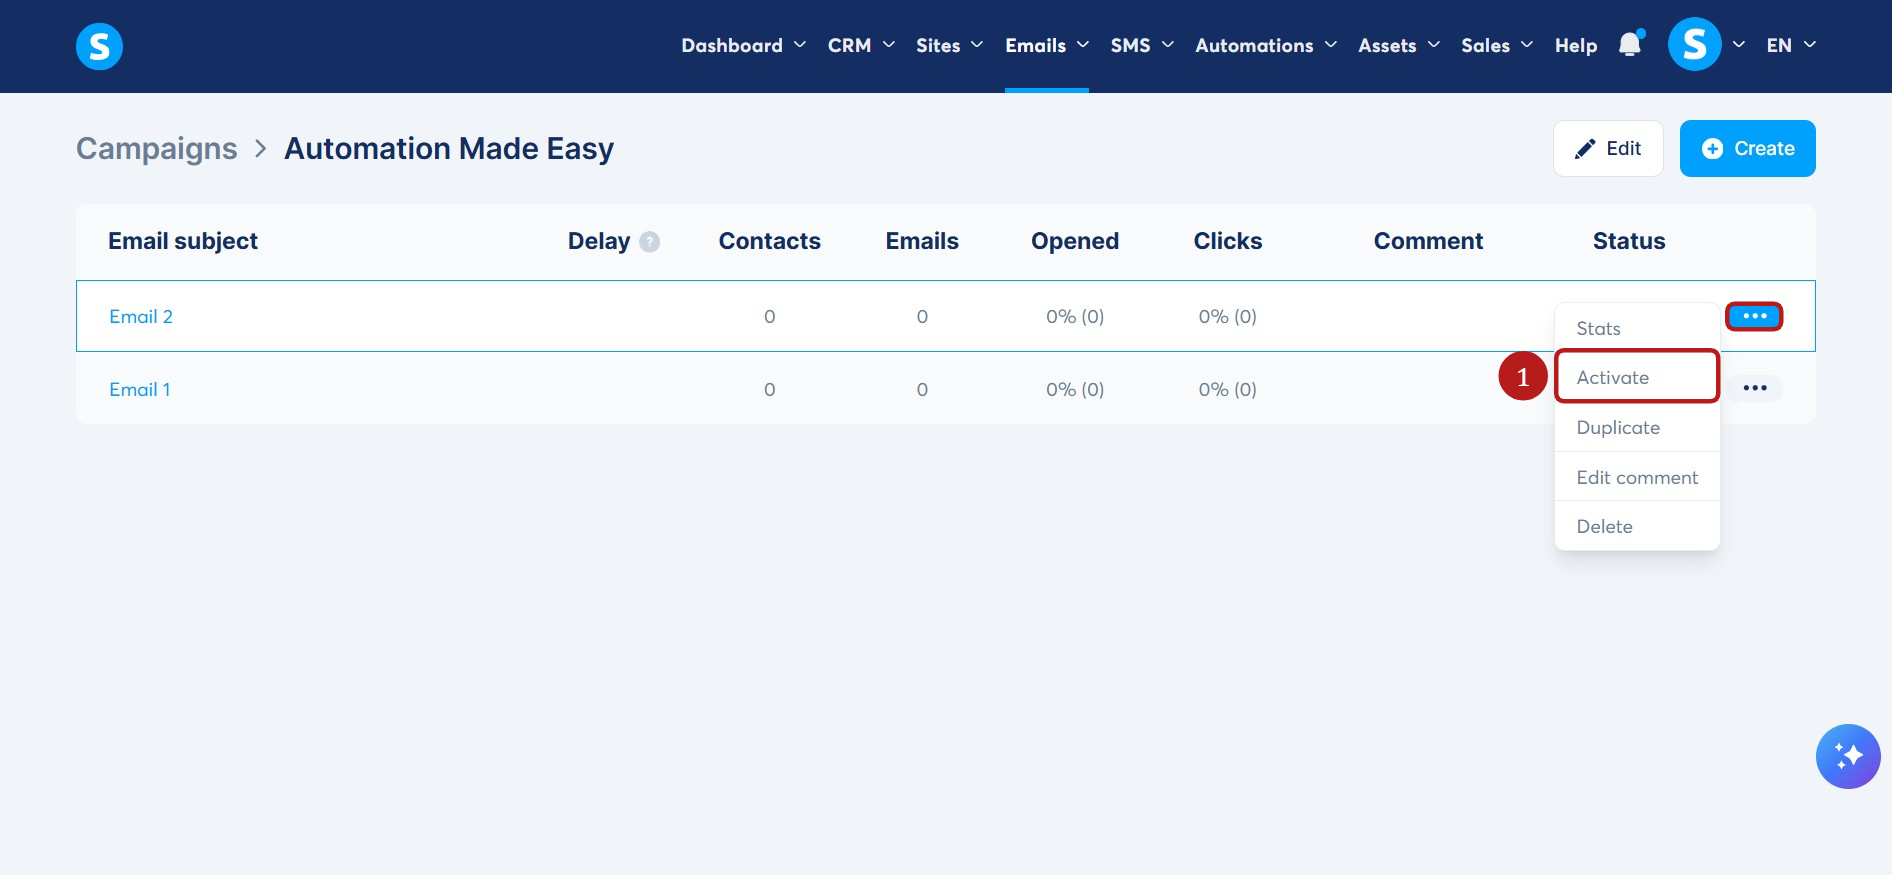
In your campaign list, click the three dots (...) next to your email, then click Activate (1).
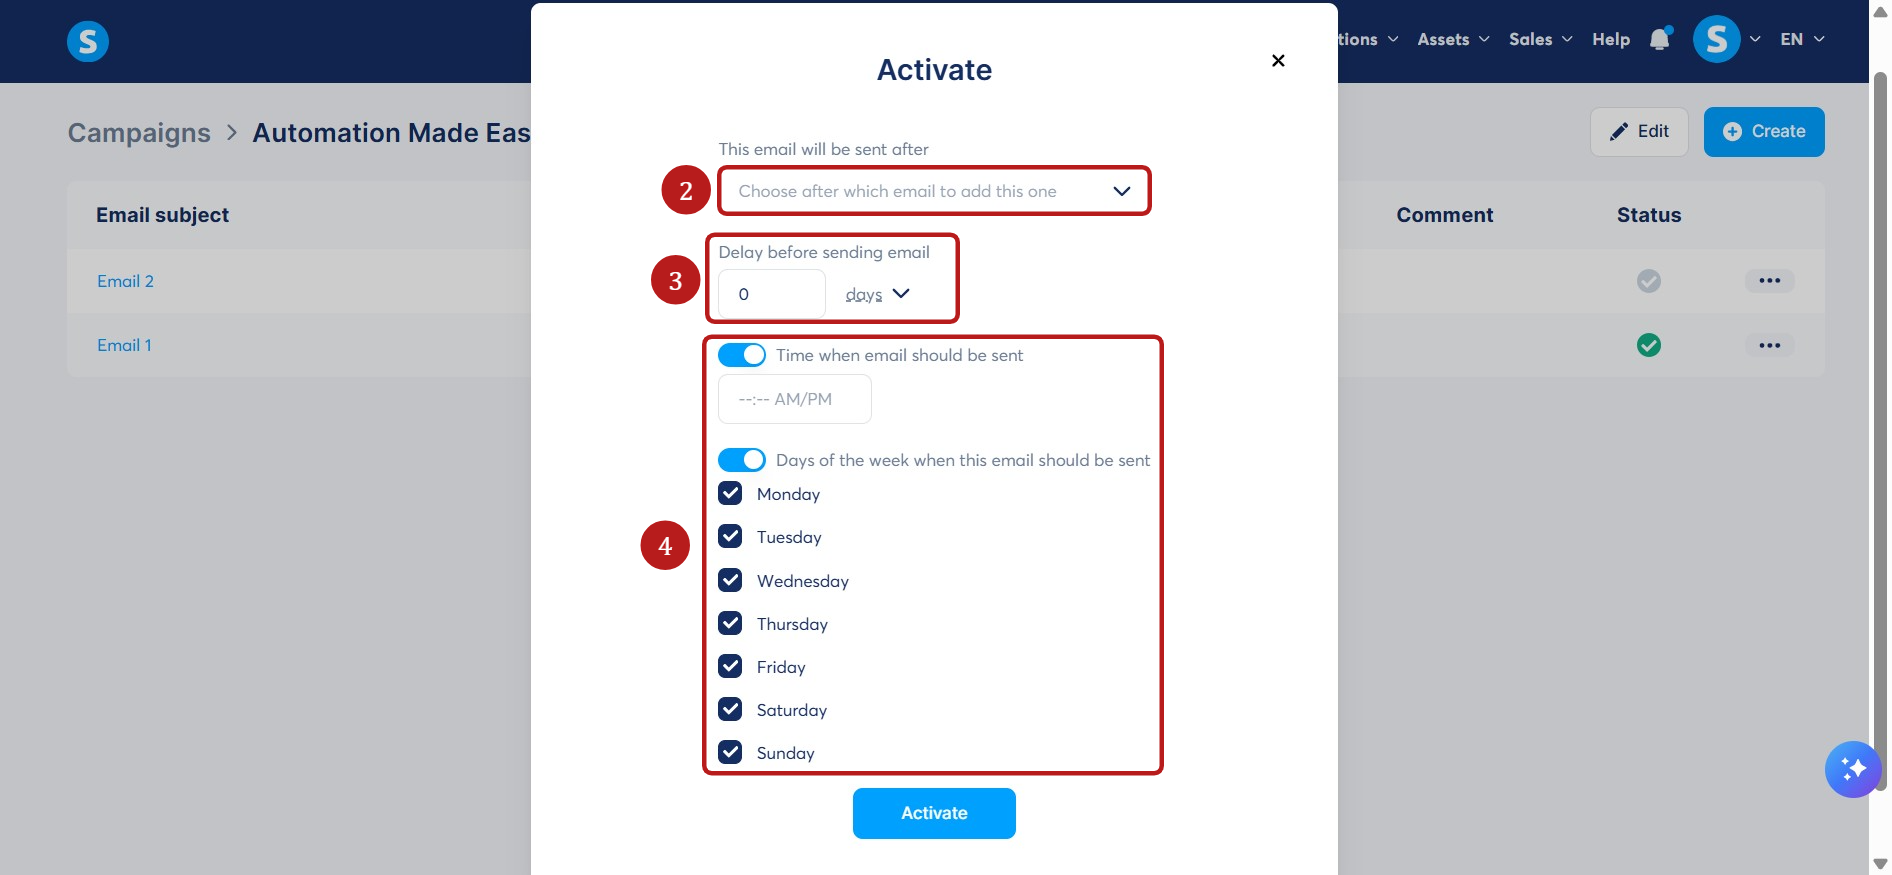
A popup will appear where you can define your delay and sending conditions as follows:
This email will be sent after (2): When you choose an email from this drop-down menu, you are performing two actions:
You define the sequence order: The email you select will be the one sent immediately before the current one.
You set the timing: The delay you define will be calculated based on the delivery time of the email you selected from the menu.
Delay (3): Enter the time you want to wait after the email you selected in the dropdown menu. The email will be sent after the selected email, once this delay has passed.
Time/Days of the week (4): Optionally, toggle these on to restrict sending to specific hours or specific days (e.g., only weekdays).
3. Example campaign
Imagine a campaign with five emails, each with specific delays and conditions:
Email 1: Sent 1 hour after the contact enters, at 7:00 PM, only on Sunday.
Email 2: Sent 1 hour after Email 1, at 7:00 AM.
Email 3: Sent 1 day after Email 2, at 8:00 AM, only on Friday.
Email 4: Sent 1 day after Email 3, at 8:00 PM, only on Thursday.
Email 5: Sent 15 hours after Email 4, at 6:00 AM.
A contact enters the campaign on Saturday, January 1, at 11:00 AM.
Email 1: It meets the "1 hour after entry" condition but must wait for the "Sunday at 7:00 PM" condition.
Sent: Sunday, January 2 at 7:00 PM.
Email 2: It has a 1-hour delay after Email 1 (which would be 8:00 PM Sunday), but the sending time condition is set to 7:00 AM. It will wait until the next available 7:00 AM window.
Sent: Monday, January 3 at 7:00 AM.
Email 3: It has a 1-day delay after Email 2 but can only be sent on Friday at 8:00 AM. It waits until the next Friday.
Sent: Friday, January 7 at 8:00 AM.
Email 4: It has a 1-day delay after Email 3, but can only be sent on Thursday at 8:00 PM. It waits until the next Thursday.
Sent: Thursday, January 13 at 8:00 PM.
Email 5: It has a 15-hour delay after Email 4. 15 hours after Thursday 8:00 PM is Friday 11:00 AM. Since the condition is 6:00 AM, it will be sent at that time on the following day.
Sent: Saturday, January 15 at 6:00 AM.
Conclusion: For an email to be sent, all conditions (delay + specific time + specific day) must be met. The delay is always calculated from the delivery time of the email immediately preceding it in the sequence.
(We recommend avoiding setting up several delays at the same time to avoid confusion).
Notes
The order of emails in a campaign is sequential from top to bottom; therefore, if an email is at the top, it means that it will be sent first, except for new emails you have created for your campaign. Indeed, when adding a new email to a campaign and it is not activated (it remains grayed out), it appears at the top of the list of emails in the campaign because it has not yet been activated and therefore configured to be sent.
When you add a new email to your email campaign, if it is configured to be in the first position or in the middle, please note that it will only be sent to contacts who have not yet reached that step. Contacts who have already passed that step will not receive it.
A campaign email will not be sent unless all the delays configured for it have been satisfied.
The elements used in an email, such as text, fonts, font colors, images, emoticons, and layouts, are coded in HTML. When overused, these elements can weigh down an email, compromising its deliverability. Receiving servers may find it difficult to deliver emails that are too heavy, which can lead to them being marked as spam or rejected by anti-spam filters. It is therefore essential to design emails in such a way as to limit their file size, avoiding excessive use of these elements and focusing on light, relevant content to improve deliverability.