How to create a website
In this article, you will learn how to create a website using the website builder.
Table of Contents:
- Creating a new website
- Editor overview
- Managing Pages
- Publishing pages
- Using Popups
- Adding a form element to your website
- Global Style settings
- Settings
- Switching website languages
- Building a multilingual website
- Device preview
- Sharing a webiste
- Domain Usage Rules
The Websites feature in systeme.io allows you to build and manage multi-page websites from a single interface.
Creating a new website
To get started, navigate to the Sites (1) tab in your main menu and click Websites (2).

On the website listing page, click Create (3).

In the popup that appears, provide the following details about your website:
- Name: Enter the name of your website (4)
- Domain name: Select the domain you want to use (5)
- Home page URL path: Once you select a domain, this field appears automatically. Use it to define the URL path for your homepage (6)
- Language: Choose the main language for your website (7)
After filling in all the required fields, click Save (8) to create your website.

Important:
- A domain can only be assigned to one website at a time.
- If the domain you want to use is already linked to another website, you must first remove it from that website before assigning it here.
After saving your website details, a window will open prompting you to choose a template for your homepage.
You can choose one of the following options:
- Choose a template: Select one of the ready-made designs and customize it.
- Build from scratch: Start with a blank canvas and design everything manually.
Once you select an option, click Save (9) to continue.

After saving the selected template for your website, you will be redirected to the website editor.
Editor overview
The editor contains four main tabs you will use to build and manage your website:
- Pages: Manage the structure of your website, switch between pages, create new pages, and access page settings.
- Popups: Create and manage popups for your website.
- Style: Define global design settings such as fonts, colors, and buttons.
- Settings: Configure website-level options such as languages and general settings.

Managing pages
The Pages tab is where you manage the structure of your website.
From here, you can view all pages (1), switch between them, and create new ones by clicking (+) Create (2).

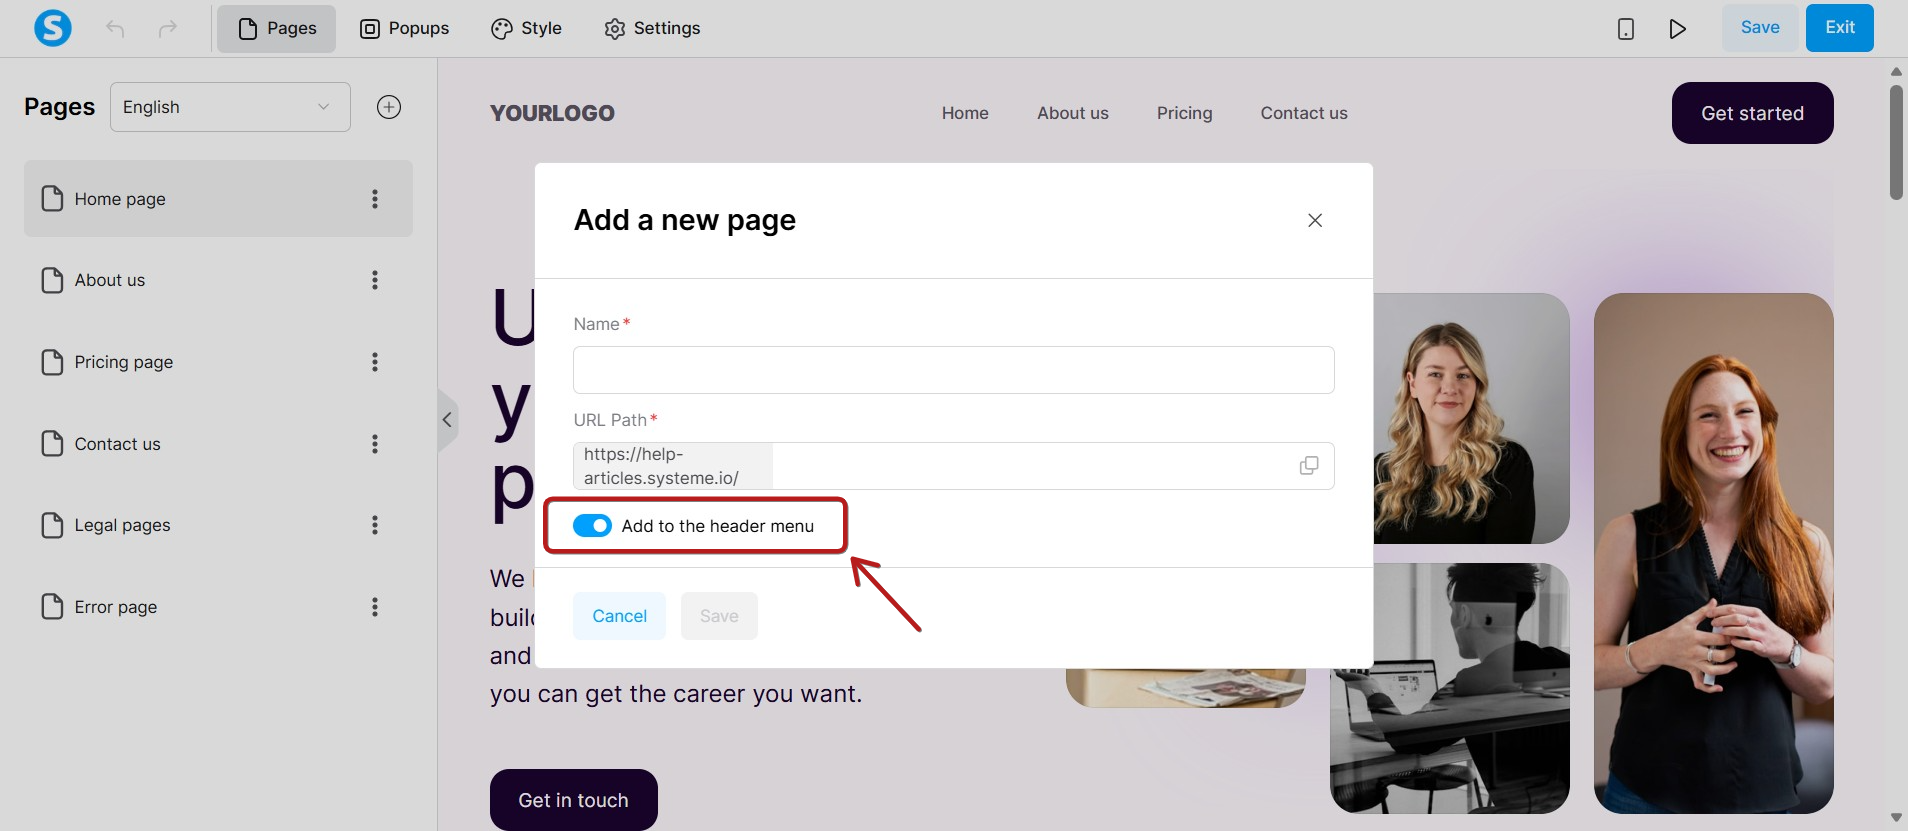
When creating a new page, you will see a toggle in the creation popup to add the page to your website menu. This is enabled by default and will automatically add a link to your new page in the website's navigation menu.
Note: If a page is deactivated, it will still appear in your menu while in the editor and preview modes, but it will not be visible to visitors on your live website.
Click any page in the list to display it in the editor area on the right. To start editing that page, click directly inside the editor area.
This opens the page editor panel, where you will find all elements available to customize your page:

You can return to your list of pages anytime by clicking Pages at the top left of the editor.
If you try to switch pages or leave the editor with unsaved changes, a confirmation popup will appear:

Note: The website editor uses the same page builder available in the sales funnel feature, so all editing tools work the same way.
Page settings
To access the settings of a specific page, click the three-dot menu next to the page name.
This menu displays the following options:
- Settings
- Unpublish
- Remove
Note: The homepage cannot be deleted. Only secondary pages include the remove option.

When you click Settings, the Page settings popup will open with the following sections:
General settings
Here you can edit:
- Page name
- URL path

SEO
Use this section to define how your page appears in search engines.
You can set the title, description, keywords, author, image, and preview how it looks in search results.
It's also possible to hide this page from search engines, preventing it from appearing in search results.

Languages
This tab is used to create language-specific versions of the page.
Clicking Duplicate language-specific versions of this page will create a copy of the page for the selected language, allowing you to manually translate its content.
Important: You must first add the languages you want to support in Settings → Languages before they can appear here.

Advanced
In this tab you can add custom tracking code specific to this page.
Use only validated scripts, as unsupported code may affect page performance or behavior.

Publishing pages
Newly created pages are added in Draft mode by default.
To publish a page, click the three-dot menu and select Publish.

Note: You can unpublish a page the same way.
Using popups
Click the + Create button in the tab Popups to create a new popup.
Once the popup appears in the editor area, click on it to begin customizing.
The editing panel will open on the left side of the screen, displaying all available settings.
Page popups vs. Website popups
Each popup can be either:
- Page popup: visible only on the page you are editing.
- Website popup: visible on all pages of the website.
To switch between these modes, click the globe icon.
- When the globe icon is blue, the popup is a Website popup.
- When the globe icon is gray, the popup is a Page popup.
The status label above the popup list updates automatically to reflect your choice:
- Page popups
- Website popups

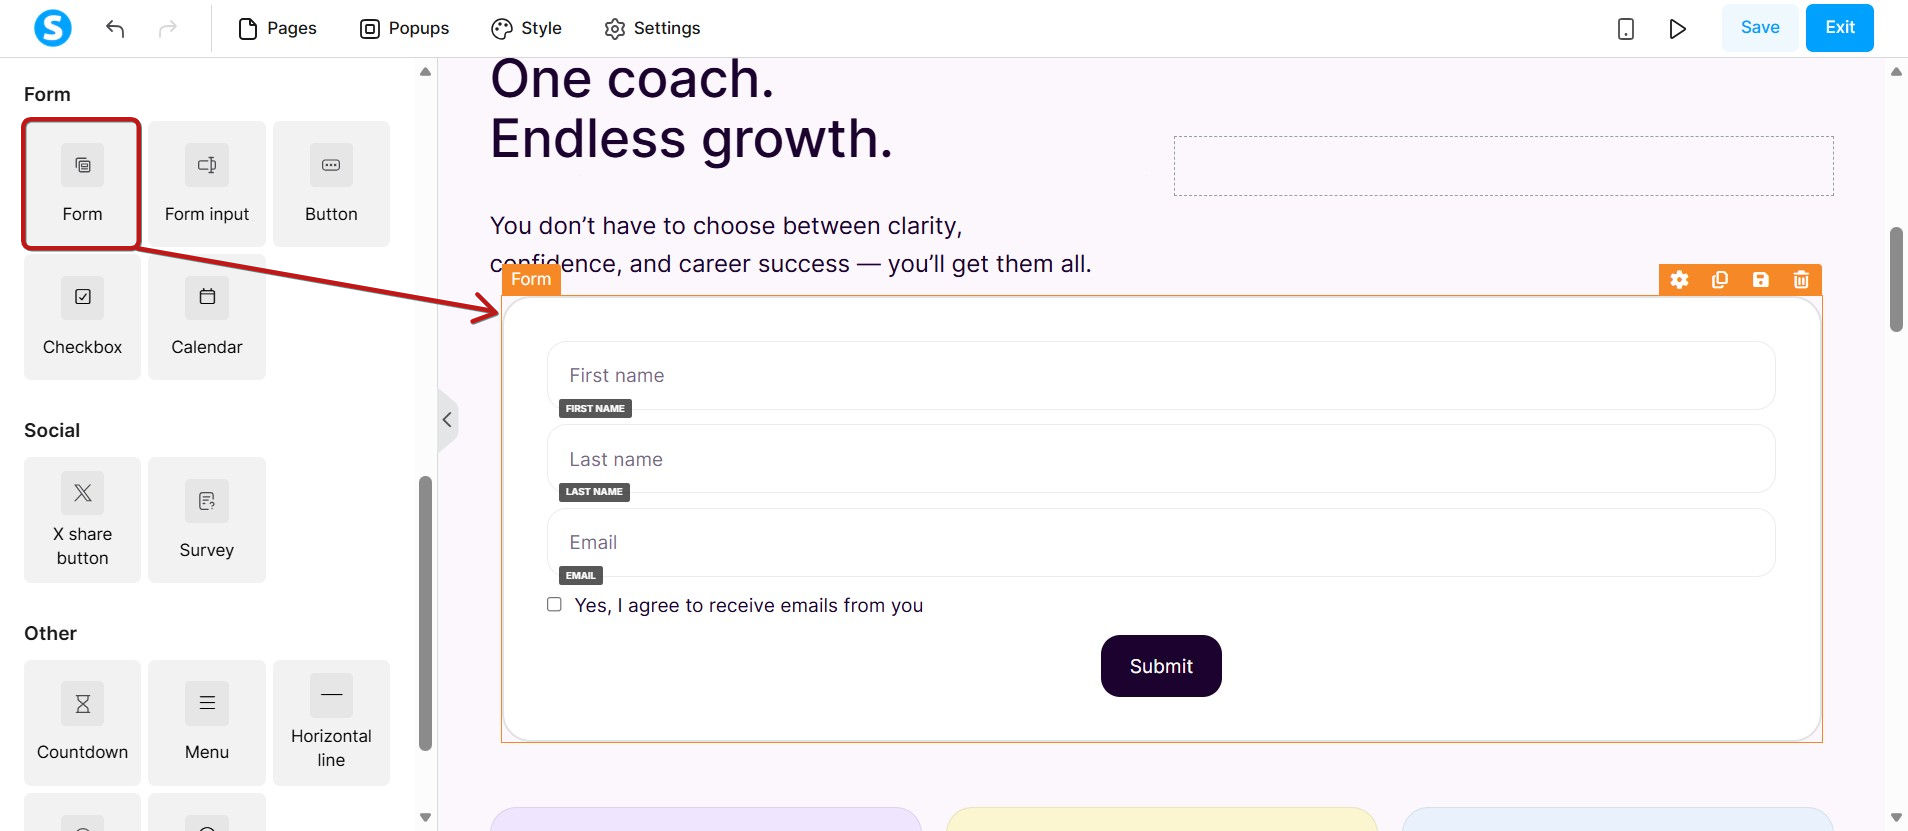
Adding a form element to your website
To easily capture leads on your website, you can use the unified Form element. Instead of adding input fields and buttons separately, the Form element acts as a single container that groups your input fields, checkboxes, and submit button together. This allows you to reliably build multiple independent forms on the same page.
When you click on the Form element, you can fully configure it using the menu panel on the left side of the editor:
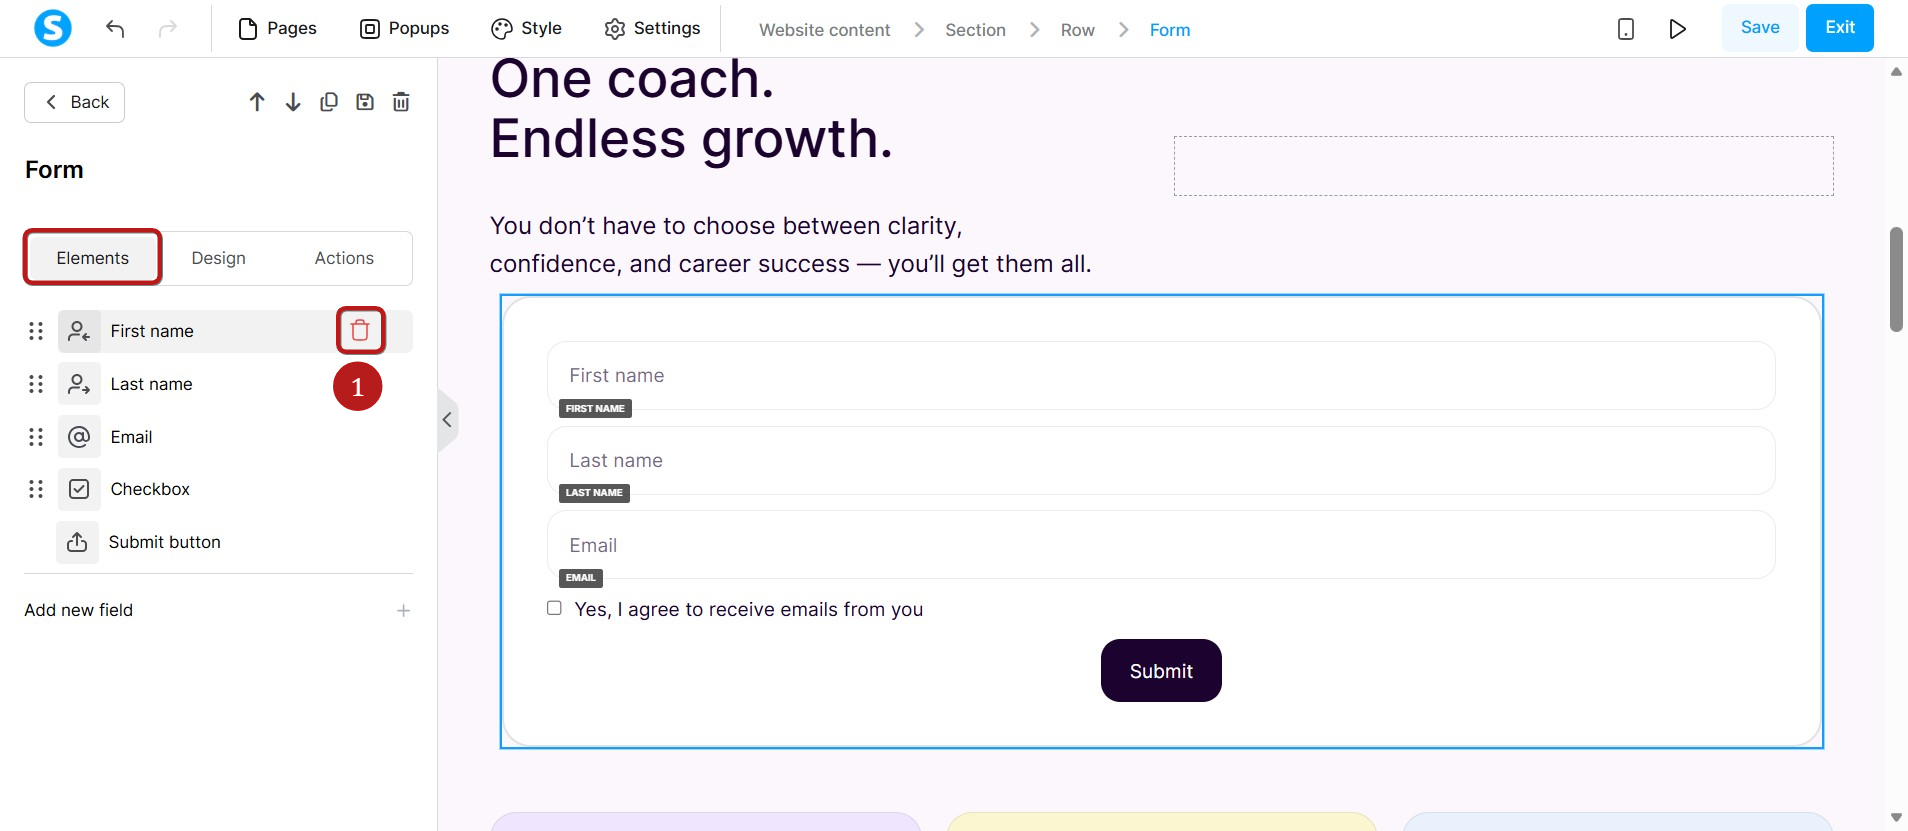
a. Under the Elements tab:
- Manage standard fields: Easily remove standard input fields (such as First name, Phone number) by hovering over the field you want to remove, and a Bin icon (1) will appear.
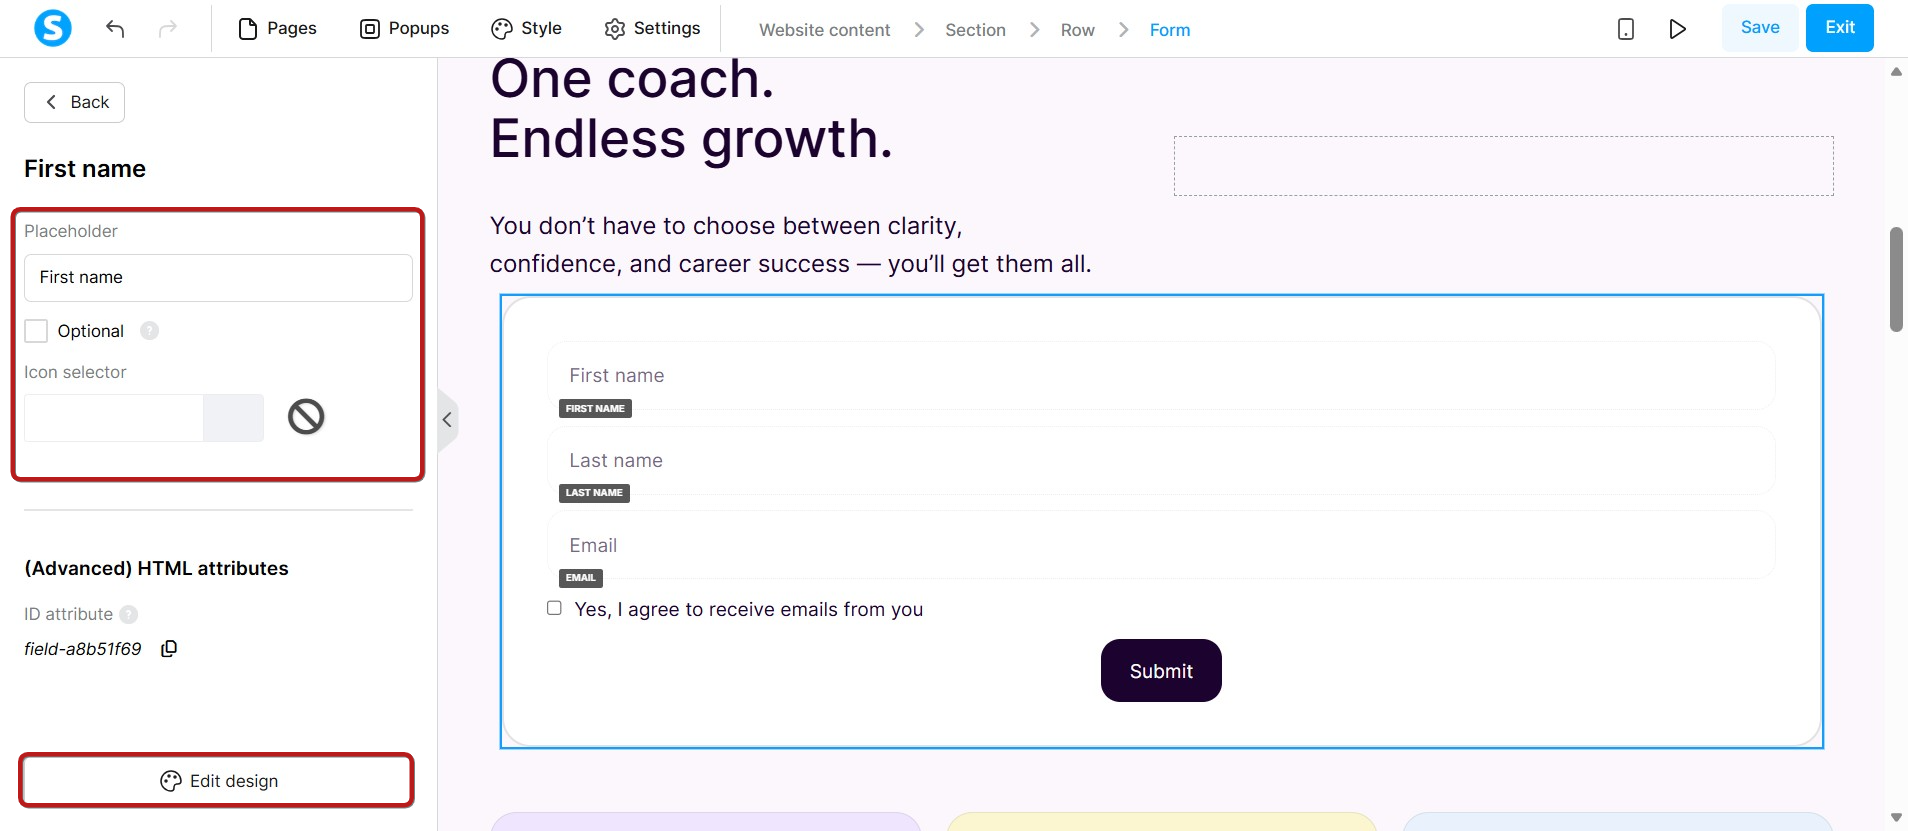
You can also edit the standard fields by simply clicking on them; you can edit the Placeholder, make it optional by checking the Optional box, add an icon, and edit the design.
- Add new field: Scroll down and click the (+) button (2) to instantly add new fields.
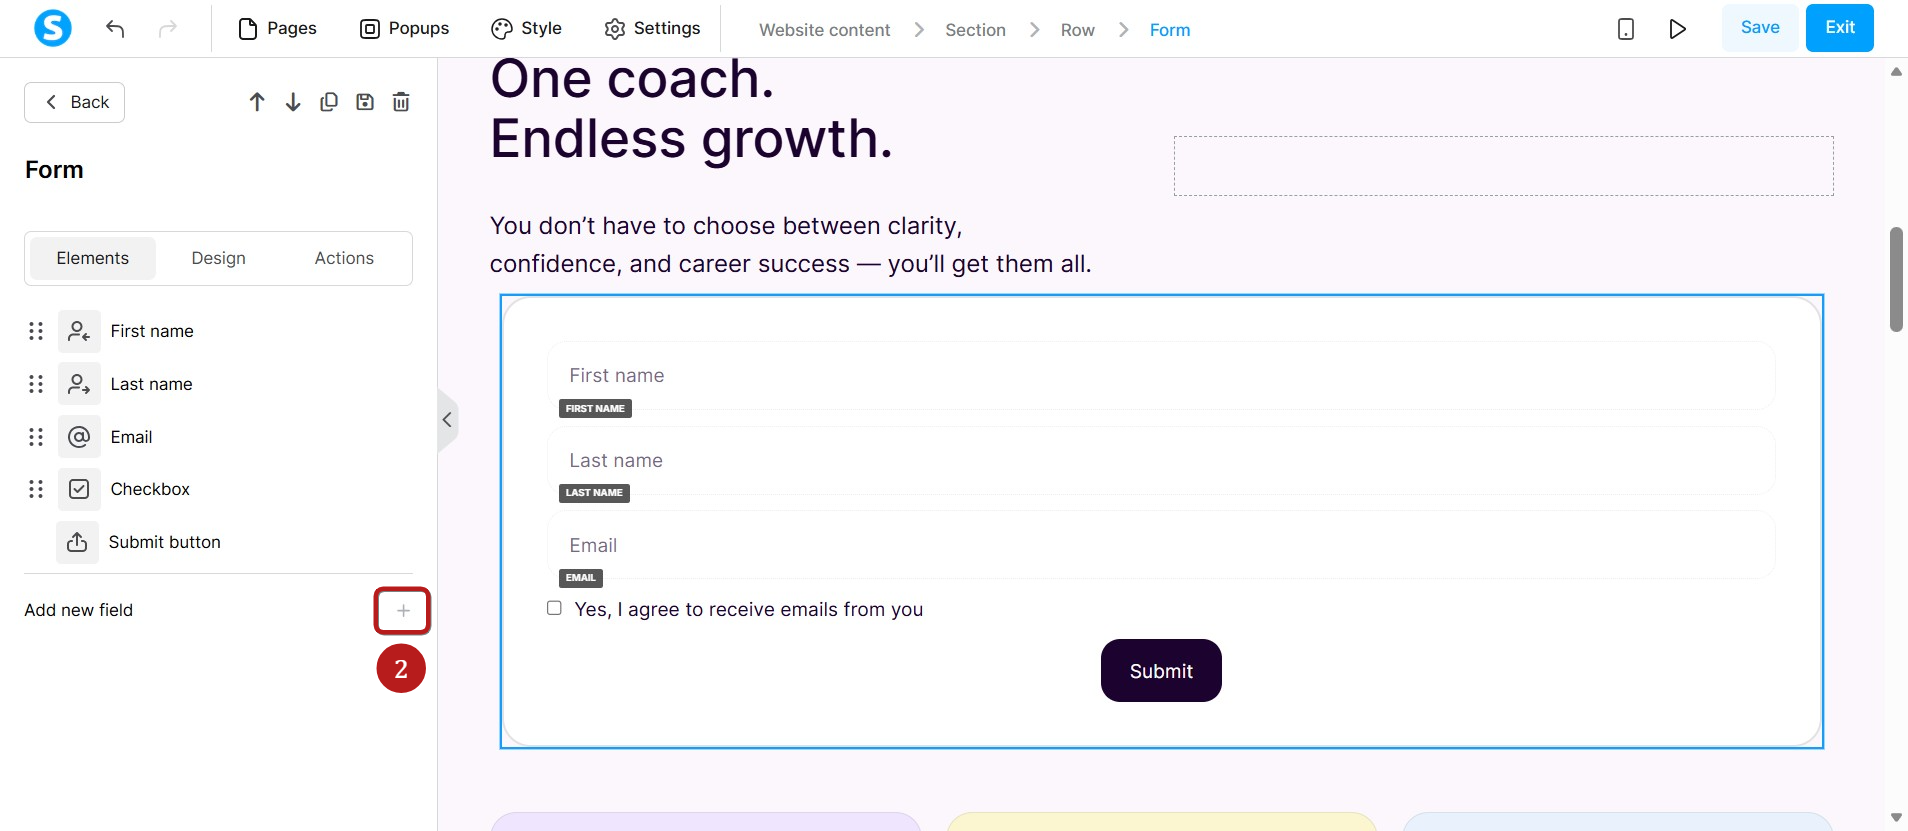
You can choose from the ones that exist by default, such as Postal code, Company name, etc. You can also add a checkbox (3).
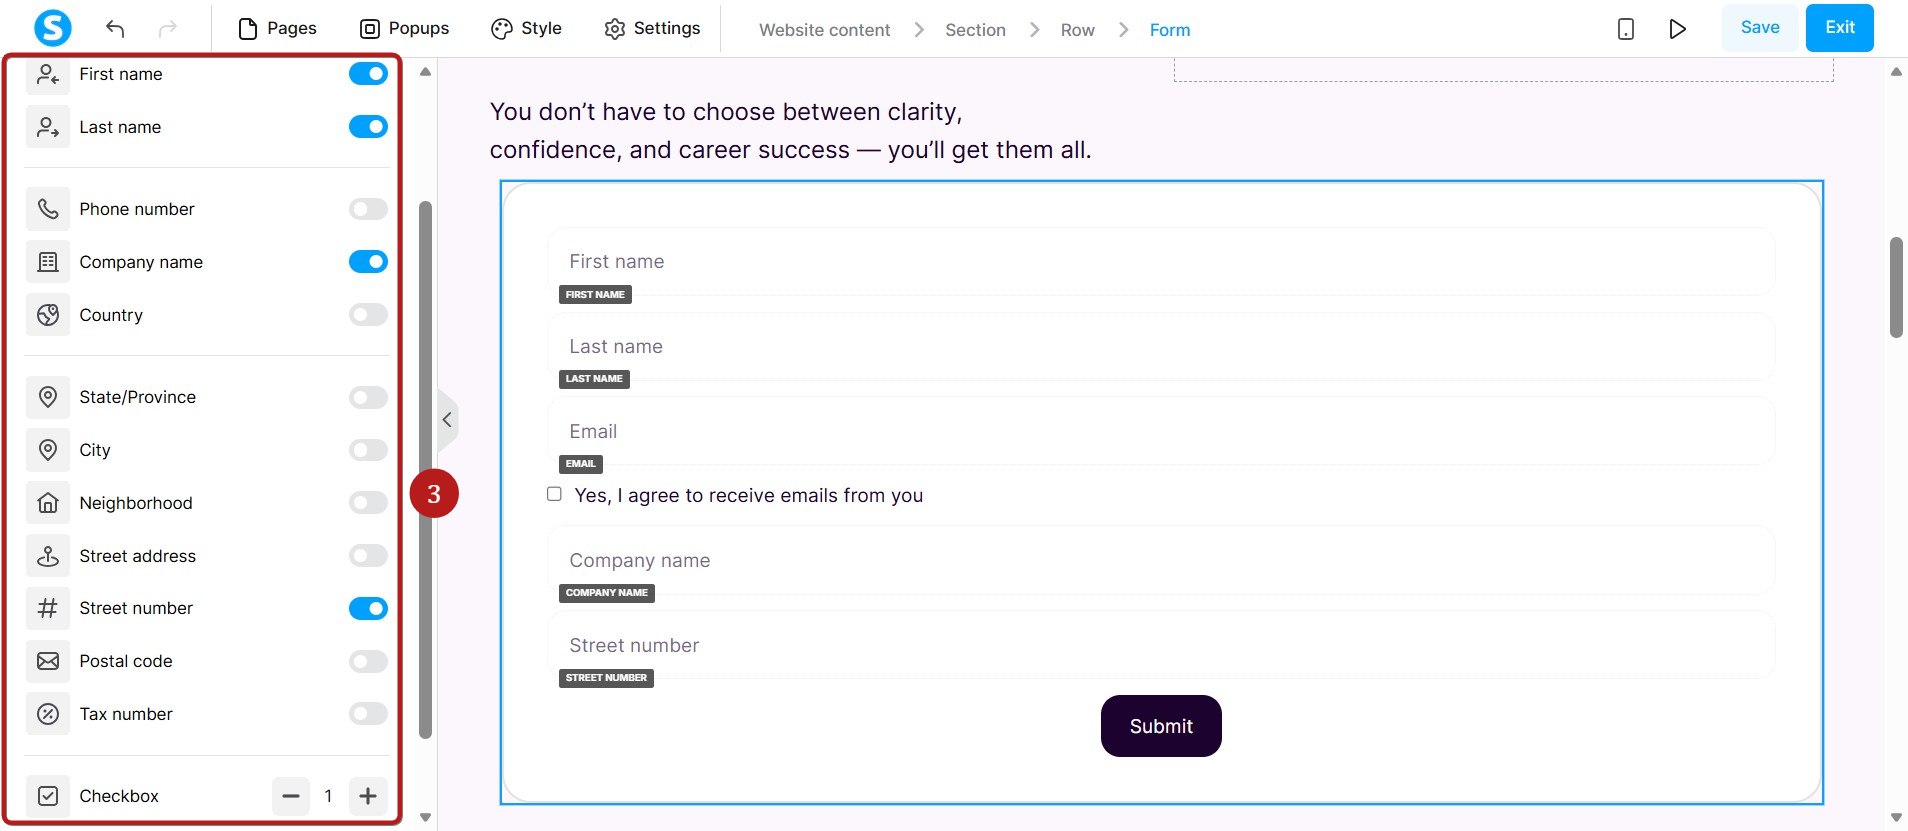
Or add a custom field (4).
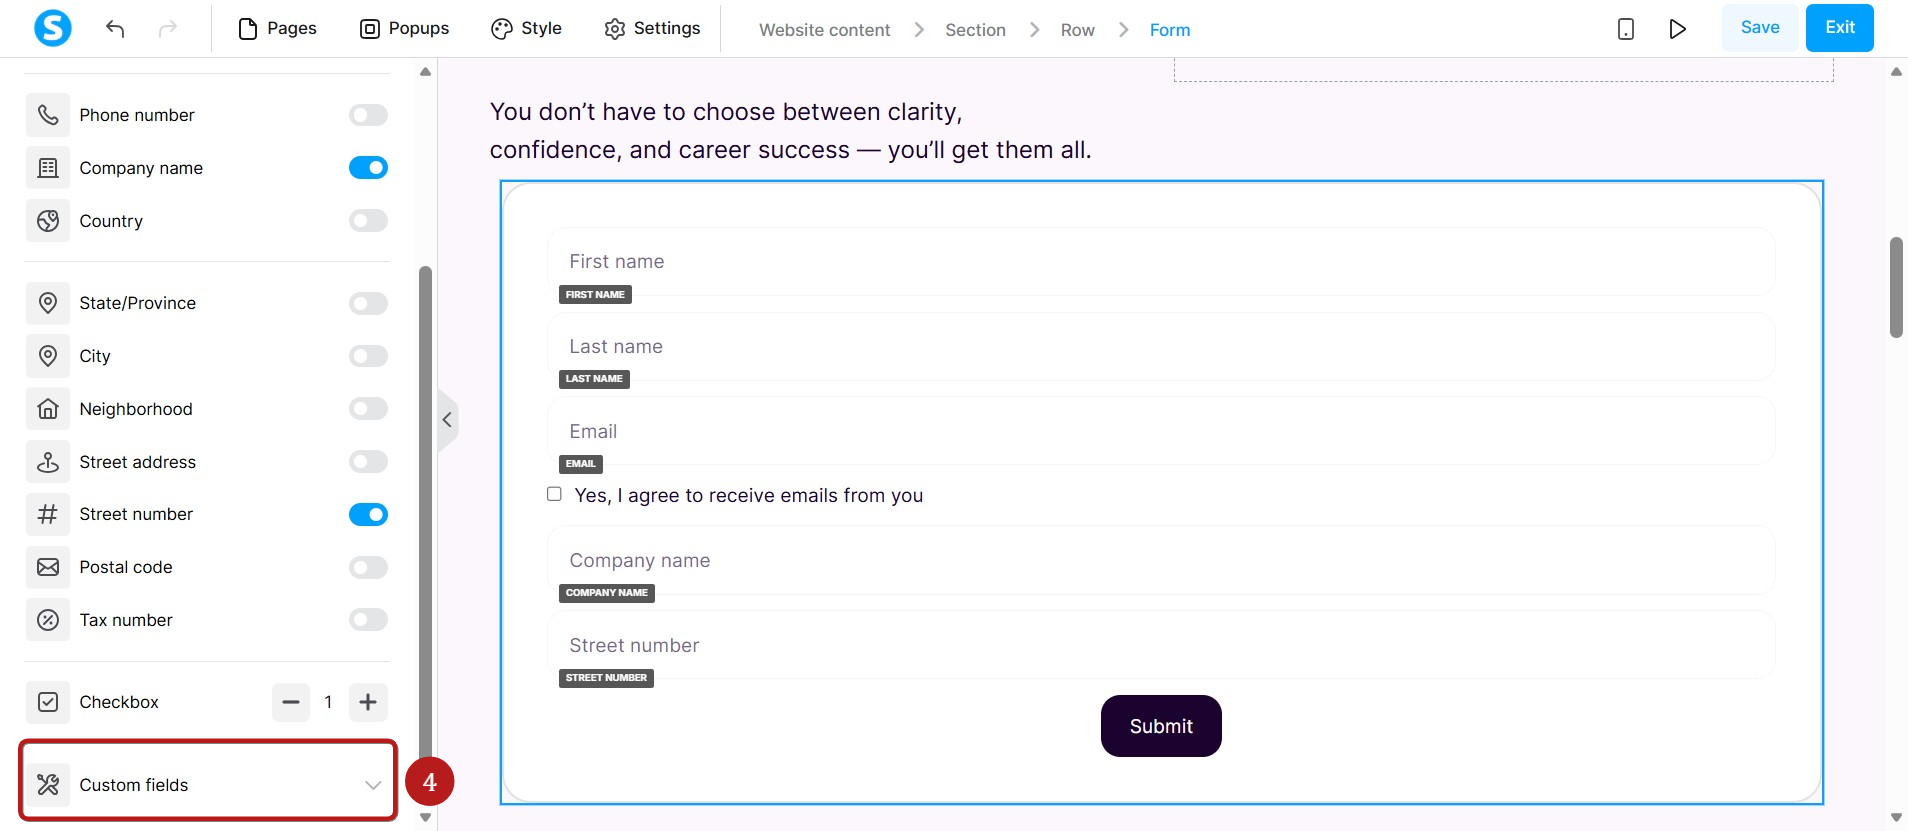
Check out the following page to learn more: How to add a custom form input field
After adding your fields, you can organize them by dragging and dropping them in the order you like.
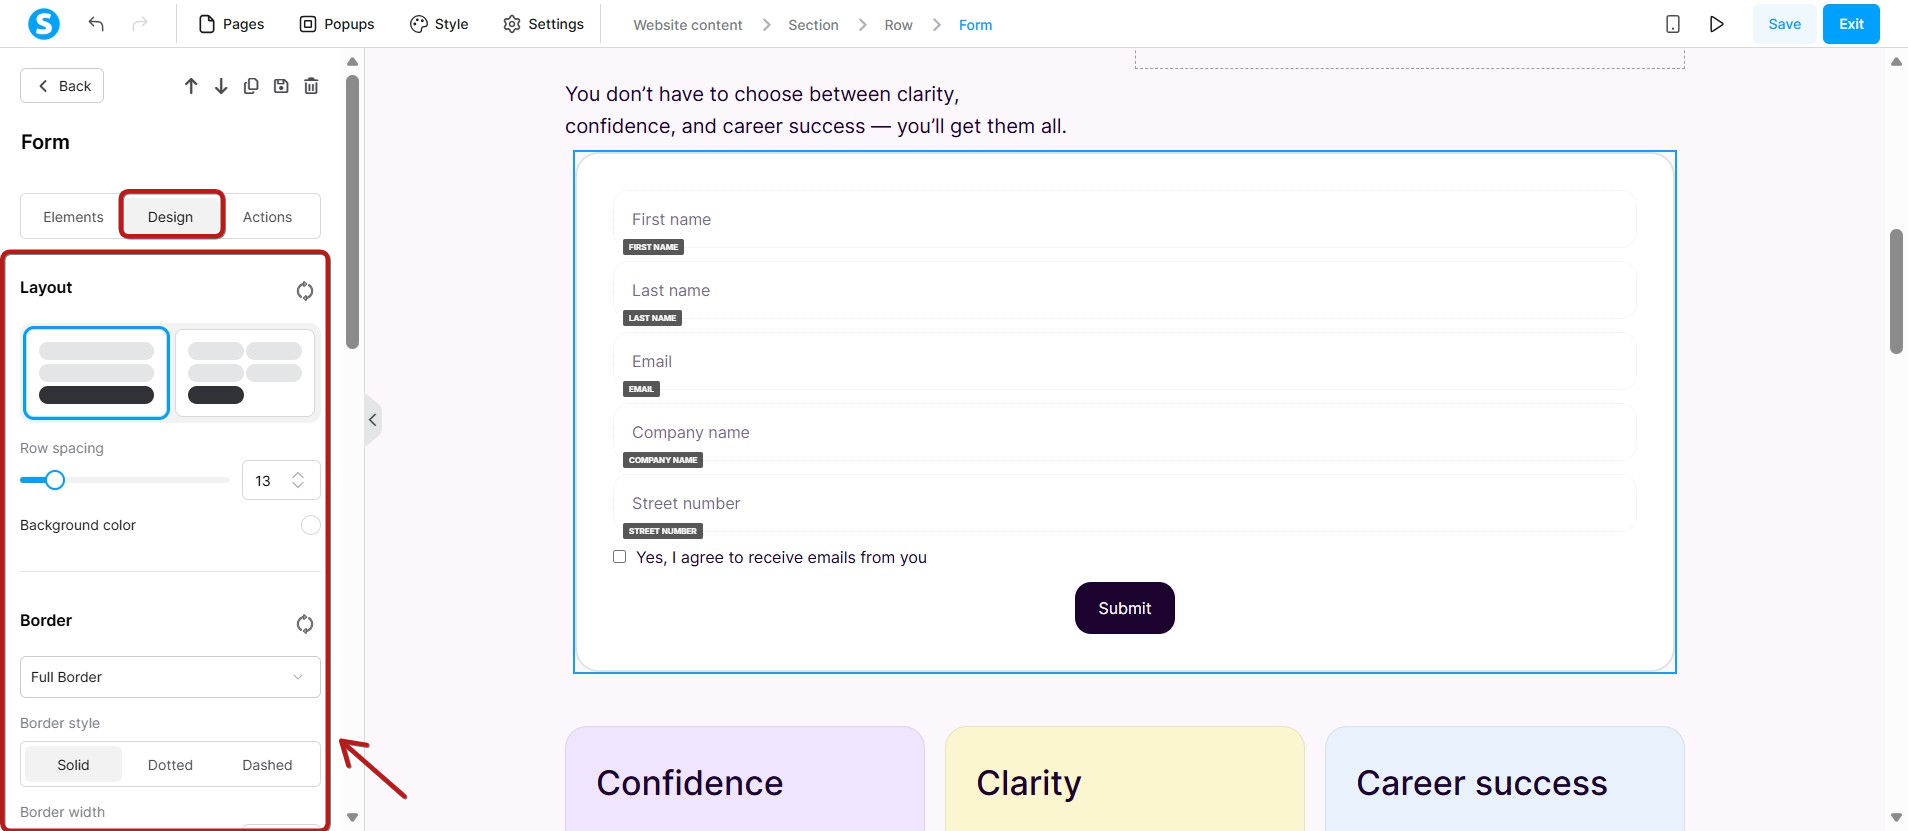
b. Under the Design tab:
- Customize appearance: By default, the form element automatically inherits your website's global style settings. However, you can use the design tab to override these settings and fully customize the borders, spacing, position, and colors to fit your specific page layout.
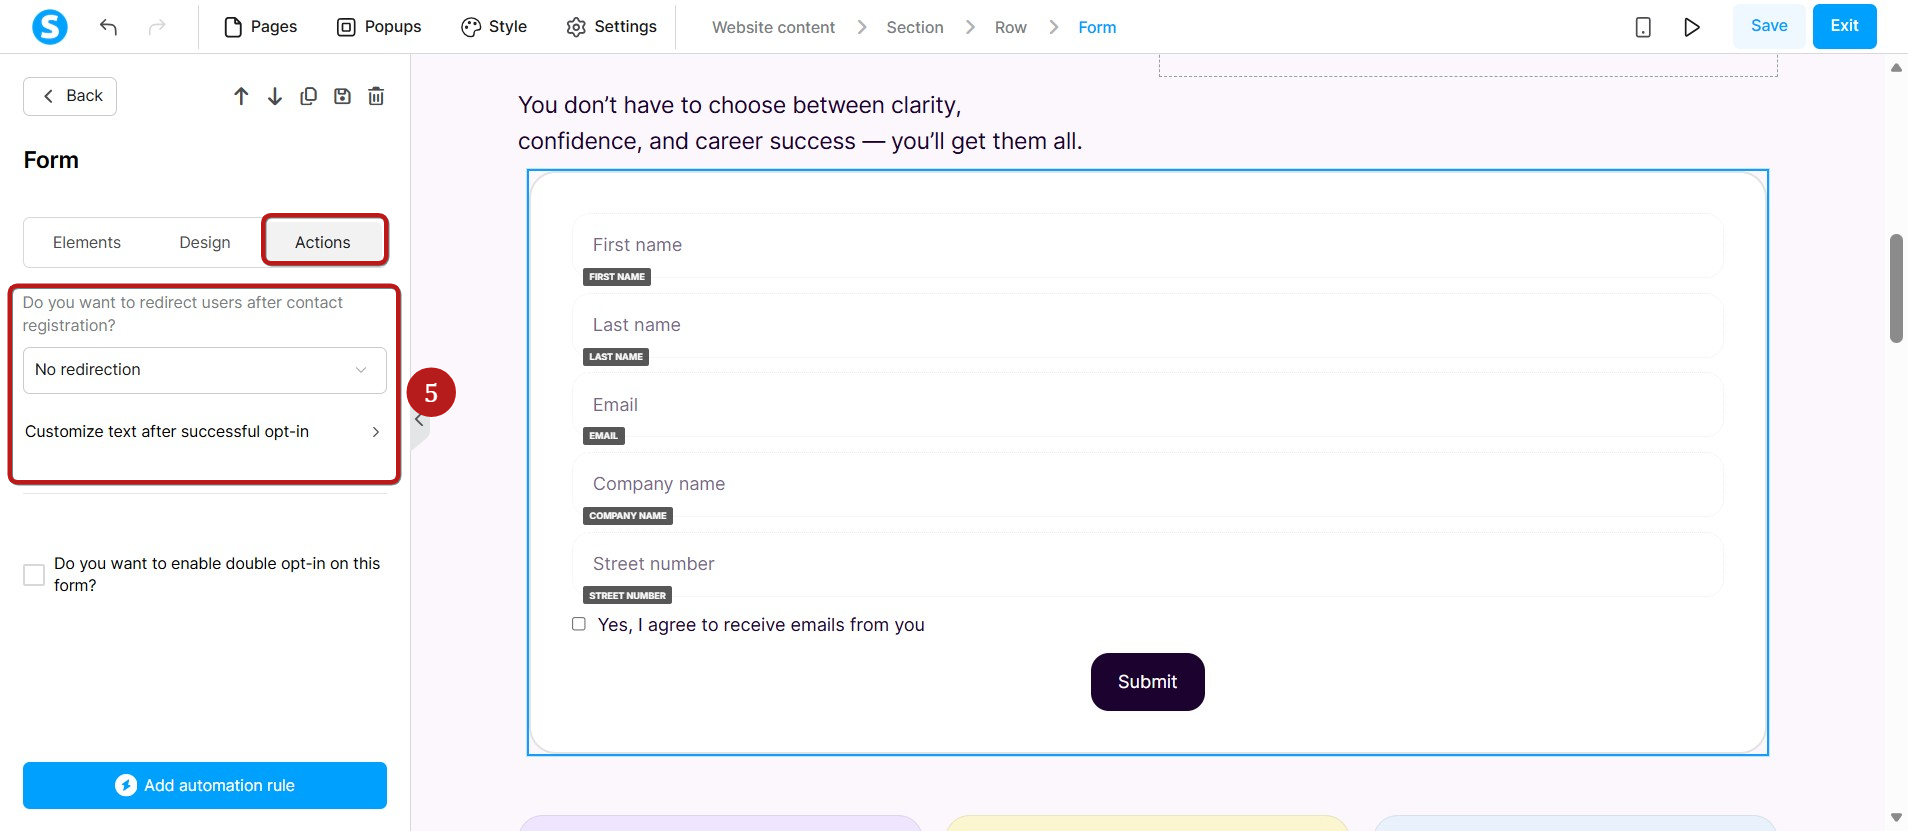
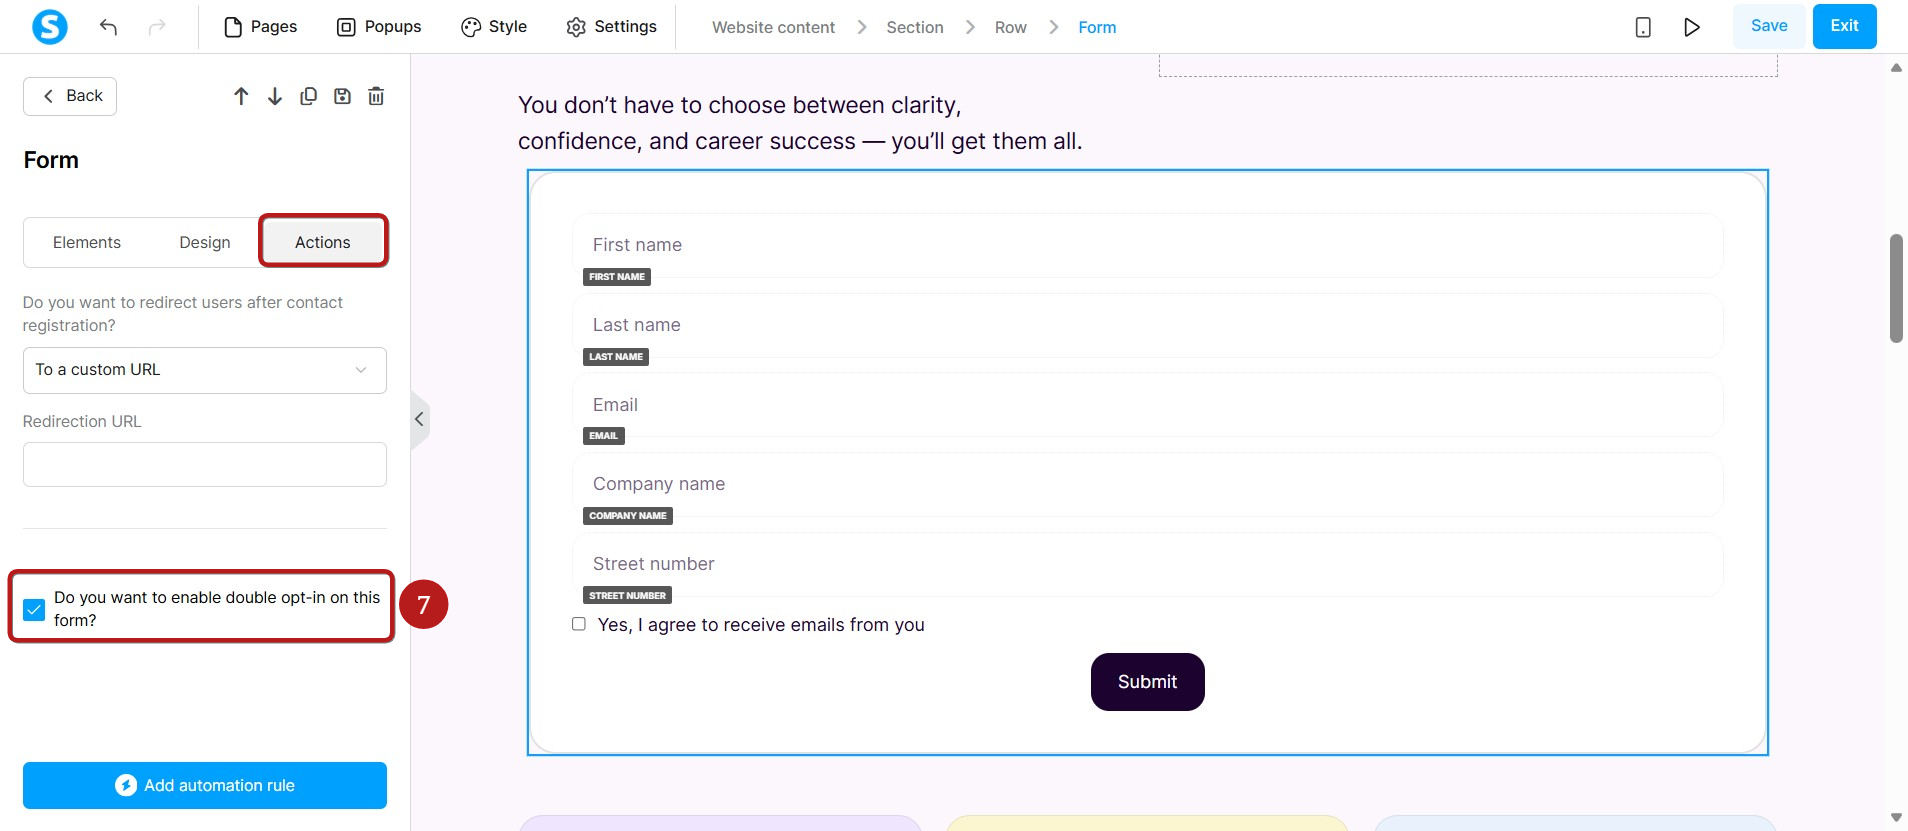
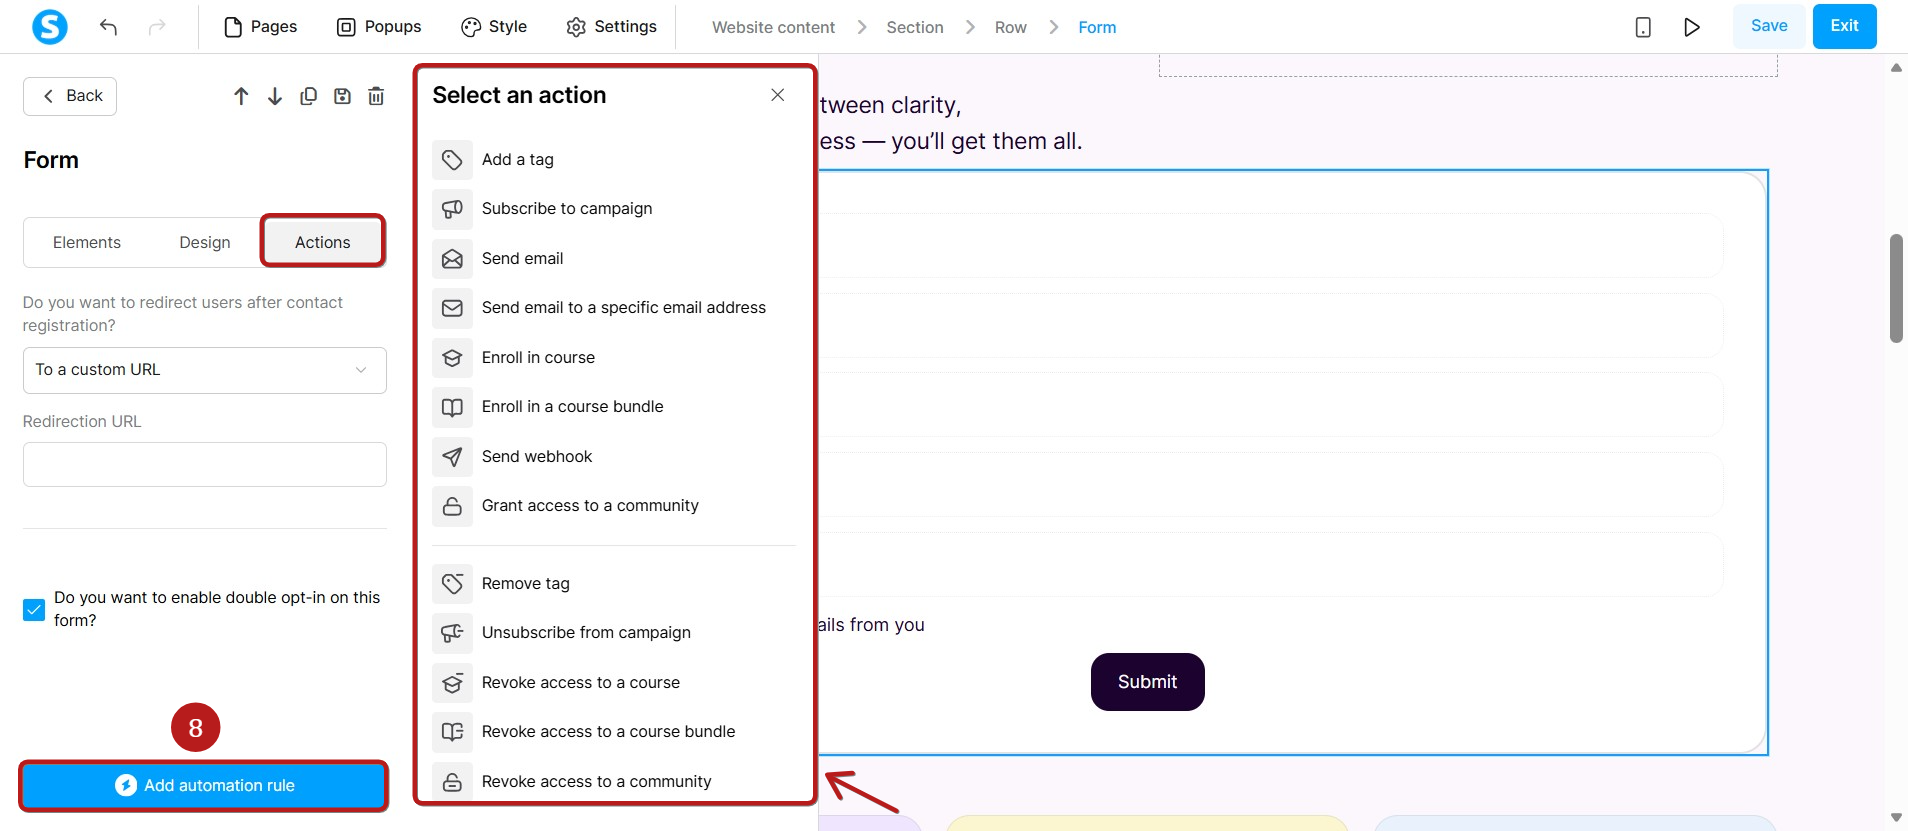
c. Under the Actions tab:
- Redirection rules (Post-submission): Choose what happens after the form is submitted.
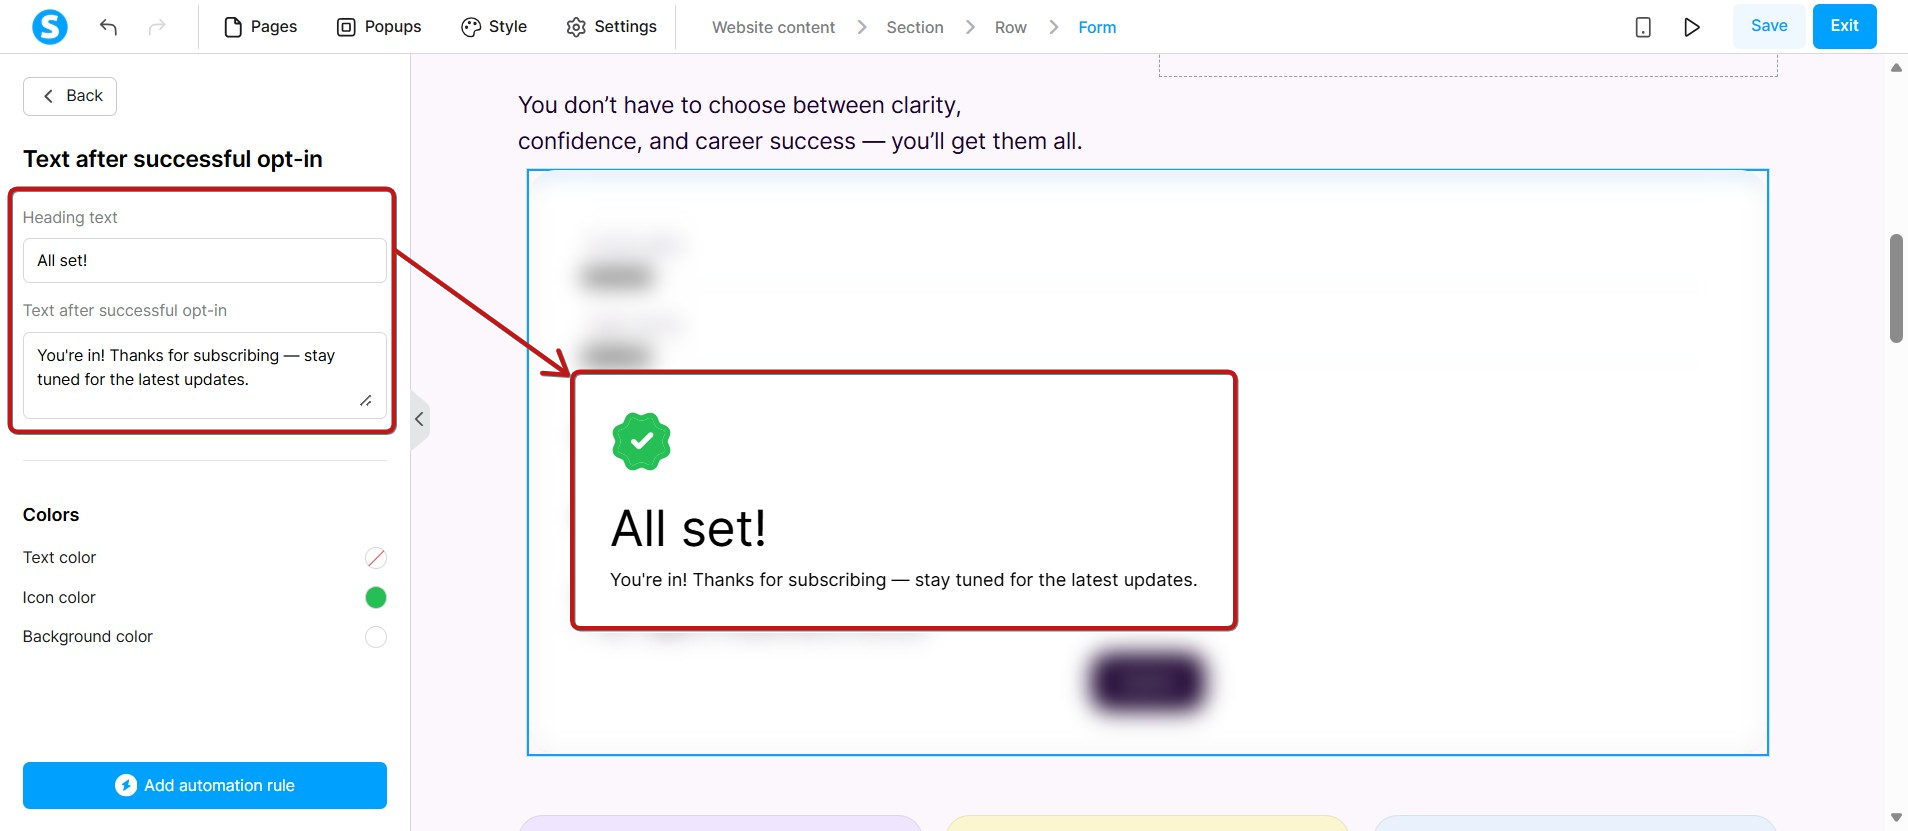
- No redirection (5): You can choose to keep visitors on the same page and display a clean success message.
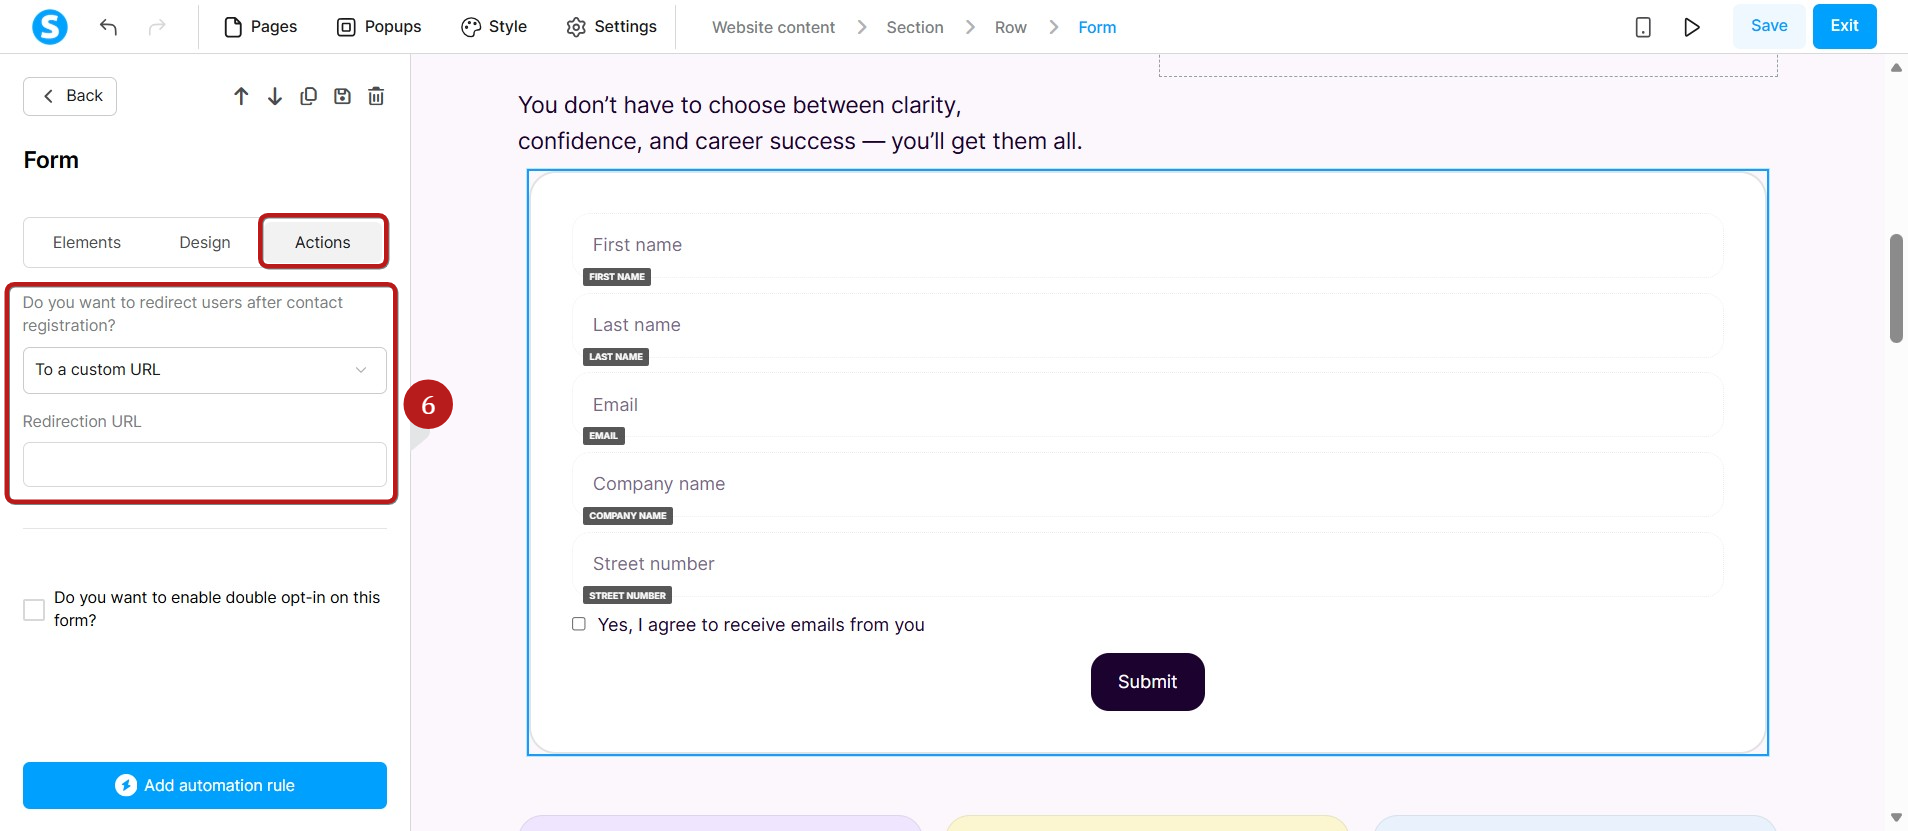
- Custom URL (6): You can choose to redirect visitors to another page.
- Double opt-in (7): Simply check the box to enable double opt-in for your new subscribers.
- In-editor automations (8): Add automation rules directly inside the page editor. You can easily trigger specific actions (like adding a tag, subscribing them to a campaign, or sending an email) the moment someone submits the form.
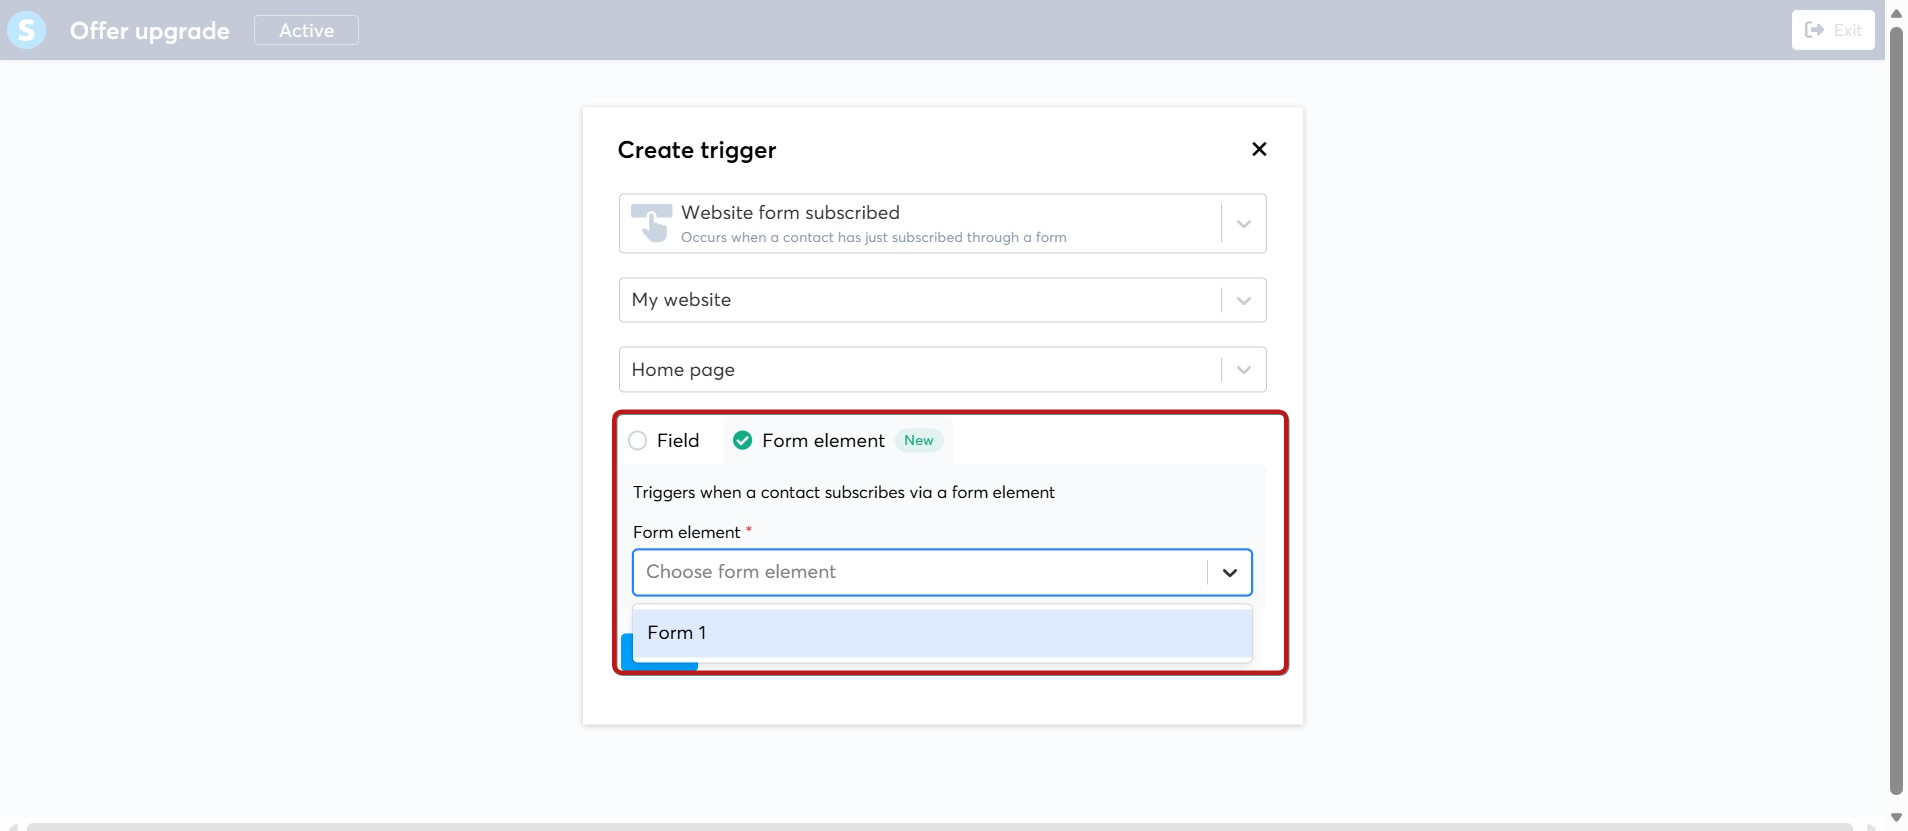
Outside of the page editor, you can also select your specific form element when configuring a "Website form subscribed" trigger inside your account's:
Automation rules:

And workflows:
Global style settings
The Style tab controls global appearance settings applied across all website pages.
You can configure:
- Typography (headers and paragraphs)
- Colors (background, buttons, links)
- Buttons
- Form fields (padding, radius, borders, colors)
Changes made here are applied globally to the entire website.

After adding elements like text, images, or other blocks to your website page, you can quickly undo styling changes by clicking the Reset icon next to settings such as typography, colors, size, or position.

Settings
The Settings tab controls general website options, including:
- Website name
- Domain
- Homepage
- Language
- Logo

Switching website languages
At the top of the Pages tab, you can switch the website language using the language dropdown.
When you select a different language, the page list updates to show the pages available for that language version.

Important:
Switching the dropdown does not translate content automatically. Each page version must be edited manually.
Building a multilingual website
The Websites feature supports multilingual structures.
To create a multilingual website:
- Build your main website in one language.
- For each page, open the three-dot menu and go to Languages.
- Duplicate the page for the language you want to add.
- Switch the website language in the Pages dropdown.
- Edit the translated version of each page manually.
This ensures full control of the content displayed in every language.

Device preview
While editing any page, you can preview how it looks on different devices.
Use the preview toolbar at the top right to switch between:
- Desktop view
- Mobile portrait view
- Mobile landscape view
This helps you check whether your layout works on all screen sizes.

Sharing a website
You can easily share a website with other systeme.io users using a simple shareable link. This is highly useful for sharing templates with clients, team members, or your audience.
From your websites list, click the three-dot menu (...) next to the website you want to share and select Share.

A popup will appear with a shareable URL. Click Copy link to clipboard.

When a user clicks the shareable link, they will be prompted to log into their systeme.io account (if they aren't already). Once logged in, the website will be automatically imported into their account, and a notification stating "Website added to your account" will appear.
Note: The Share option is only available for websites that already have a template selected. If you haven't chosen a template for your website yet, the share option will not appear in the menu.
Domain usage rules
If you need to change your website domain after the website has already been created or published, you can update these details from the Websites list.
To access your website settings:
- Exit the website editor
- Navigate to Sites > Websites
- Find your website in the list
- Click the three-dot menu button next to it
- Select Settings
This opens the Edit website popup, where you can modify:
- Website name
- Domain name
- Homepage URL path
When you click the X icon to remove the assigned domain, the system will show a warning informing you that the website will be deactivated until a new domain is selected.

Important: Removing the domain will deactivate the website. Your site will remain inaccessible until you assign another domain.