Loading
In this article, you will learn how to set up a link in bio on systeme.io.
I. Getting started with your link in bio
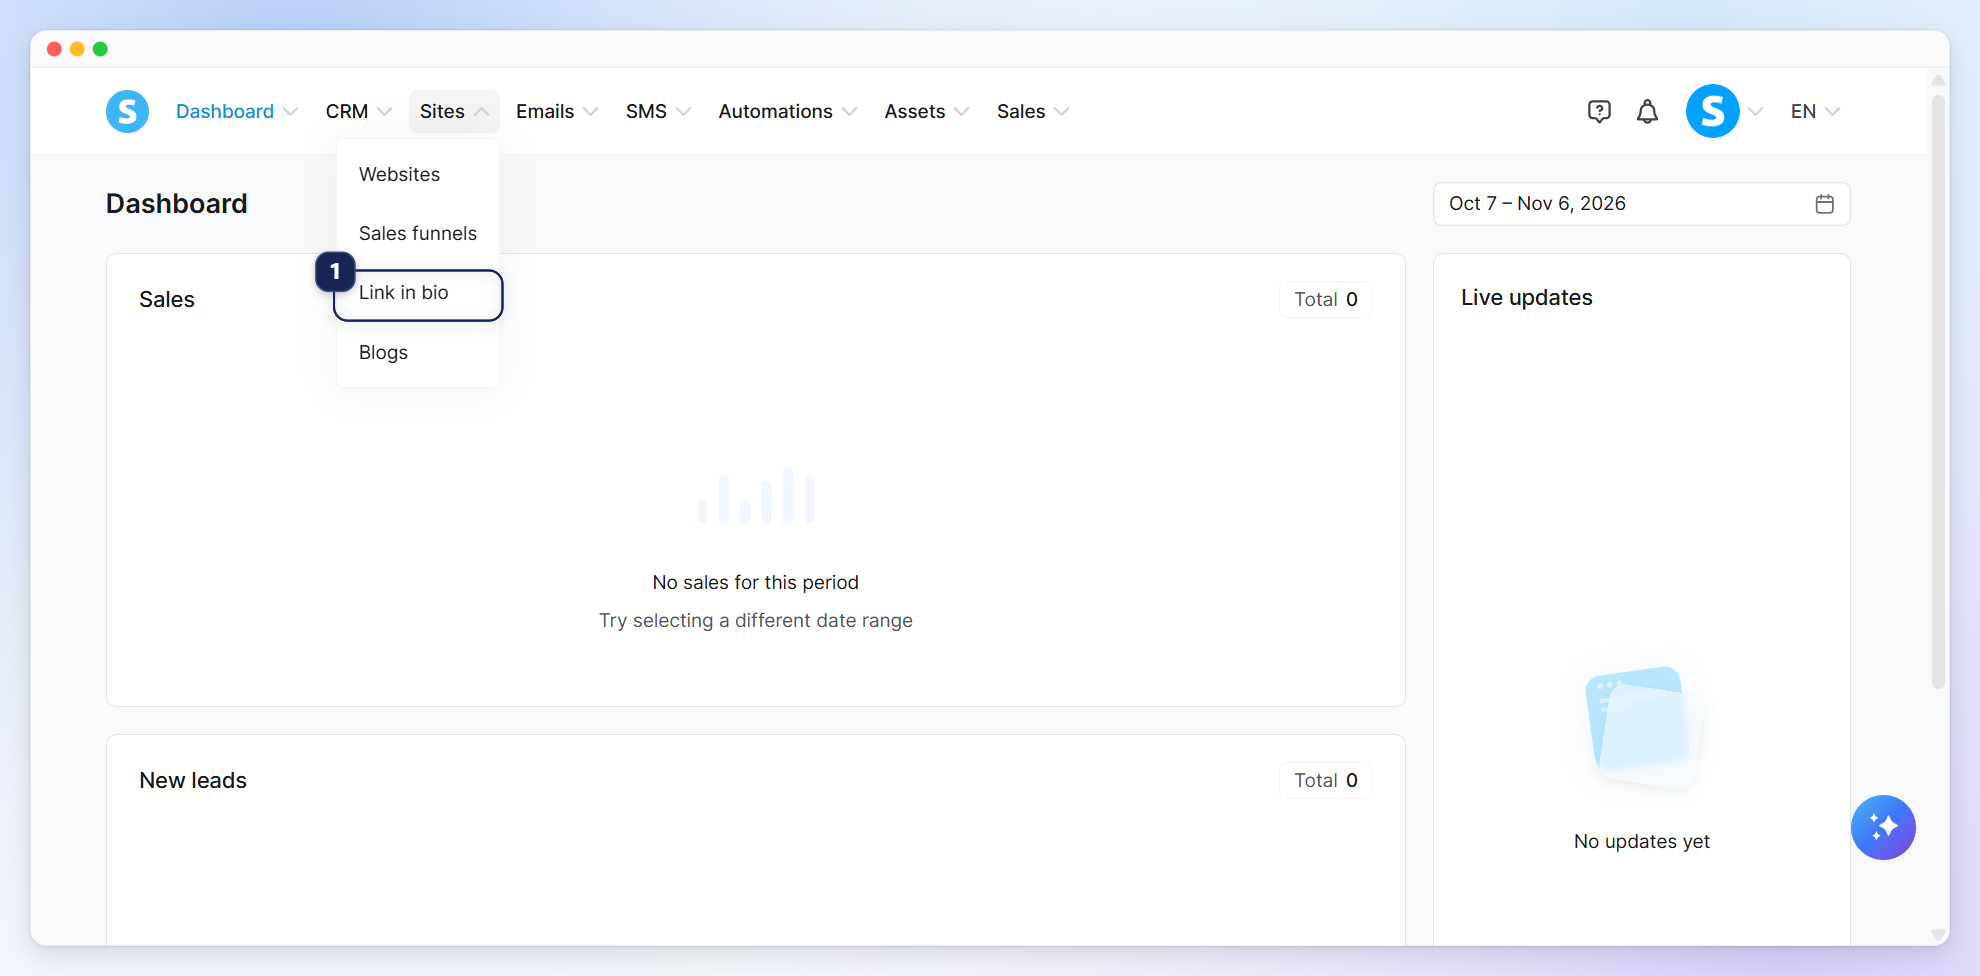
Click Link in bio (1) under the Sites tab.
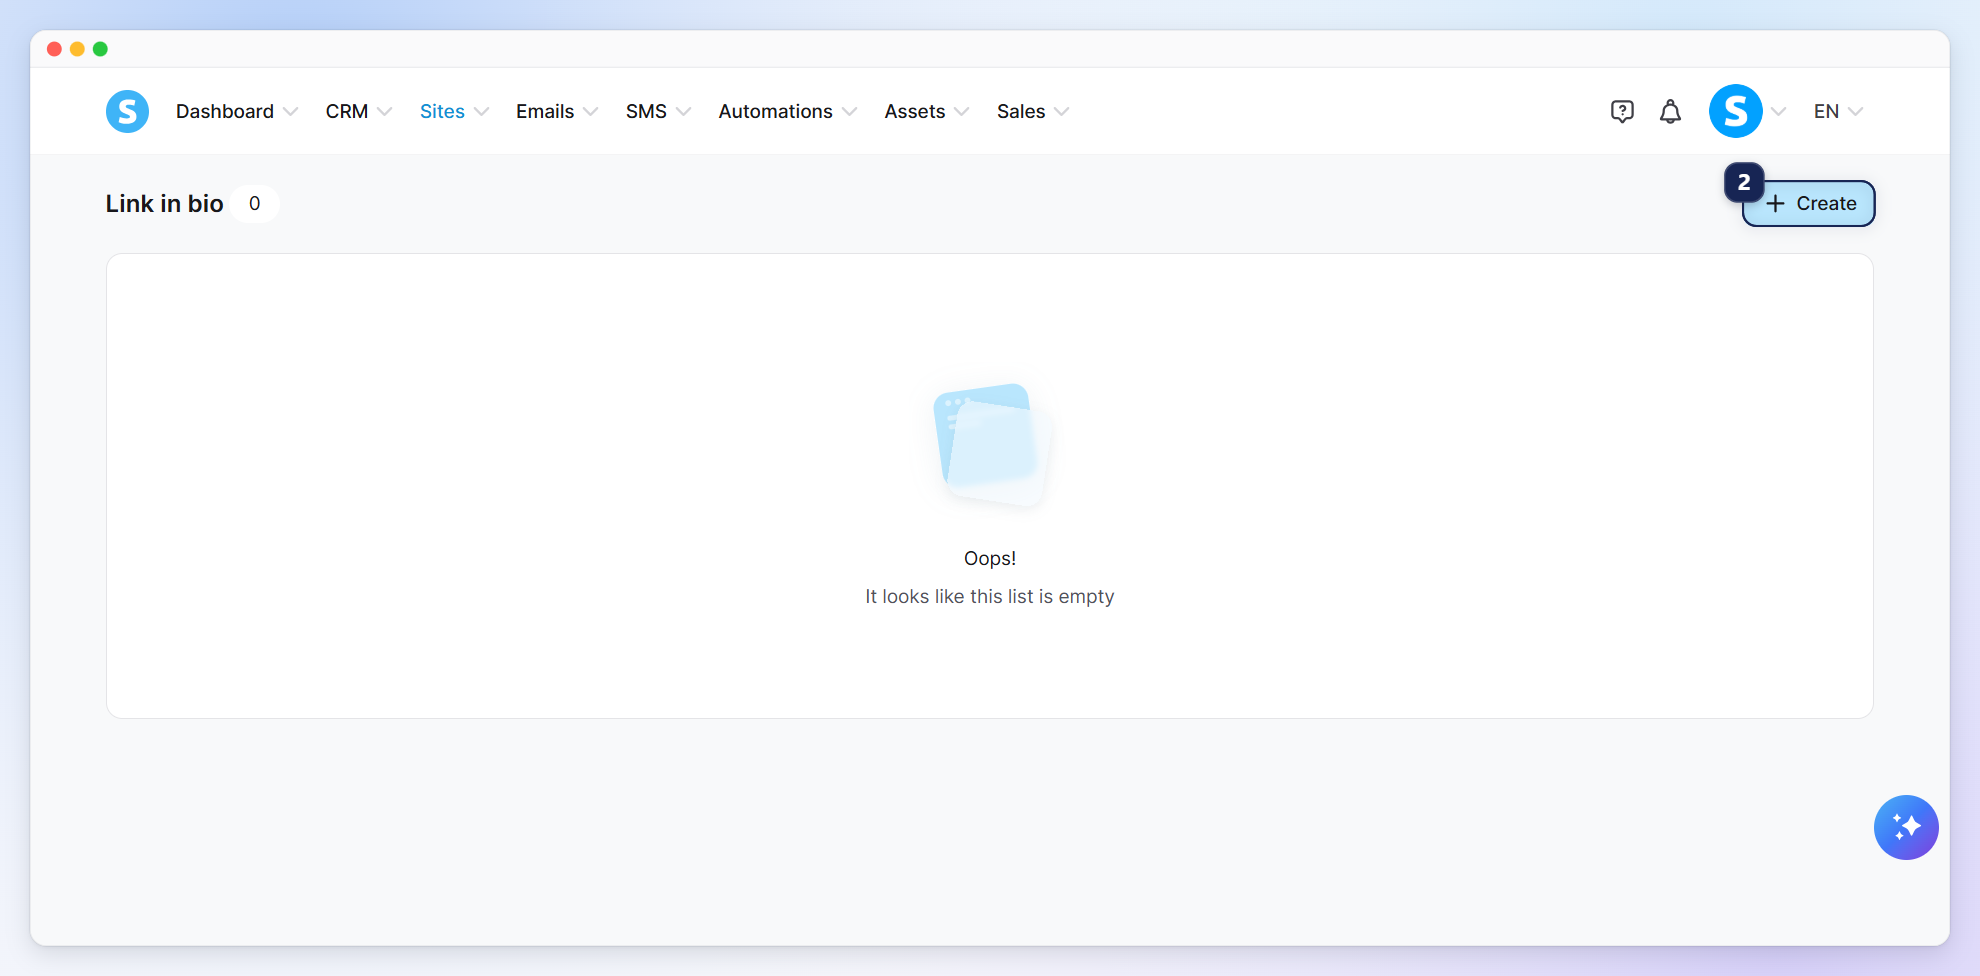
Click on Create (2) to create your link in bio.
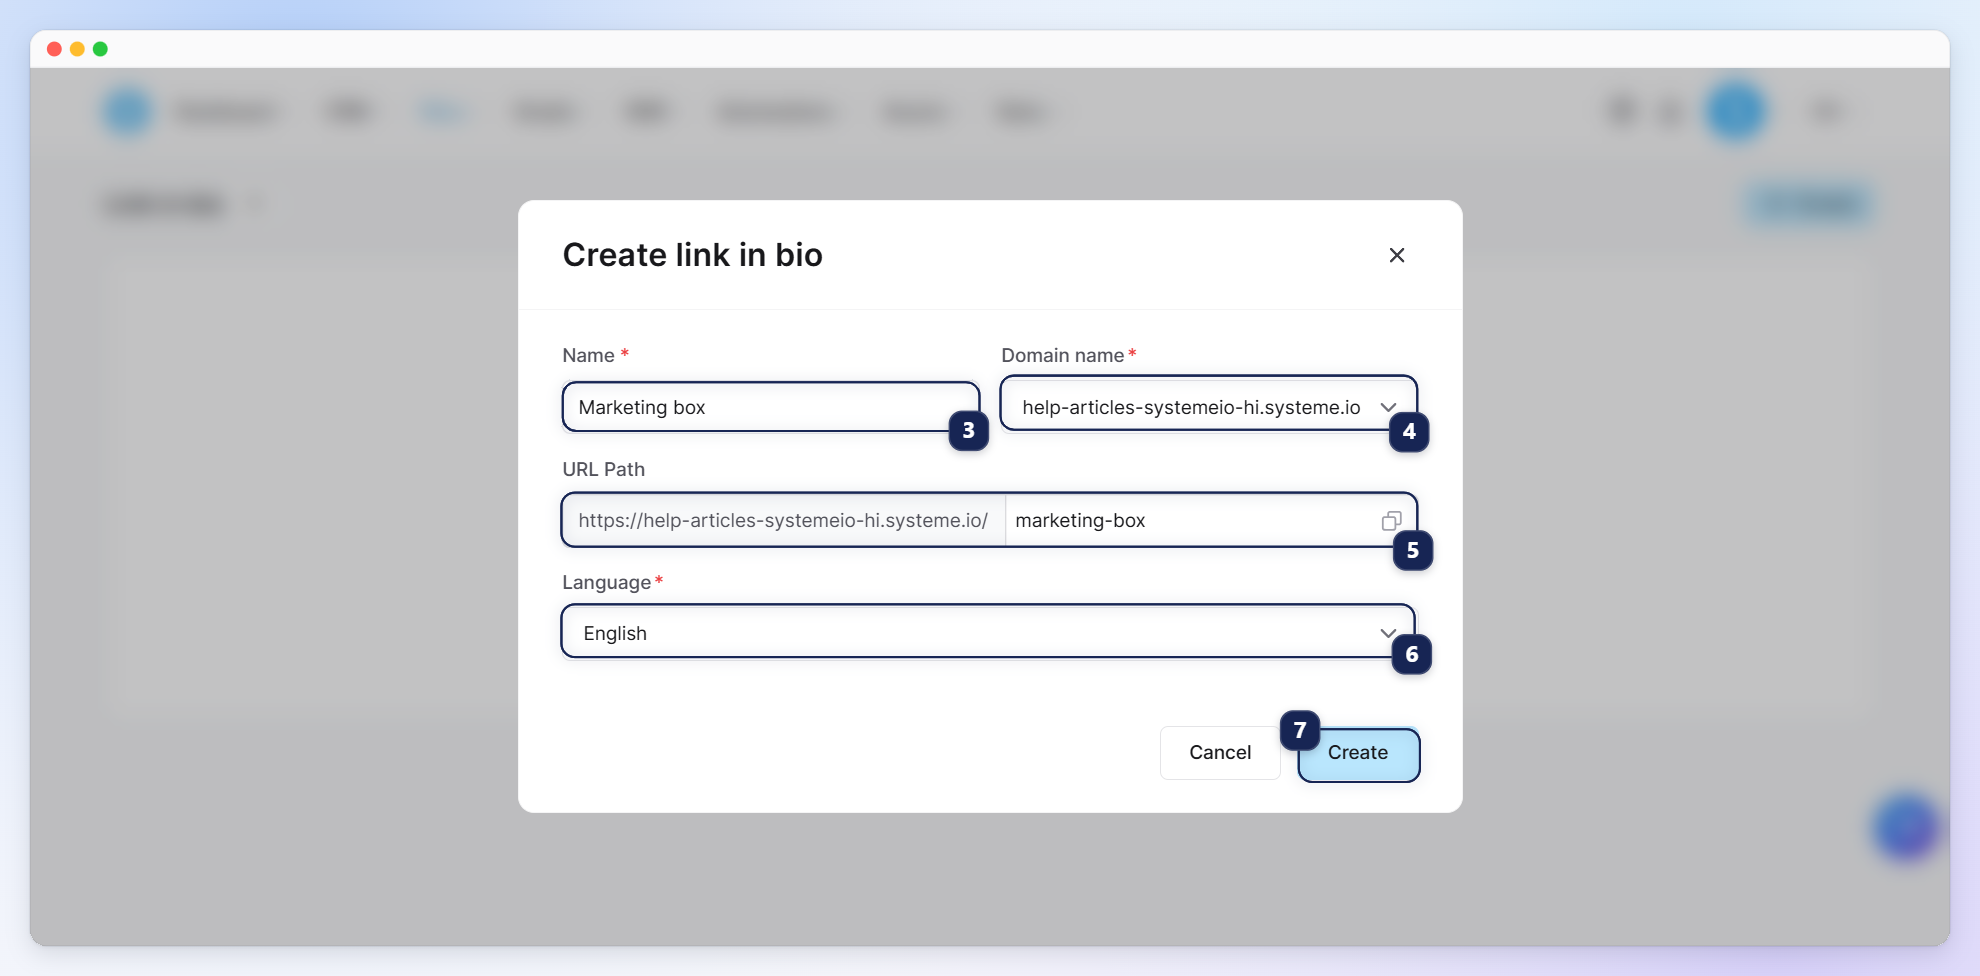
A pop-up will appear where you need to enter the name (3), the domain (4), the URL path (5) and choose the language (6), then click on Save (7) to complete the new link in bio creation.
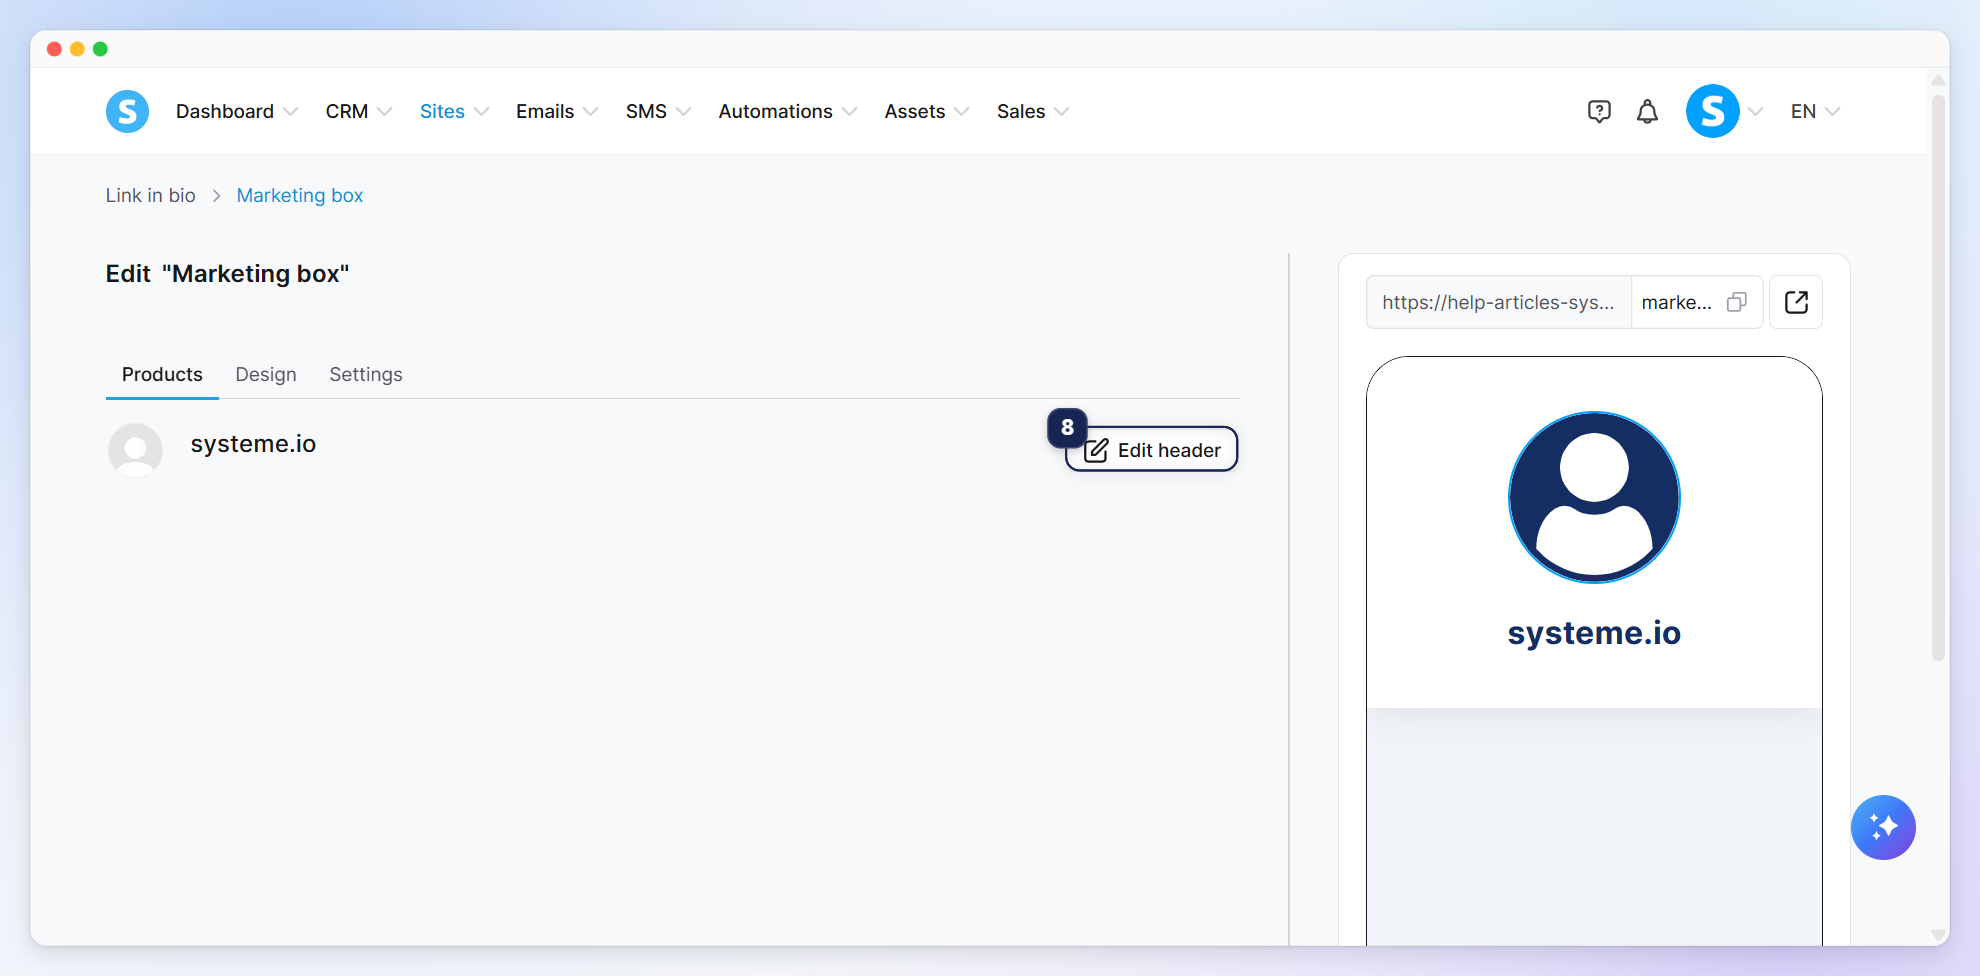
Afterward, you will see the overall preview of your link in bio, along with settings that you can modify to personalize its content.
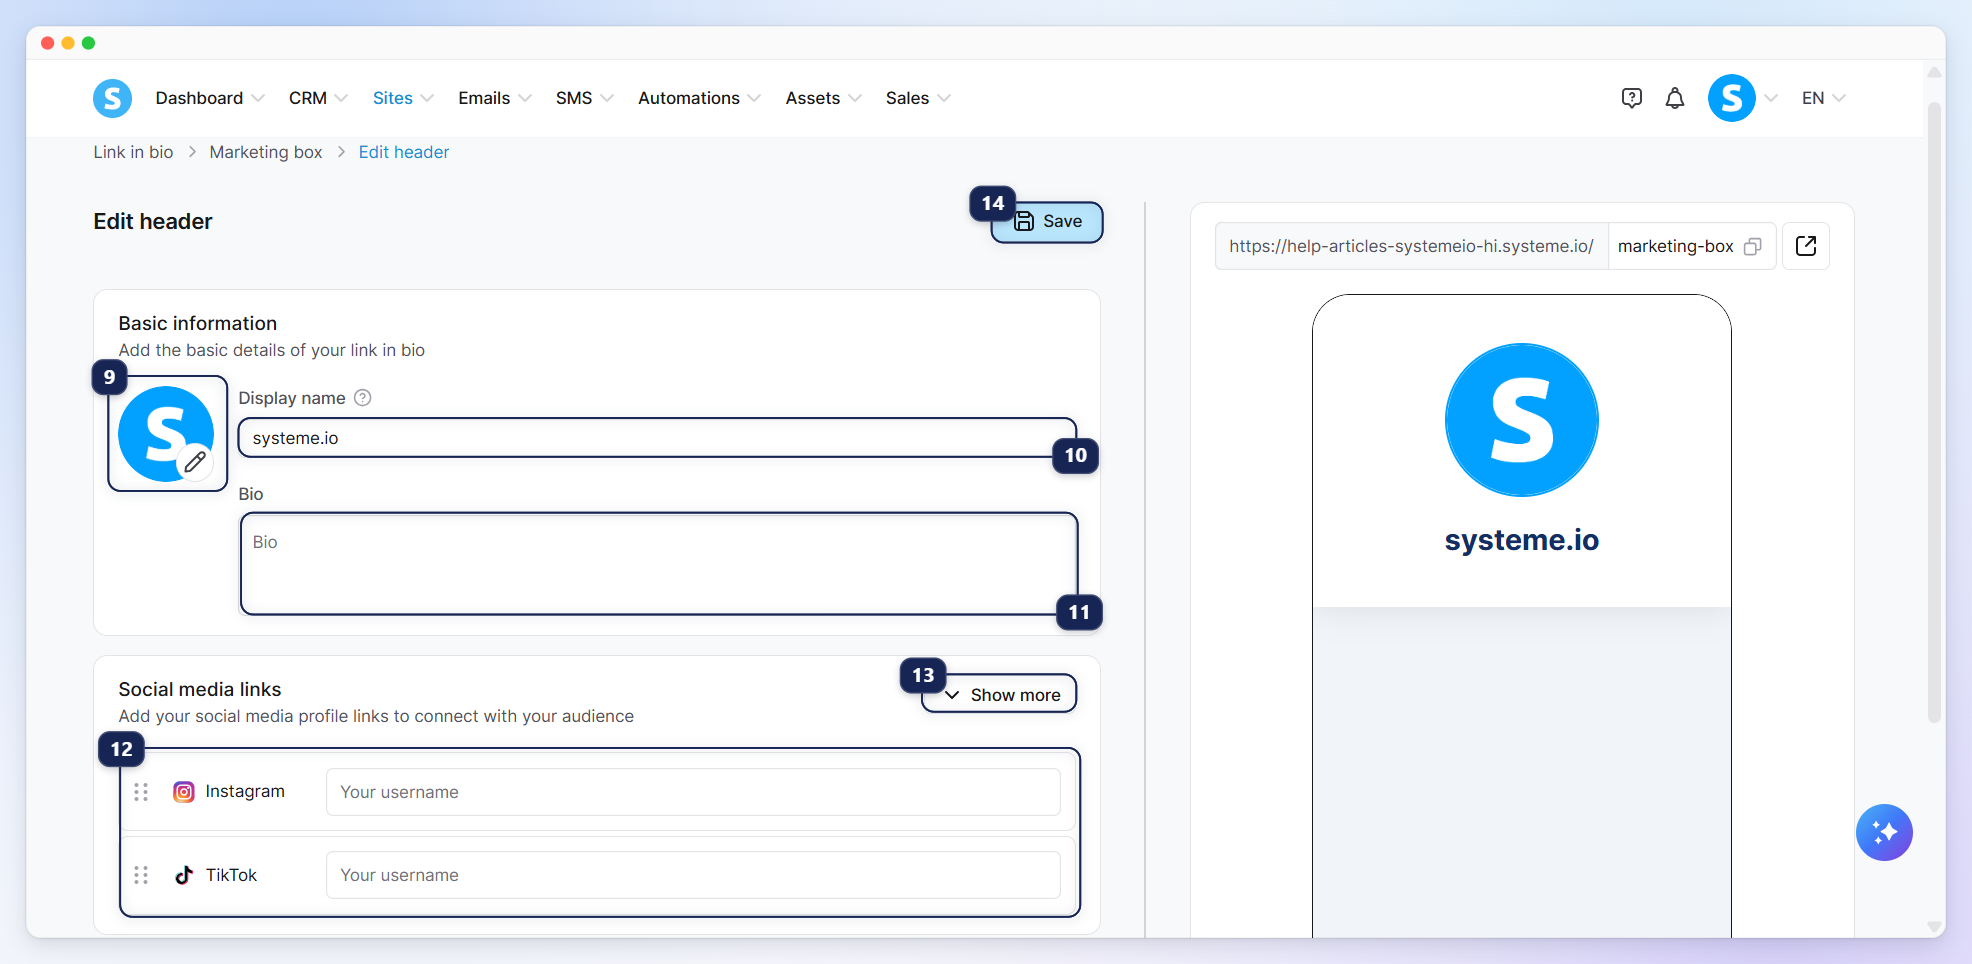
To modify the header of your link in bio, click Edit header (8).
In the header, you can edit the image (9), Display name (10), and Bio (11).
You can also add links to your social media accounts, like Instagram and TikTok (12). Click on Show more (13) to see all available options, then enter your username and click Save (14).
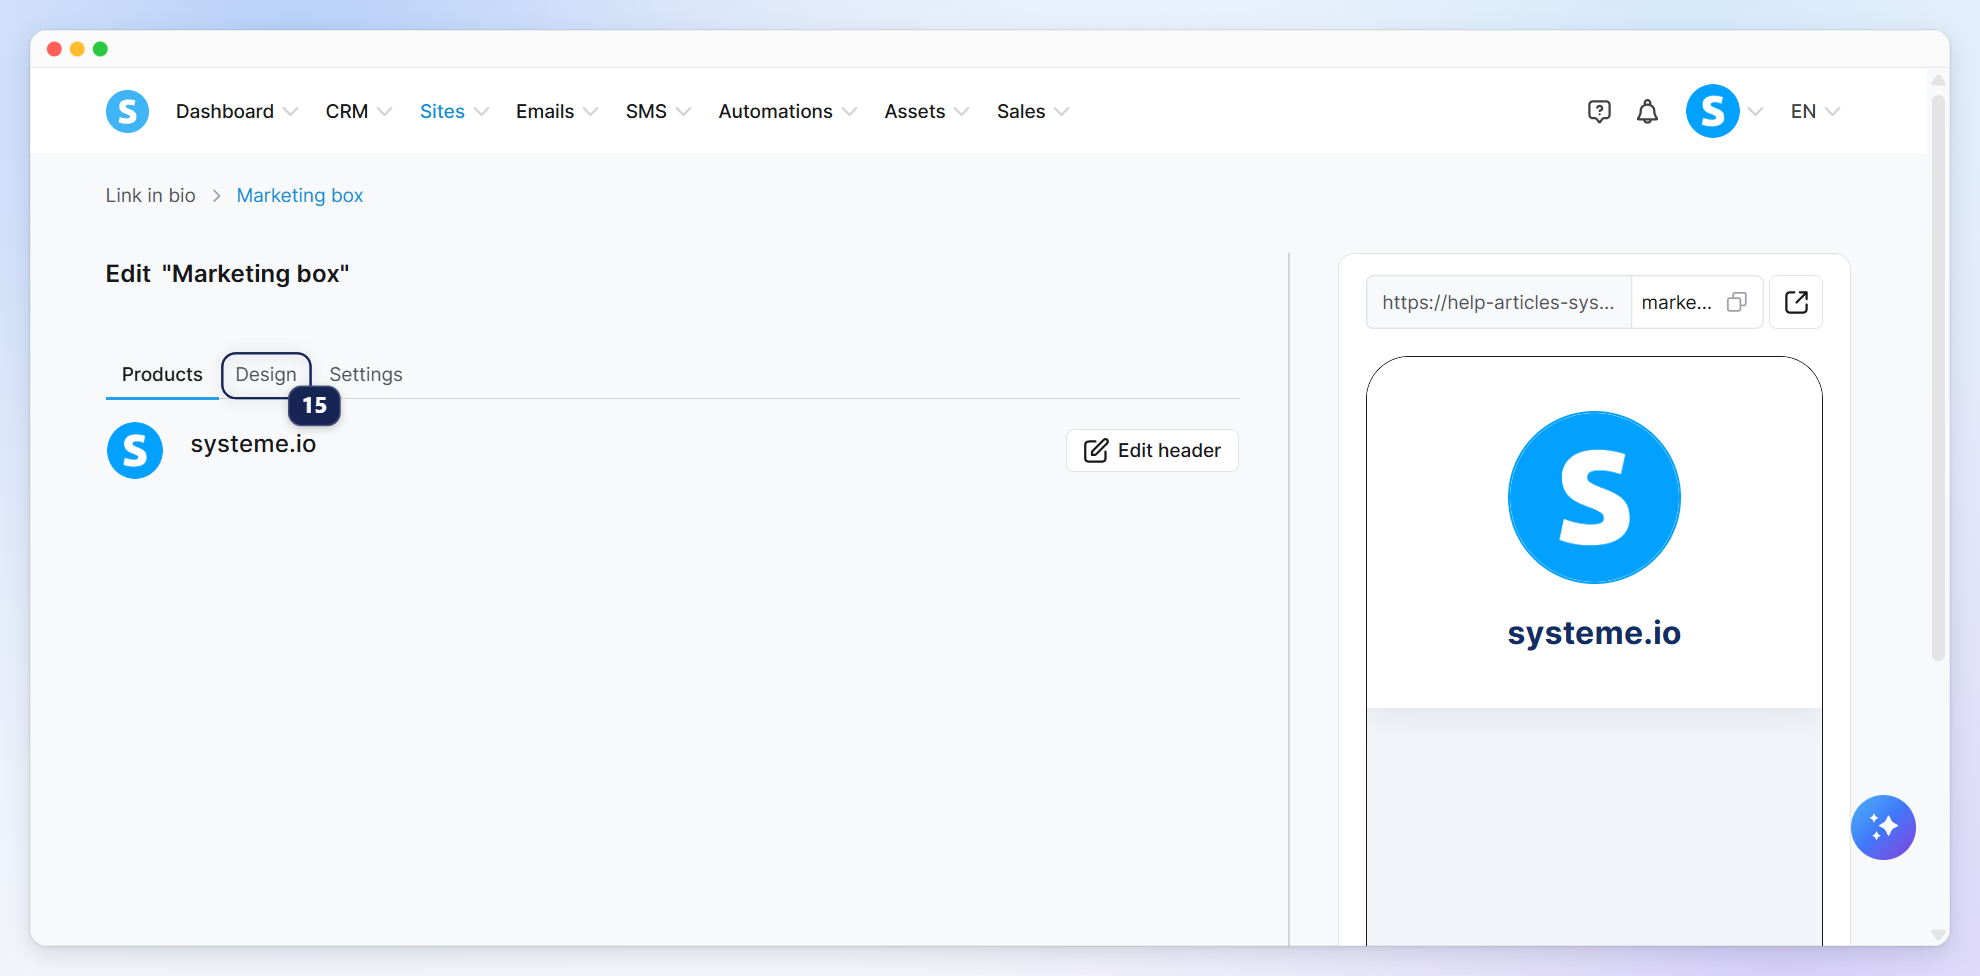
To change the design of your link in bio, click the Design Tab (15).
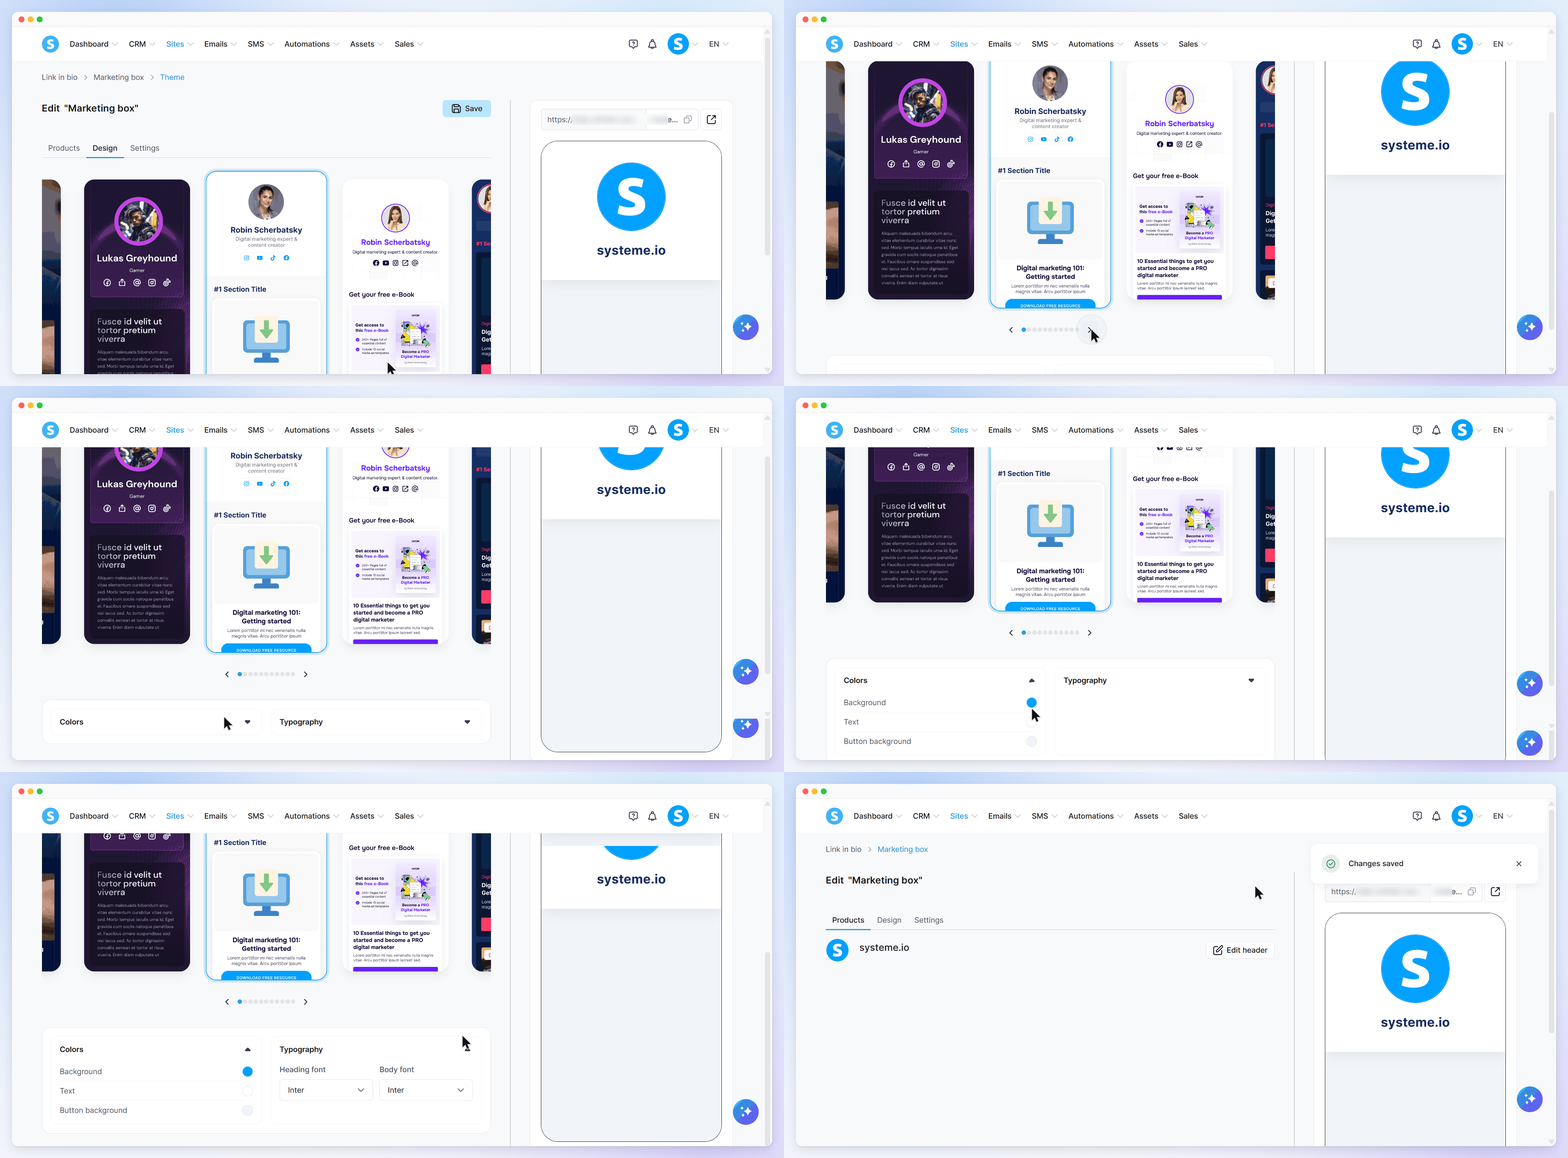
You’ll see several theme templates to choose from. Select the one you like best, customize its colors, heading font, and body font using the options shown, then click Save to save your design.
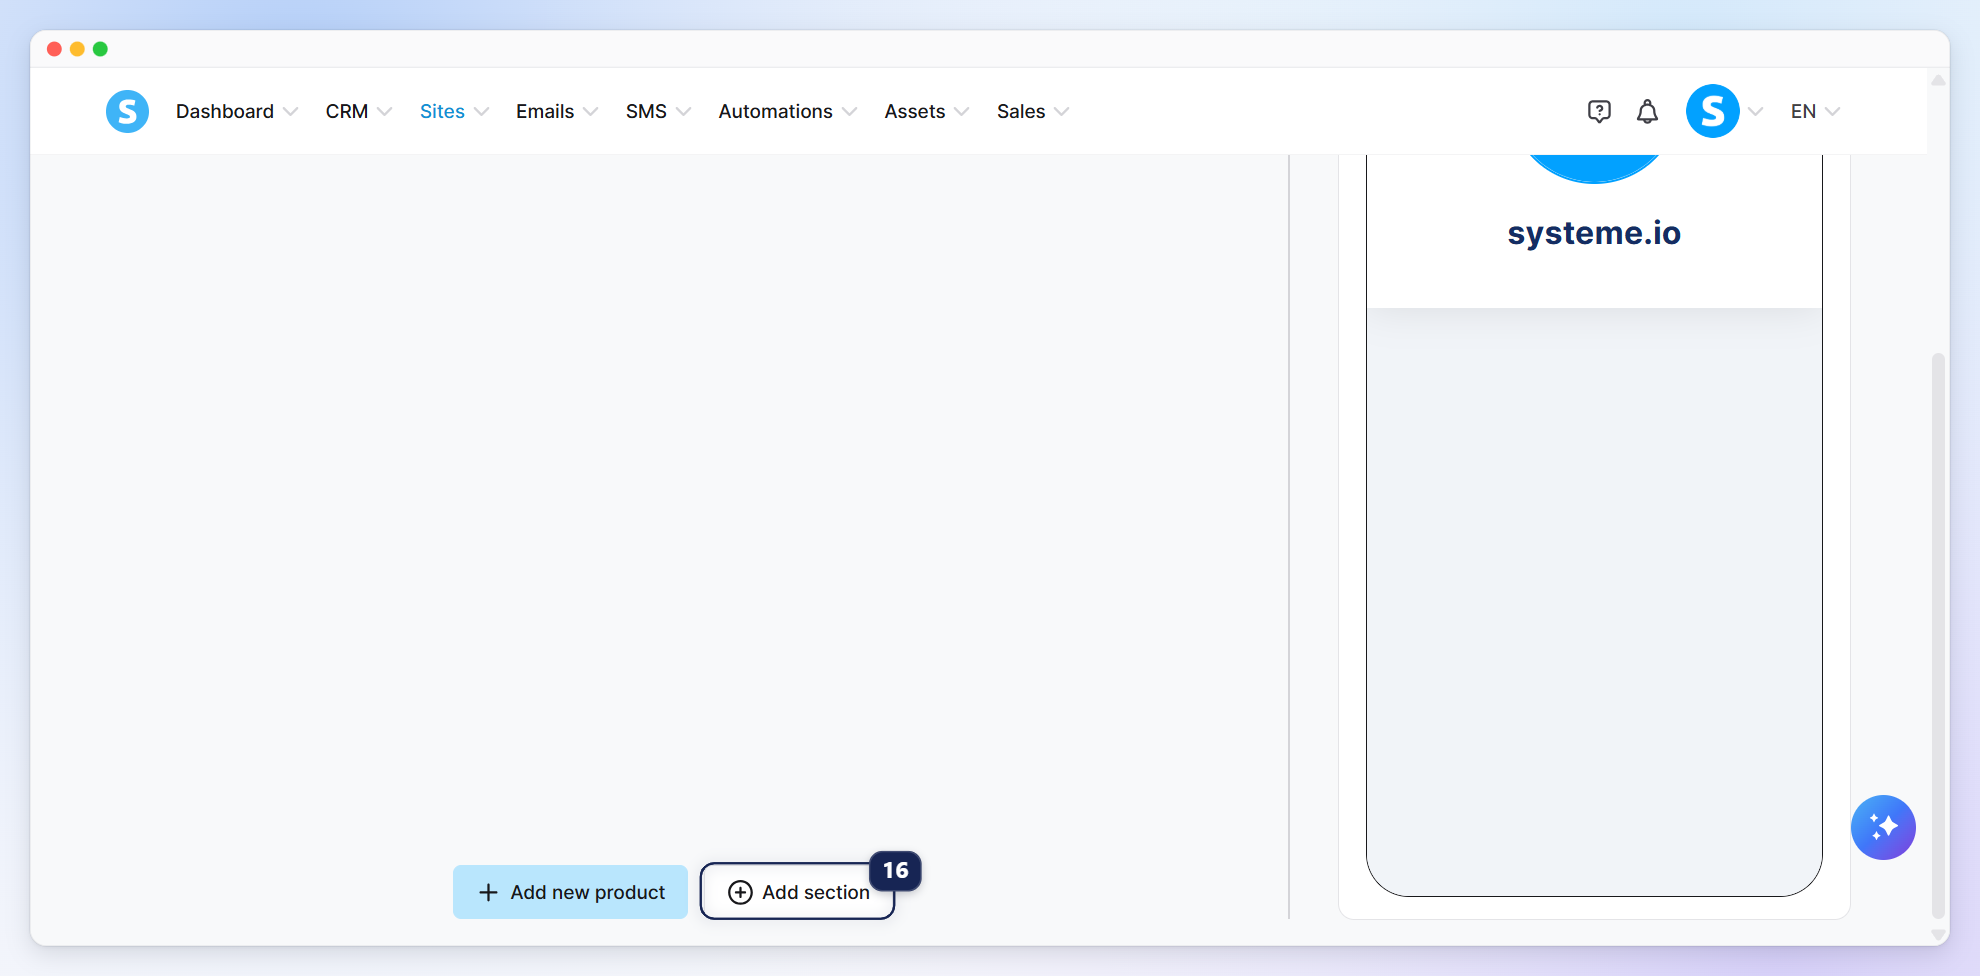
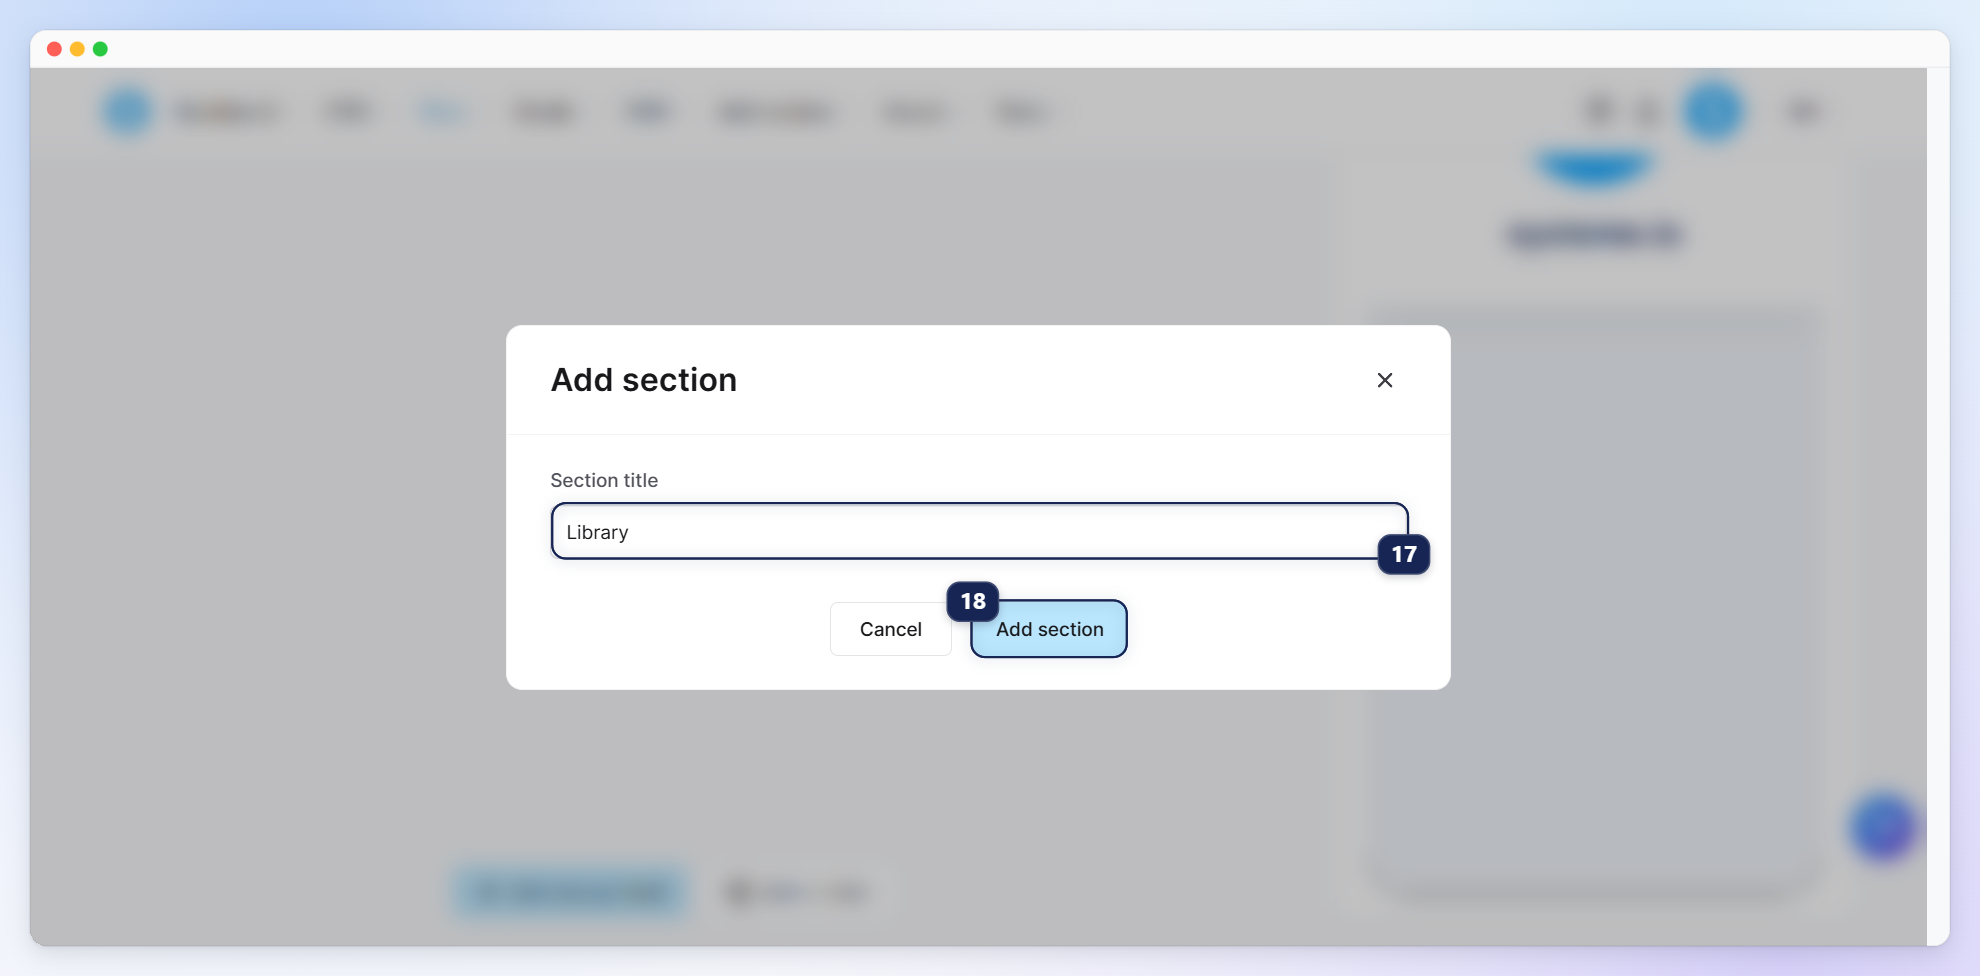
To add a section to your link in bio, click Add section (16).
A pop-up will appear where you need to add a title for your section (17), then click Add section (18) to save.
II. Managing your link in bio
1. Adding products
To create a product, click Add new product (1).
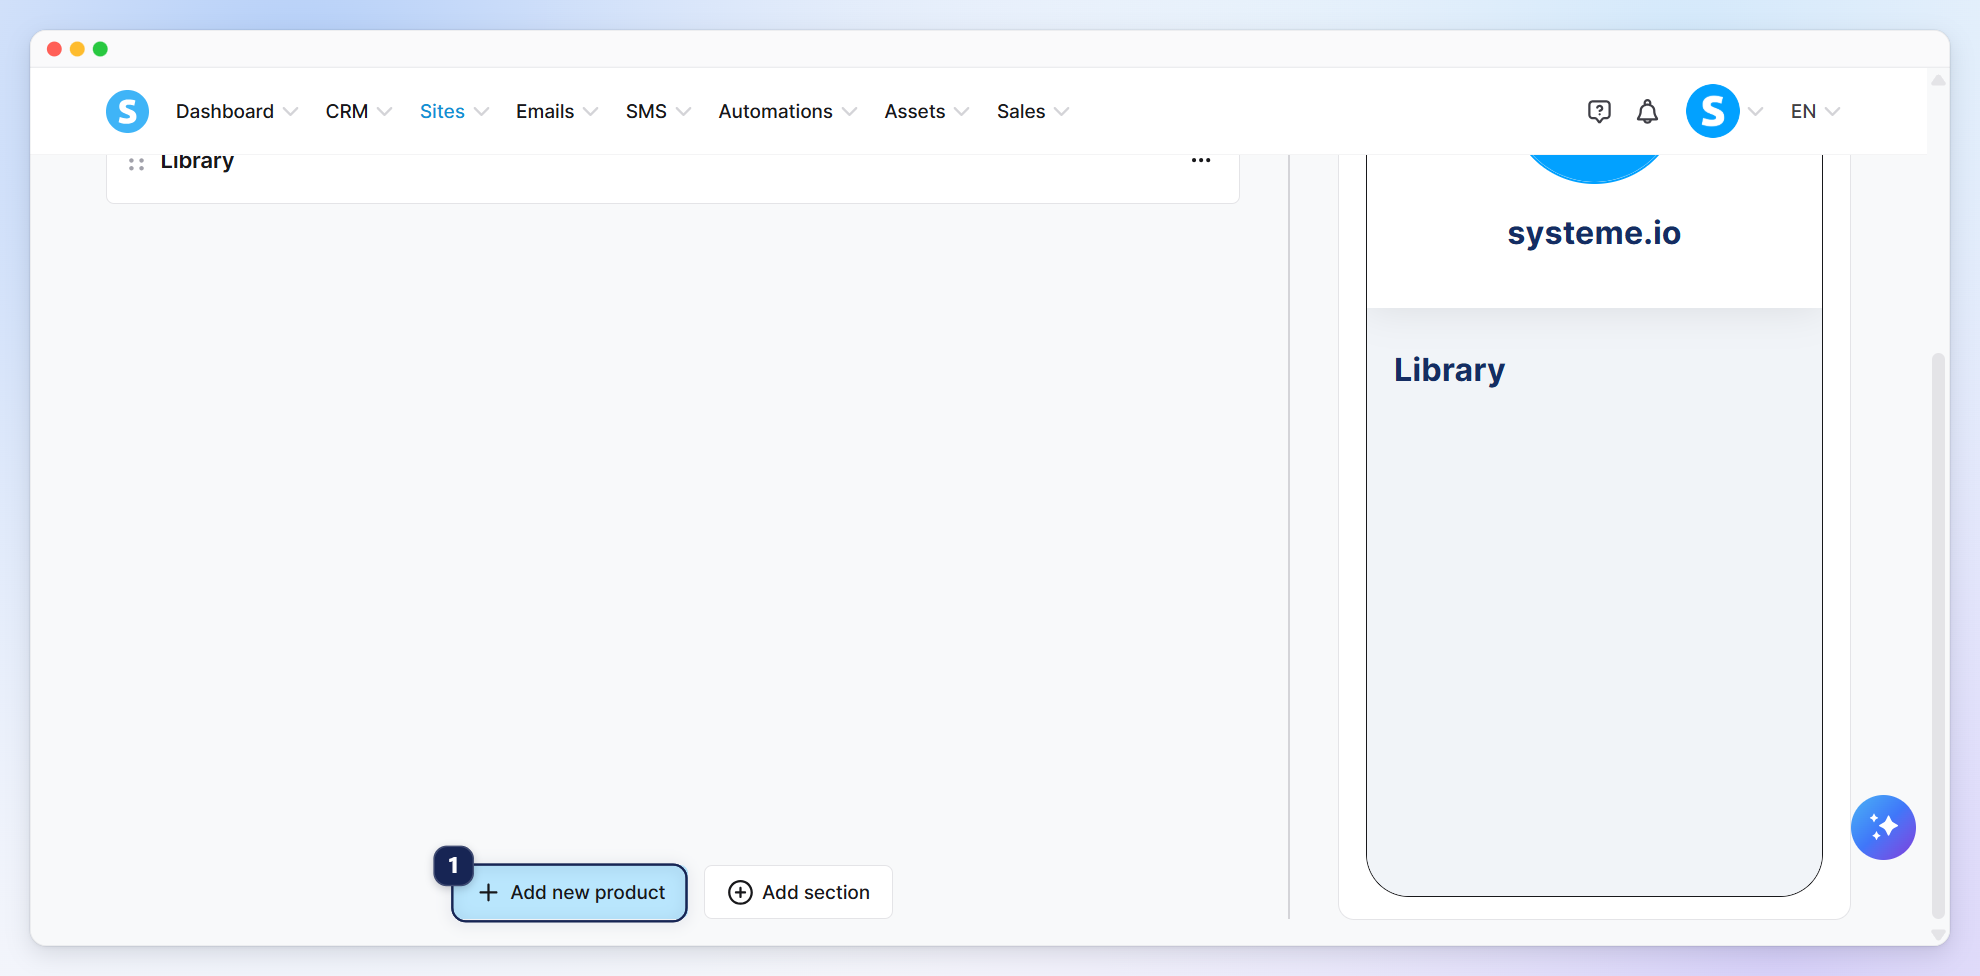
You have the option to create different products: Redirect to an external link, collect emails, sell a digital download, sell a course, and sell a physical product.
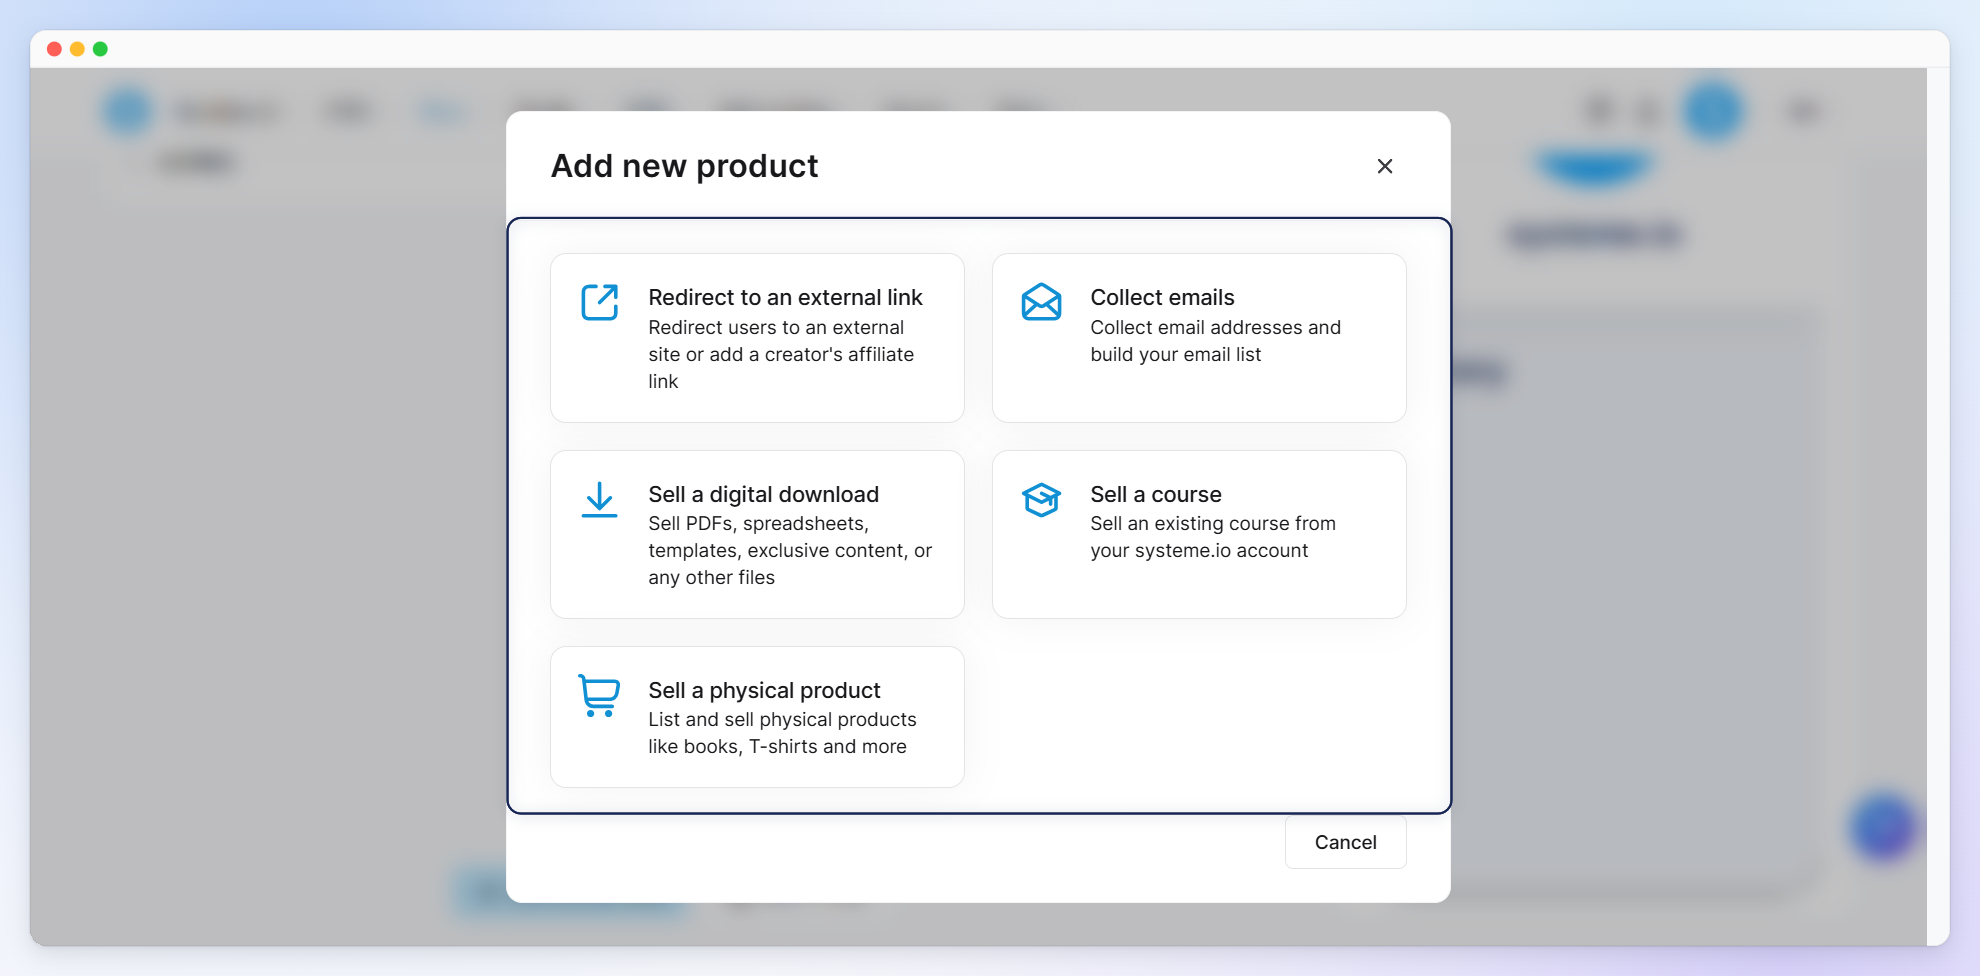
a. Redirect to an external link:
Use this option when you want to send your customers to another website, landing page, or product outside your lin in bio.
Add a thumbnail image (1), title (2), button (3), and subtitle (4), then paste the redirect link for the button (5). Once you're done, click Publish (6) to make it visible in your link in bio.
To save your work without publishing, click Save as draft (7).
b. Collecting emails:
Use this option when you want to collect email addresses. Three tabs need to be configured:
Thumbnail (1): Select the thumbnail image (2) you want to use, then edit the title (3), button (4), and subtitle (5) as needed.
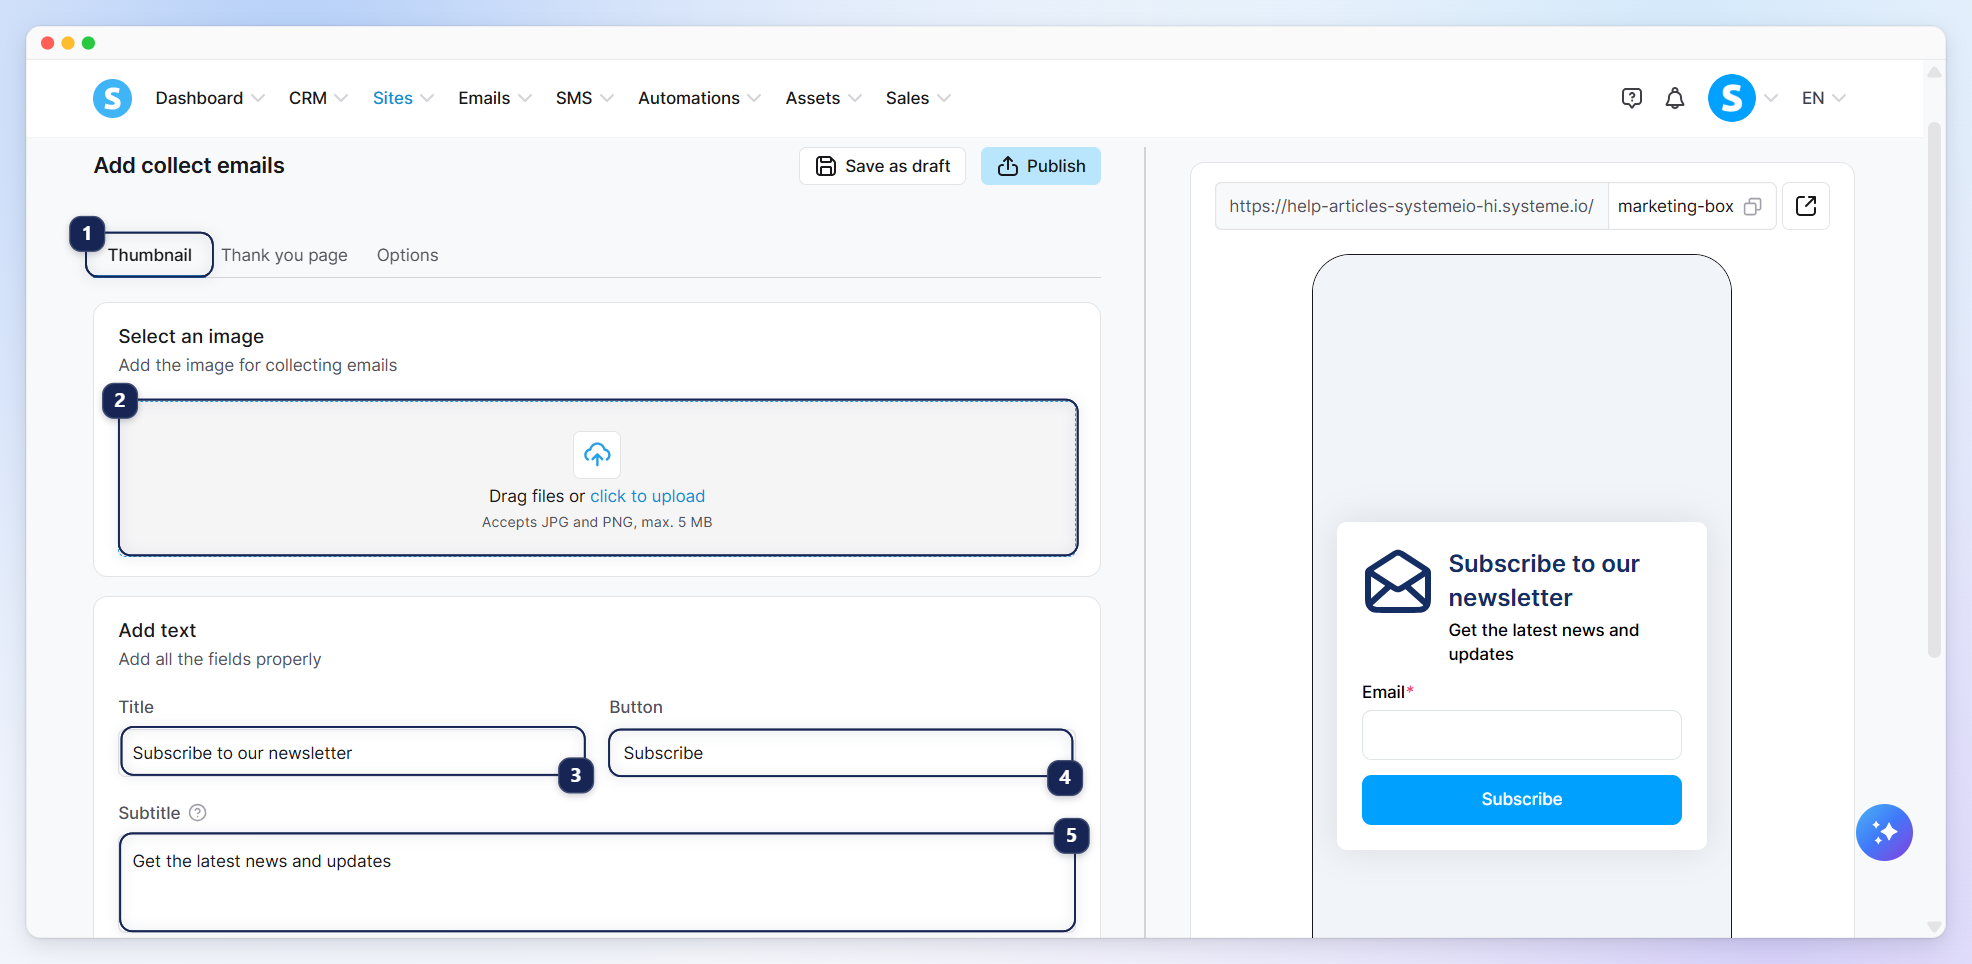
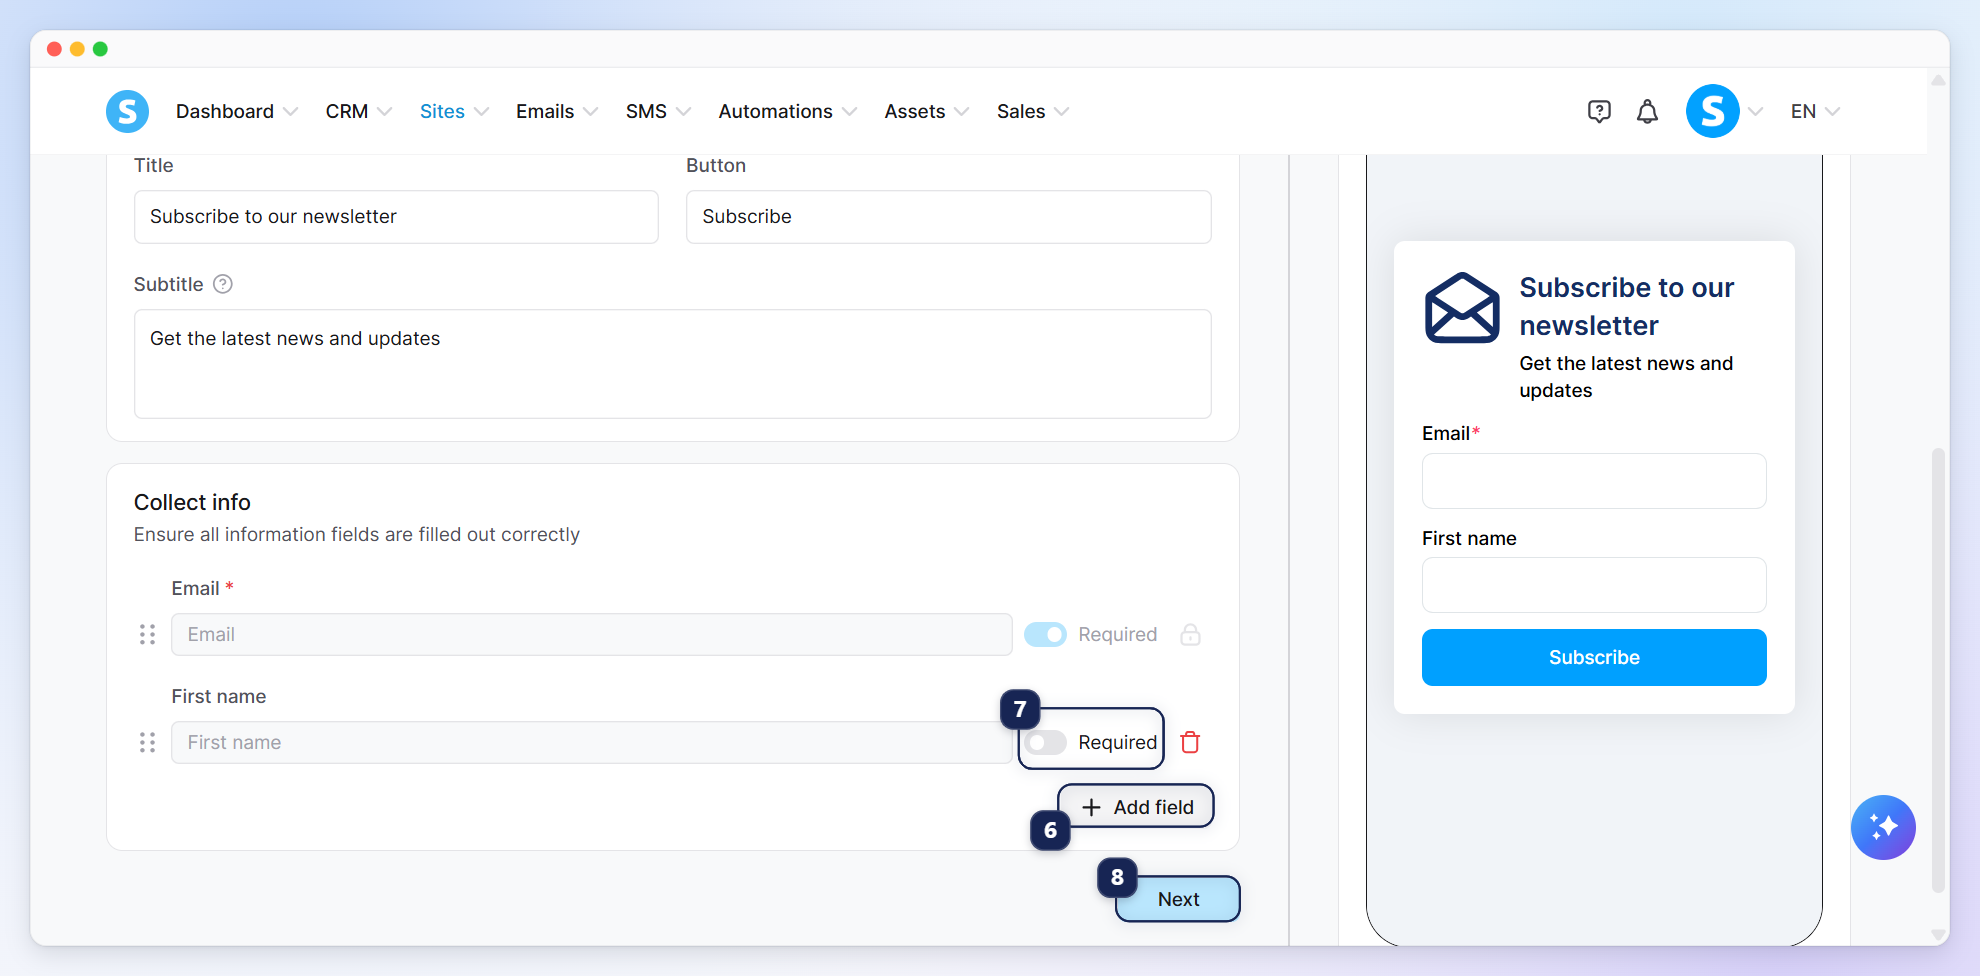
Add the fields you want to use to collect information from people who sign up. The Email field is added by default. To collect additional information, click Add field (6) and select a field, such as First name. You can also make any field mandatory by enabling the Required switch (7).
When you're done, click Next (8) to save and move to the second tab, or Save as draft (at the top of the page) to save work without publishing.
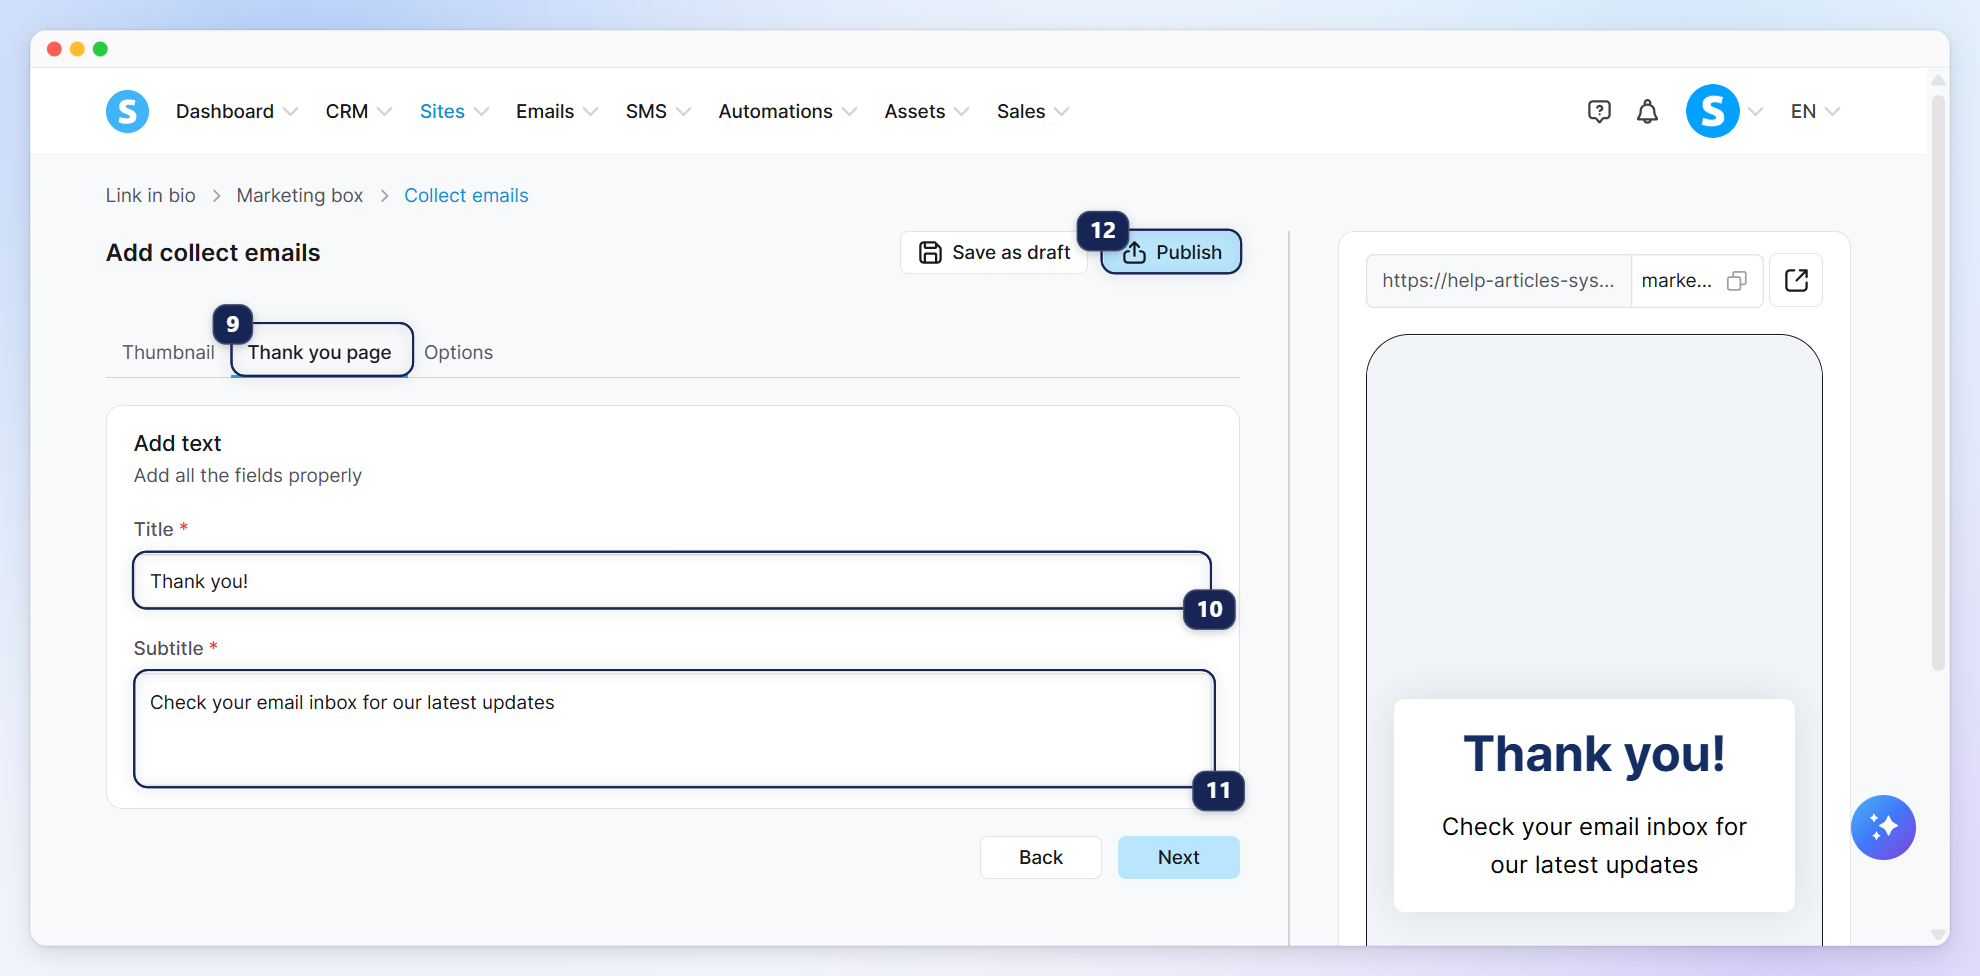
Thank you page (9): This is the page visitors see after submitting the form. Add a title (10) and subtitle (11) to display on this page.
Once you've completed all the steps, click Publish (12) to make your email collection product available in your link in bio.
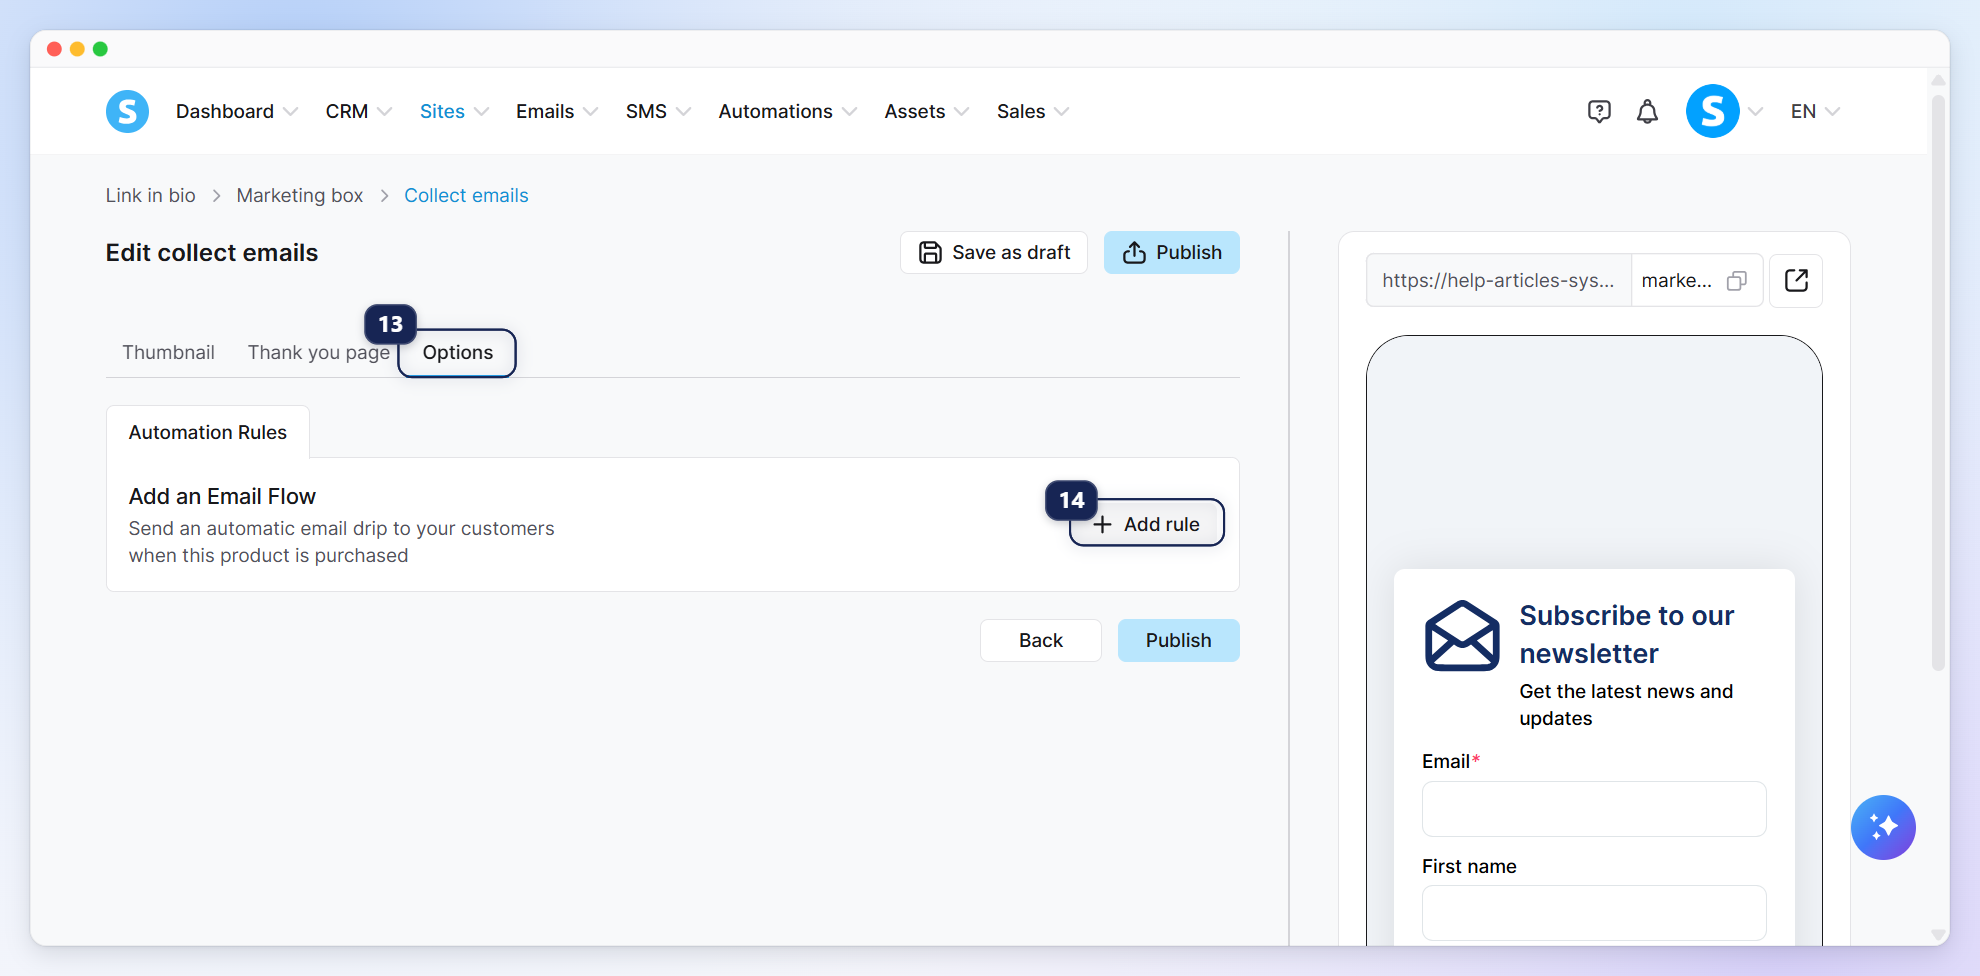
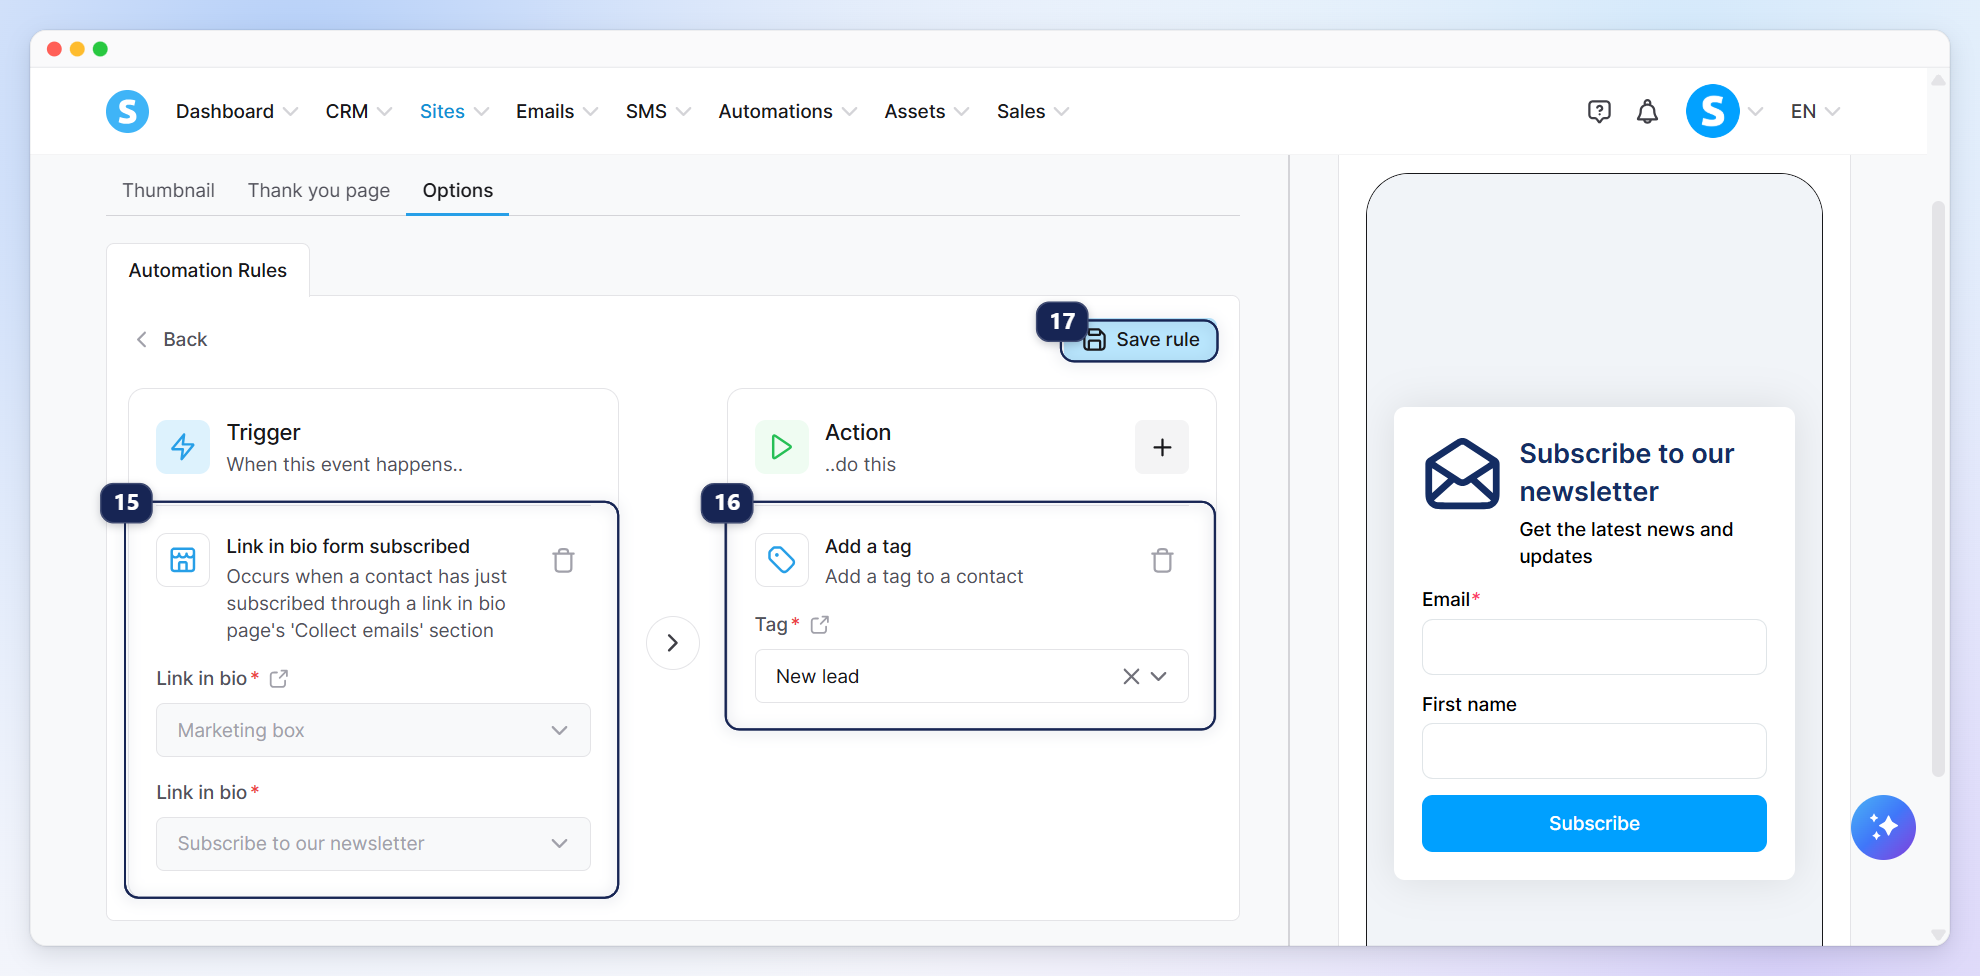
Options (13): Once your product is saved as a draft or published, you can add automation rules to it.
To do so, click Add rule (14).
In the pop-up window, select Link in bio form subscribed (15) as the trigger, then choose the action you want to perform when someone subscribes through the collect emails section of your link in bio. In this example, we chose to add a tag (16). Once you've configured the rule, click Save rule (17).
c. Selling a digital download:
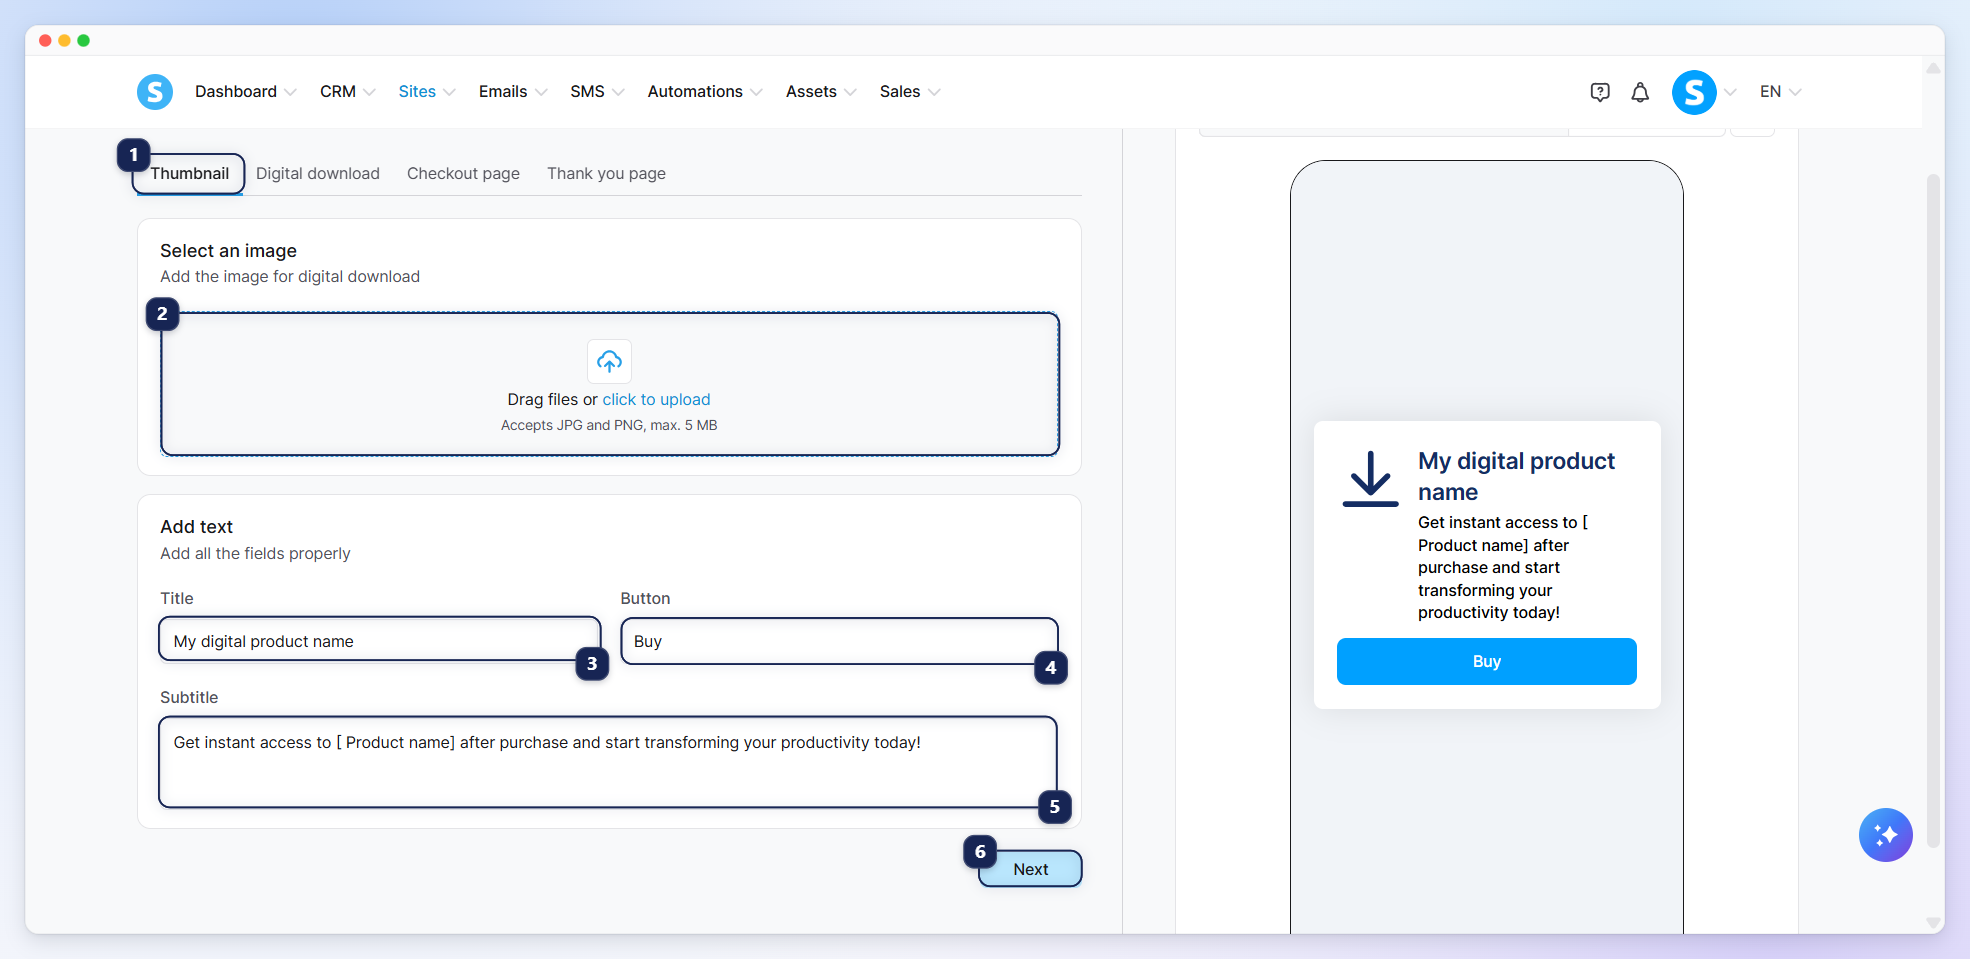
To set up your digital product, four tabs need to be configured:
Thumbnail (1): Select the thumbnail image (2) you want to display, then customize the title (3), button (4), and subtitle (5).
Once you're done, click Next (6) to save your changes and move to the second tab.
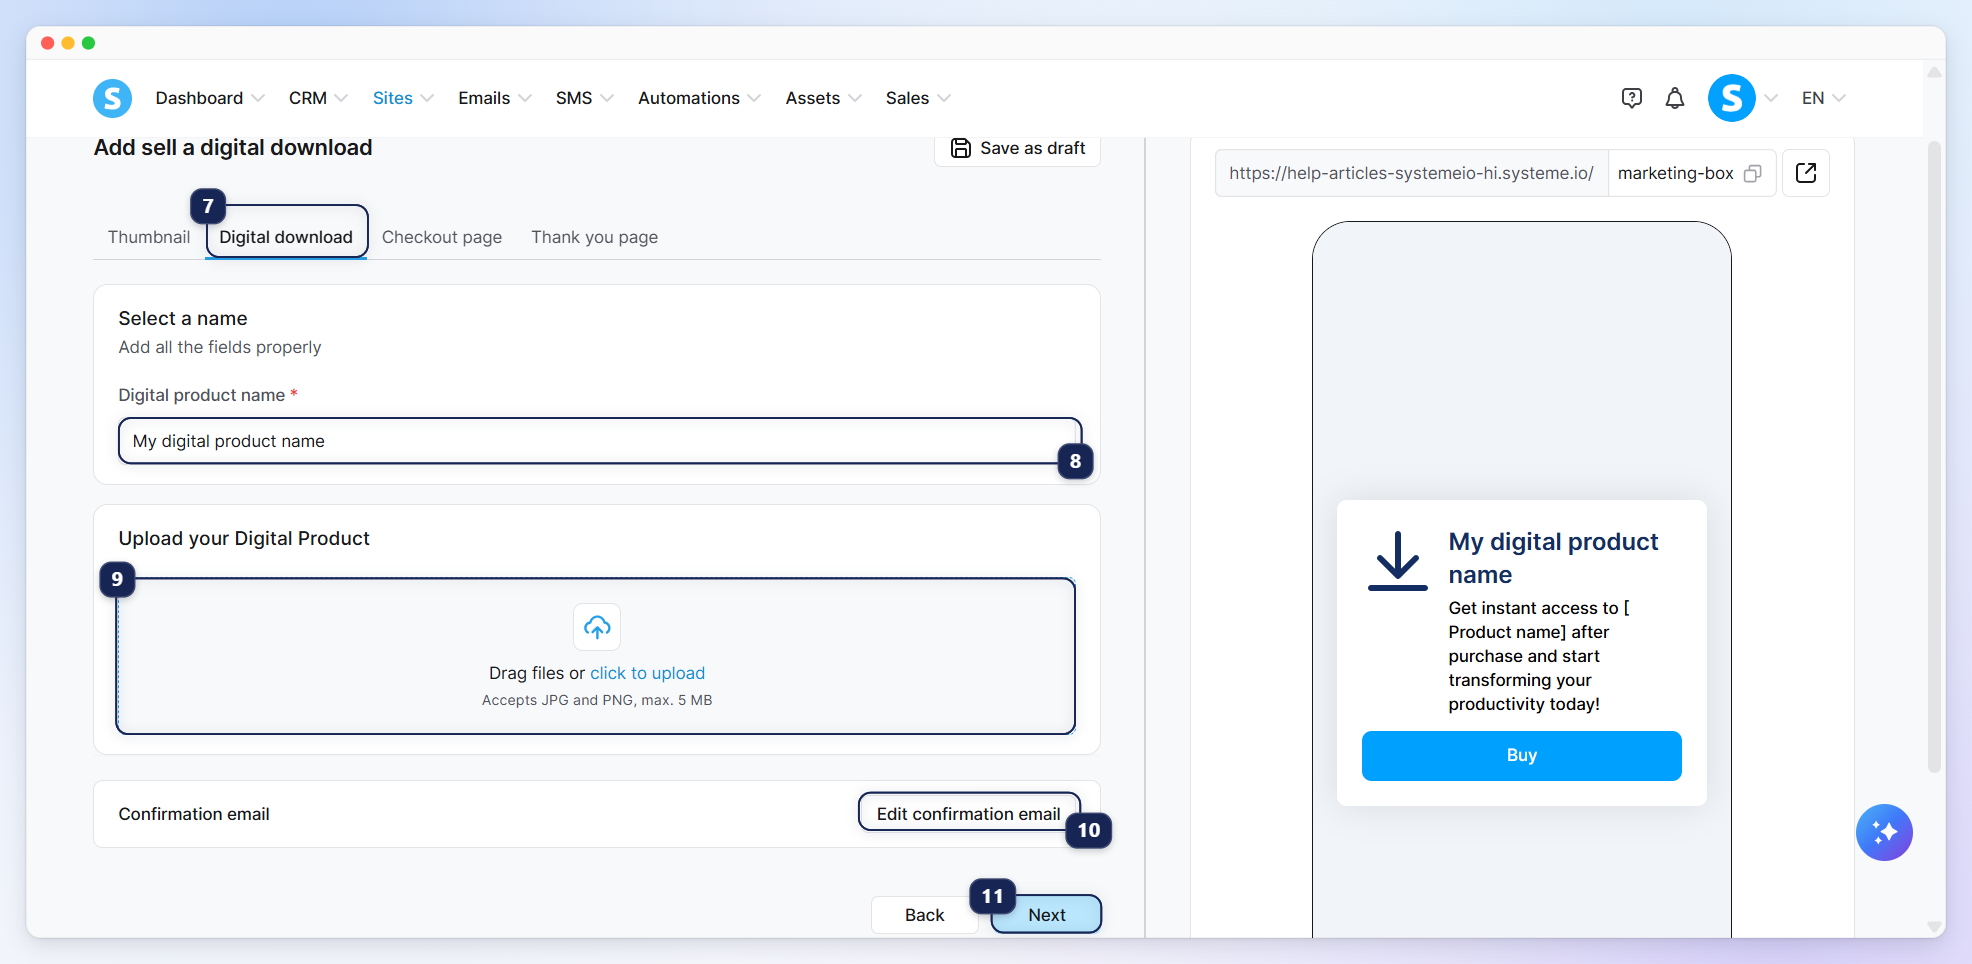
Digital download (7): Enter a name (8) for your digital product, upload your digital product (9), and customize the confirmation email that will be automatically sent to customers after payment (10).
Once you're done, click Next (11) to save your changes and move to the third tab.
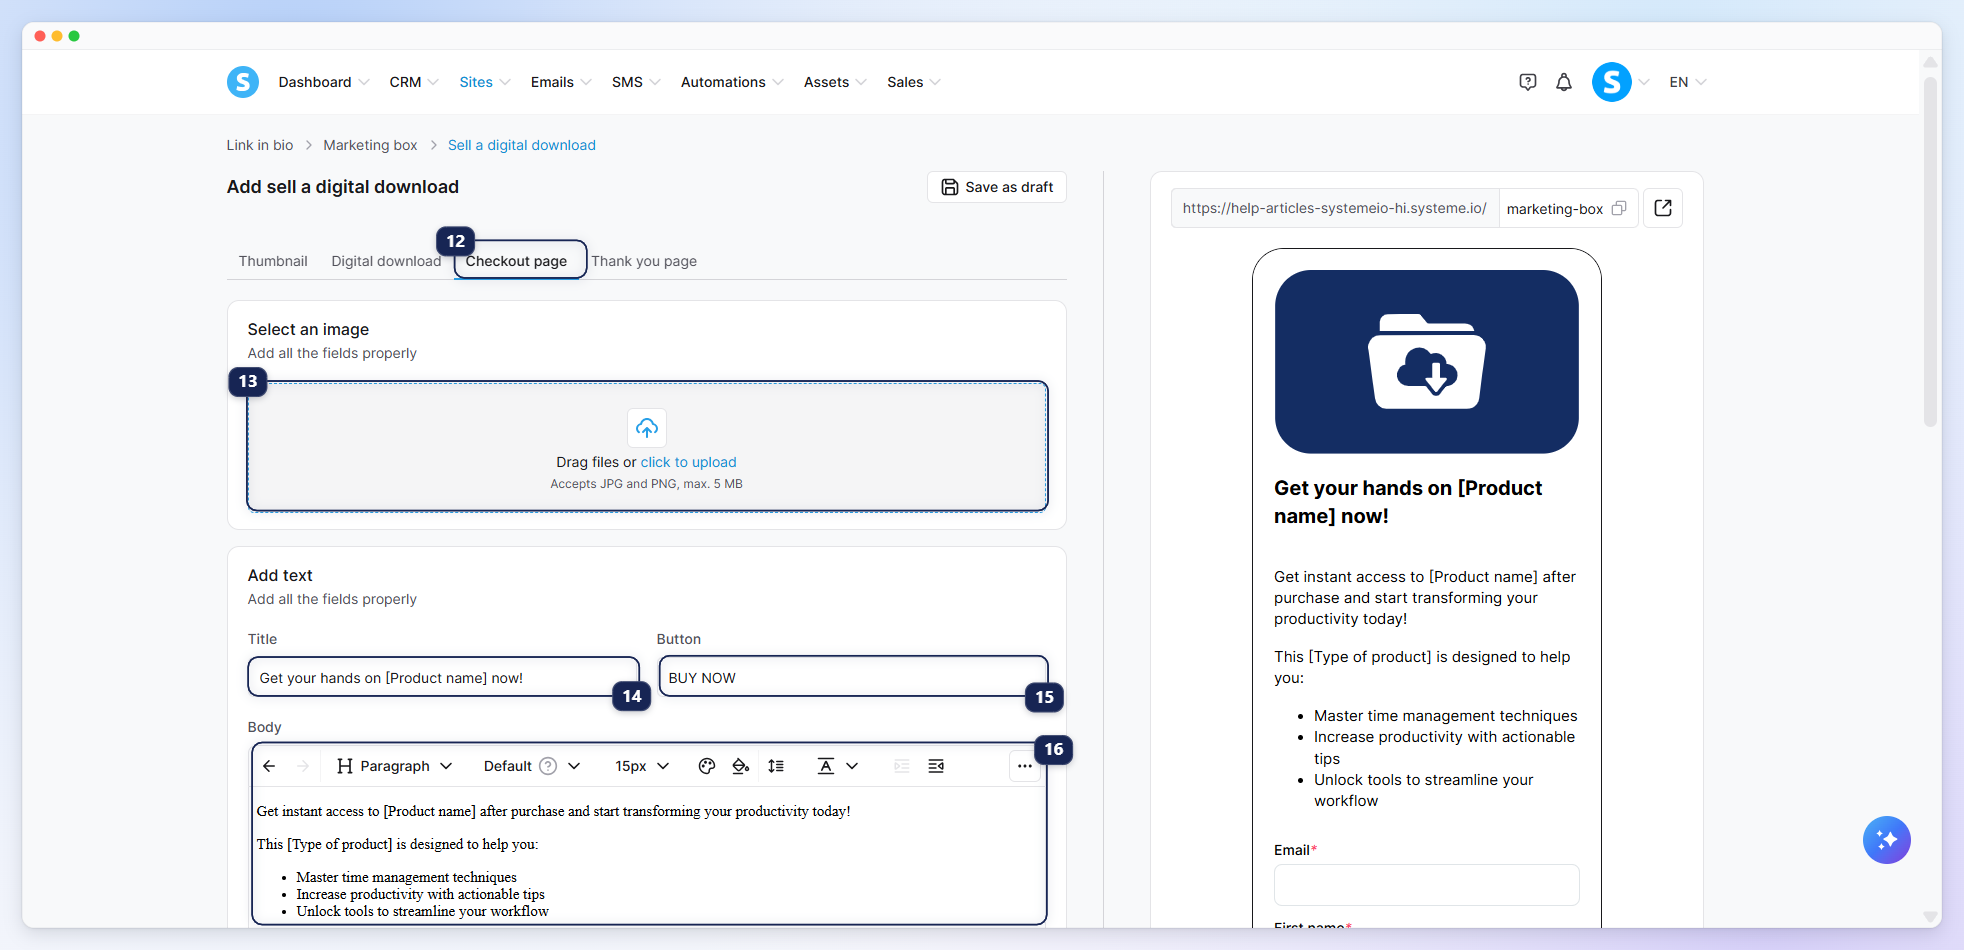
Checkout page (payment page) (12): Add a product image (13) and customize the text by adding a title (14), button (15), and the description (body)(16).
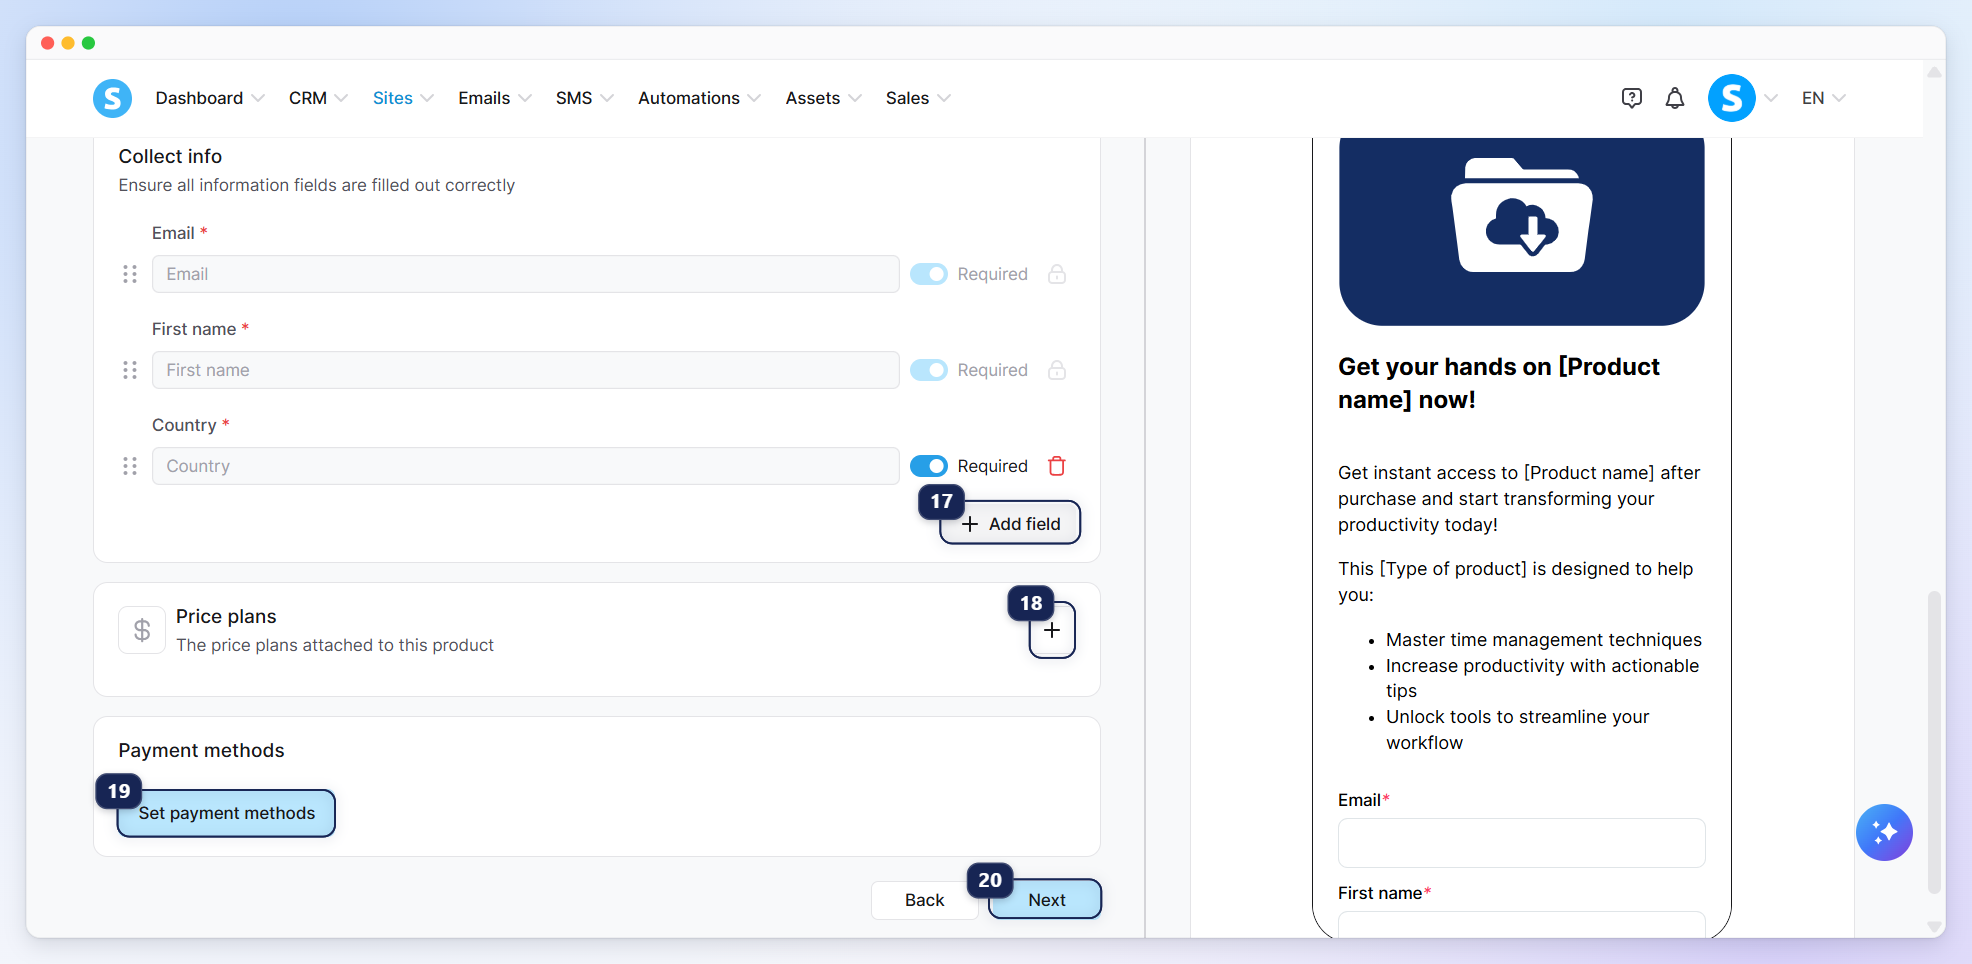
When you scroll down, you'll find the payment form settings. Add the fields you want to use to collect customer information. Email, first name, and country are included by default. To add more fields, click Add field (17).
Next, click + (18) in the Price plans section to create a new price plan, or select an existing one. Then, click Set payment methods (19) to configure the available payment methods.
Once you've completed these steps, click Next (20) to save your changes and move to the third tab.
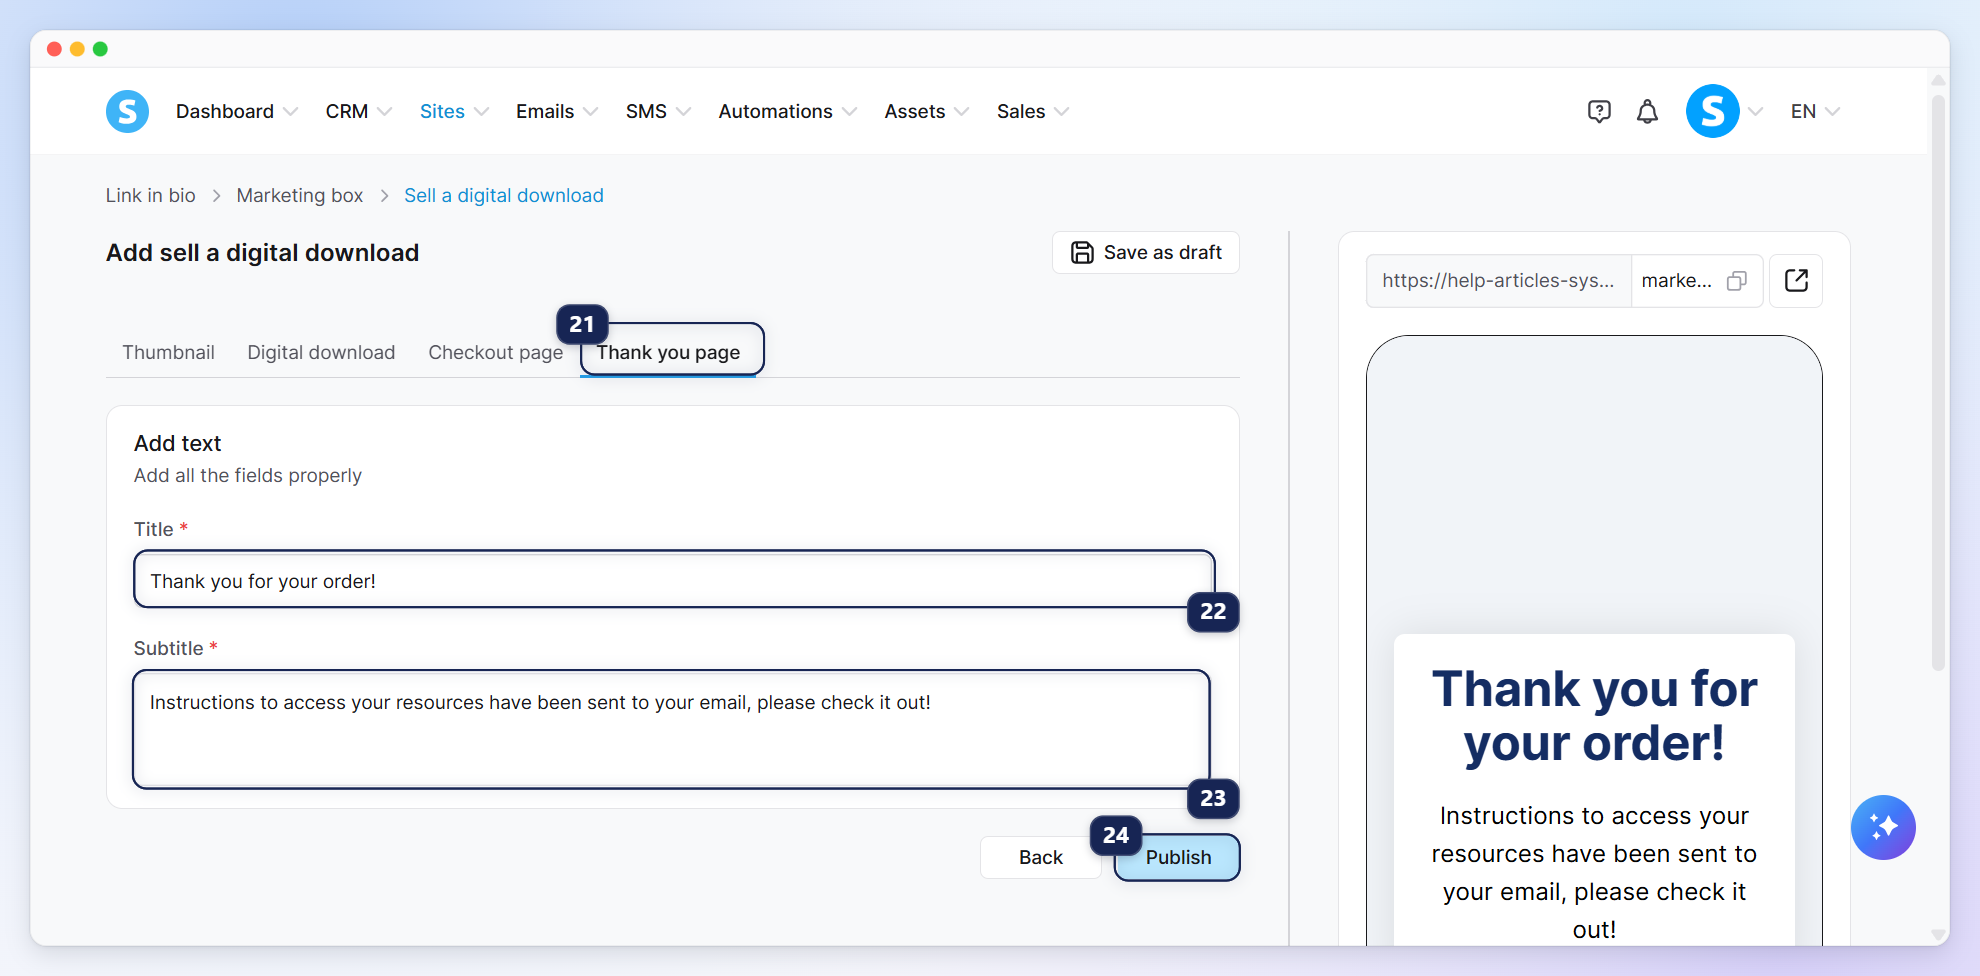
Thank you page (21): Add a title (22) and subtitle (23) to display after customers complete their purchase.
Once you've completed all the steps, click Publish (24) to make your product available in your link in bio.
d. Selling a course:
To set up your course in the link in bio, there are five tabs to complete:
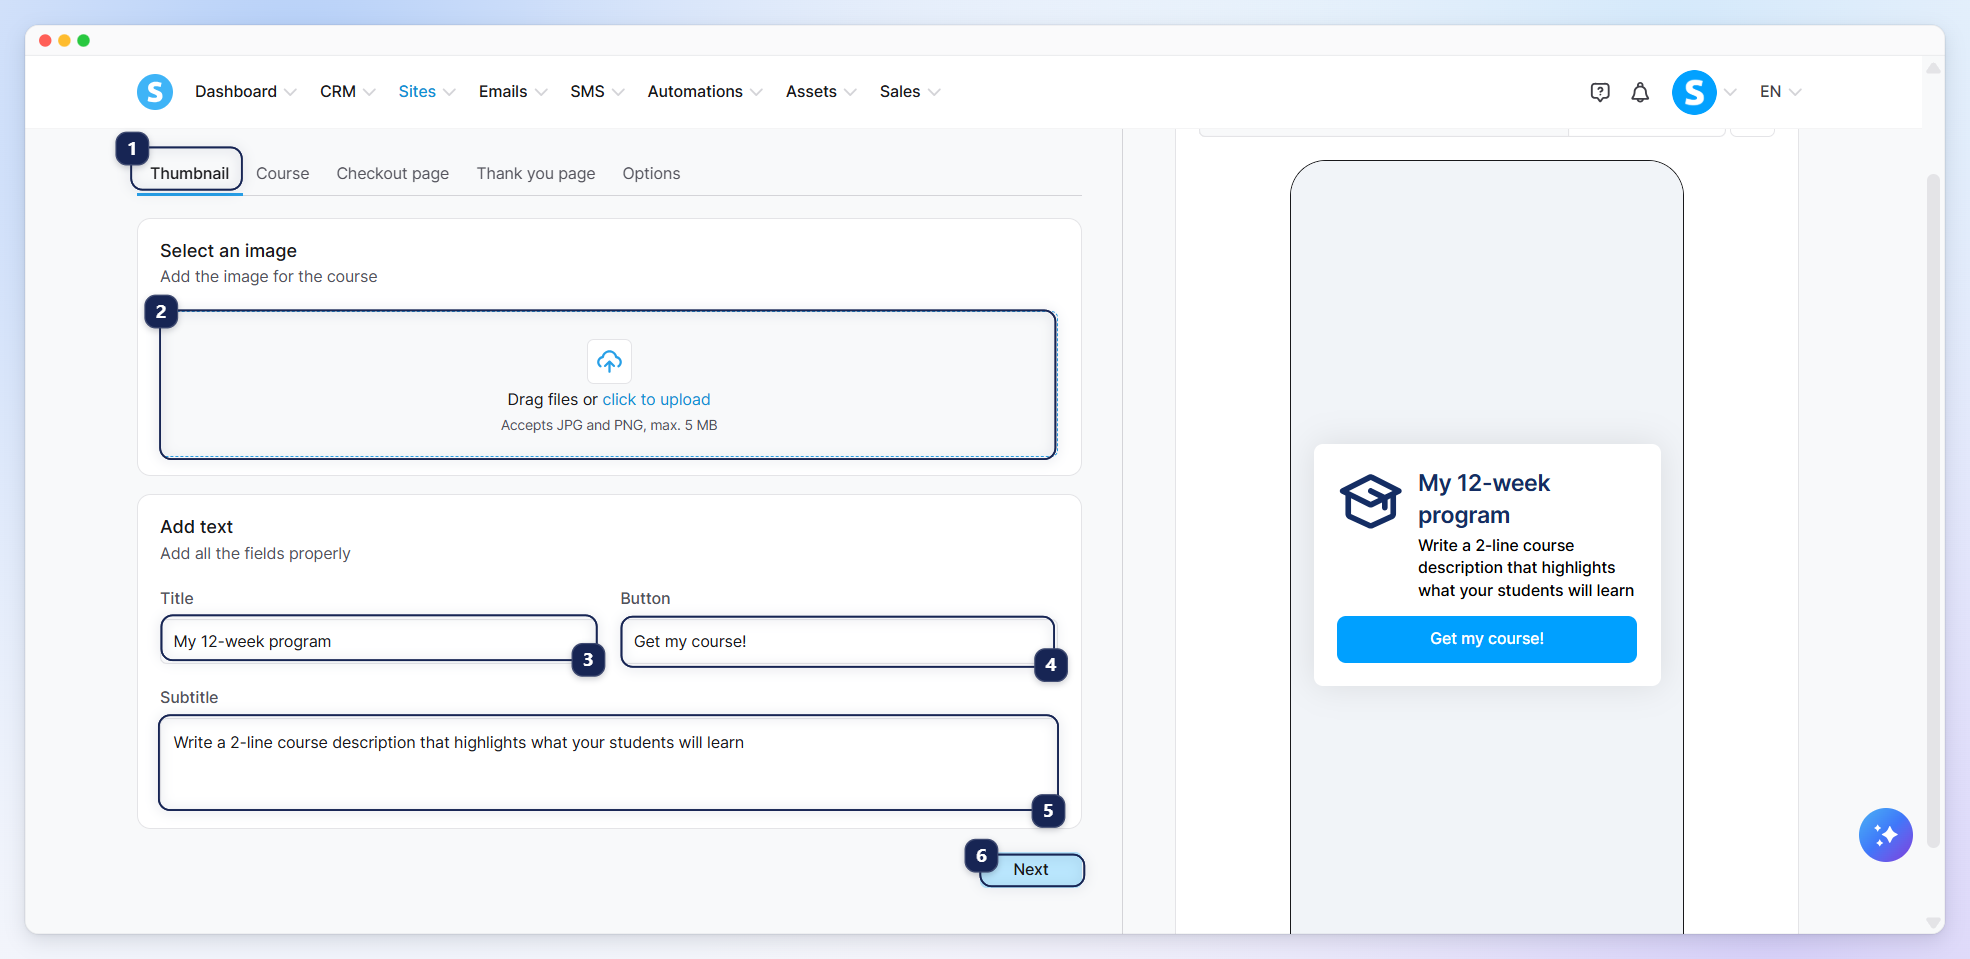
Thumbnail (1): Select the thumbnail image (2) you want to display, then customize the title (3), button (4), and subtitle (5).
Once you're done, click Next (6) to save your changes and move to the second tab.
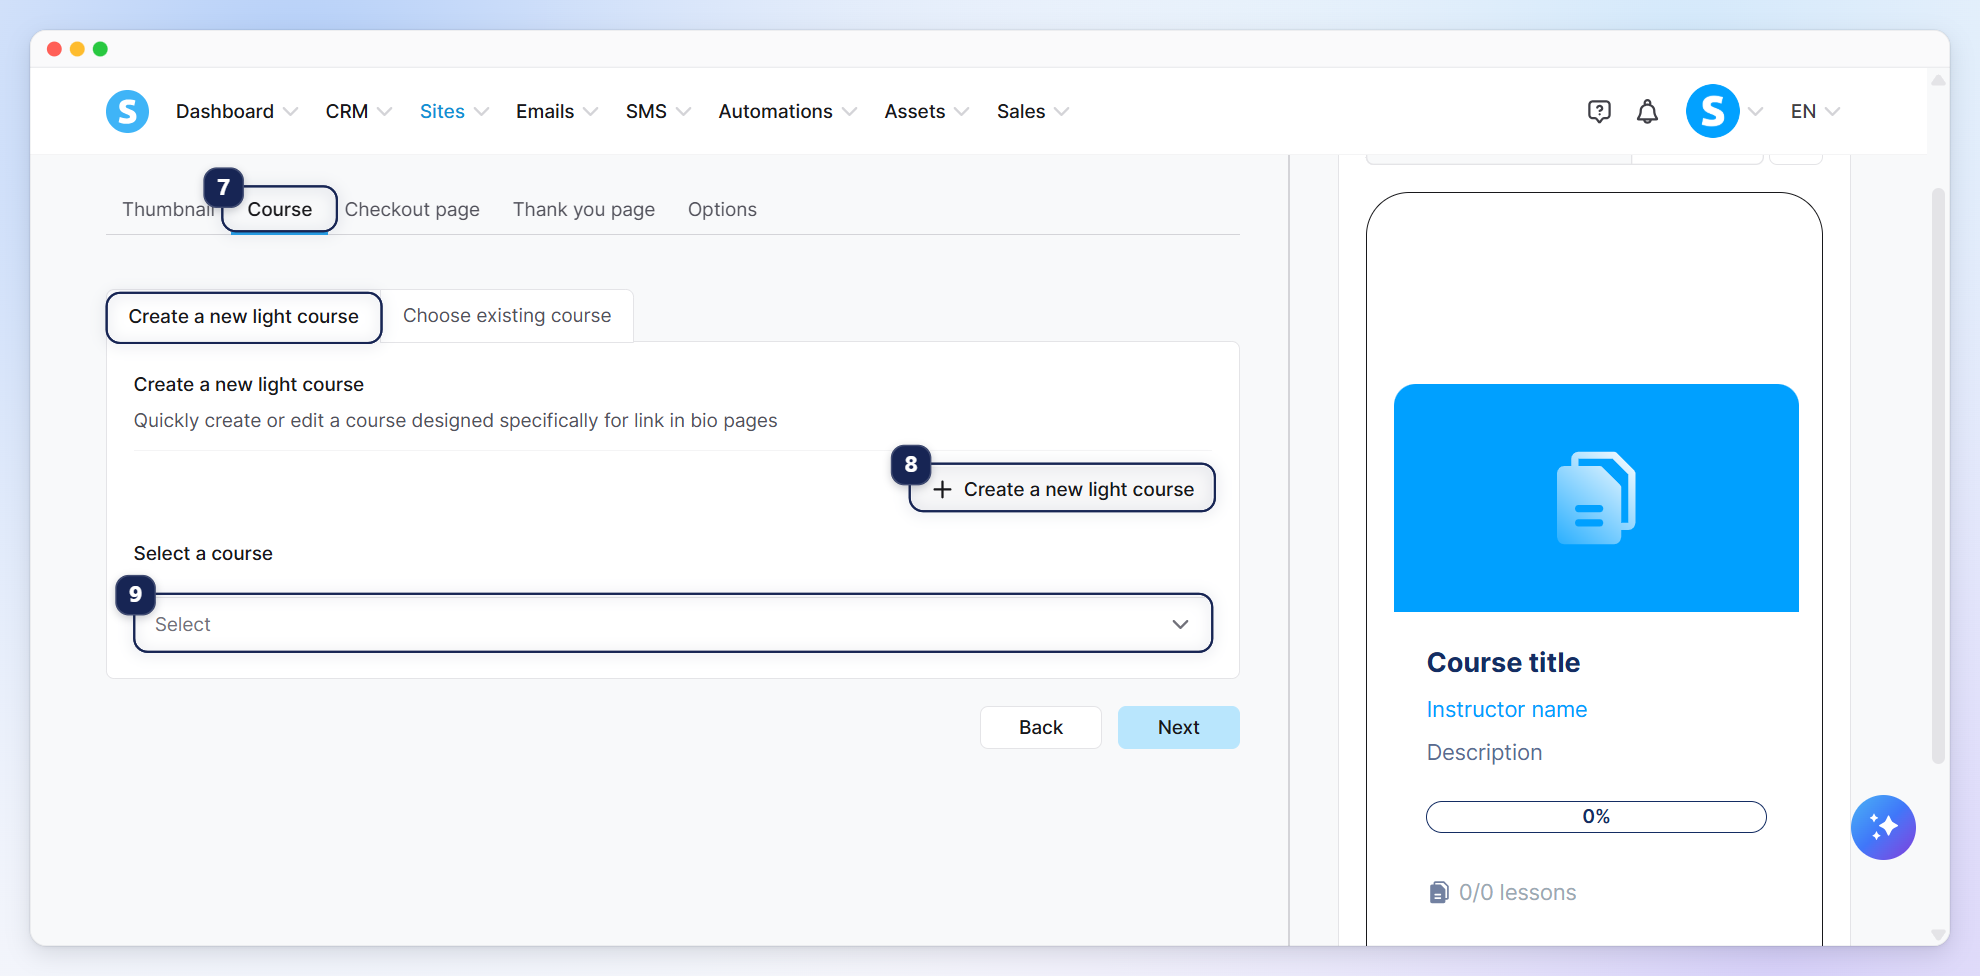
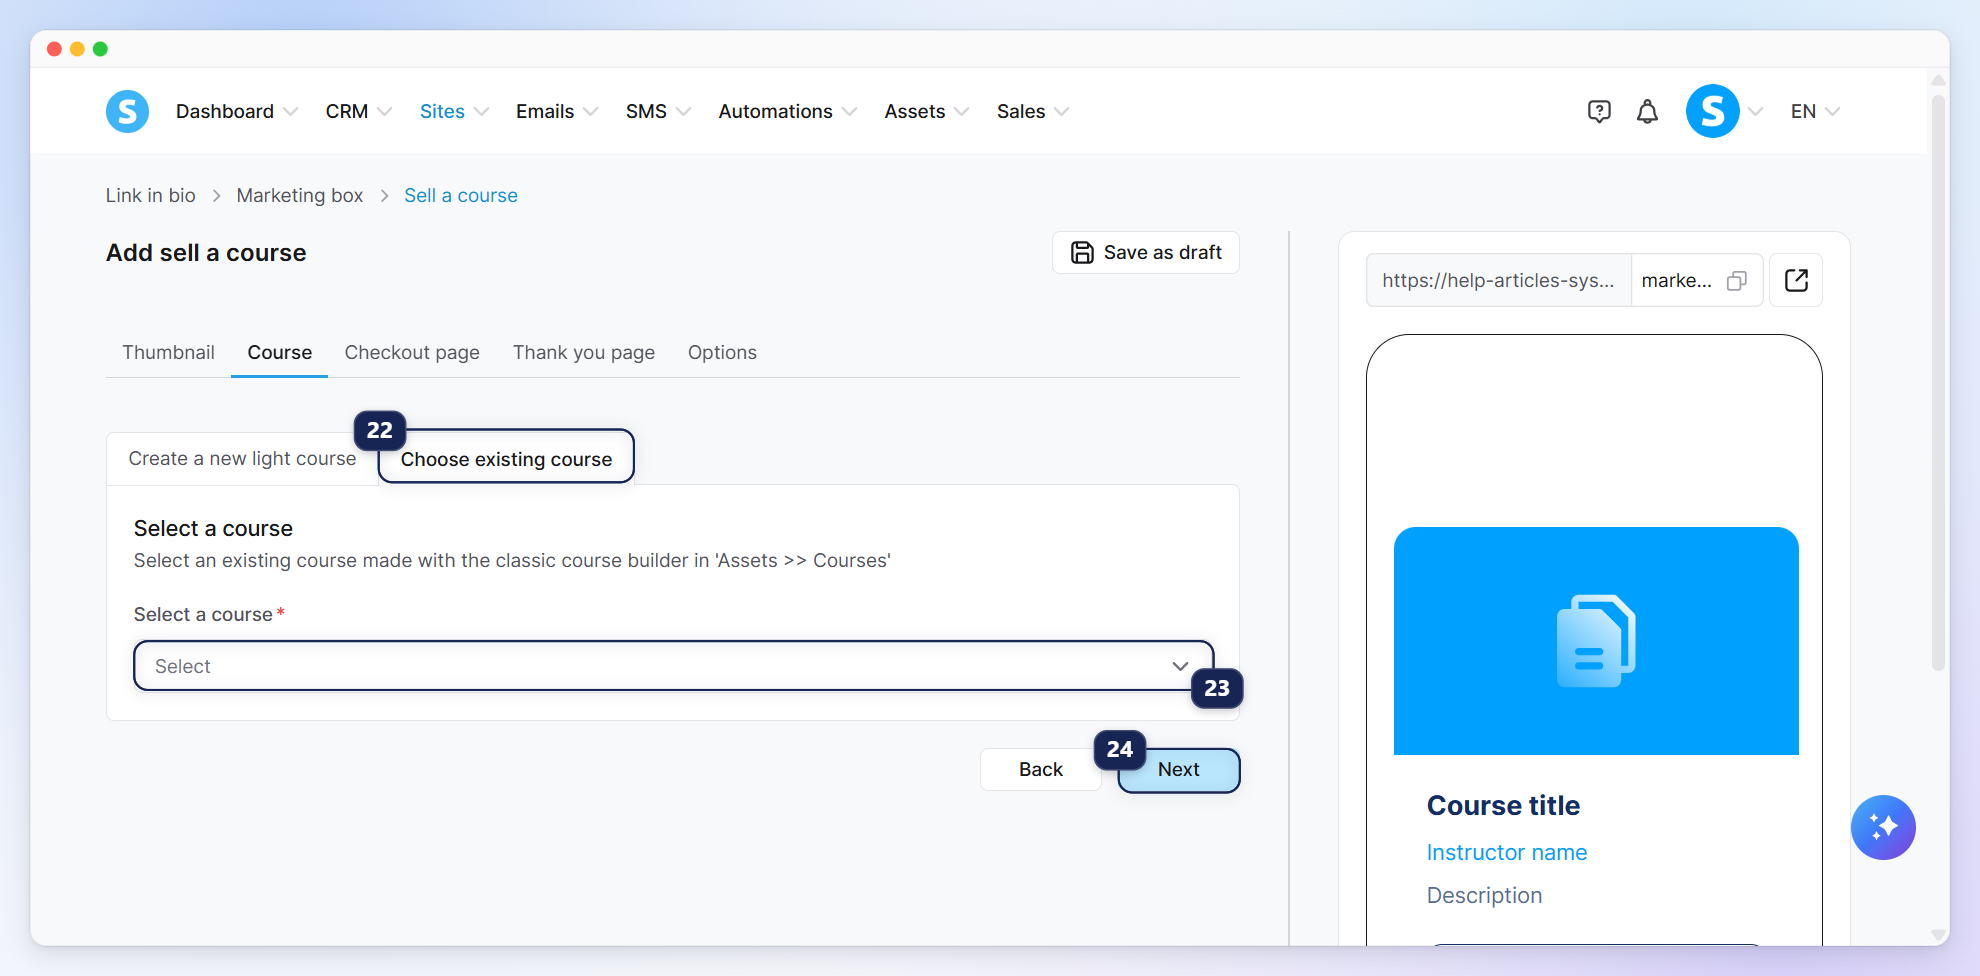
Course (7): Choose how you want to set up your course. You can create a new light course by clicking Create a new light course (8), or select an existing one from the Select a course drop-down menu (9).
If you choose to create a new light course, enter a title (10) and description (11) for your course.
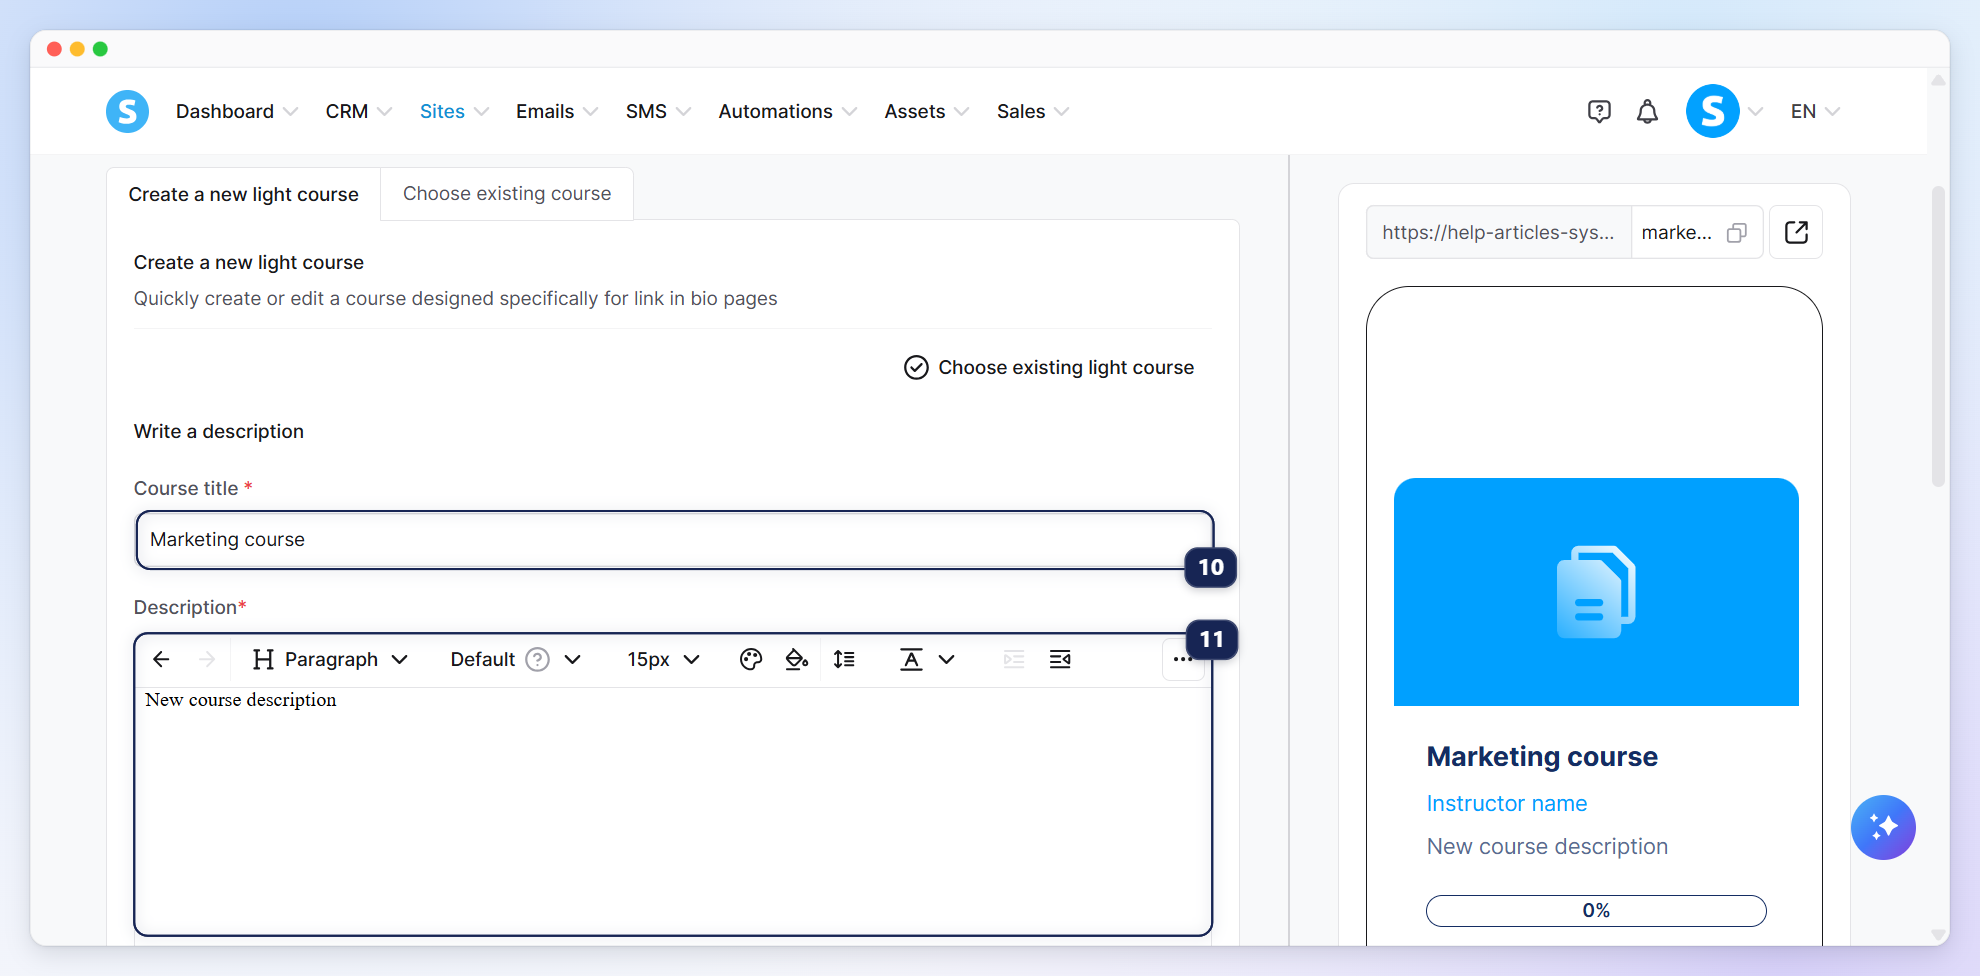
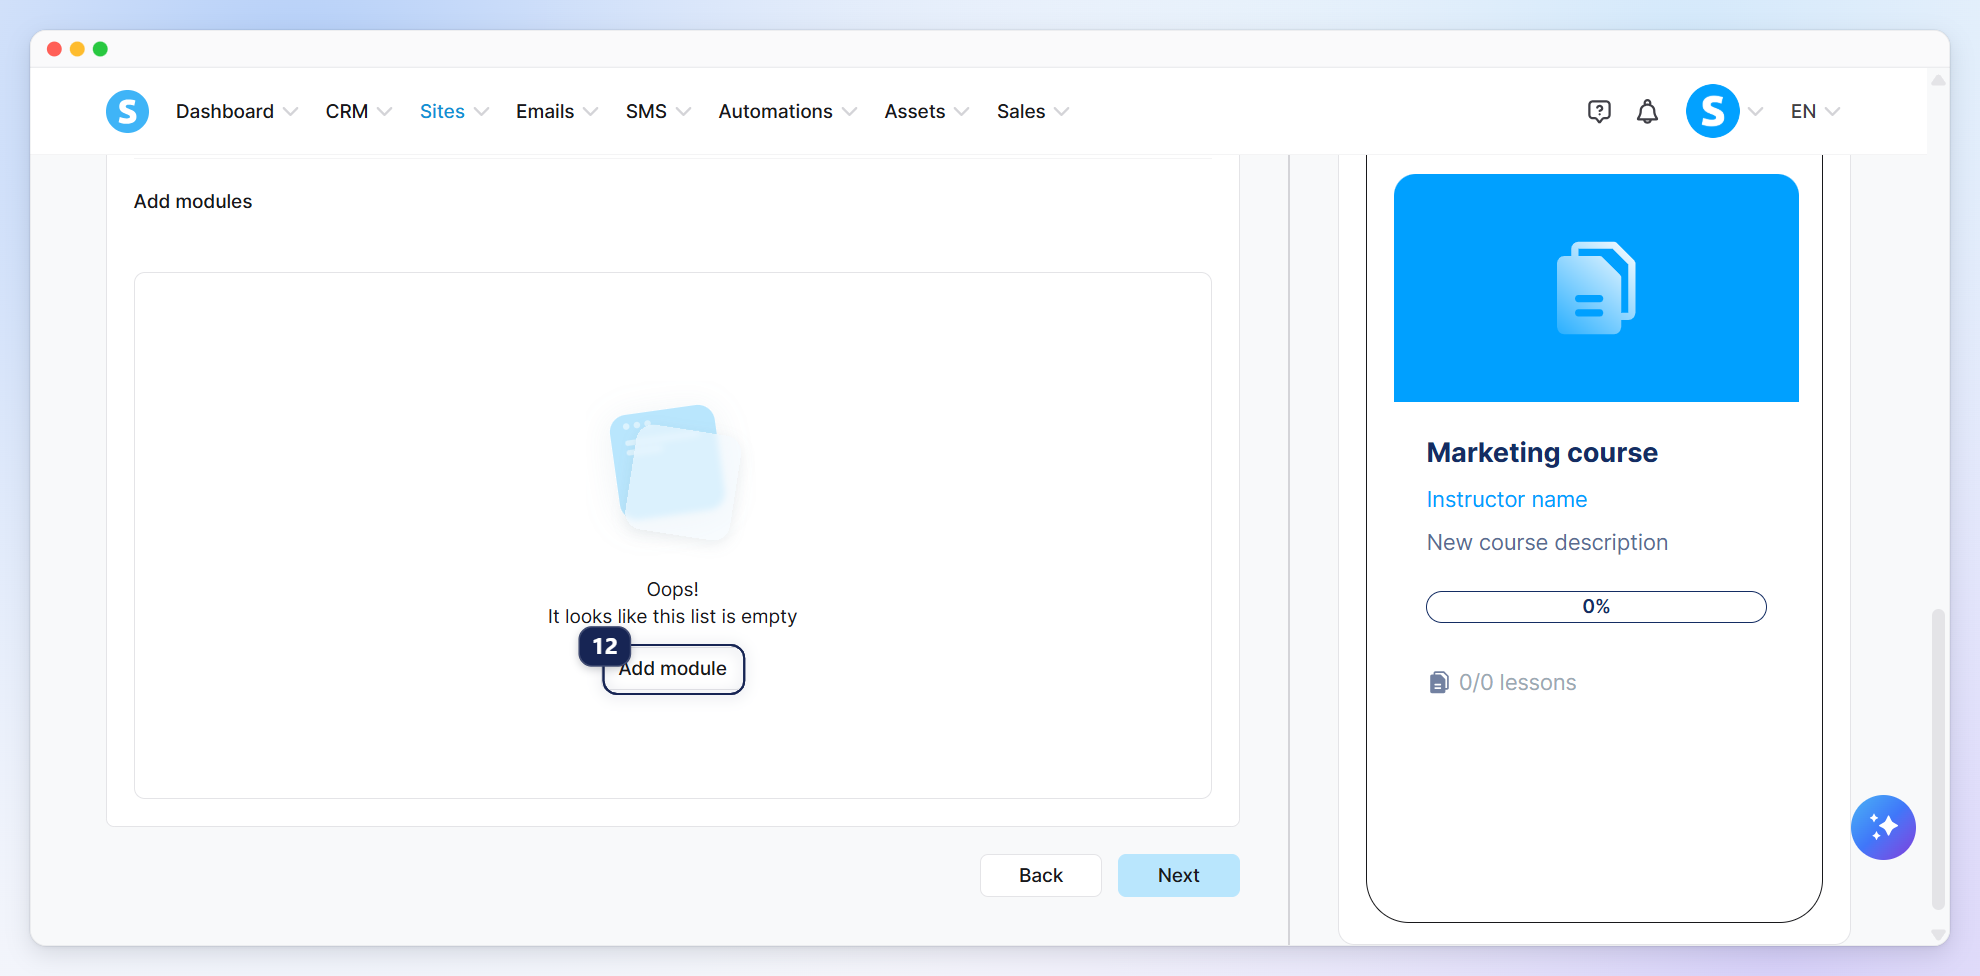
Scroll down and click Add module (12) to add modules to your course.
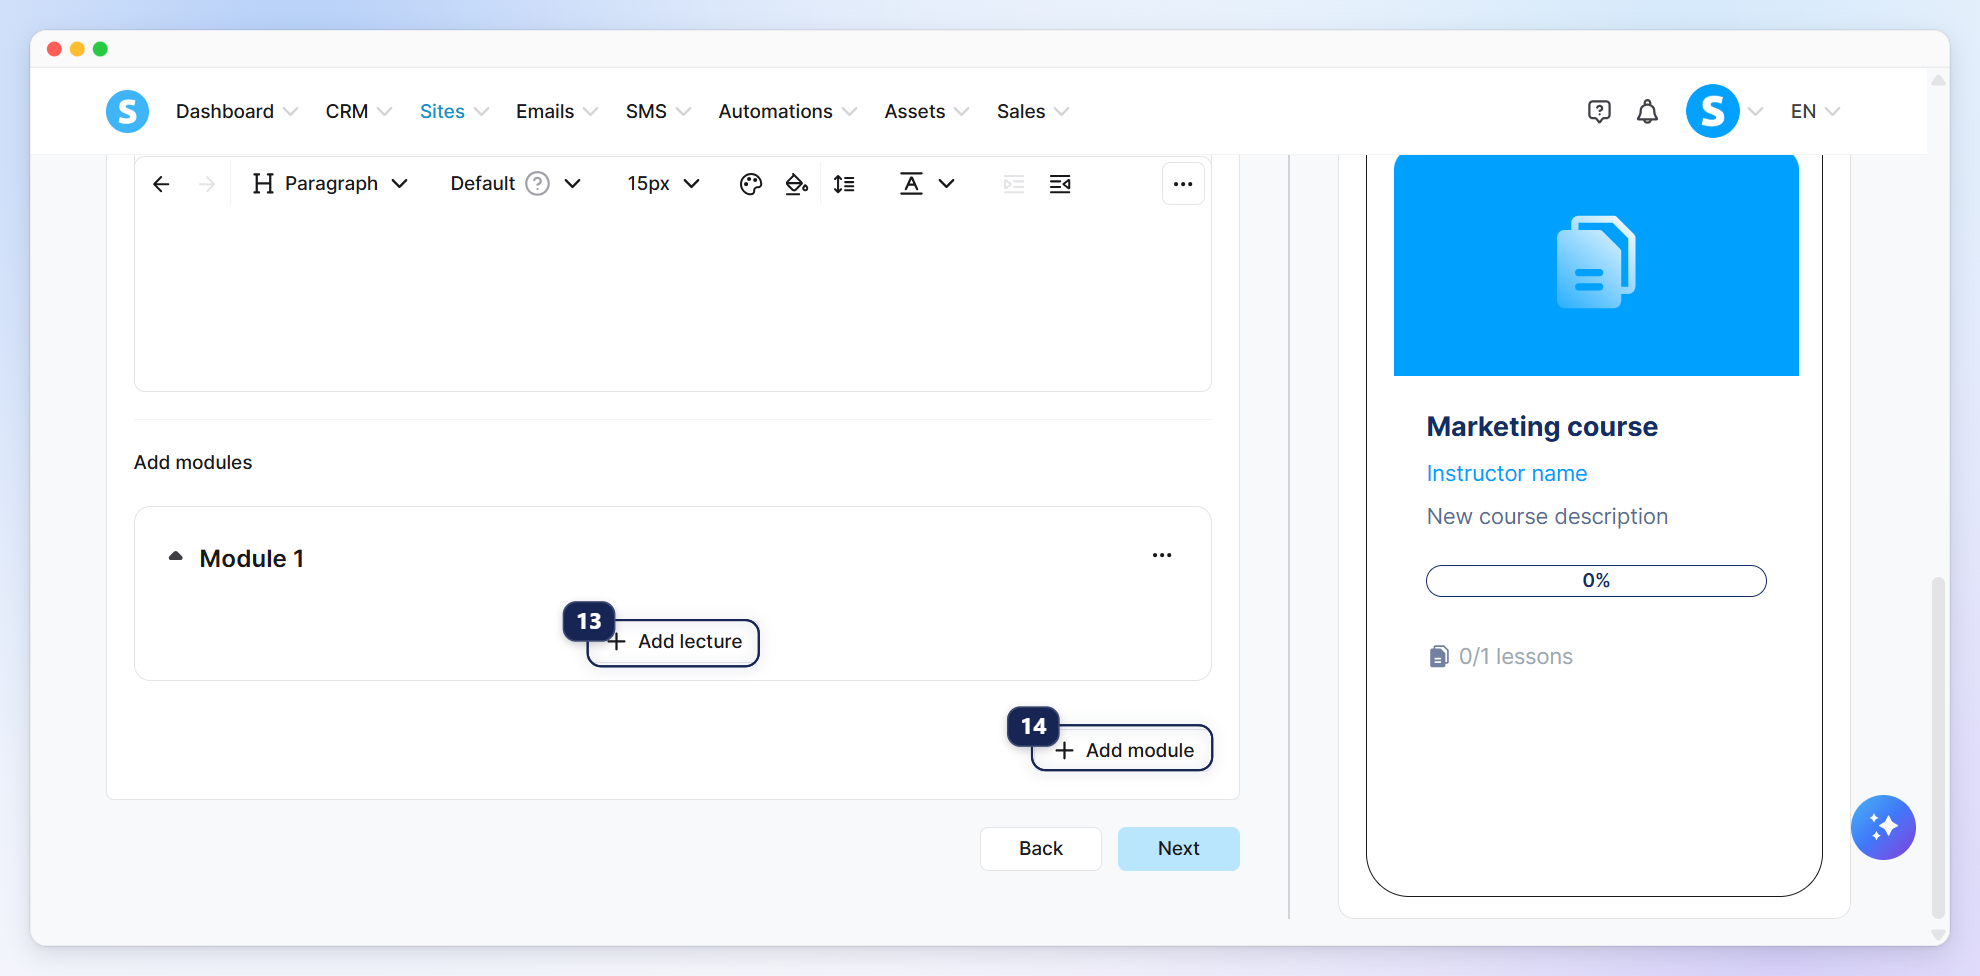
After creating your first module and giving it a name, click Add lecture (13) to add a lecture to it. To create additional modules, click Add module (14).
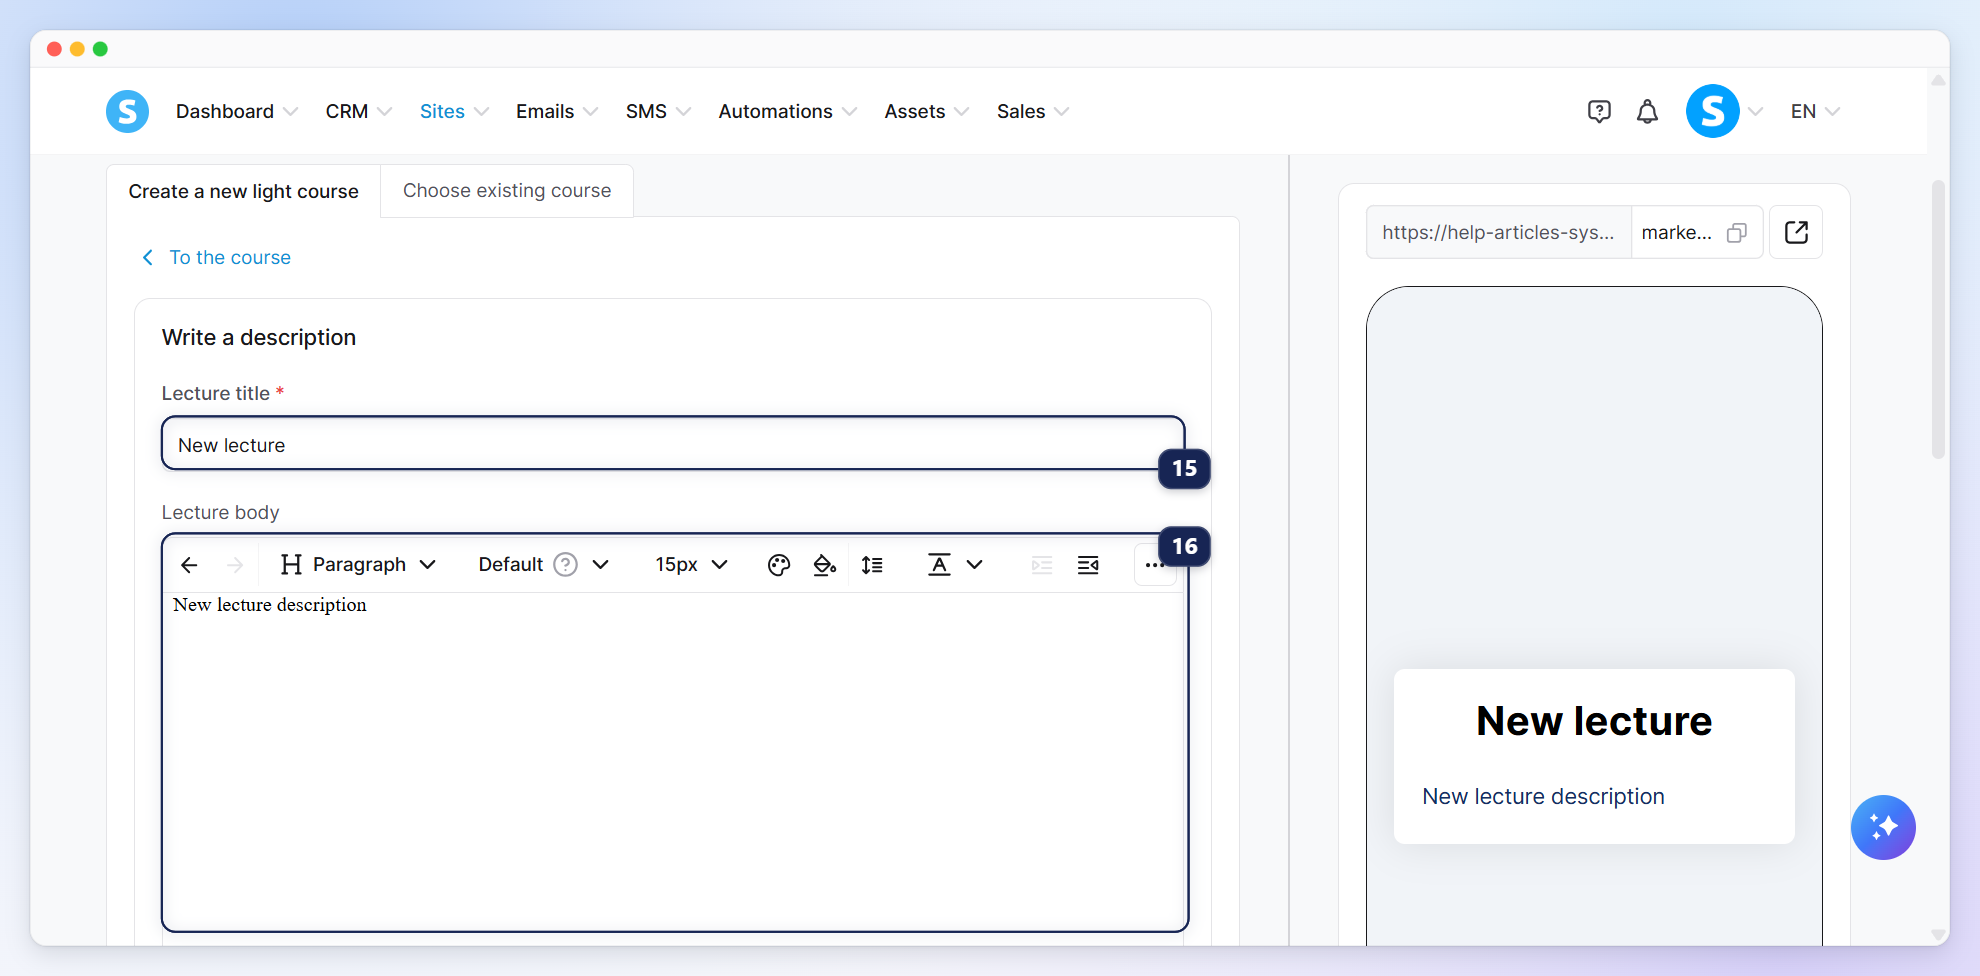
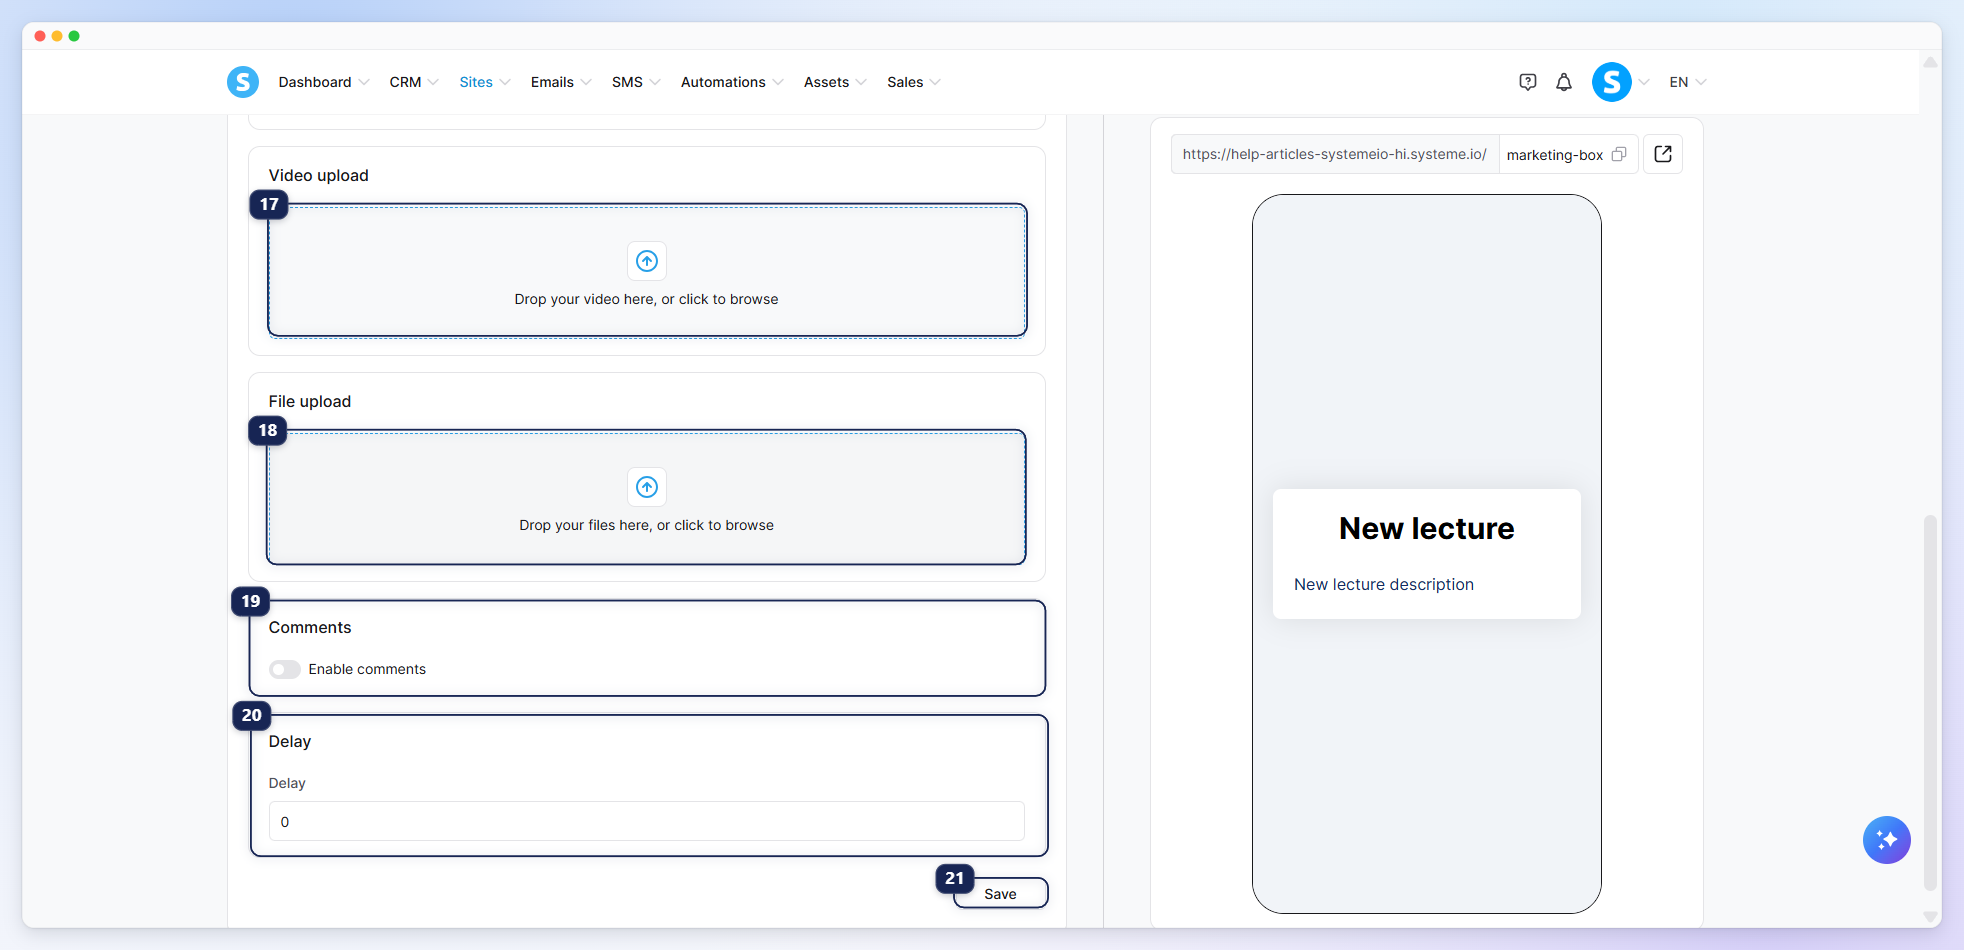
Enter a title (15) and description (16) for your lecture.
Scroll down to add a video (17) or file (18) to your lecture. You can also enable comments (19) and set a delay (20) before the lecture becomes available. Once you're done, click Save (21) to save your changes.
To use an existing classic course, click Choose existing course (22) back in the main course tab and select the course you want to use (23).
Once you've selected or created a course, click Next (24) to save your changes and move to the third tab.
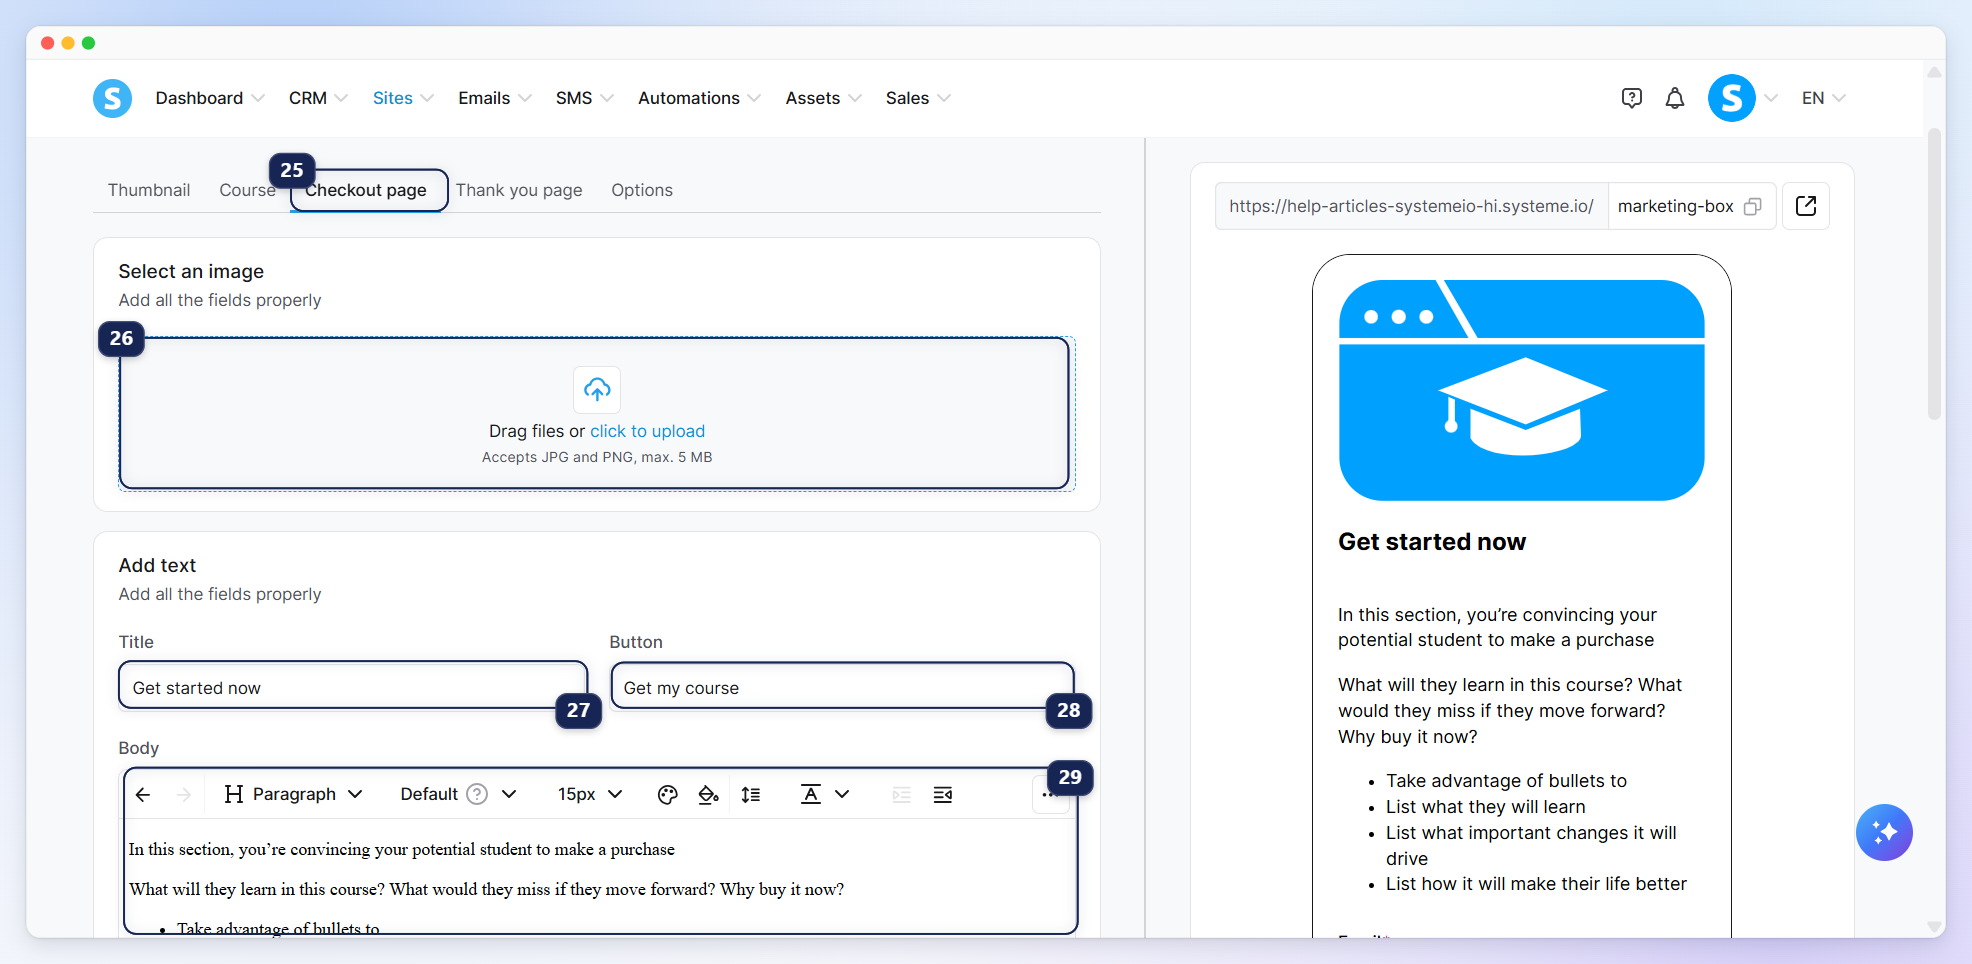
Checkout page (Payment Page) (25): Add a product image (26), then customize the title (27), button (28), and description (body) displayed on the checkout page (29).
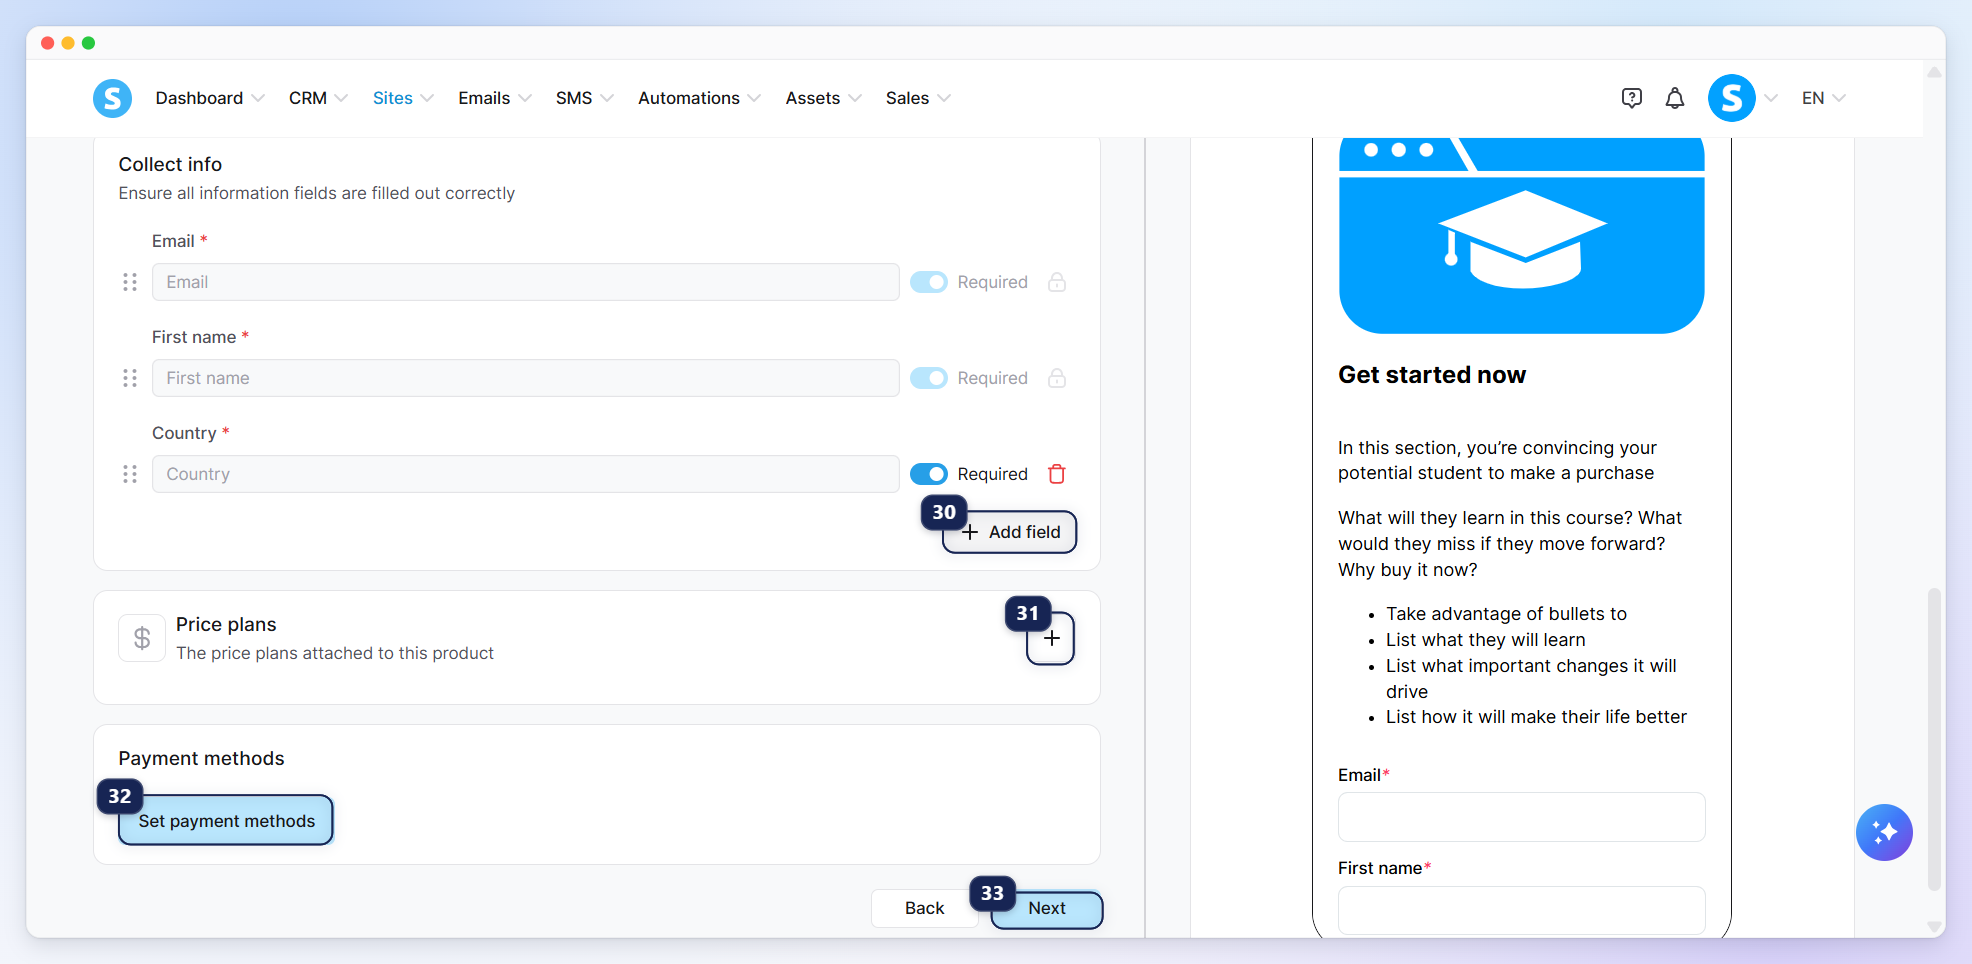
When you scroll down, you'll find the payment form settings. Email, first name, and country are included by default. To collect additional information, click Add field (30) and select the fields you need.
Next, click + (31) in the Price plans section to create a new price plan, or select an existing one. Then, click Set payment methods (32) to configure the available payment methods.
Once you've completed these steps, click Next (33) to save your changes and move to the fourth tab.
Thank you page (34): Add a title (35) and subtitle (36) to display after customers complete their purchase.
Once you've completed all the steps, click Next (37) to move to the last tab.
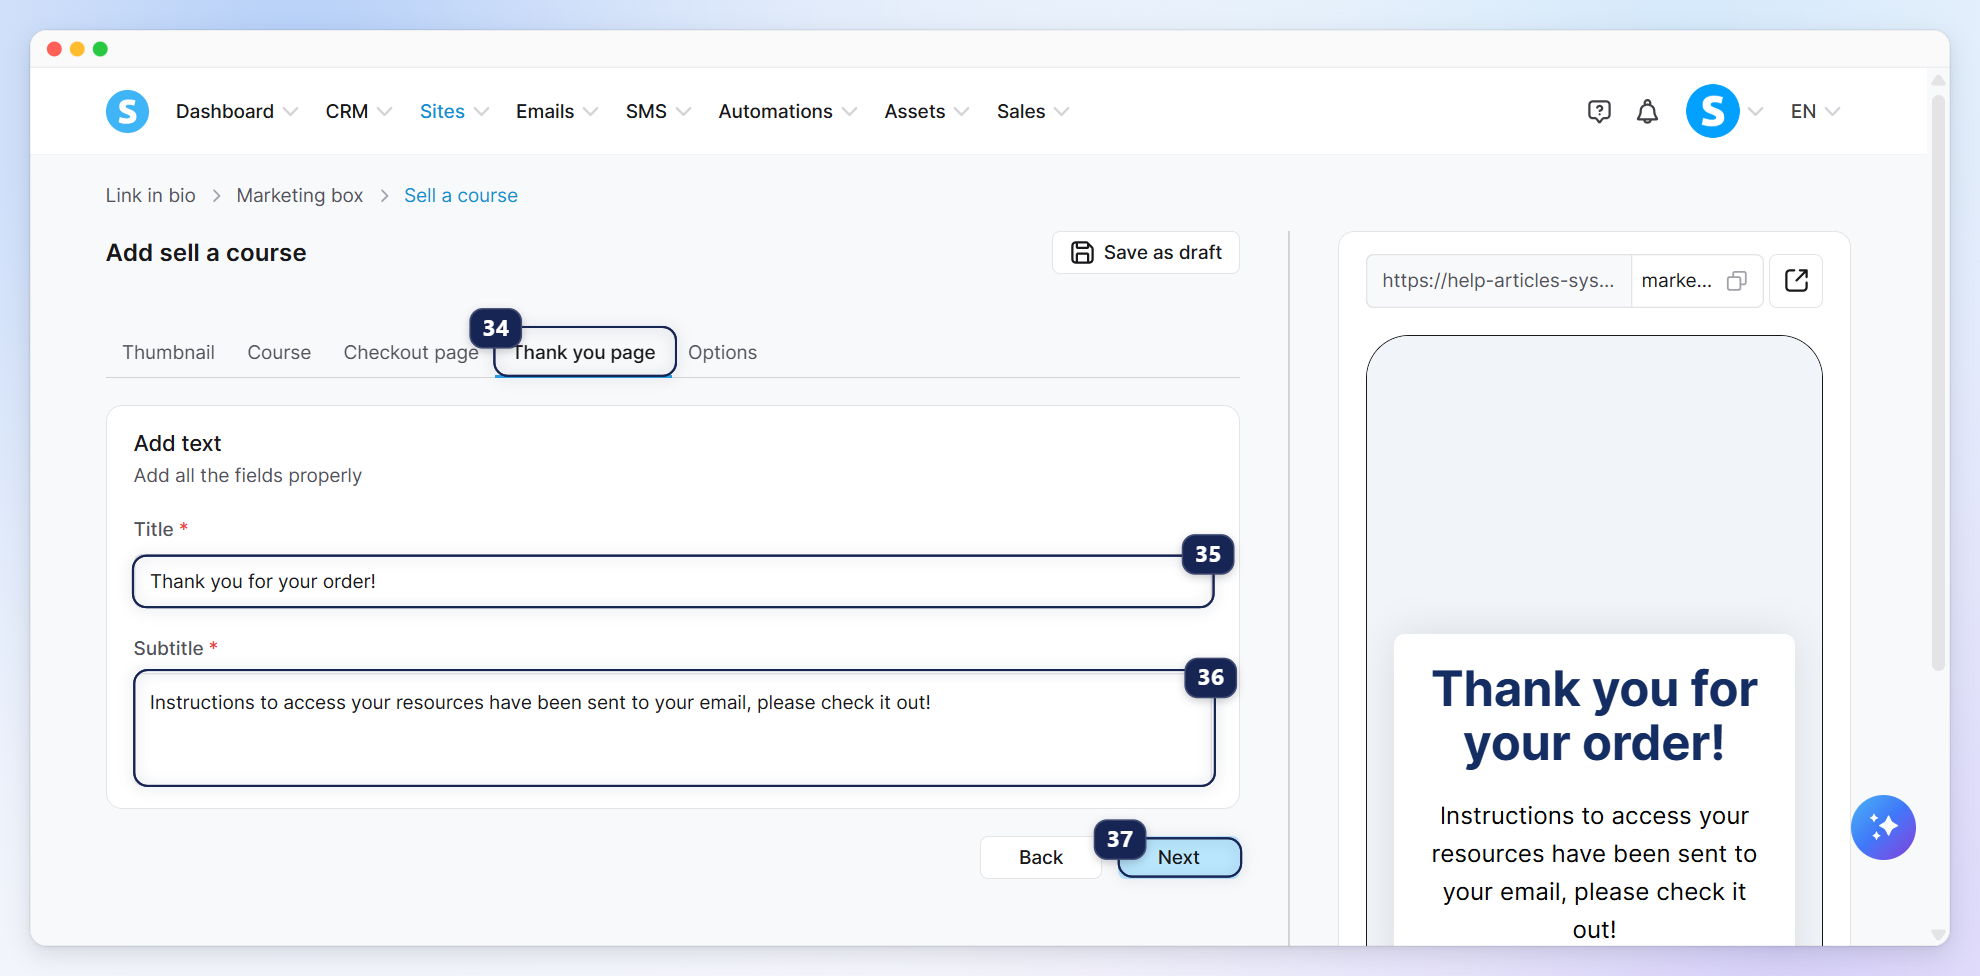
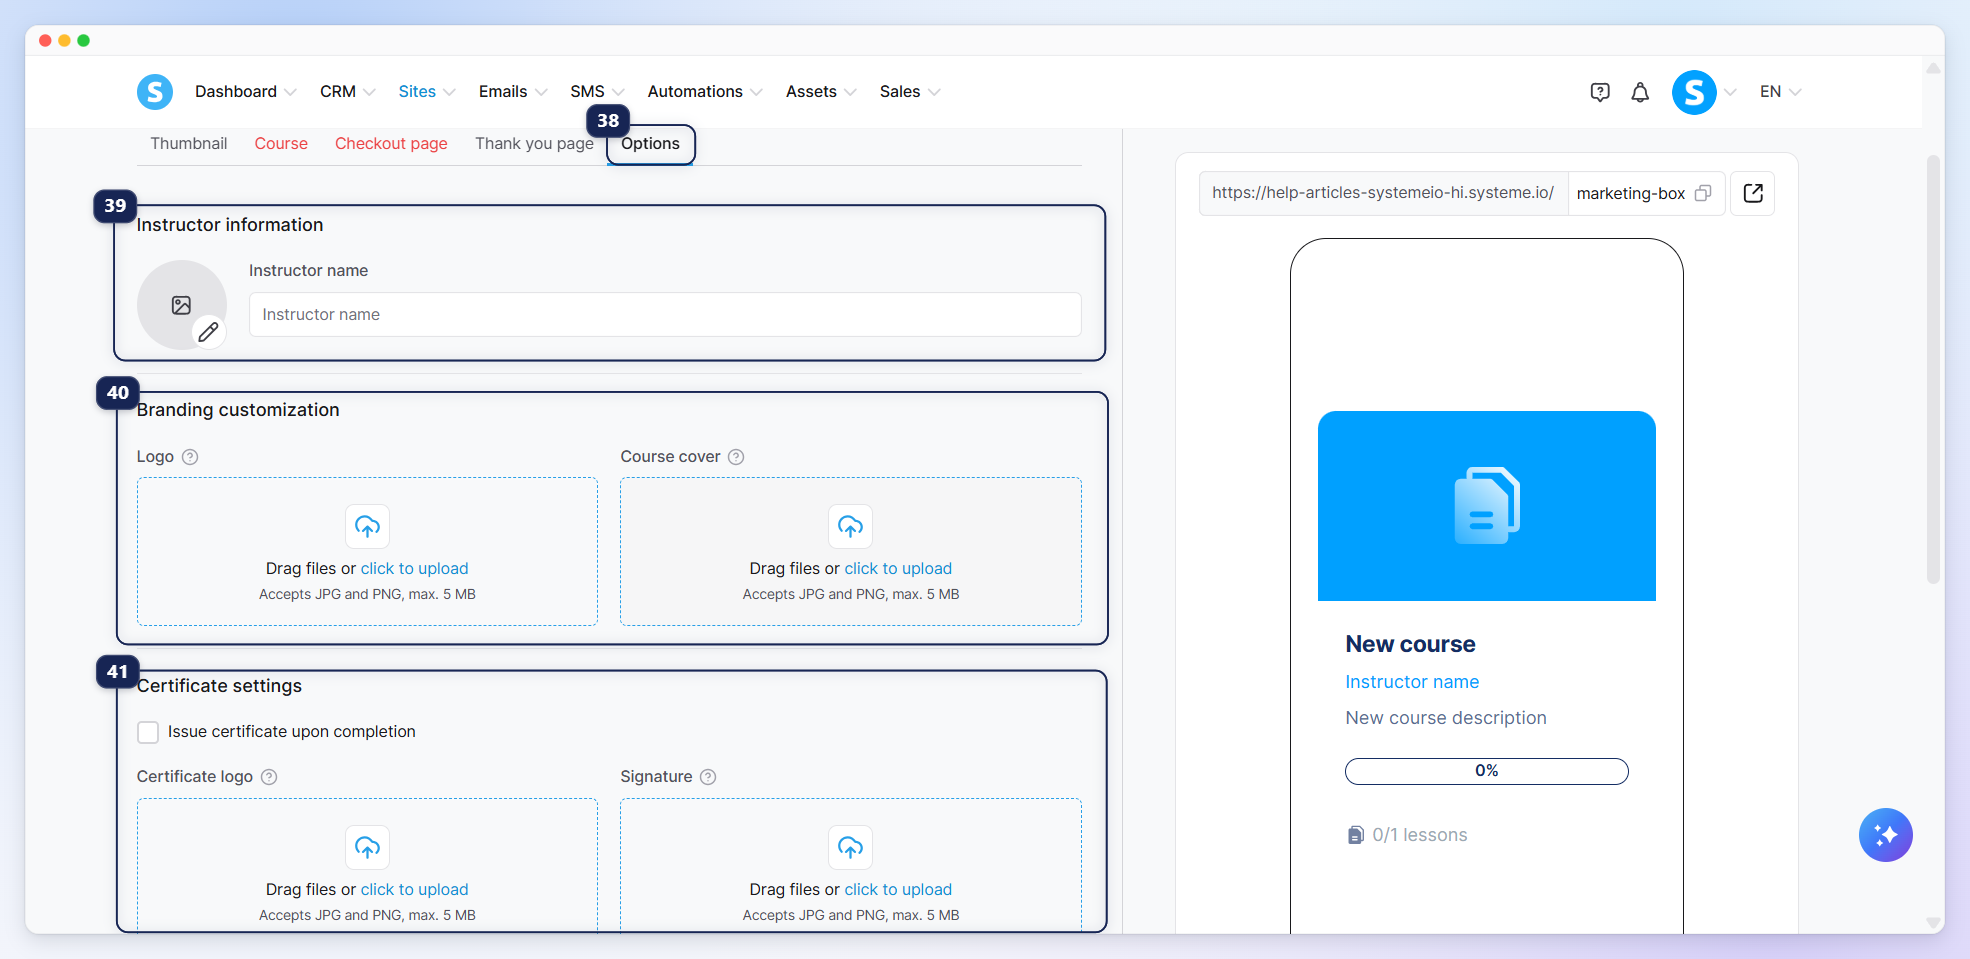
Options (38): Once your offer is published, you can access this section to manage the settings of the course you selected or created.
Add the instructor's information (name and photo) (39), customize the branding by uploading your logo and course cover (40), and configure the certificate settings (41).
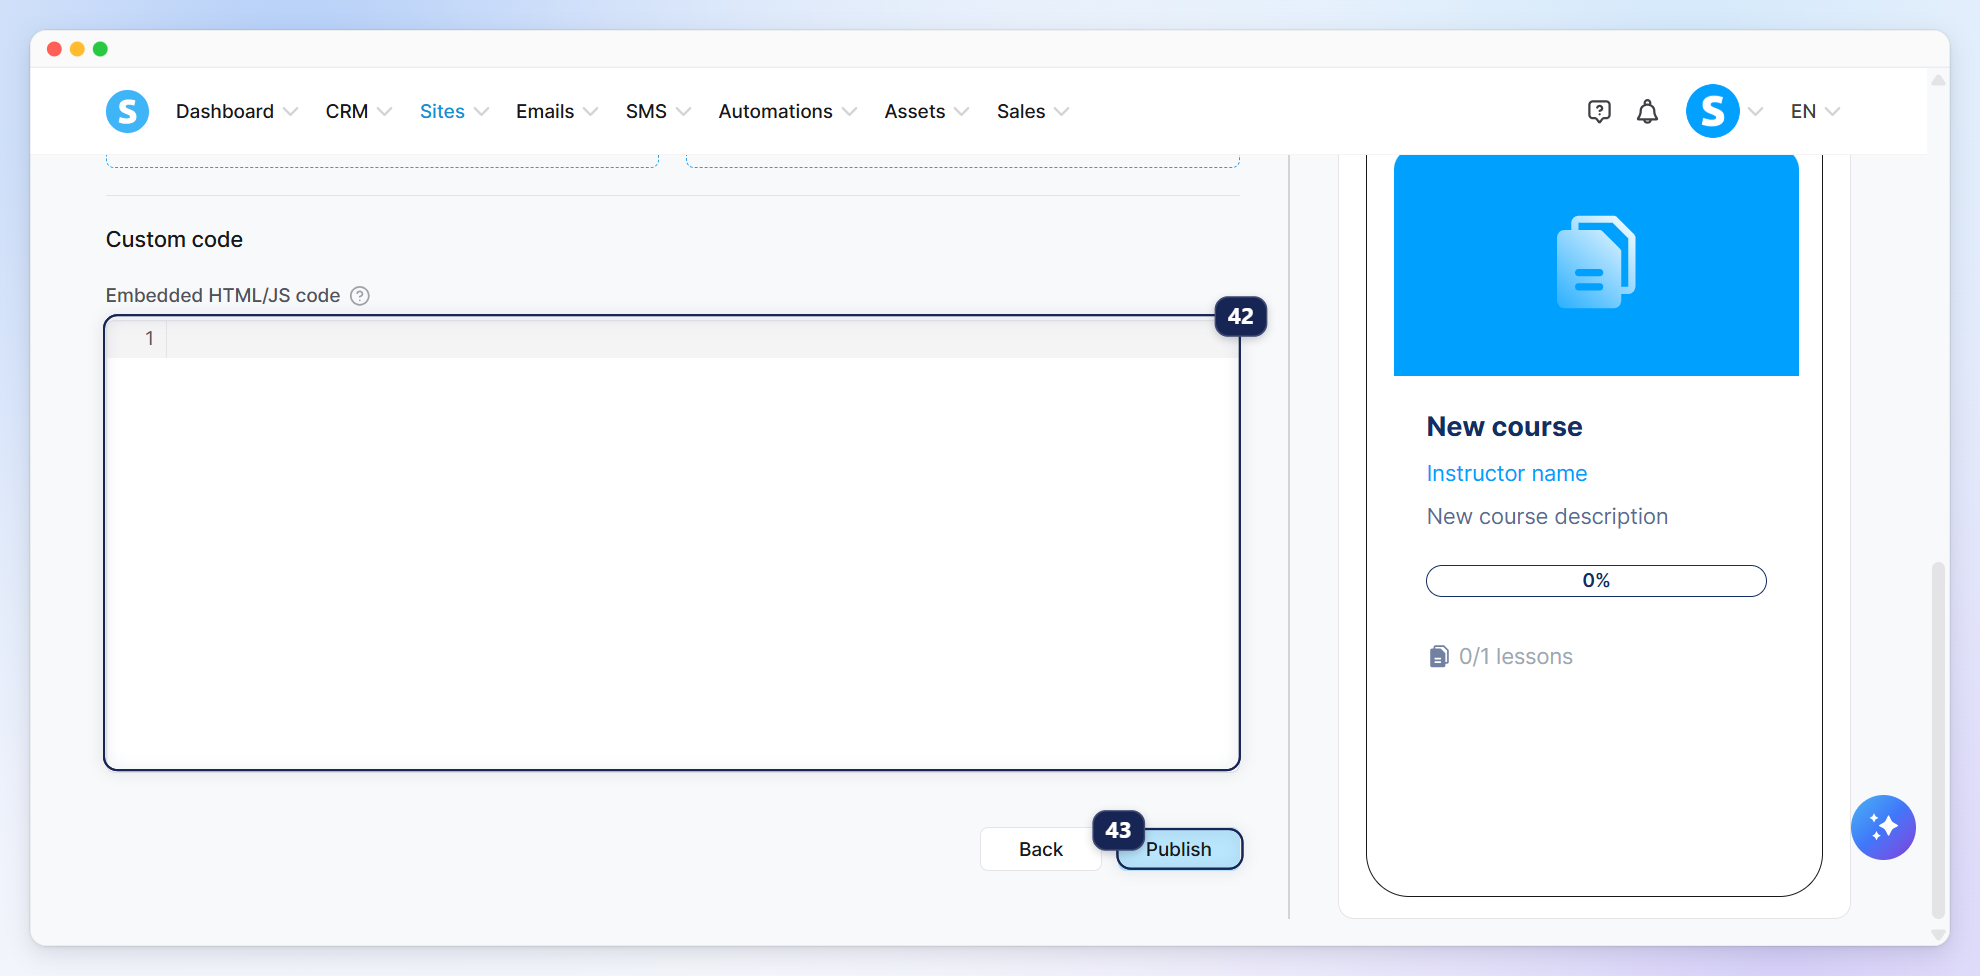
Scroll down to find the Custom code section, where you can add your own HTML or JavaScript code to further customize your course page (42).
Once you've finished configuring your course, click Publish (43) to save it and make it available in your link in bio.
e. Selling a physical product
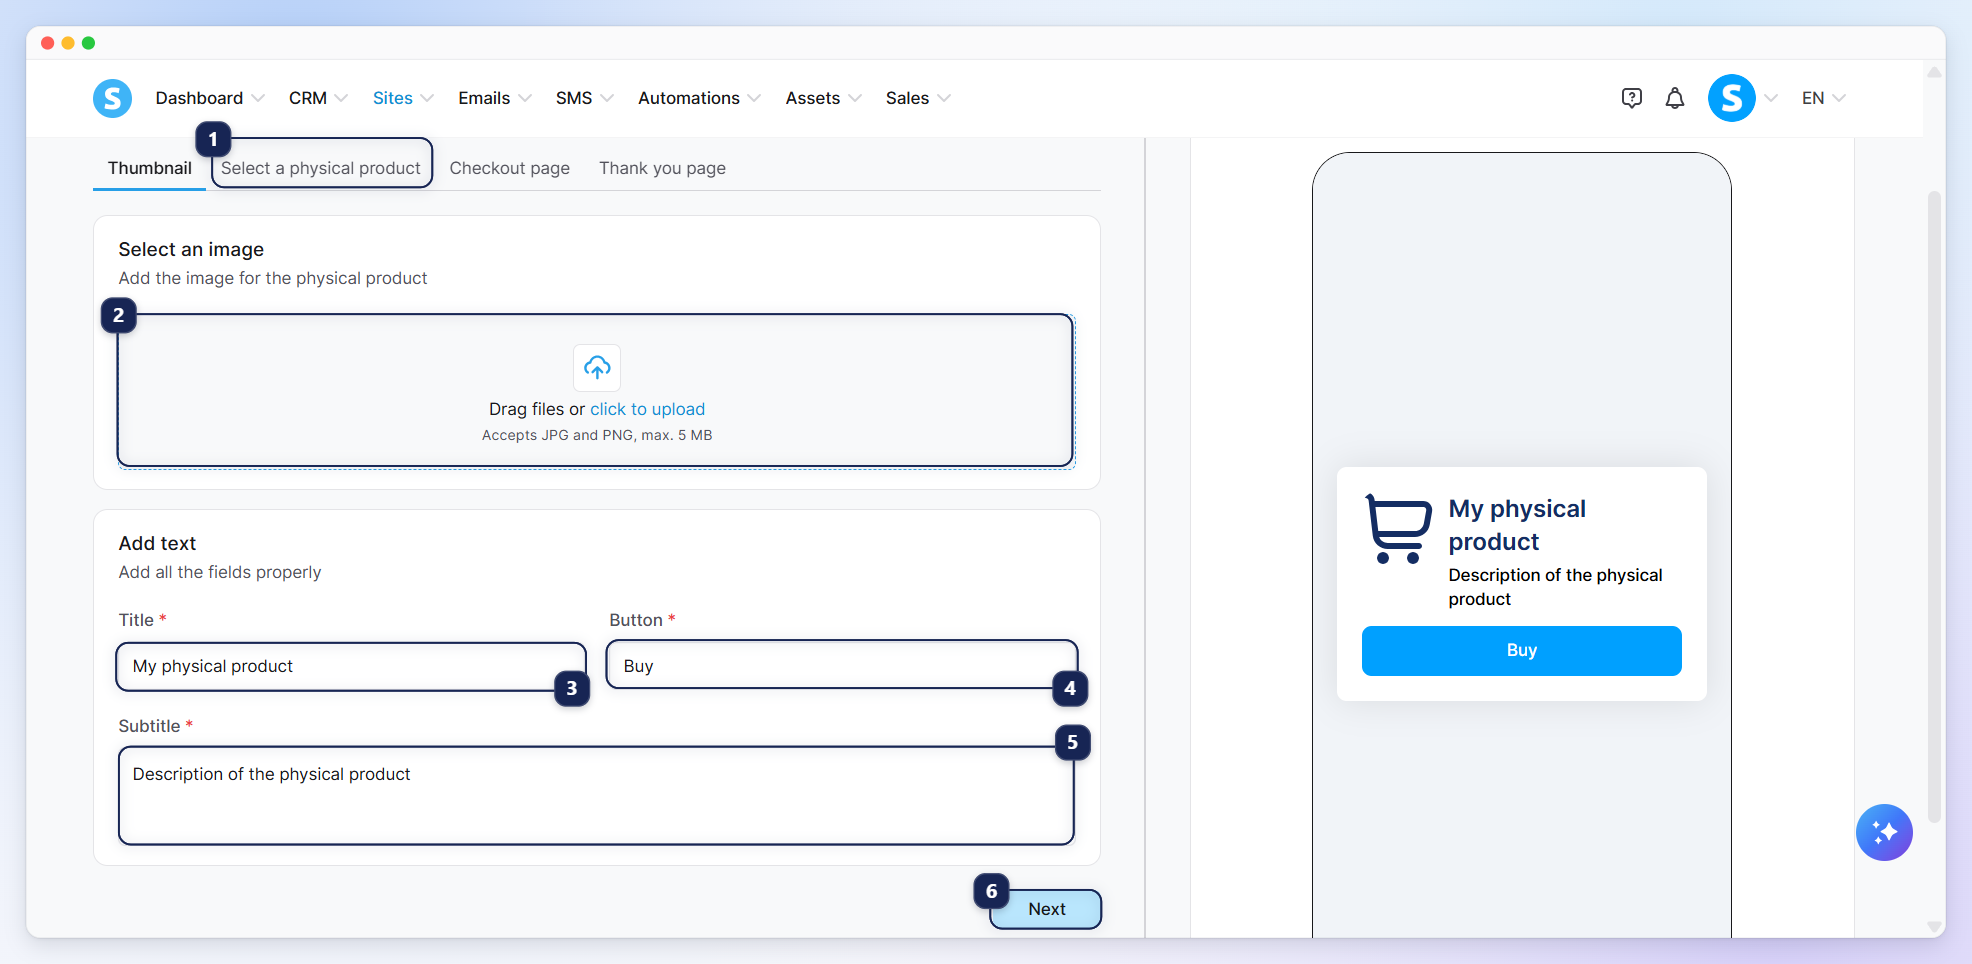
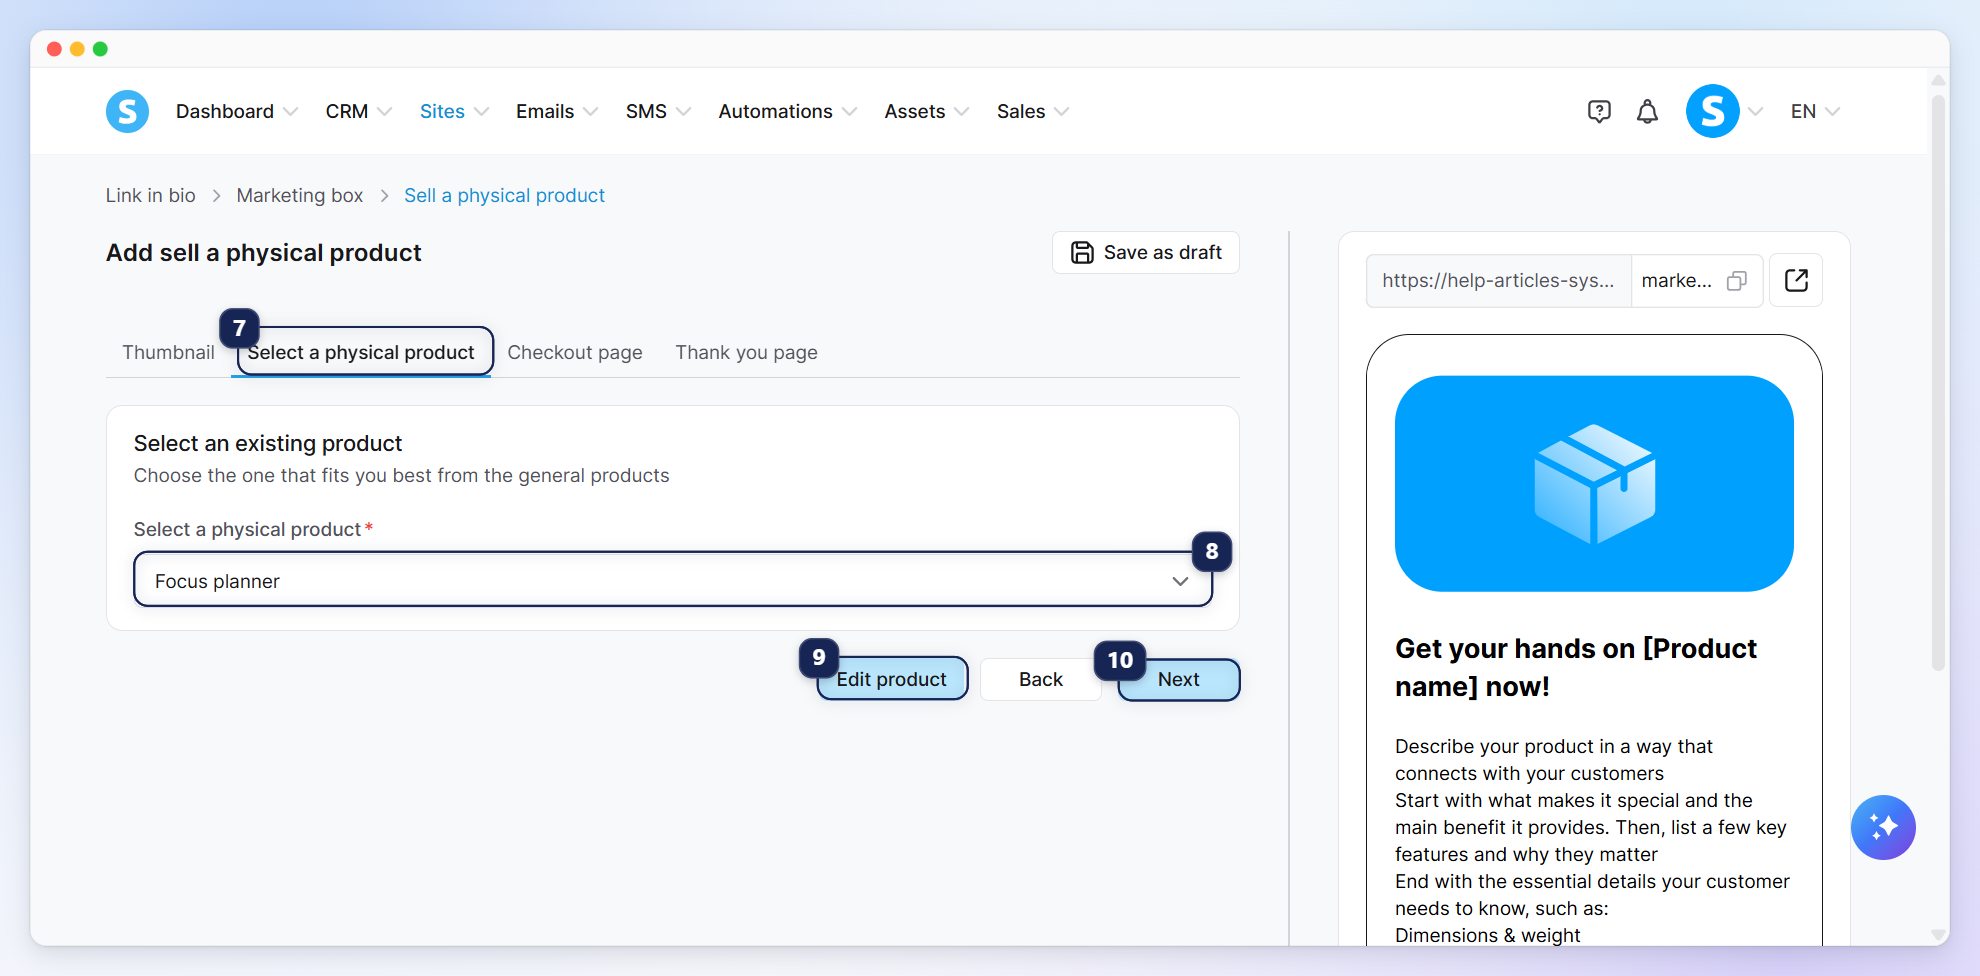
To set up your physical product, four tabs need to be configured:
Thumbnail (1): Select the thumbnail image (2) you want to use, then customize the title (3), button (4), and subtitle (5).
Click Next (6) to save your changes and move to the second tab.
Select a physical product (7): Choose an existing physical product from your systeme.io account (8). To make changes to it, click Edit product (9). Then, click Next (10) to save your changes and move to the next tab.
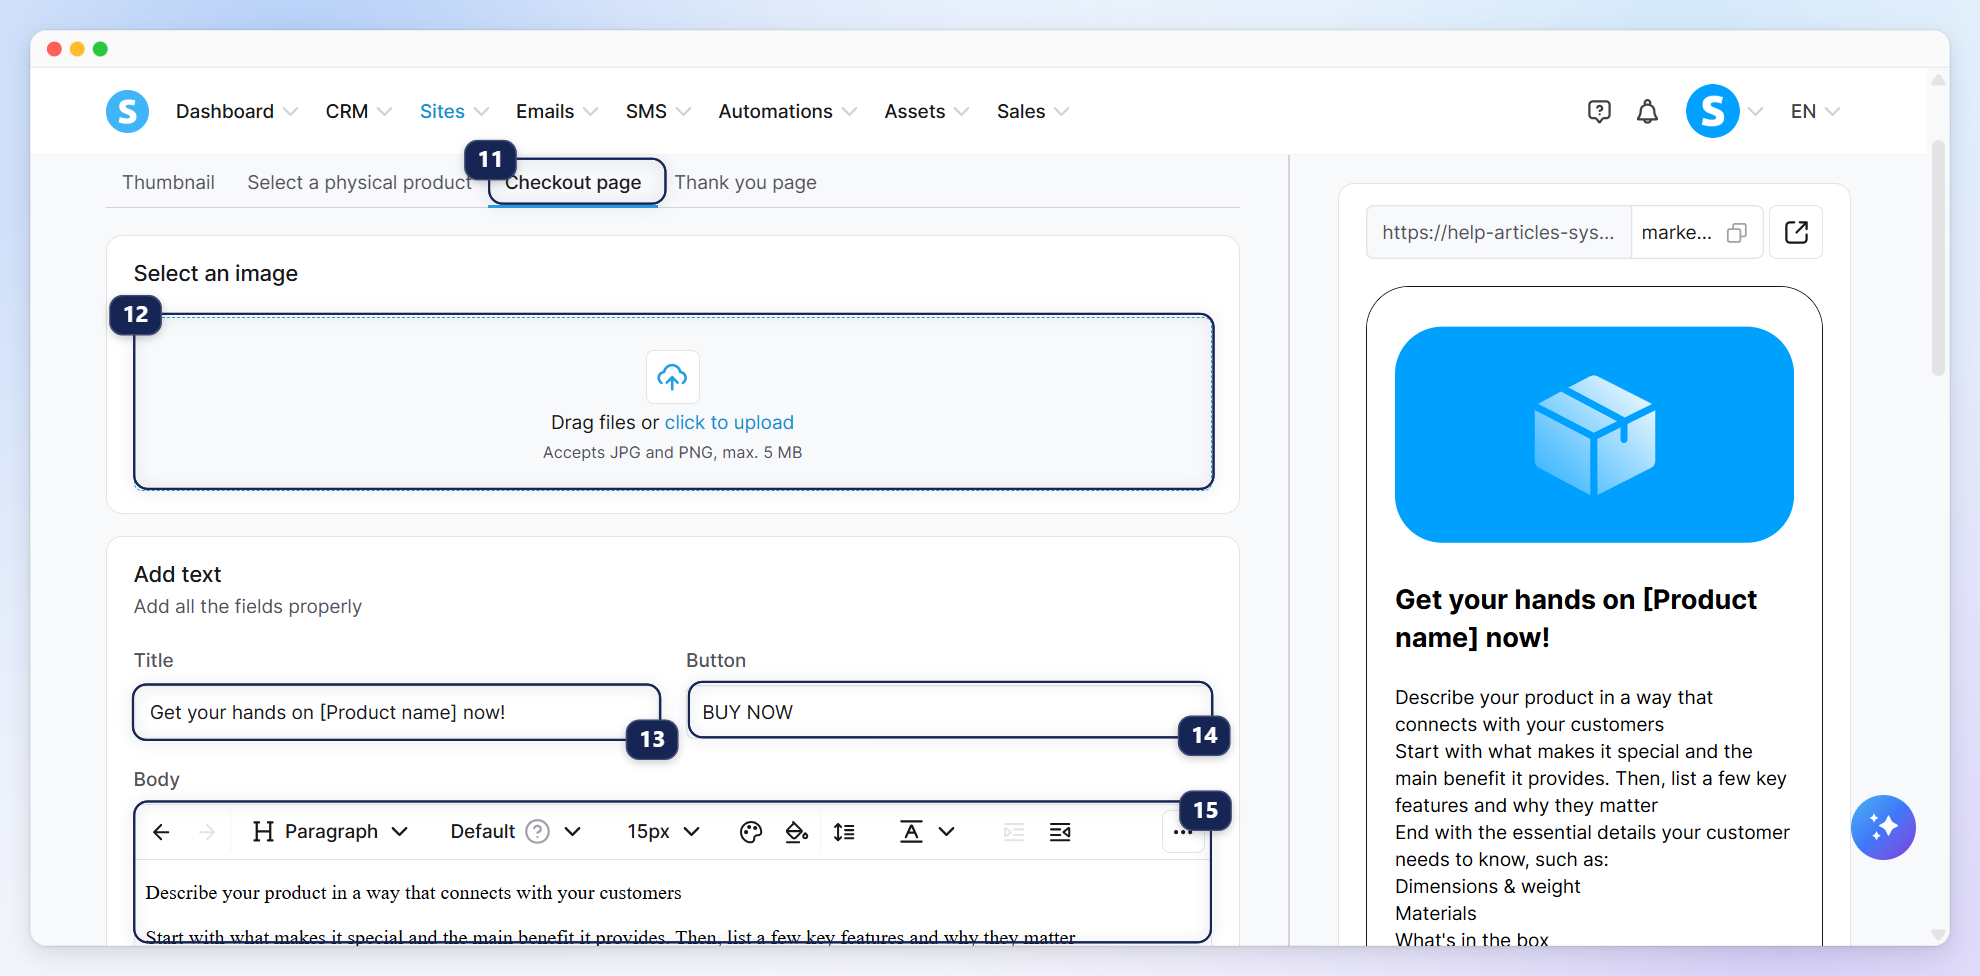
Checkout page (Payment Page) (11): Add a product image (12) and customize the title (13), button (14), and description (body) (15) displayed on the checkout page.
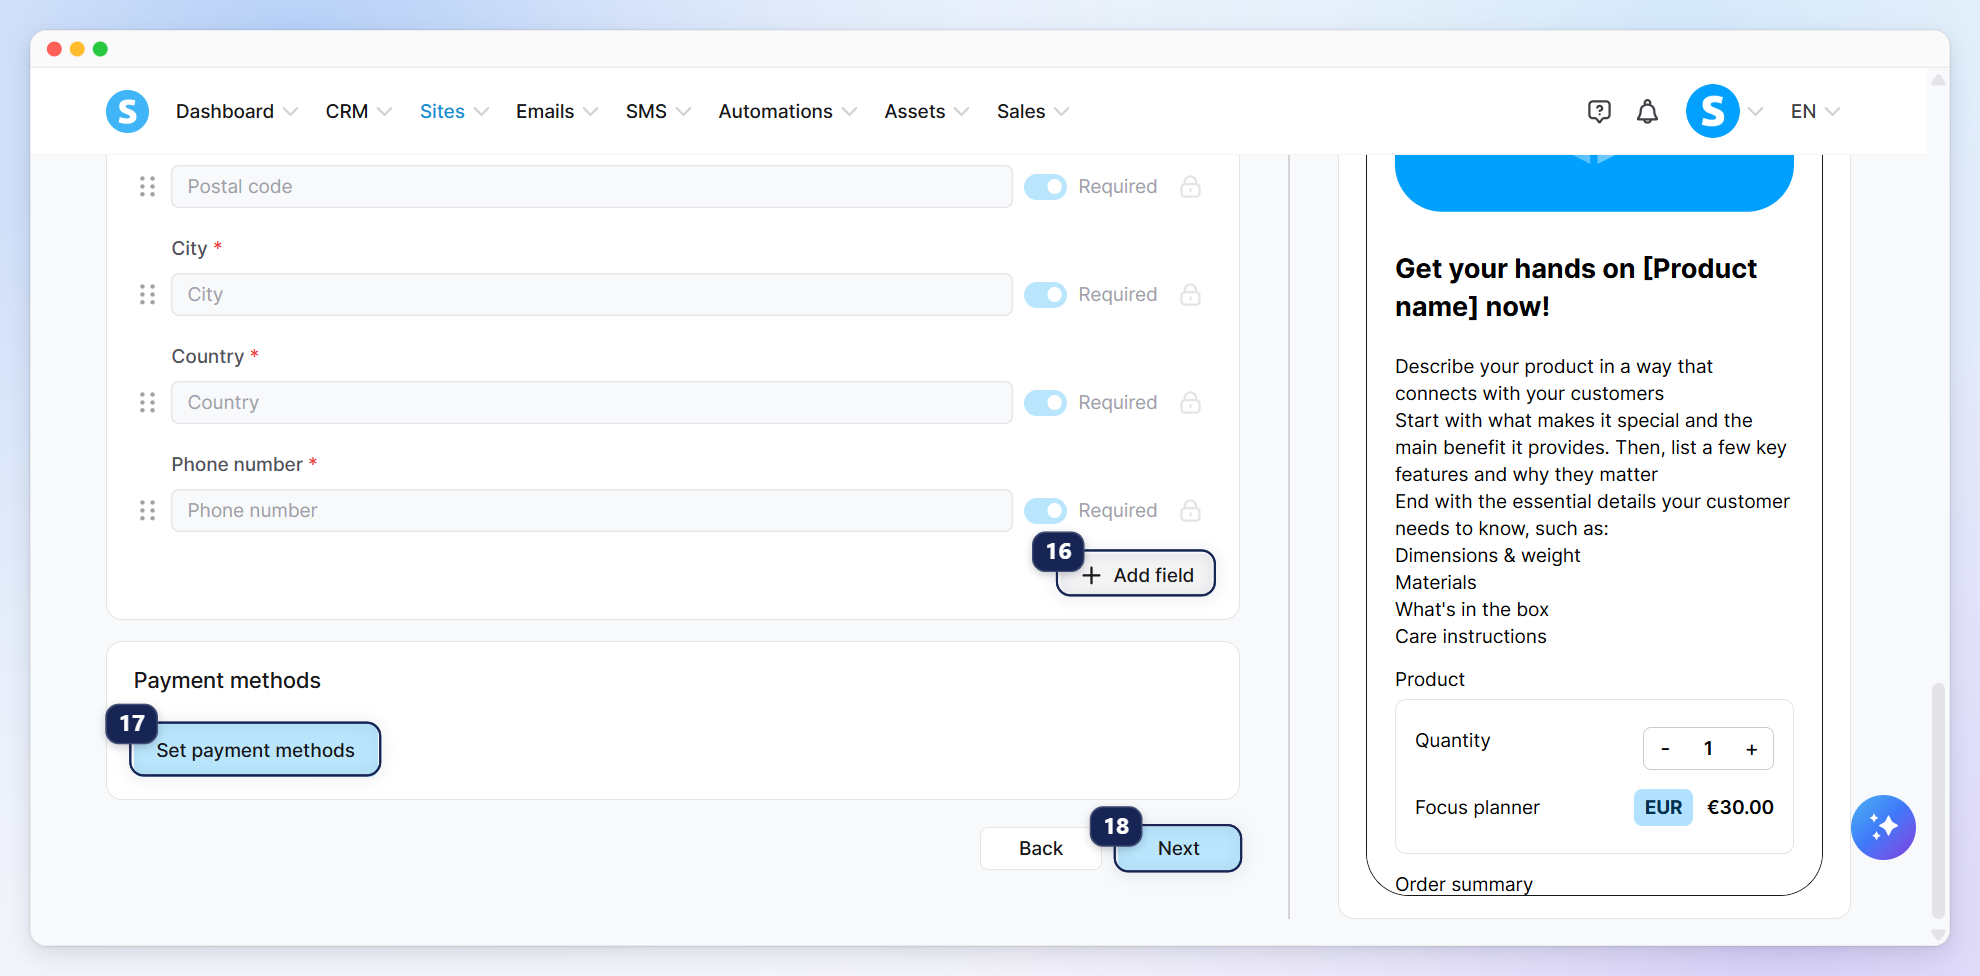
Scroll down to the payment form settings to configure the fields used to collect customer information. For physical products, several fields are included by default, such as email, first name, last name, street address, and postal code. To collect additional information, click Add field (16).
Select your preferred payment methods by clicking Set payment methods (17). Then, click Next (18) to move to the last tab.
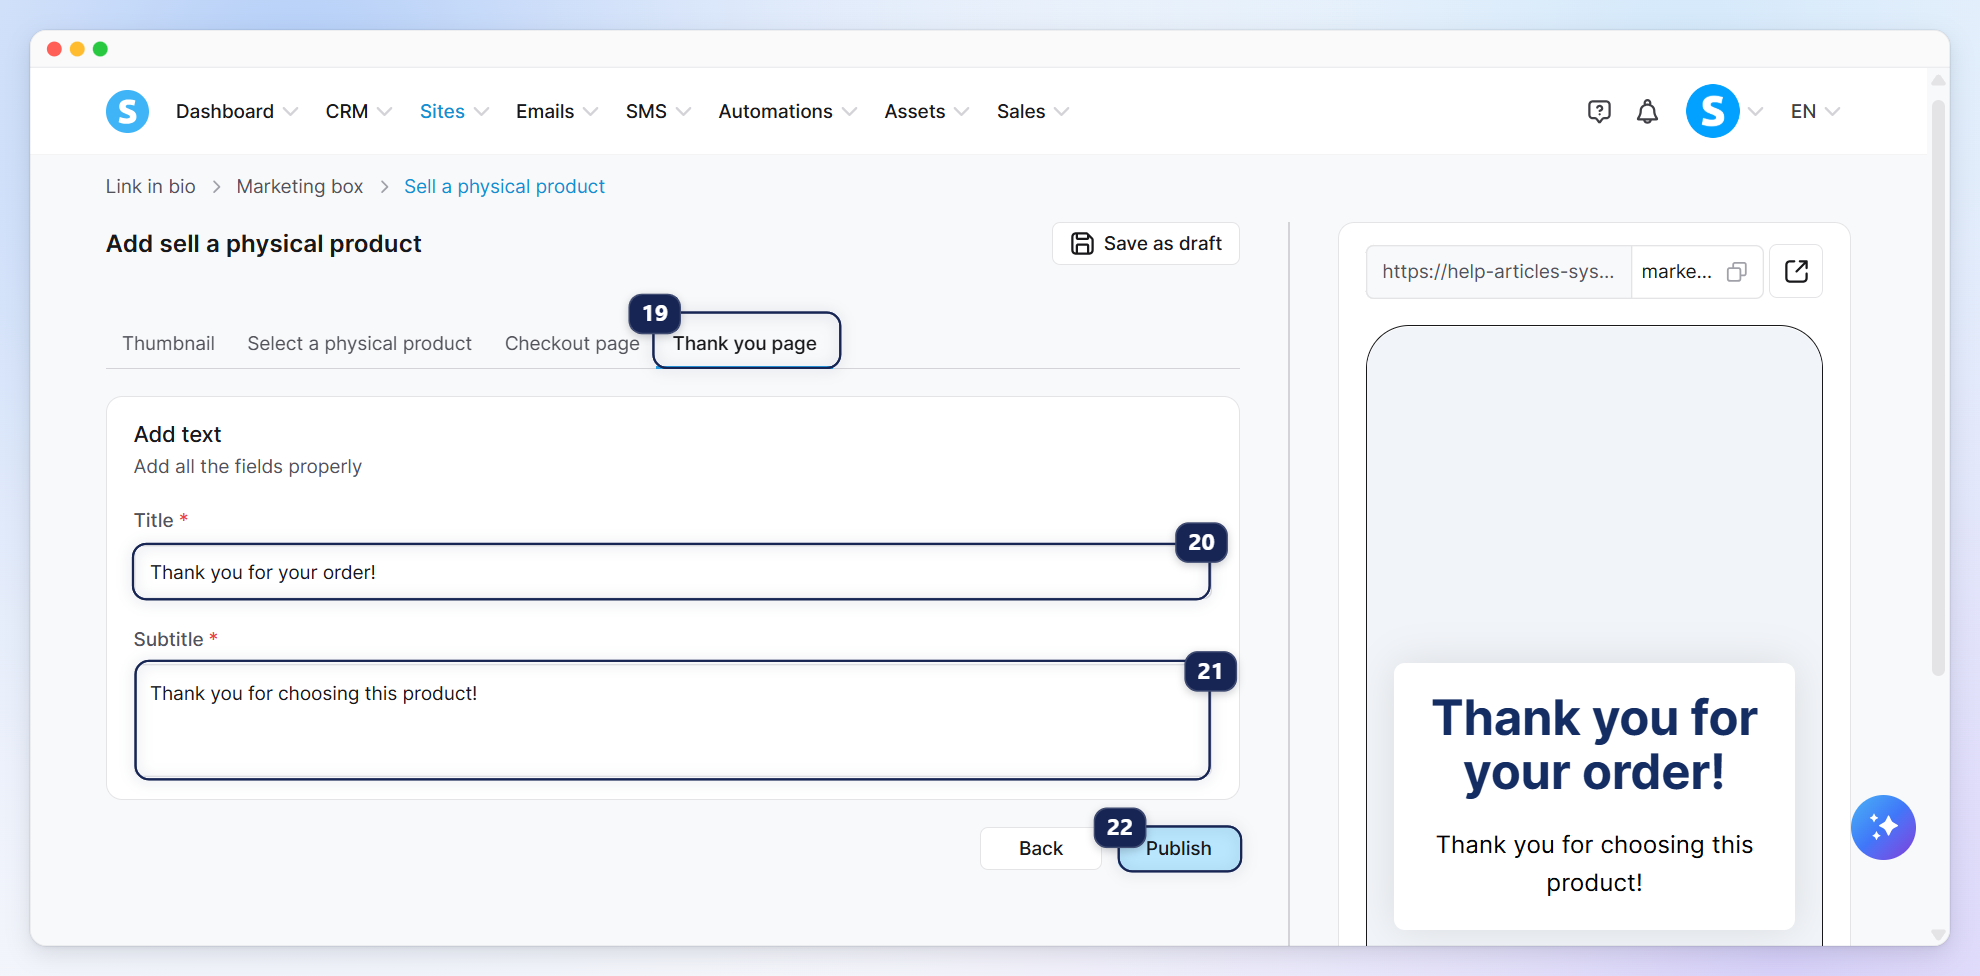
Thank you page (19): Add a title (20) and subtitle (21) to display after the customer completes their purchase.
Finally, click Publish (22) to make your product available in your link in bio.
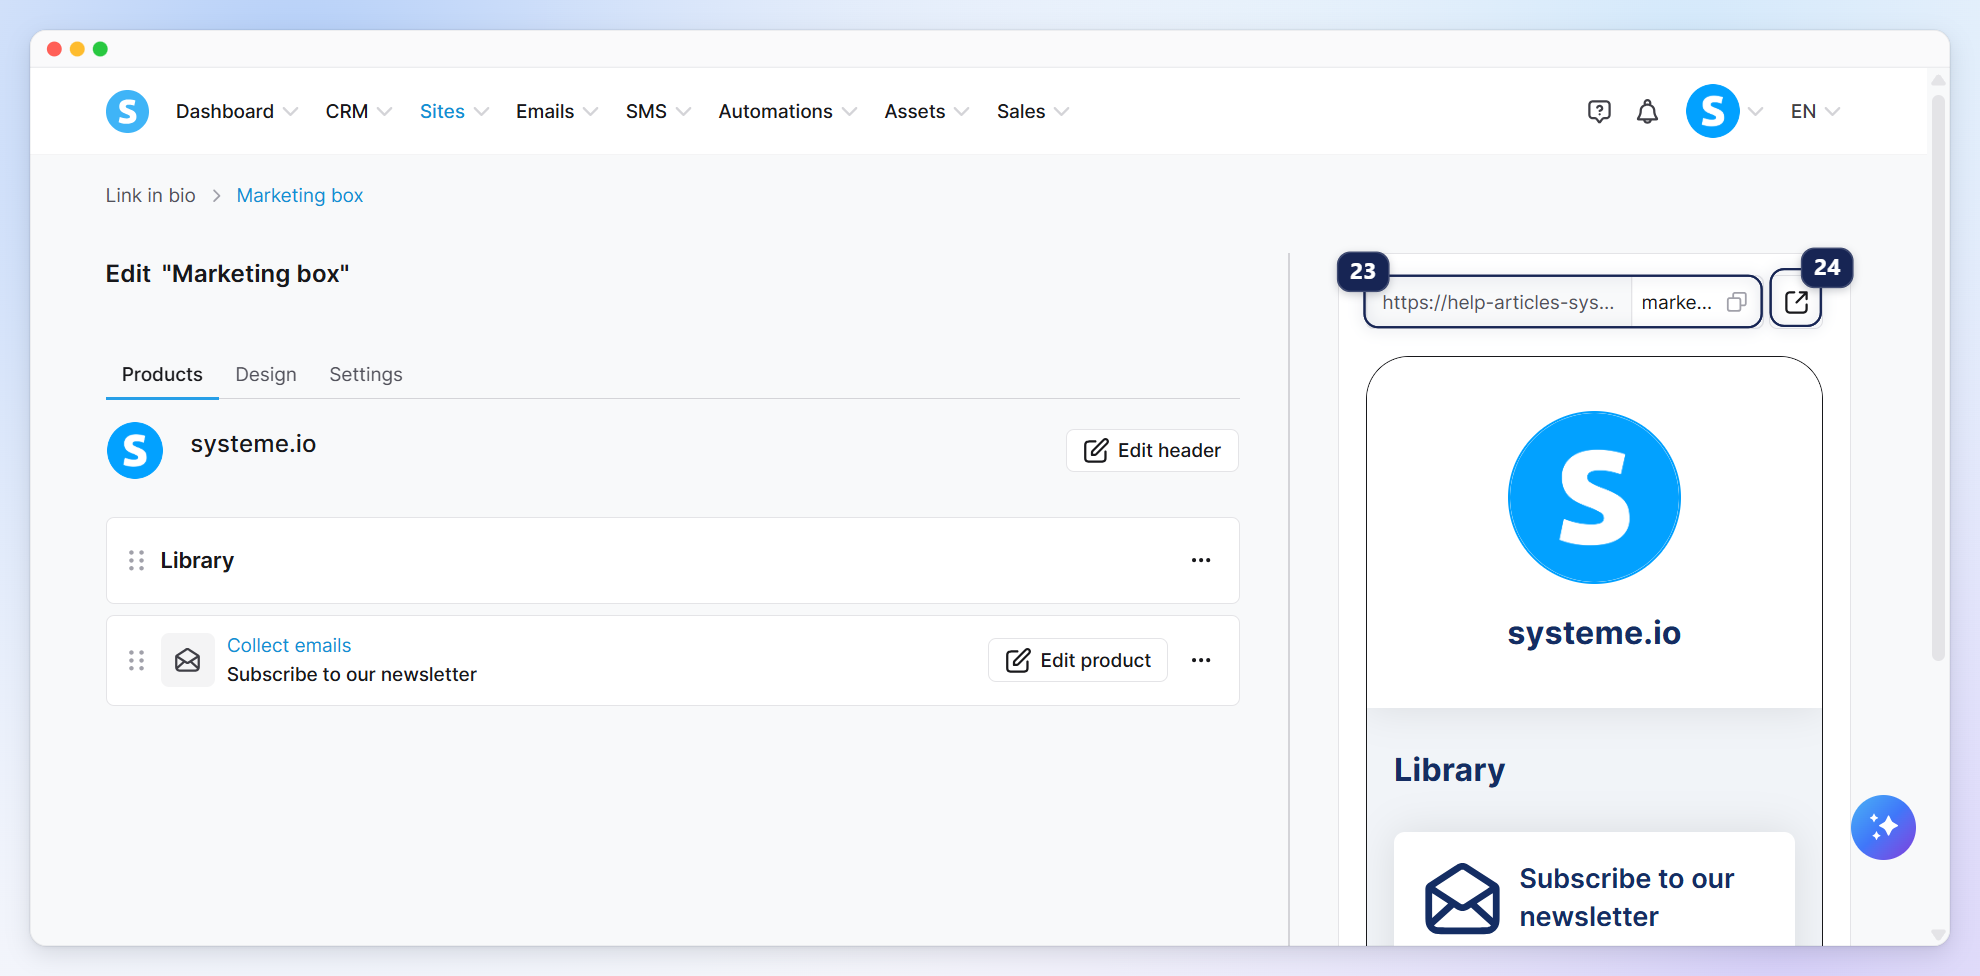
To copy your link in bio URL, click the Copy icon (23). To preview your link in bio, click the View icon (24).
2. Configuring link in bio settings
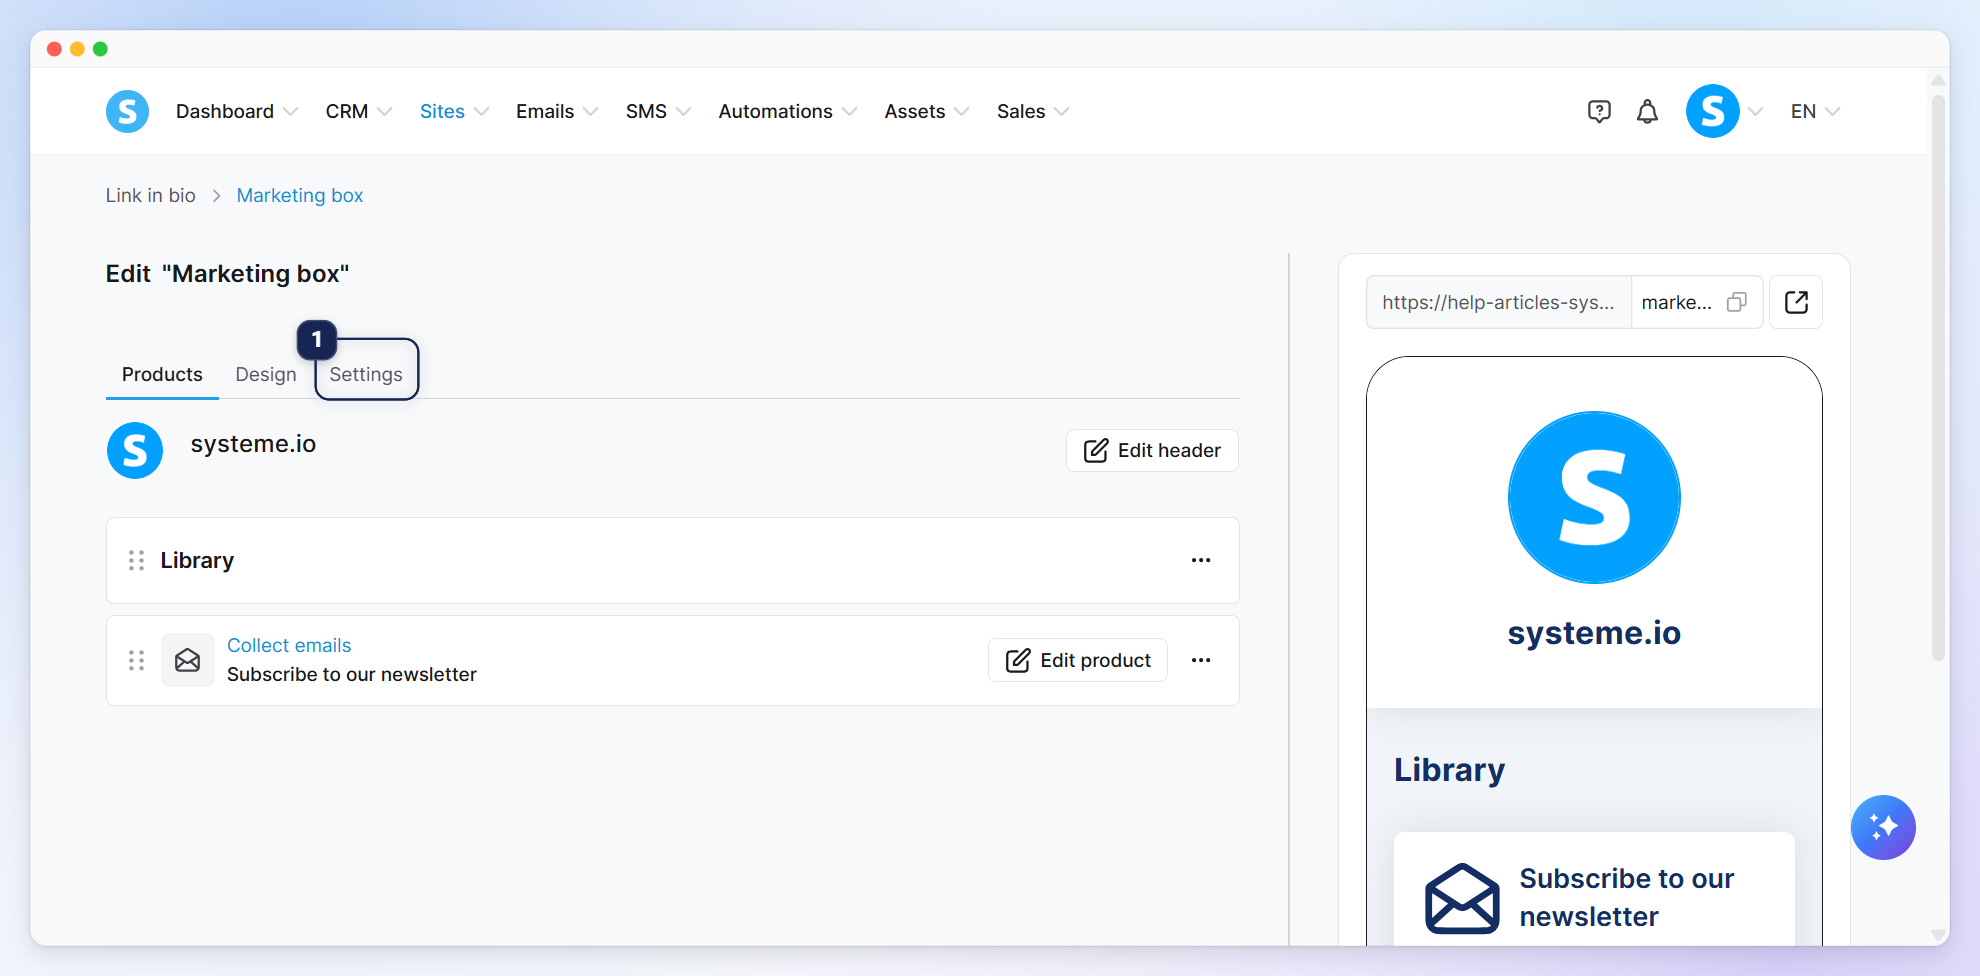
Once you've published your digital products, you can customize your link in bio settings by clicking Settings (1).
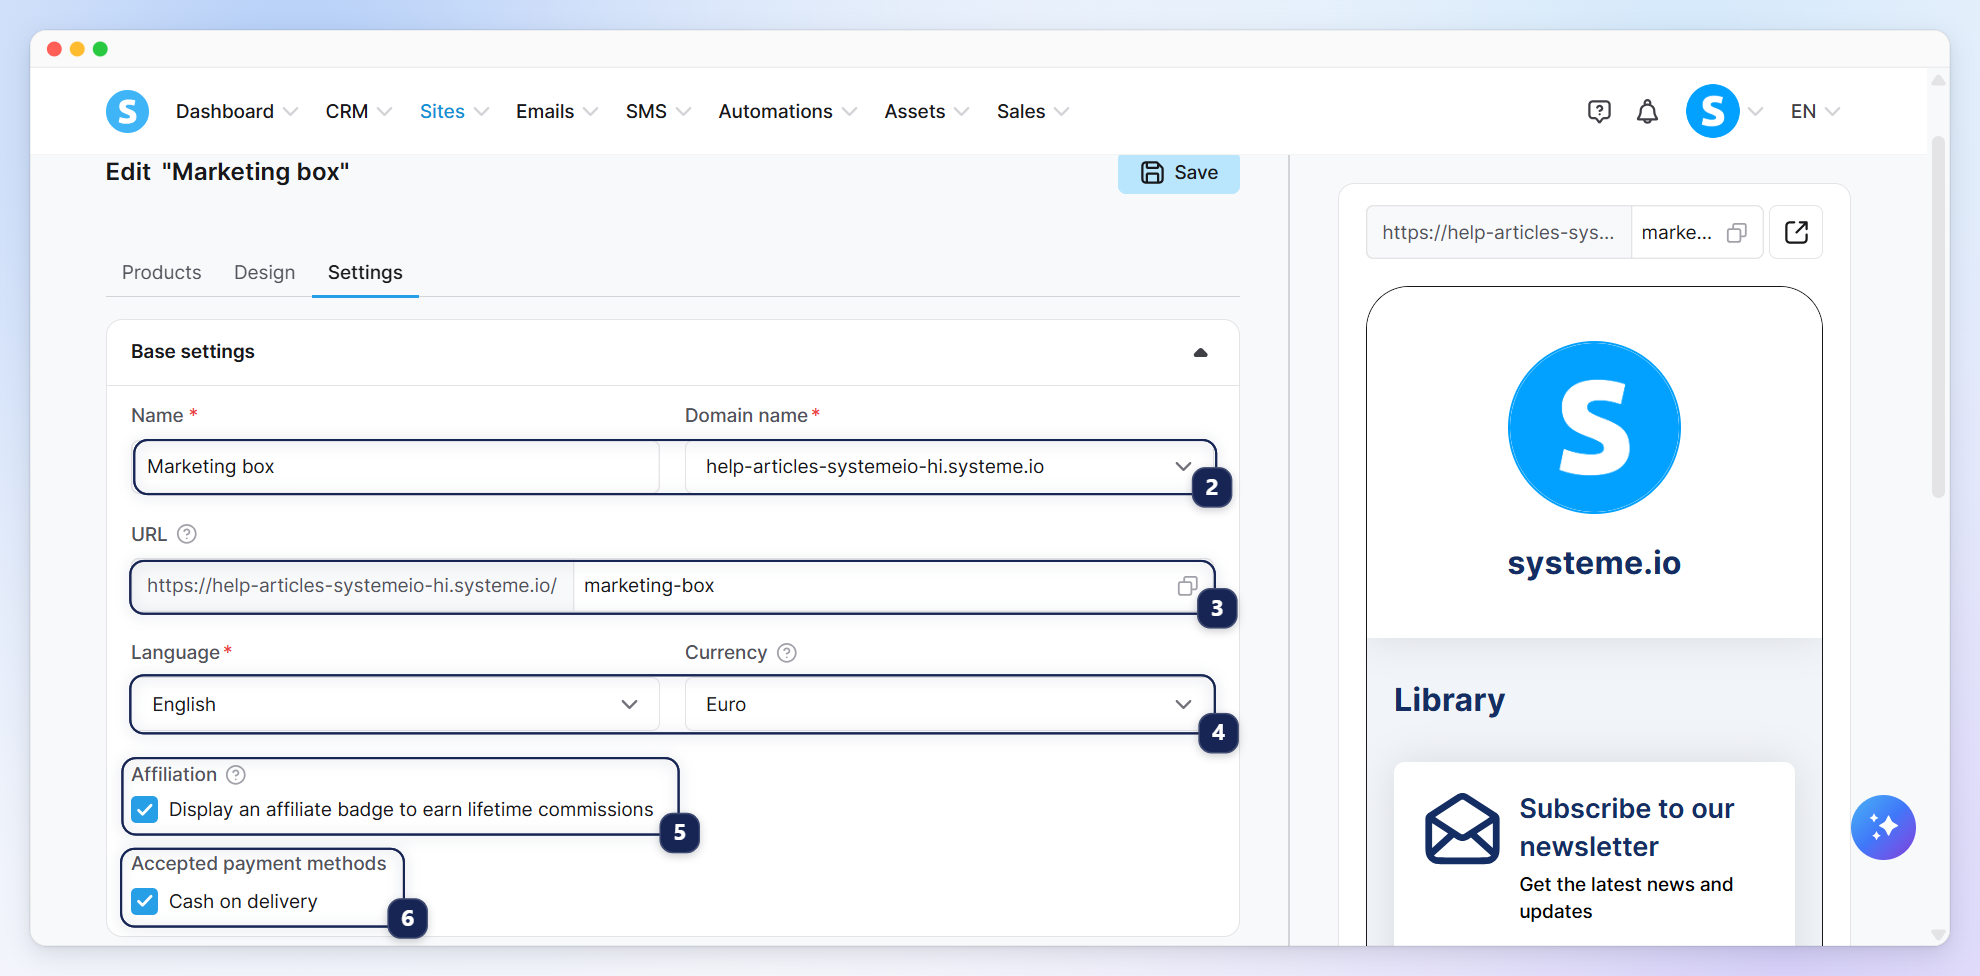
You can customize the following settings:
Name and domain name of your link in bio (2).
URL path (3).
Language and currency (4).
Affiliate option to display an affiliate badge and earn lifetime commissions (5).
Accepted payment methods, such as cash on delivery (6).
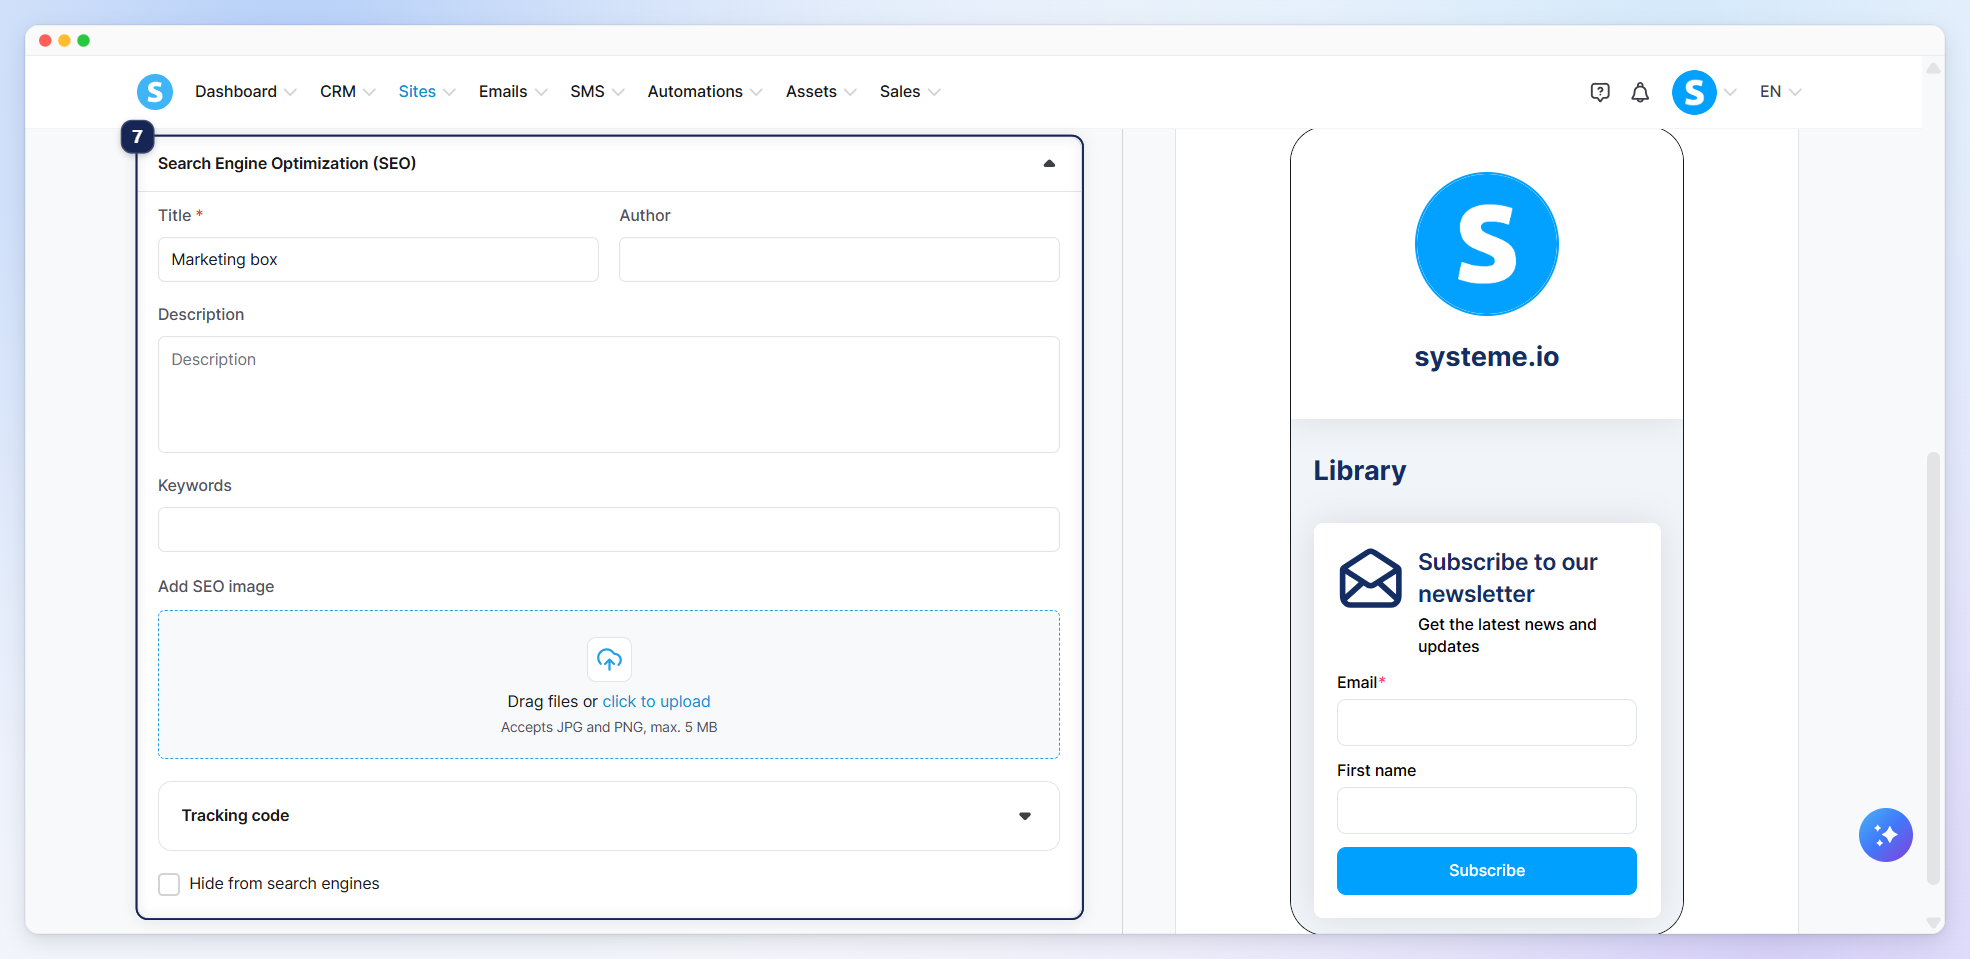
Scroll down the settings page to find the SEO section (7), where you can add a title, description, keywords, specify the author of your link in bio, select a social media image, add tracking codes, and choose whether to hide your link in bio from search engines.
Finally, click Save at the top of the page to apply your changes.
3. Managing your link in bio
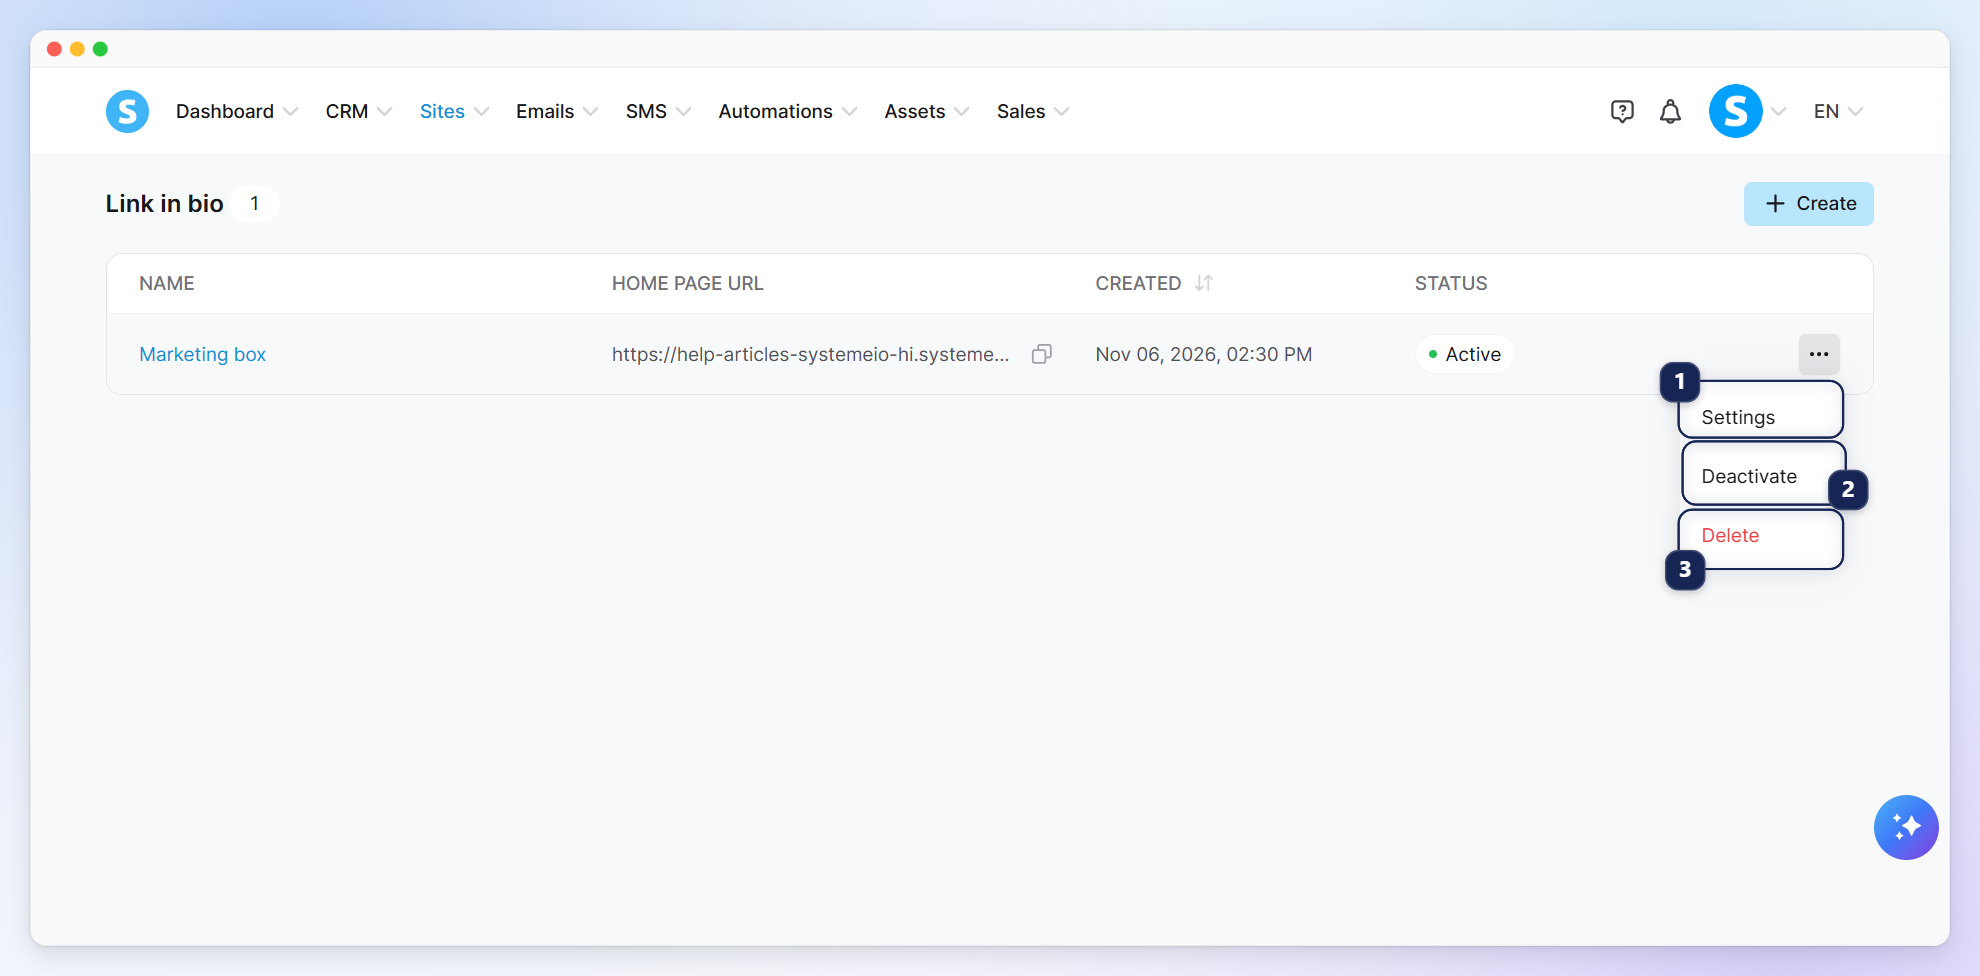
Click the three-dot menu next to your link in bio to access the following options:
Settings (1): To edit your link in bio settings.
Deactivate (2): To make your link in bio invisible.
Delete (3): To permanently delete your link in bio.
Note: It is not yet possible to modify the URL path of products listed on a link in bio.