How to connect your IONOS subdomain to systeme.io
What you will need:
- A systeme.io account
- A subdomain purchased from IONOS
Important: Please follow the first step of this article before proceeding with this guide.
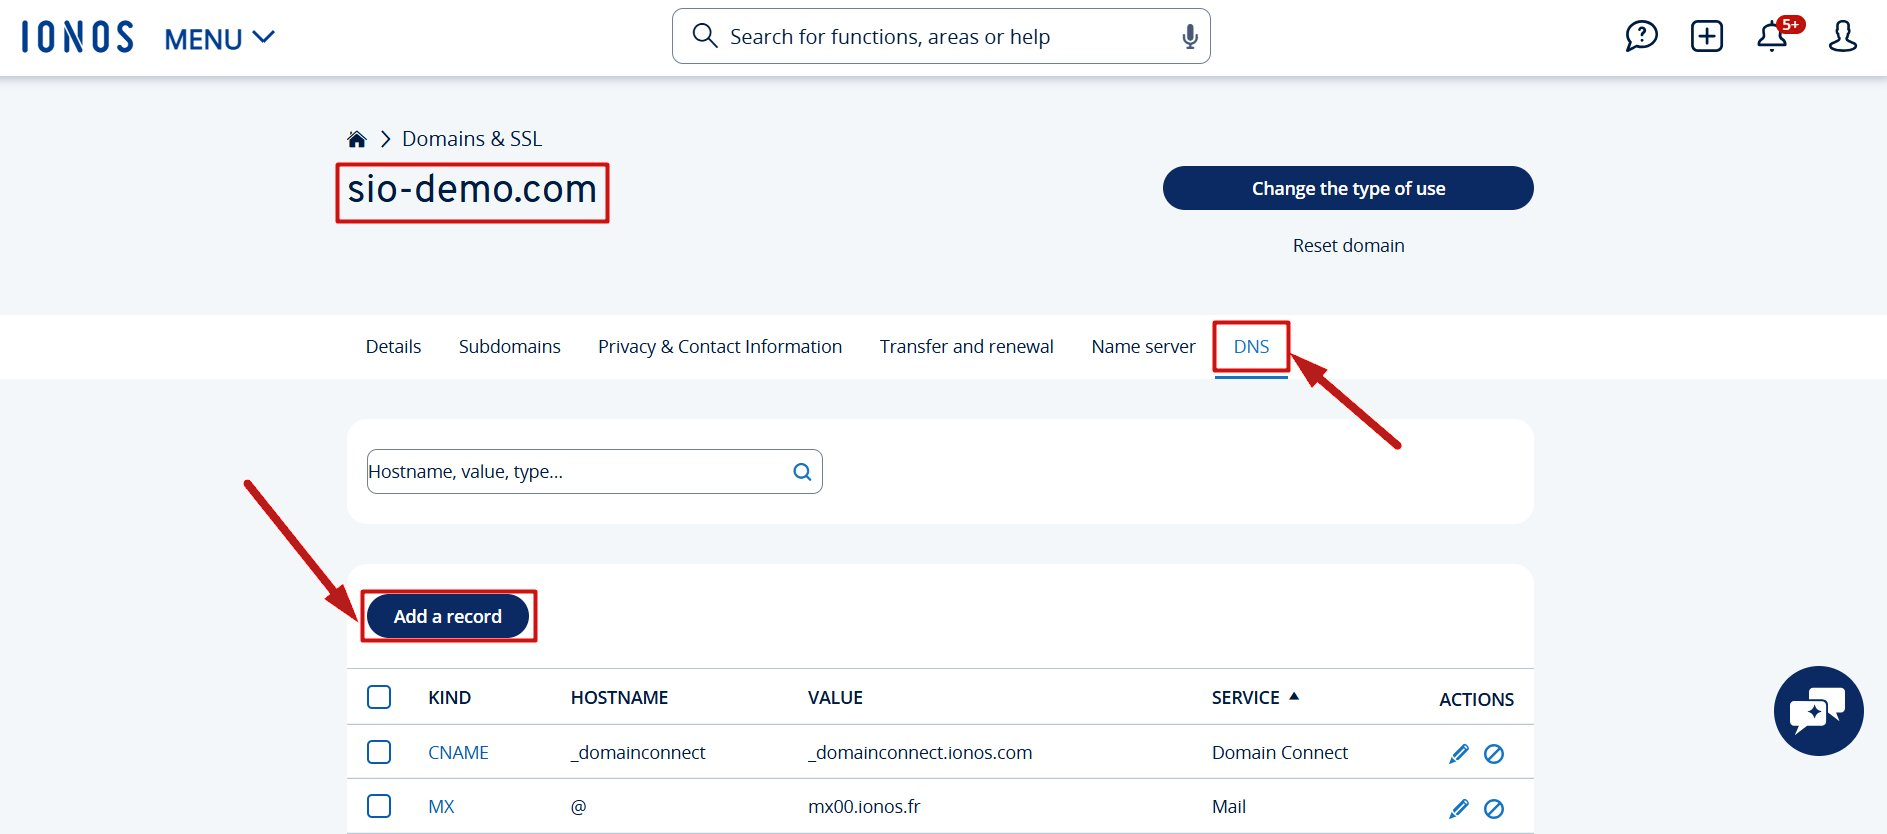
After adding the subdomain in systeme.io, you must access the DNS settings in your IONOS account.
Note: Each domain added to systeme.io has unique CNAME records that must be added to your host's DNS settings.
Example:
In this example, we will connect the subdomain example.sio-demo.com to systeme.io
First, hover over your profile picture, click Settings, then go to Custom Domains and add your custom domain.

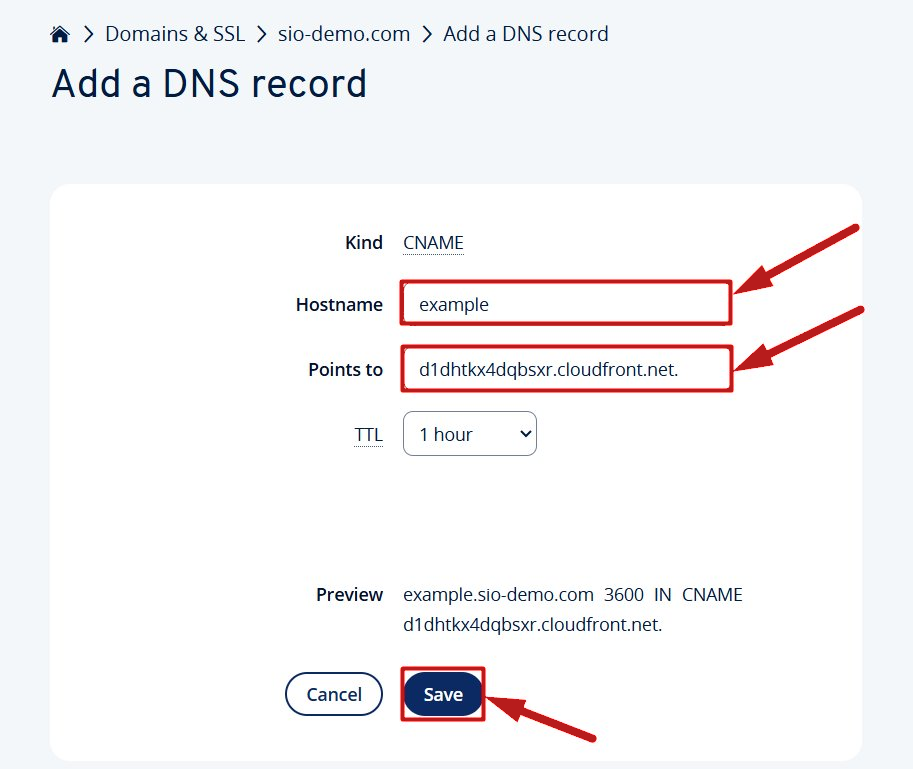
First CNAME:
- Go to the DNS zone for your domain name, then click Add a record.
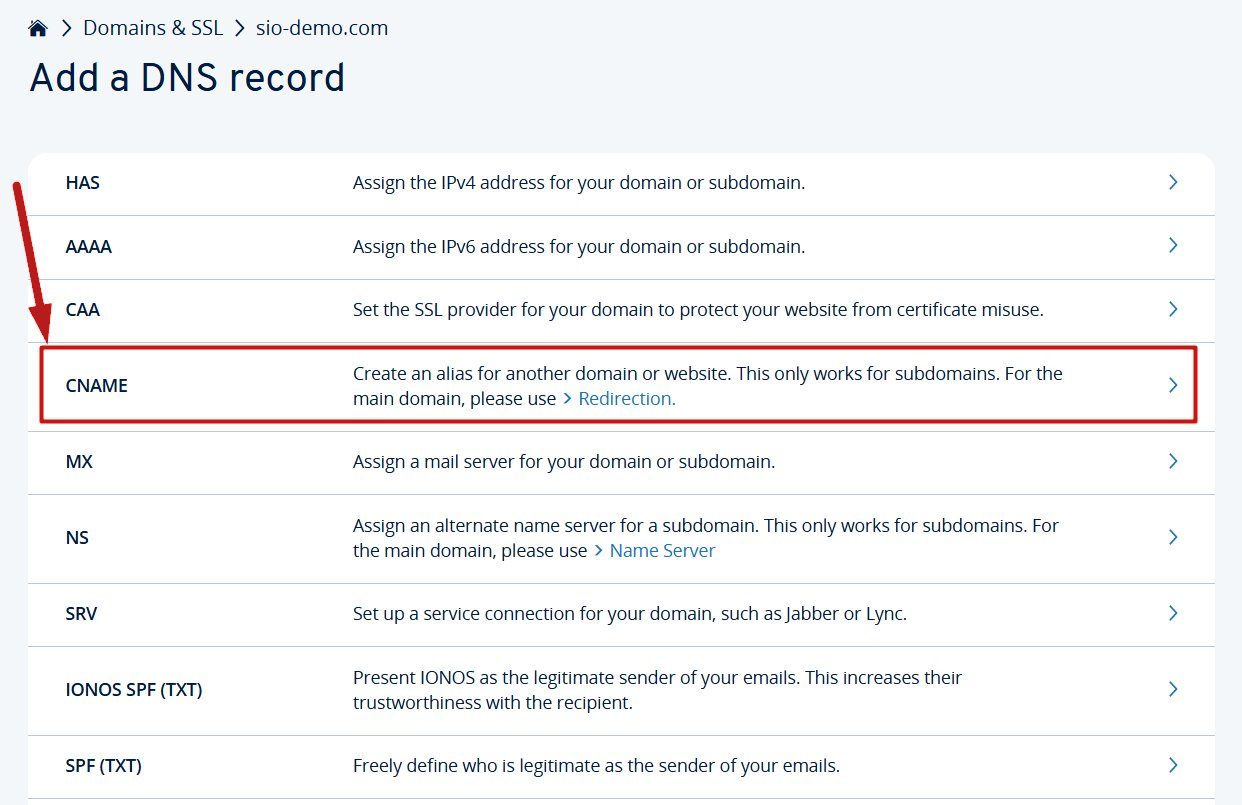
- Select the CNAME type.
- Enter example in the Hostname field, then enter d1dhtkx4dqbsxr.cloudfront.net. in the Points to field.
- Finally, click Save.
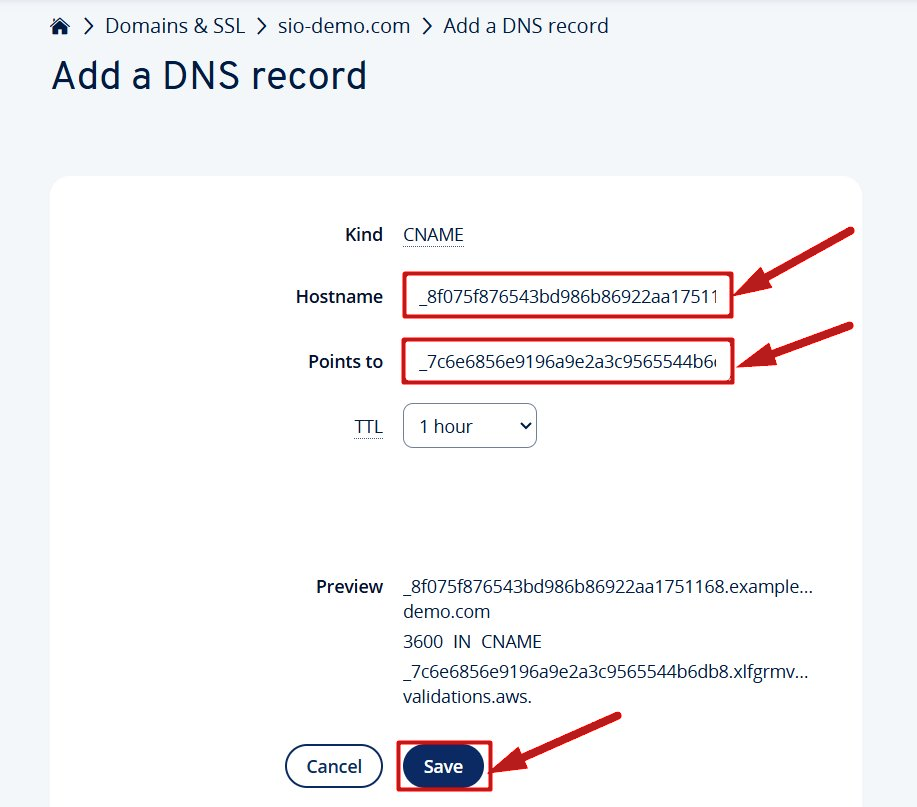
Second CNAME :
- Go to the DNS records for your domain.
- Click Add a record and select CNAME as the type.
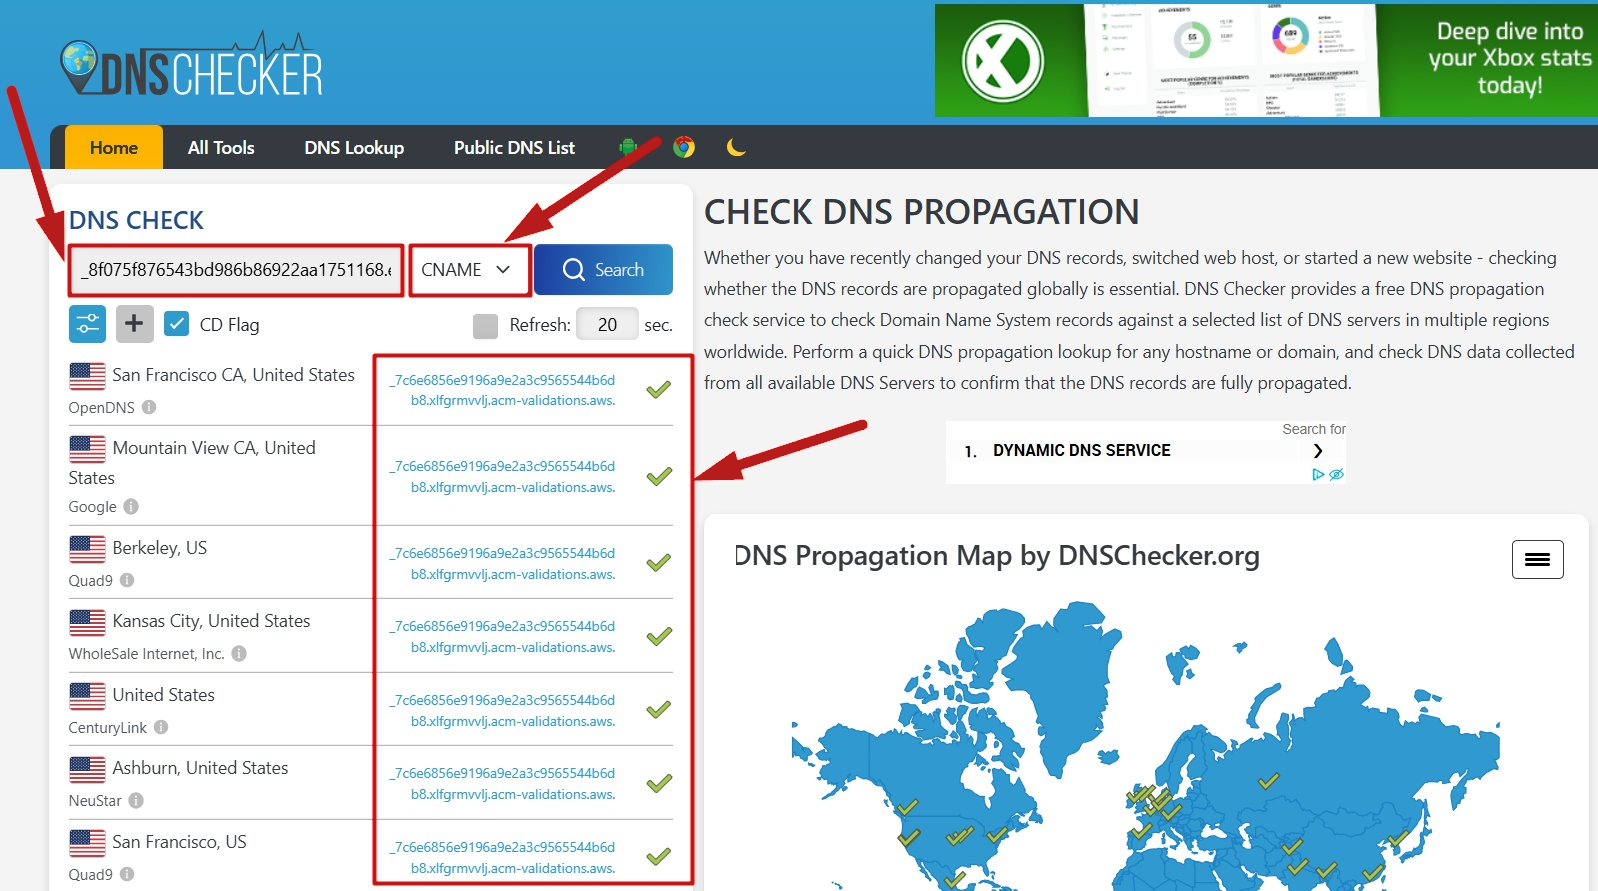
- In the Hostname field, enter the text that appears before your domain name (in our example,_8f075f876543bd986b86922aa1751168.example).
- Then, enter _7c6e6856e9196a9e2a3c9565544b6db8.xlfgrmvvlj.acm-validations.aws. in the Points to field.
- Finally, click Save.
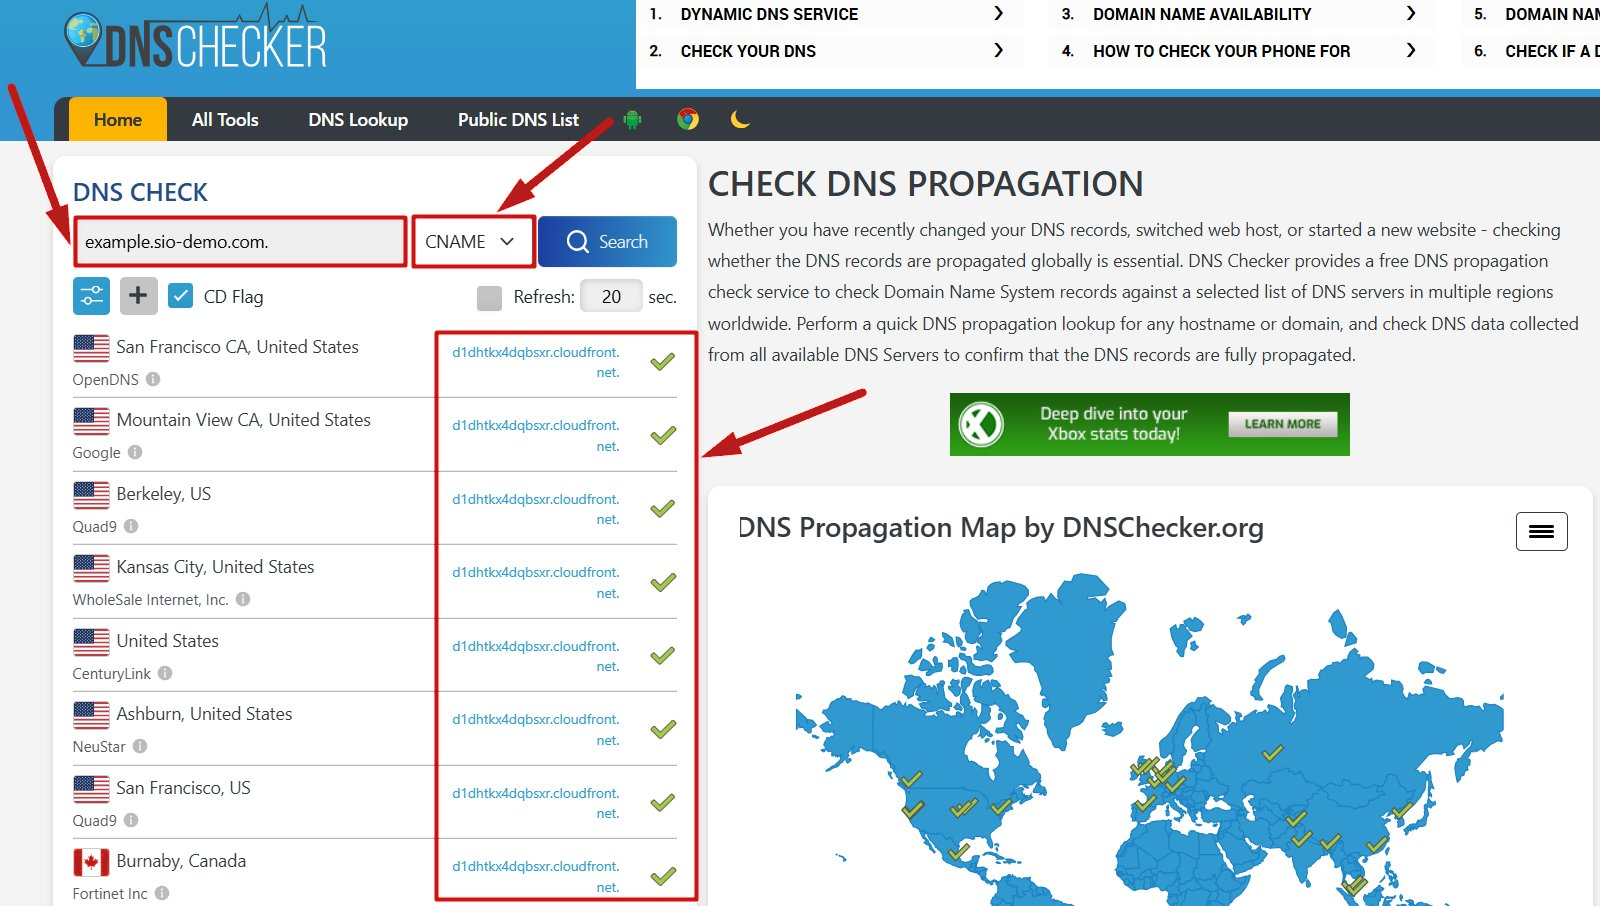
Once the two CNAMEs are correctly added to your host, you can check their status using the following tool: https://dnschecker.org
Note: To check your records, you must enter the full CNAME name (including your domain name) into the search bar.
CNAME verification 01:
CNAME verification 02:
Notes:
- It can take up to 24–48 hours for DNS records to propagate completely.
- Sometimes, your host may not be able to register a CNAME record due to a conflict with other existing DNS records. This usually happens when adding the first CNAME. If this occurs, contact your host support to determine if those existing records are necessary or if they can be safely deleted.