How to connect your Namecheap domain to systeme.io
On this page, you will learn how to add DNS records to Namecheap to connect your main domain name. This will allow you to add your complete website (www.domain.com) to systeme.io to use it as a custom domain in your sales funnels and blogs, which helps strengthen your brand.
What you will need:
- A systeme.io account
- A domain name purchased from Namecheap
After adding the root domain in systeme.io, access the DNS settings in your Namecheap account.
Note: Each domain added to systeme.io has its own CNAME records to integrate into the hosting site.
Example:
In this example, we will connect the domain www.sio-team.org to systeme.io
First, hover over your profile picture, click Settings, then go to Custom Domains and add your custom domain.

First CNAME:
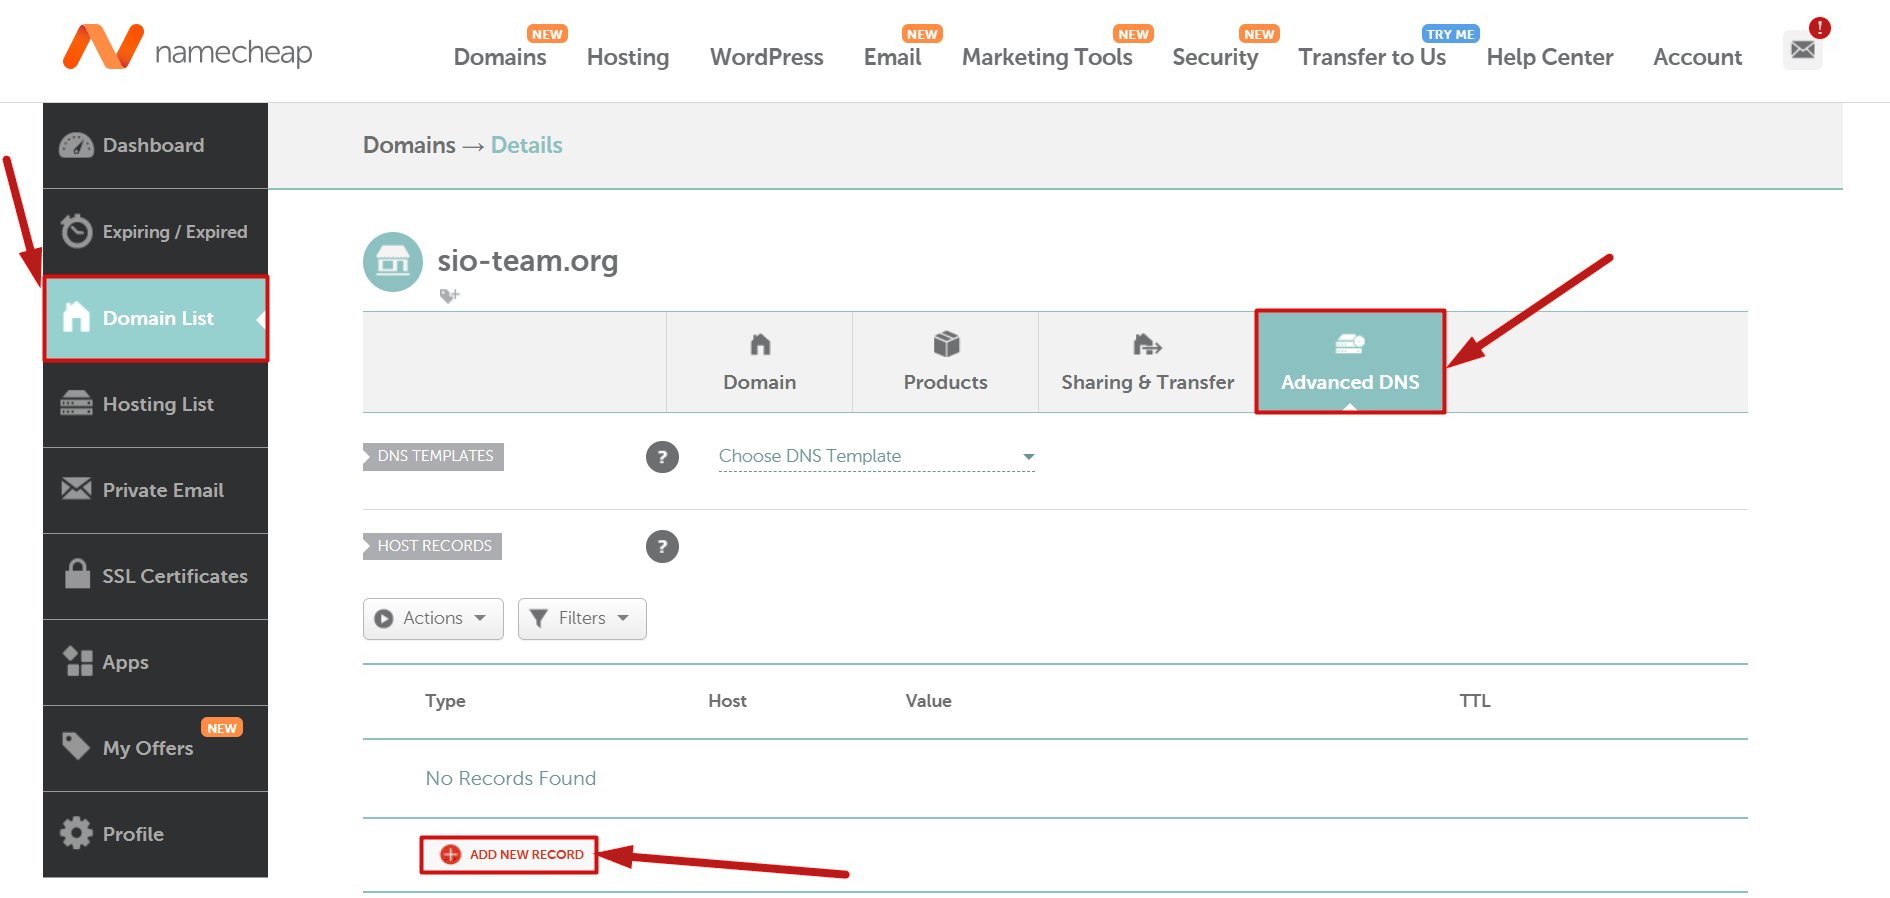
- Go to the Domain List
- Then click the Advanced DNS tab for your domain name.
- Click on Add new record.
- Select the type CNAME record.
- Enter www in the Host field.
- Enter d1hsnhtev7c1t3.cloudfront.net. in the Value field.
- Finally, click on the green checkmark icon to confirm.

Note: If a CNAME record with the name "www" already exists, edit its value to "d1hsnhtev7c1t3.cloudfront.net."
Second CNAME:
- Click on Add new record
- Select the type CNAME record
- In the Host field, copy and paste everything before the domain name, which in our example is _76d12d056e60850a0ece88732639788d
- Enter _30b2320cb1269ad7af19f945284c0073.xlfgrmvvlj.acm-validations.aws. in the Value field.
- Finally, click on the green checkmark to confirm.

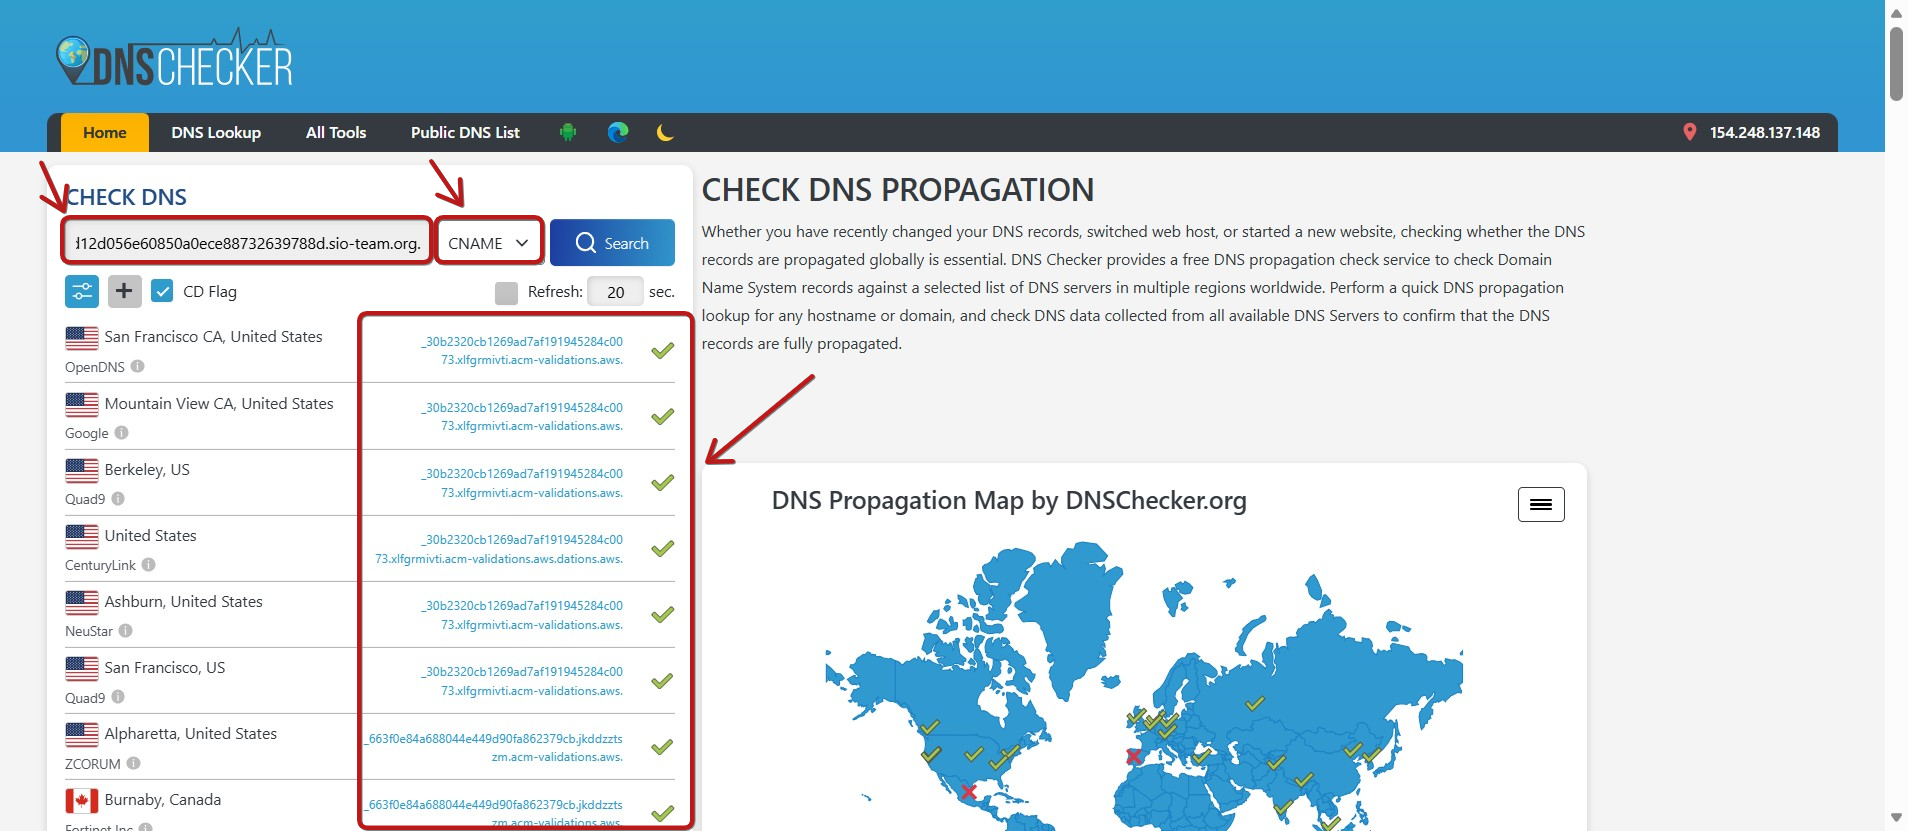
Once both CNAME records are properly added to your host, you can check their status using the following tool:
Note: To check your records, you must enter the full CNAME name (including your domain name) into the search bar.
You should see the same value you added next to a green checkmark, as shown in the example below. If not, the records have not been added correctly, and you need to review your DNS zone:
CNAME 1 verification:

CNAME 2 verification:
Set a Redirect Record:
- Go to the Advanced DNS section for your domain name.
- Click on Add new record.
- Select URL Redirect Record from the dropdown menu.
- Enter @ in the Host field.
- Enter https://www.domain-name.com in the Value field. In our example, you should enter https://www.sio-team.org.
- Select Permanent (301).
- Finally, click on the green checkmark to confirm.

Add an ALIAS record (Recommended Method if the redirect doesn't work):
- Go to the Advanced DNS section of your domain name
- Click on Add new record
- Select the type ALIAS record
- Enter @ in the Host field
- In the Value field, enter the value from your first CNAME record
- Set TTL to Automatic or the lowest available option
- Click Save all changes (the green checkmark icon)
This method has proven to be more reliable for Namecheap domains and should resolve any redirection issues you may encounter.
Notes:
- It can take up to 24–48 hours for DNS records to propagate completely.
- Sometimes, your host may not be able to register a CNAME record due to a conflict with other existing DNS records. This usually happens when adding the first CNAME.
If this occurs, contact your domain host to determine if these existing records are necessary or if they can be safely deleted.