How to connect your Namecheap subdomain to systeme.io
This allows you to add a subdomain (subdomain.domain.com) to systeme.io for use in your sales funnels and blogs, helping you maintain a professional brand.
What you will need:
- A systeme.io account
- A domain name purchased from Namecheap
After adding the subdomain in systeme.io, you will need to access the DNS settings in your Namecheap account.
Note: Each subdomain added to systeme.io has its own CNAME records to integrate into Namecheap.
Example:
In this example, we will connect the subdomain example.sio-team.org to systeme.io
First, hover over your profile picture, click Settings, then go to Custom Domains and add your subdomain.

First CNAME:
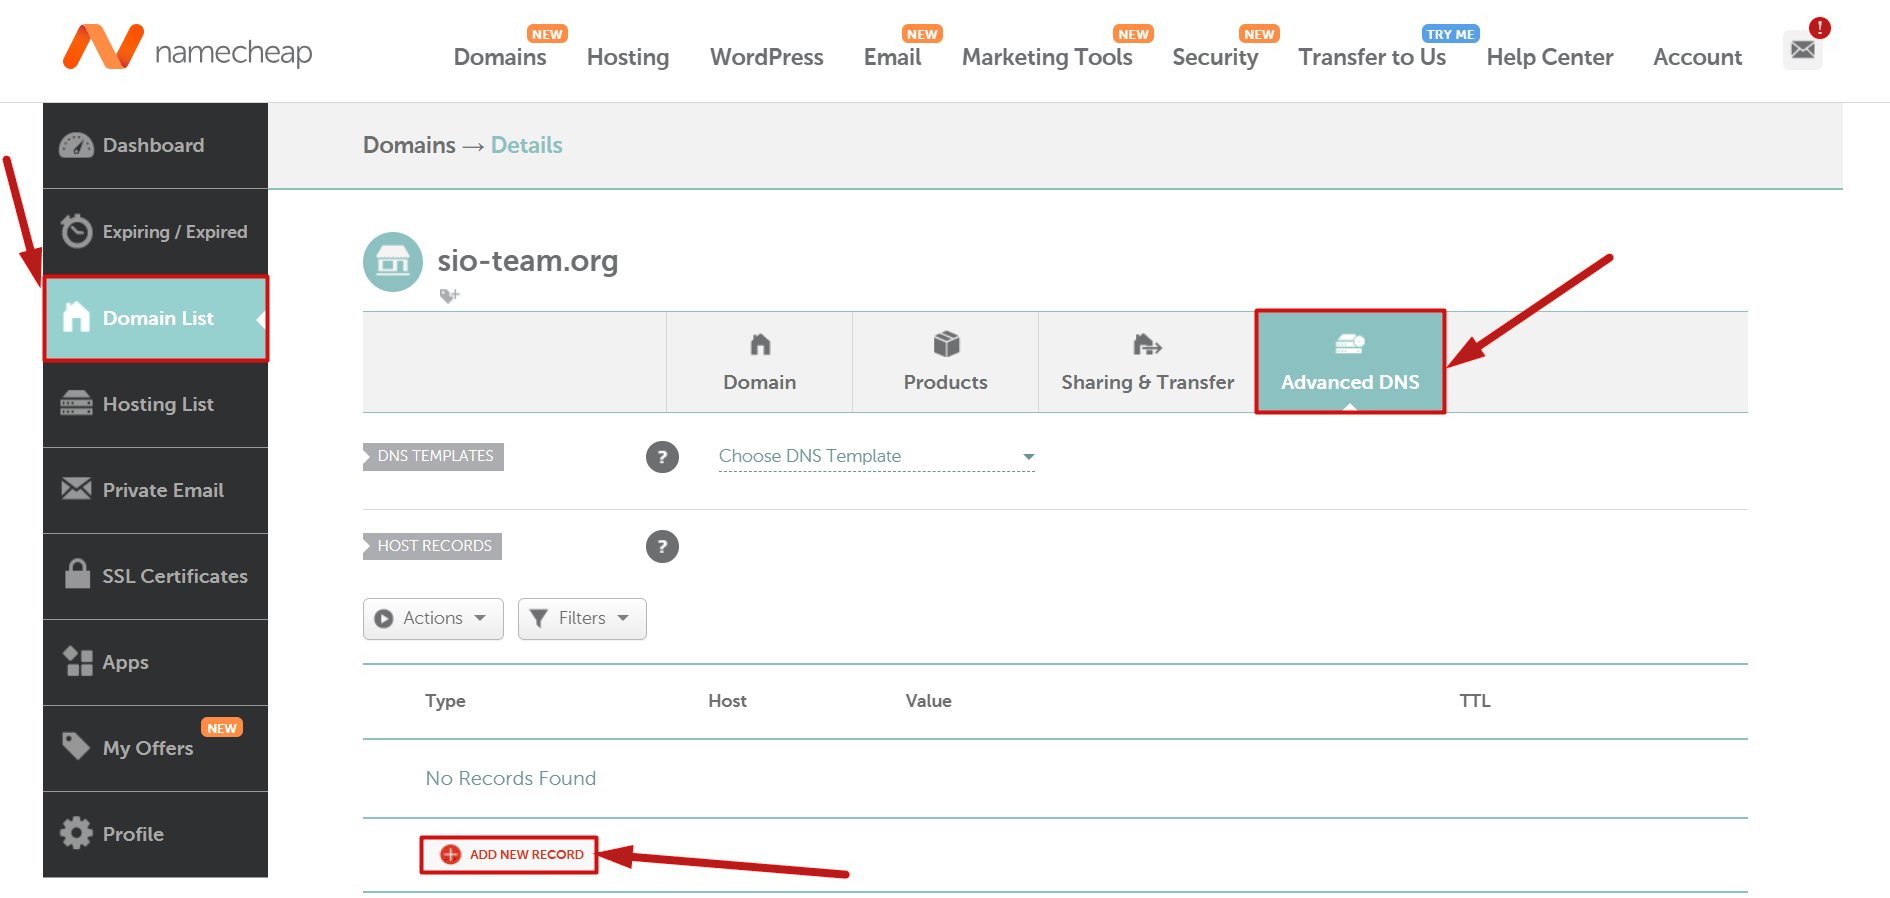
- Go to the Domain list section
- Click the Advanced DNS tab of your domain name.
- Click on Add new record.
- Select CNAME Record from the Type dropdown menu.
- Enter 'example' in the Host field.
- Enter d1wzk10427sdbr.cloudfront.net. in the Value field.
- Click on the green check icon to confirm.
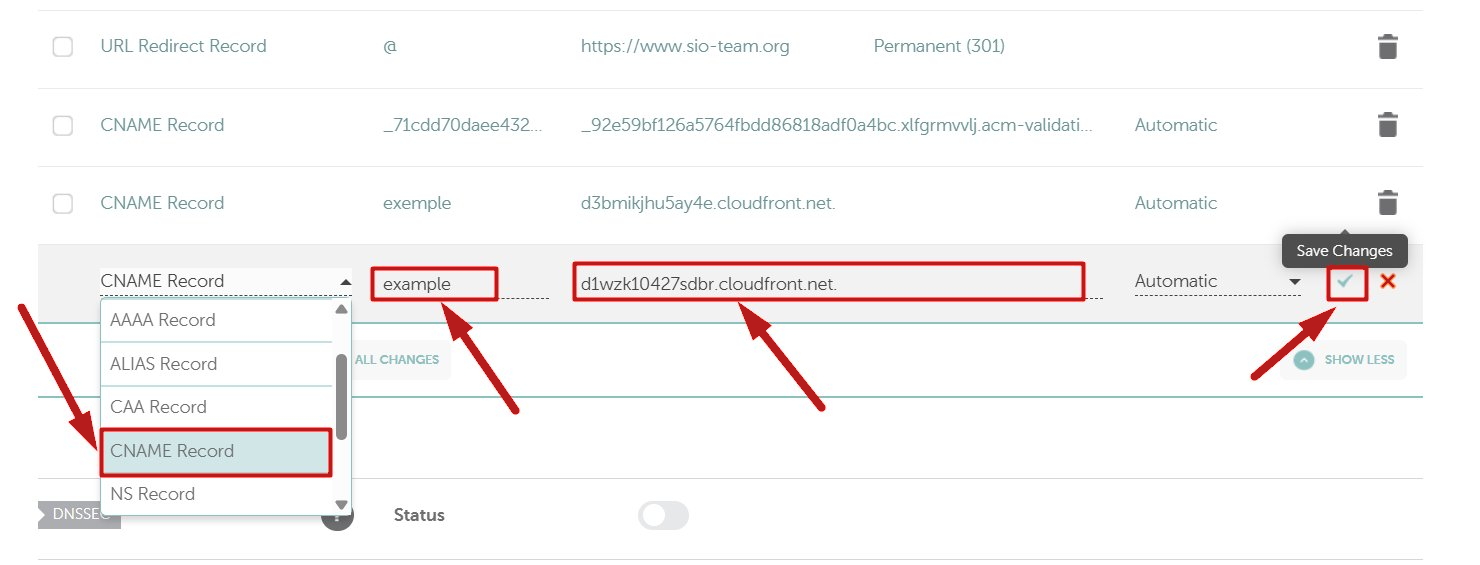
Note: if a CNAME record with the name example already exists, edit its value to d1wzk10427sdbr.cloudfront.net.
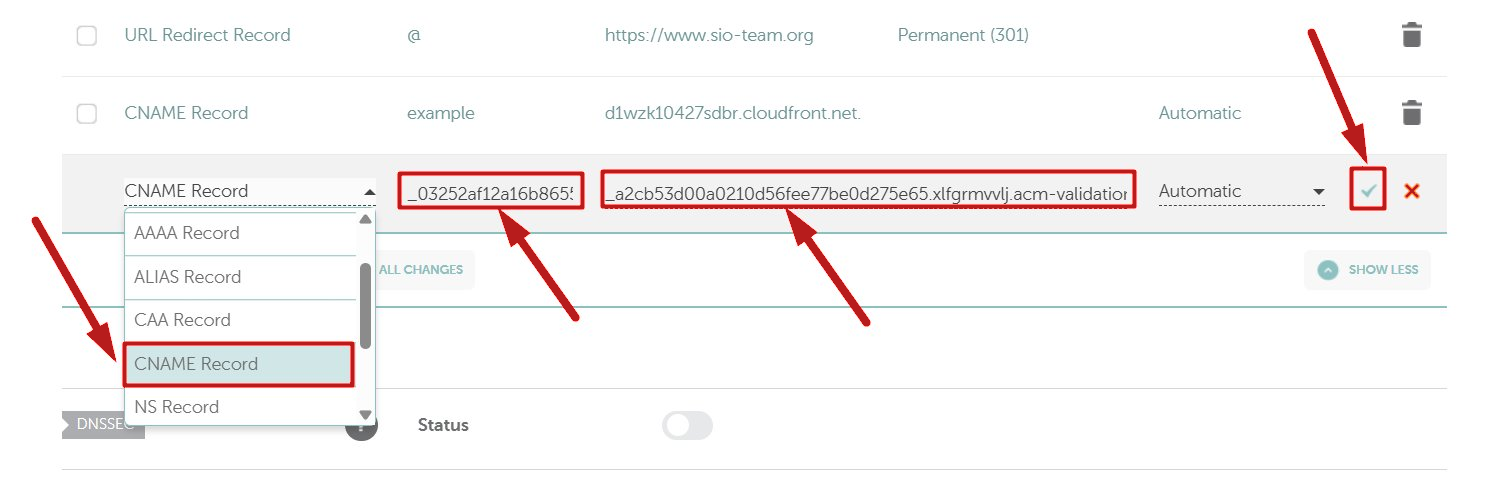
Second CNAME:
- Follow the same process described above to add a new CNAME record
- In the Host field, copy and paste the string before your domain name. In this example, it is _03252af12a16b8655797acbc3d568e21.example >> then
- In the Value field, enter _a2cb53d00a0210d56fee77be0d275e65.xlfgrmvvlj.acm-validations.aws.
- Click on the green check icon.
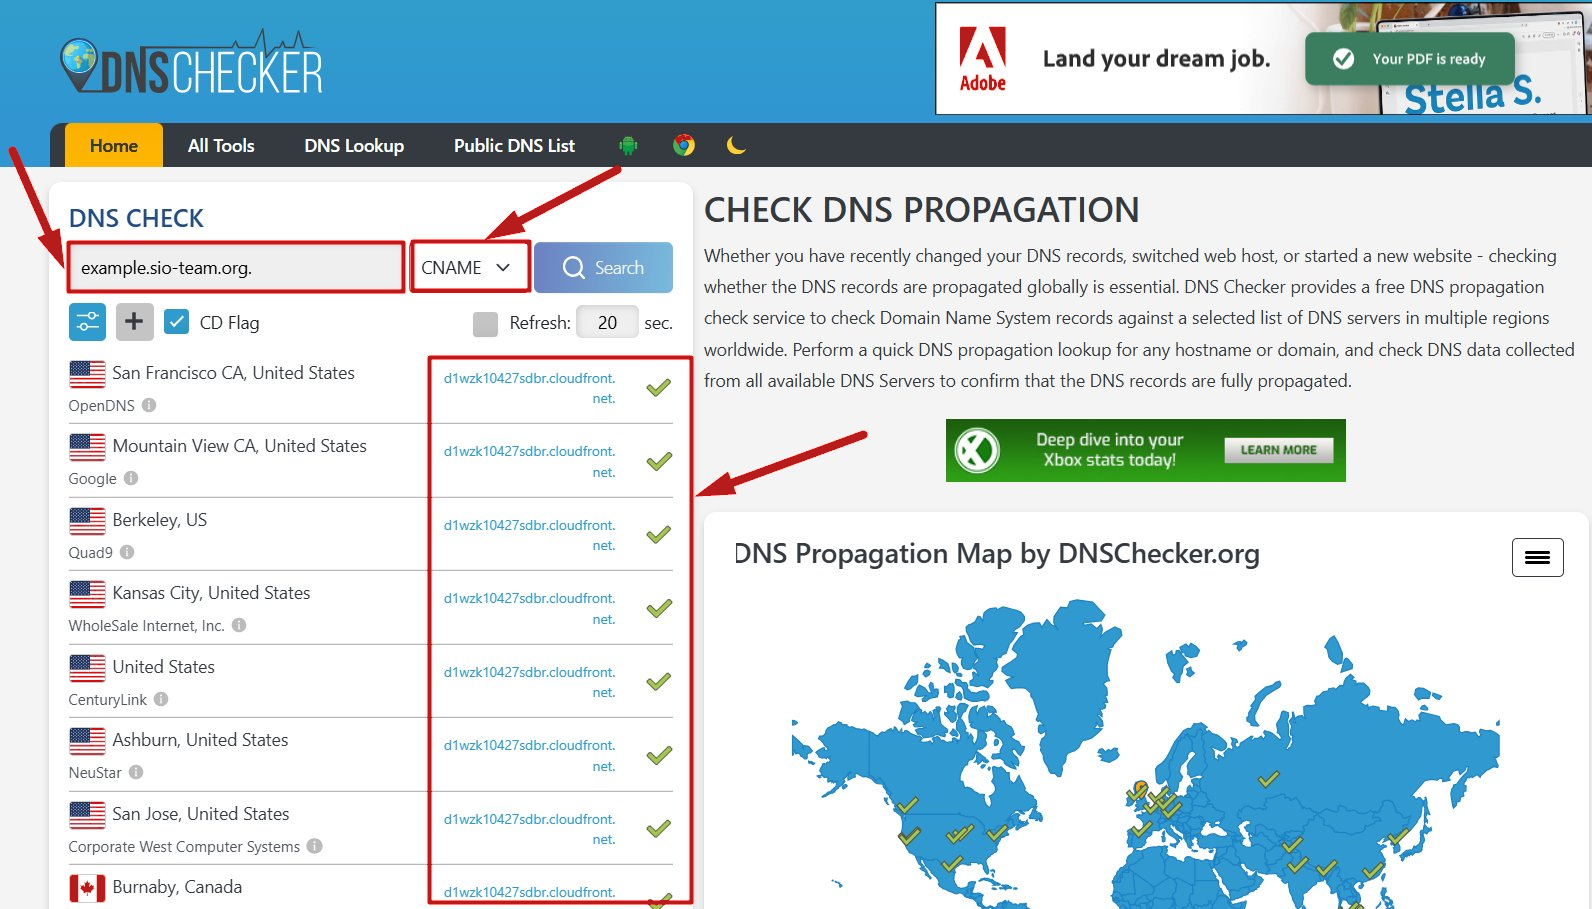
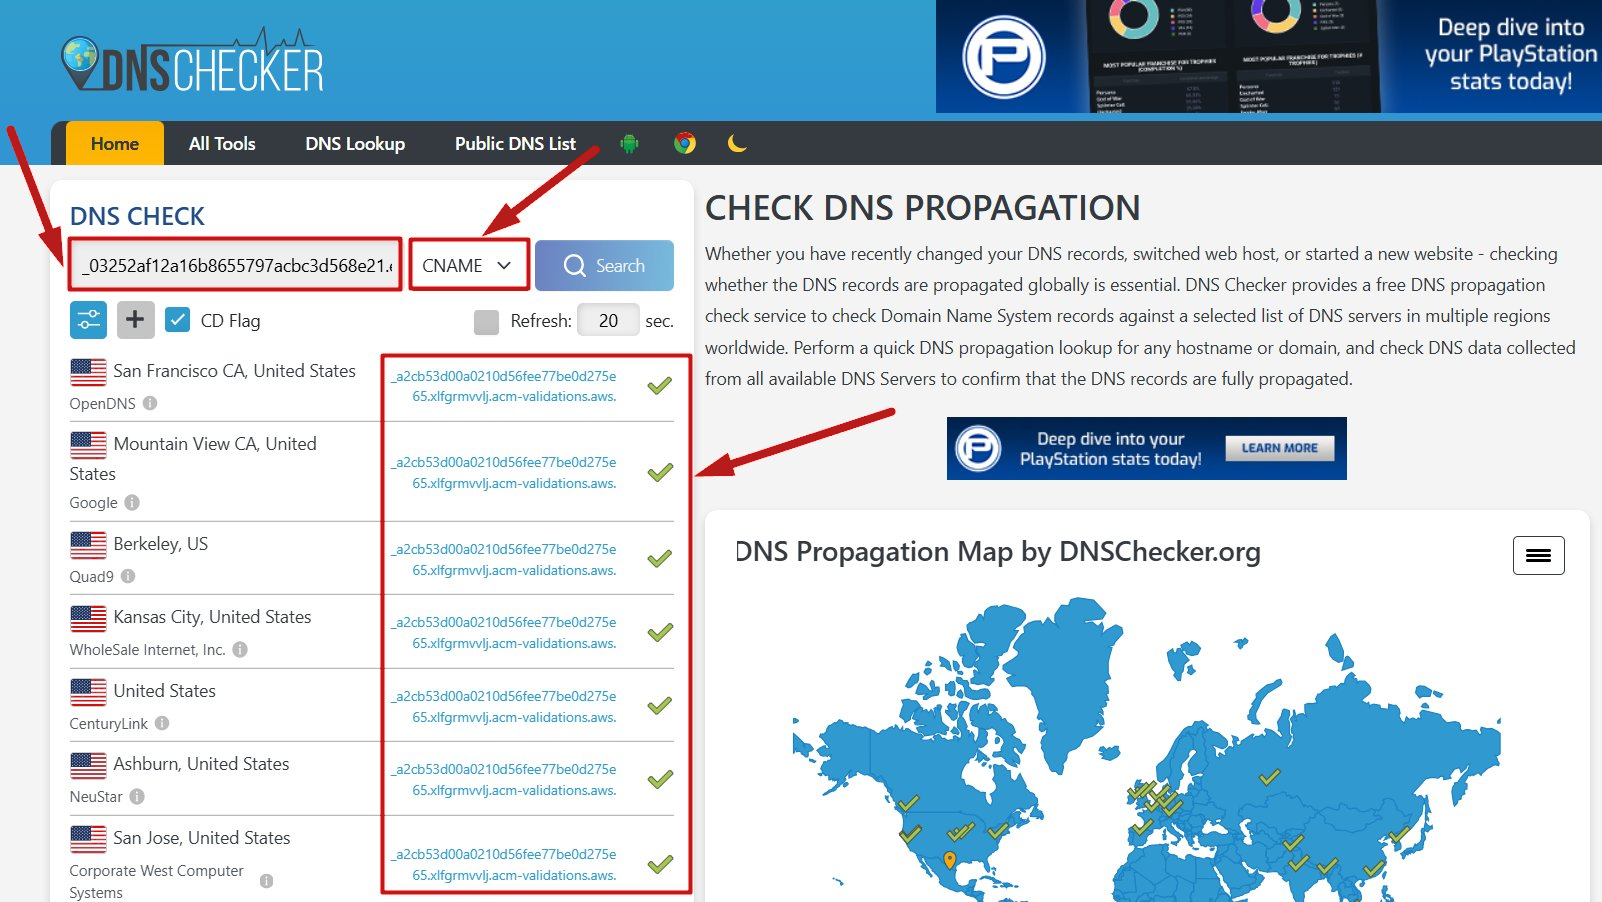
Note: To check your records, you must enter the full CNAME name (including your domain name) into the search bar.
CNAME 1 verification:
CNAME 2 verification:
Notes:
- It can take up to 24–48 hours for DNS records to propagate completely.
- Sometimes, your host may not be able to register a CNAME record due to a conflict with other existing DNS records. This usually happens when adding the first CNAME. If a conflict occurs, contact your domain host's support team to determine if the existing records are necessary or if they can be safely removed.