How to connect your Hostinger domain to systeme.io
On this page, you will learn how to add DNS records to Hostinger to connect your main domain name. This will allow you to add your complete website (www.domain.com) to systeme.io to use it as a custom domain in your sales funnels and blogs, which helps strengthen your brand..
What you will need:
- A systeme.io account
- A domain name purchased from Hostinger
After adding your root domain to systeme.io, you will need to access the DNS settings in your Hostinger account.
Note: Each domain added to systeme.io has its own CNAME records to integrate into the hosting site.
Example:
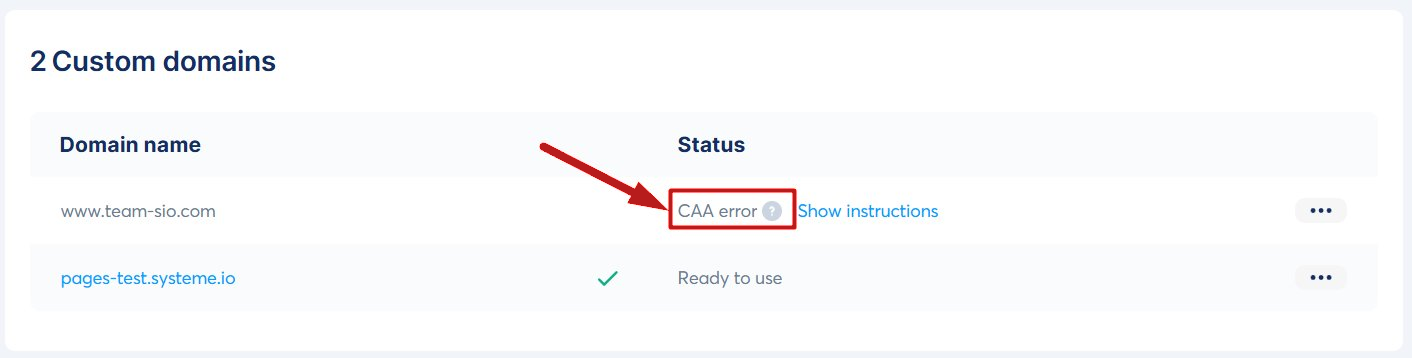
In this example, we will connect the domain www.team-sio.com with systeme.io
First, hover over your profile picture, click Settings, then go to Custom Domains and add your custom domain.

Before adding the 2 CNAME records, you must add 10 CAA records. This allows our servers to generate an SSL certificate for your domain and prevents CAA-related errors.
You will need to add two types of CAA records for each Certificate Authority (CA):
- Issue: allows the issuance of standard certificates.
- Issuewild: allows the issuance of wildcard certificates.

Instructions for adding CAA type DNS records on Hostinger
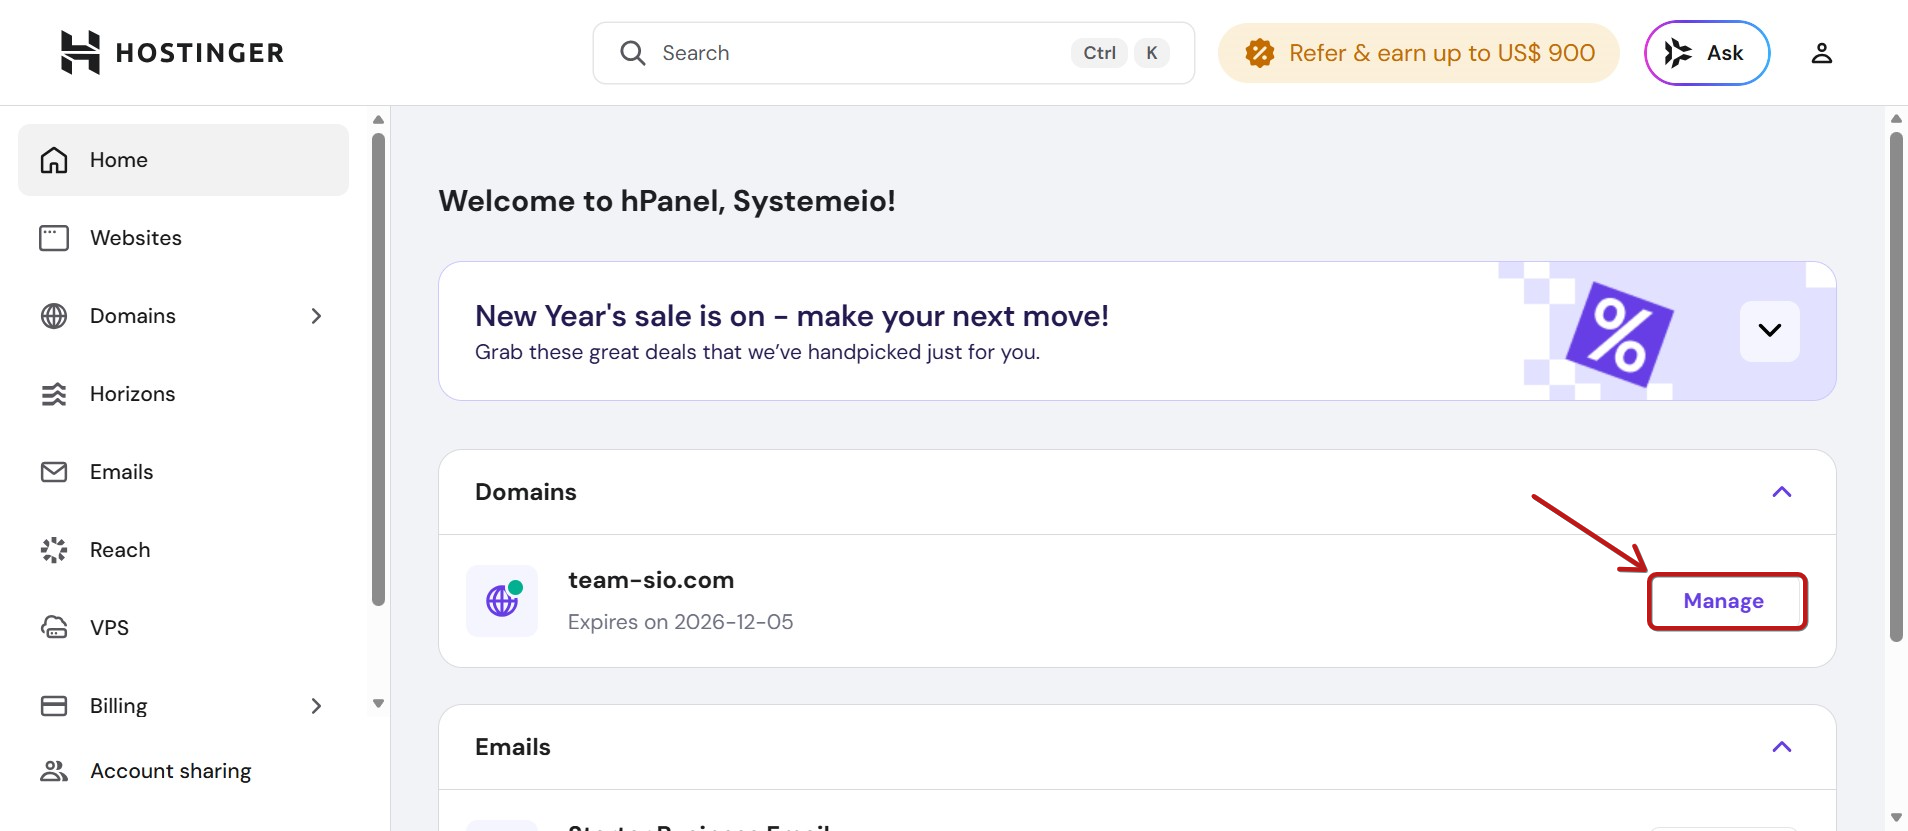
Log into Hostinger and click Manage next to the domain you want to connect.
Navigate to the DNS / Nameservers section.
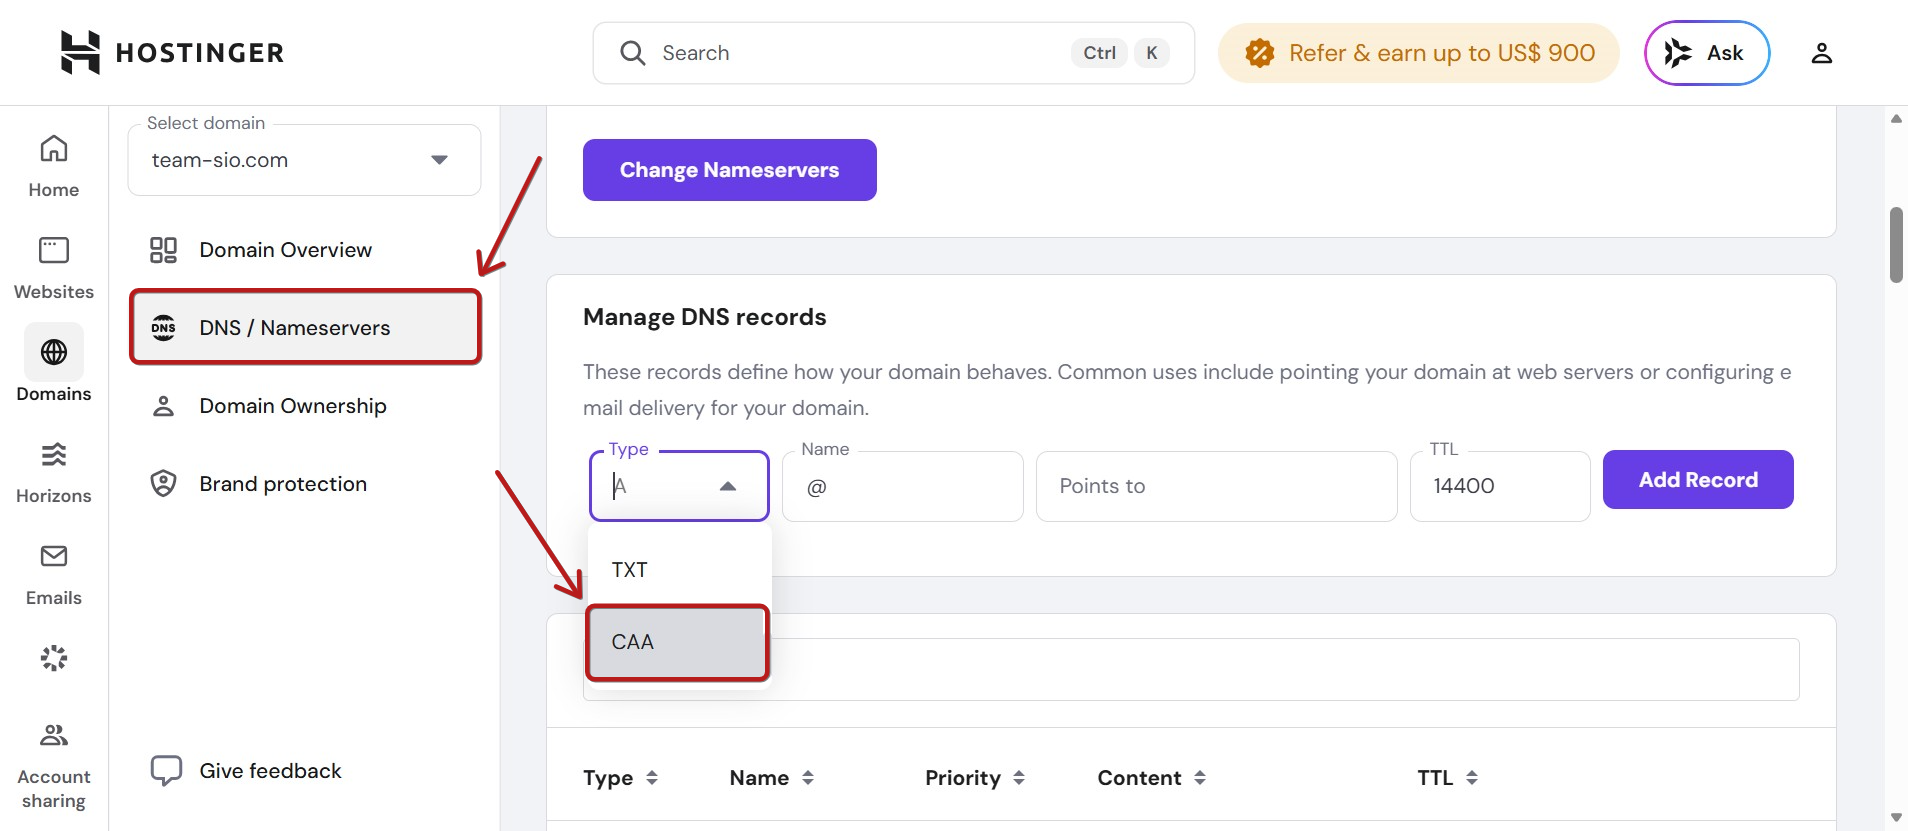
You need to add the 10 CAA records as described in the steps below:
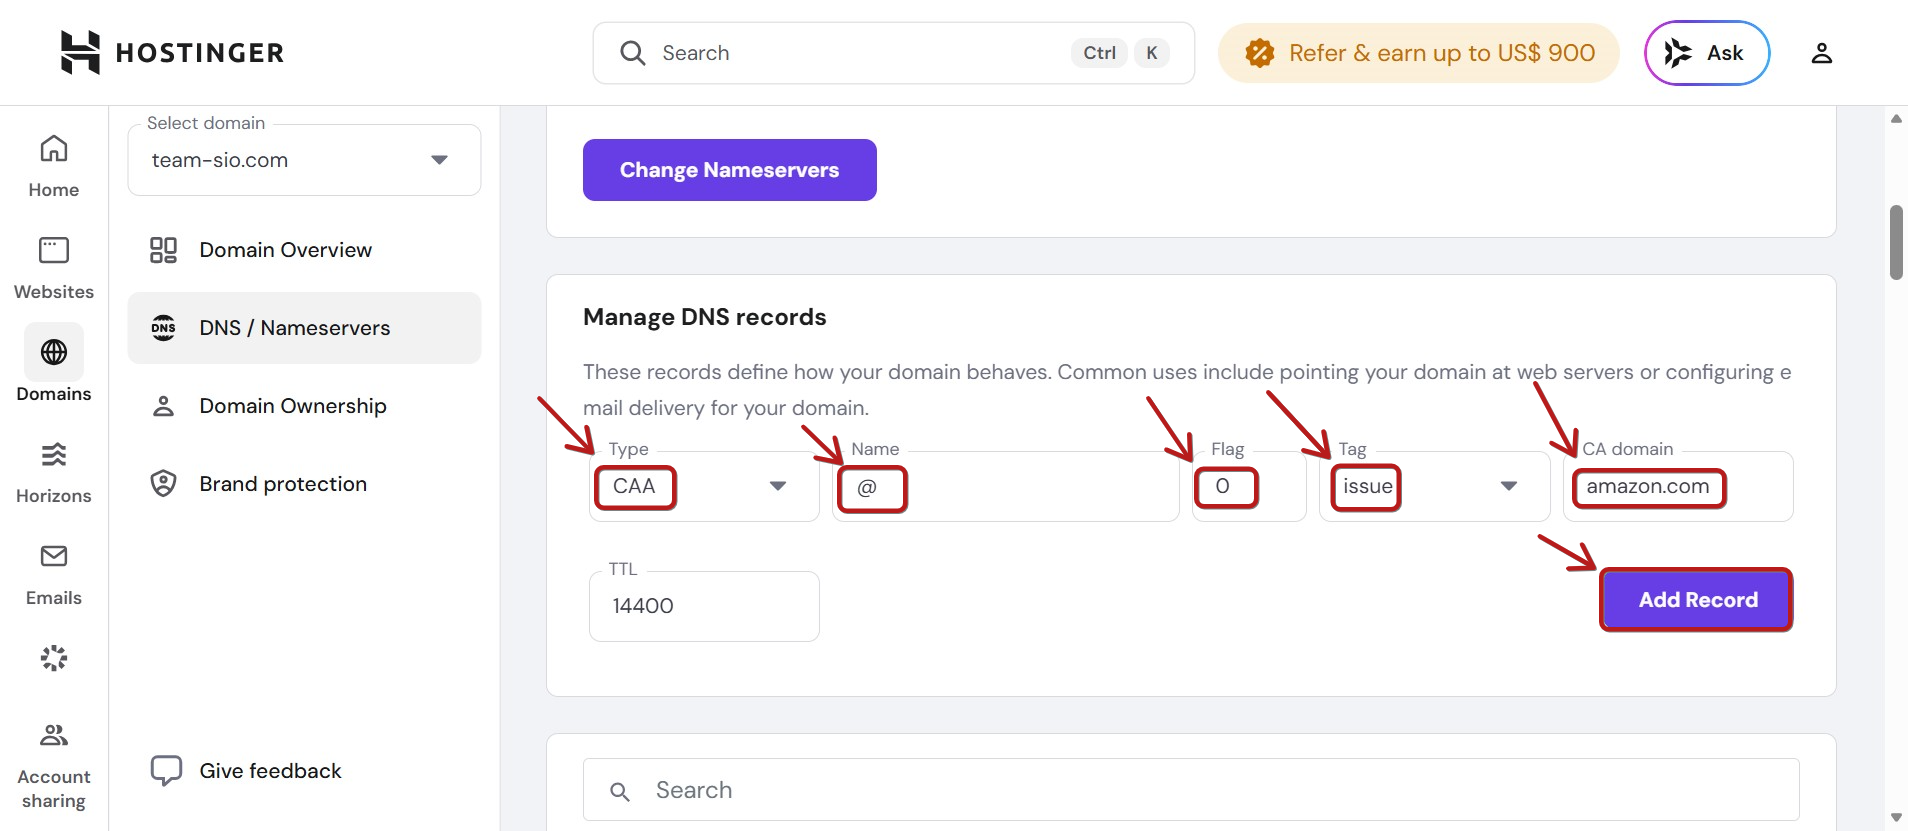
1. Add the "Issue" record for the CA domain "amazon.com":
- Type: CAA
- Name: @
- Flag: 0
- Tag: issue
- CA Domain: amazon.com
- Click on Add Record
2. Add the "Issuewild" record for the CA domain "amazon.com":
- Type: CAA
- Name: @
- Flag: 0
- Tag: issuewild
- CA Domain: amazon.com
- Click on Add Record

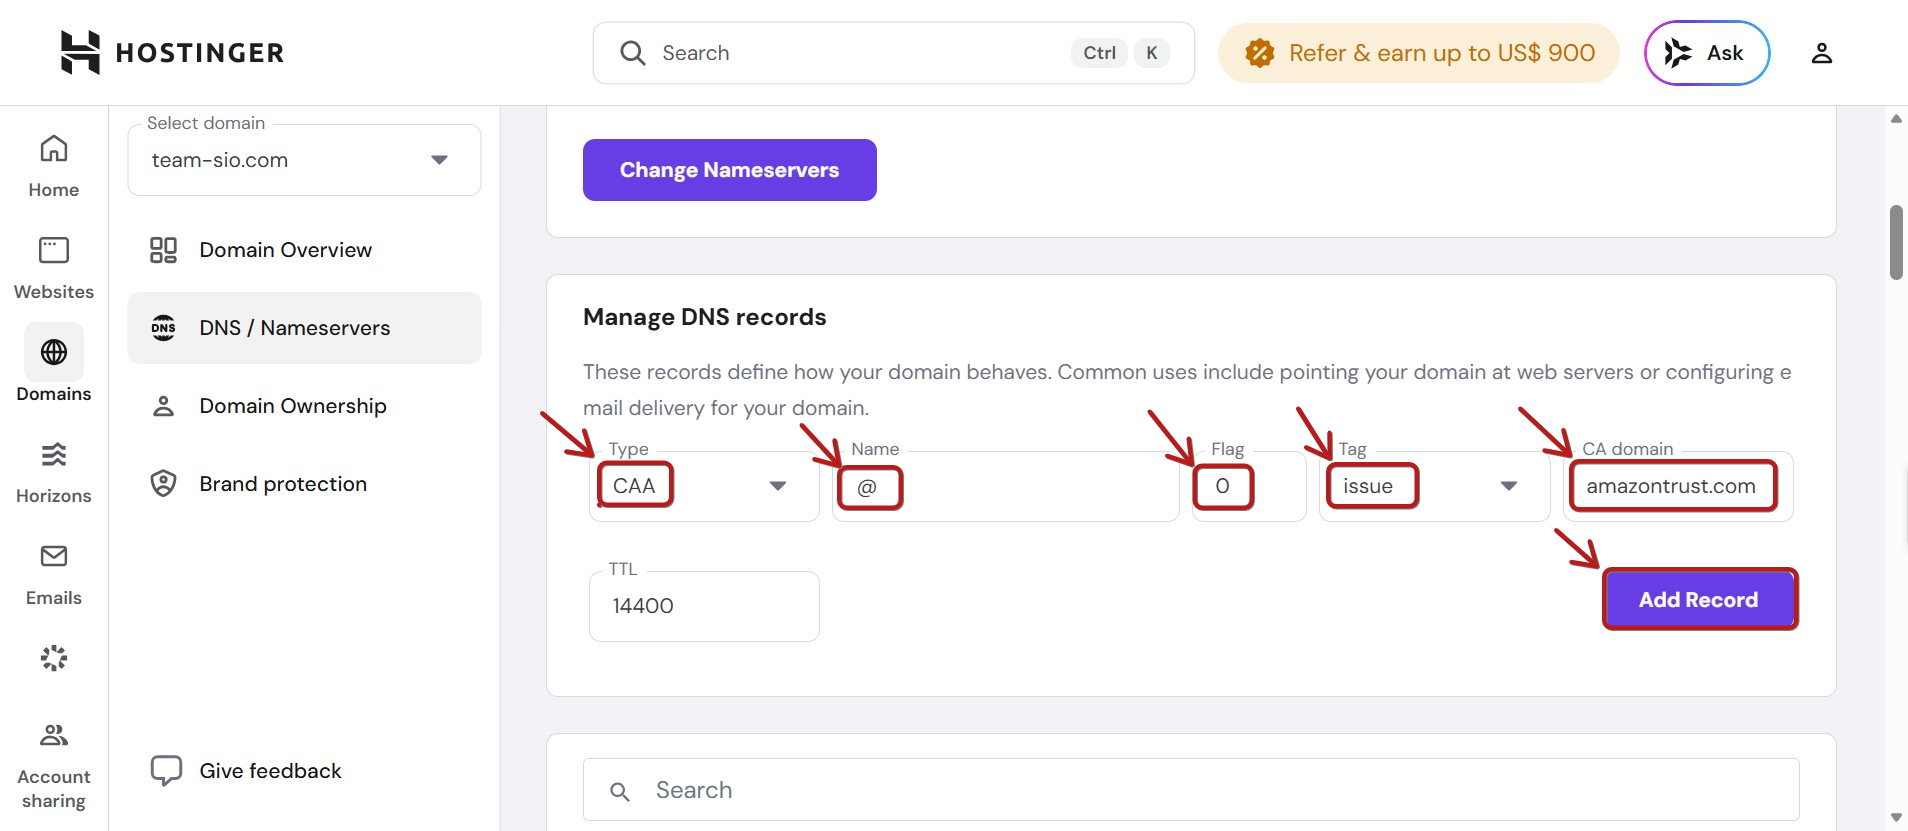
3. Add the "Issue" record for the CA domain "amazontrust.com"
- Type: CAA
- Name: @
- Flag: 0
- Tag: issue
- CA Domain: amazontrust.com
- Click on Add Record
4. Add the "Issuewild" record for the CA domain "amazontrust.com"
- Type: CAA
- Name: @
- Flag: 0
- Tag: issuewild
- CA Domain: amazontrust.com
- Click on Add Record

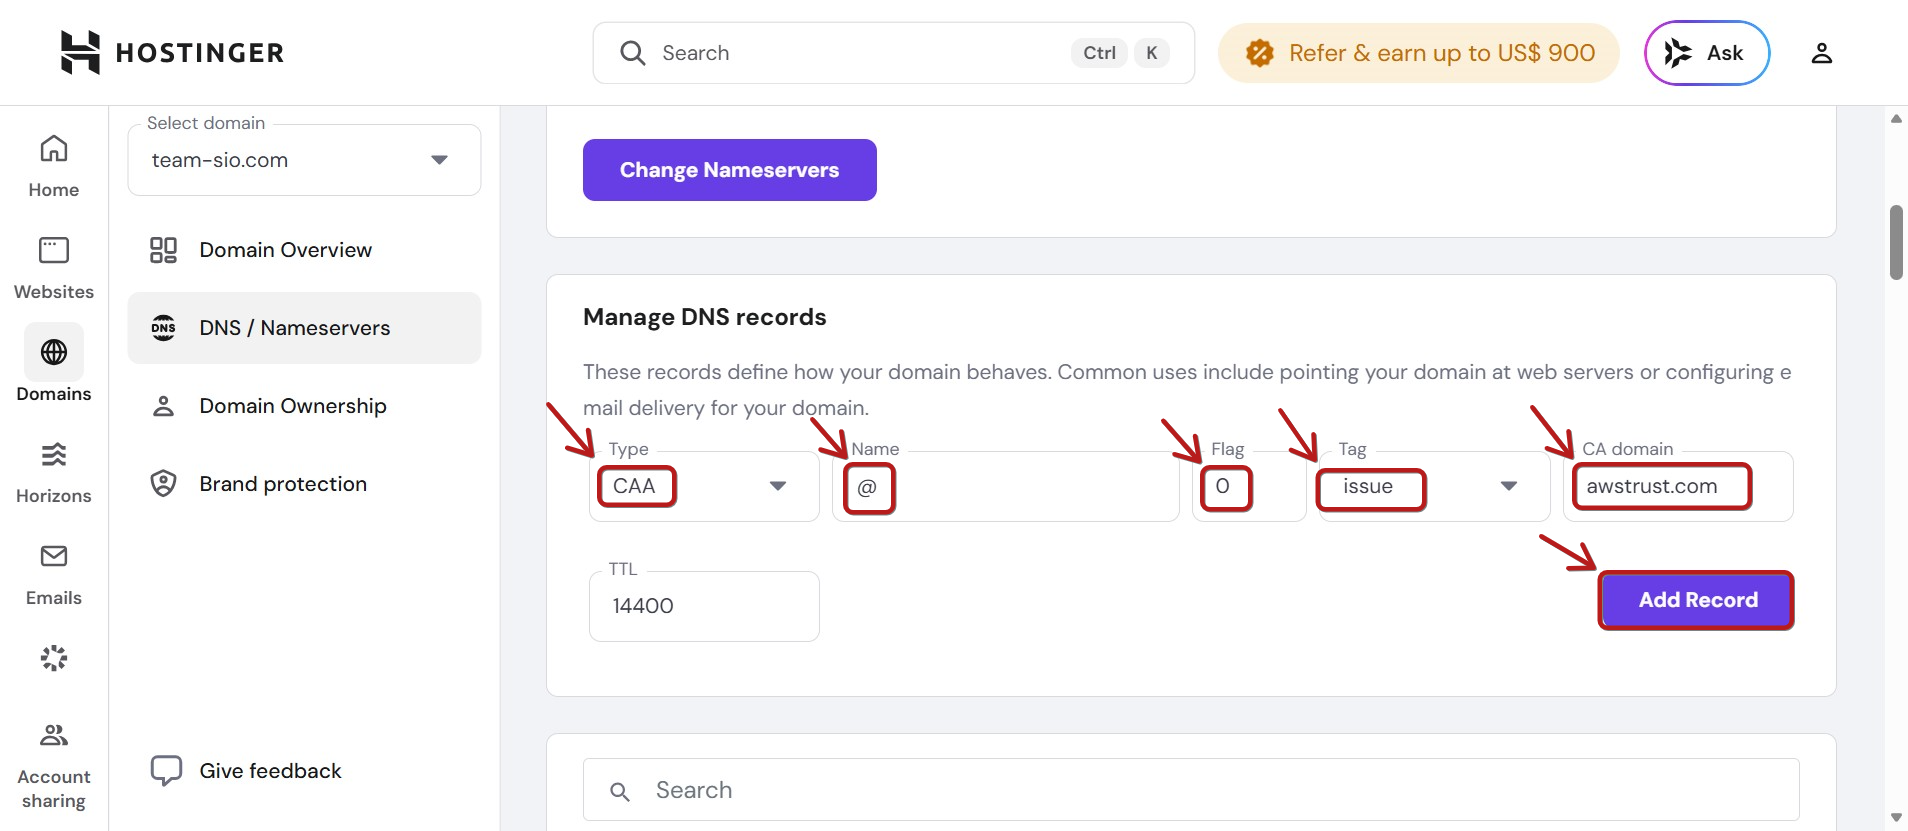
5. Add the "Issue" record for the CA domain "awstrust.com"
- Type: CAA
- Name: @
- Flag: 0
- Tag: issue
- CA Domain: awstrust.com
- Click on Add Record
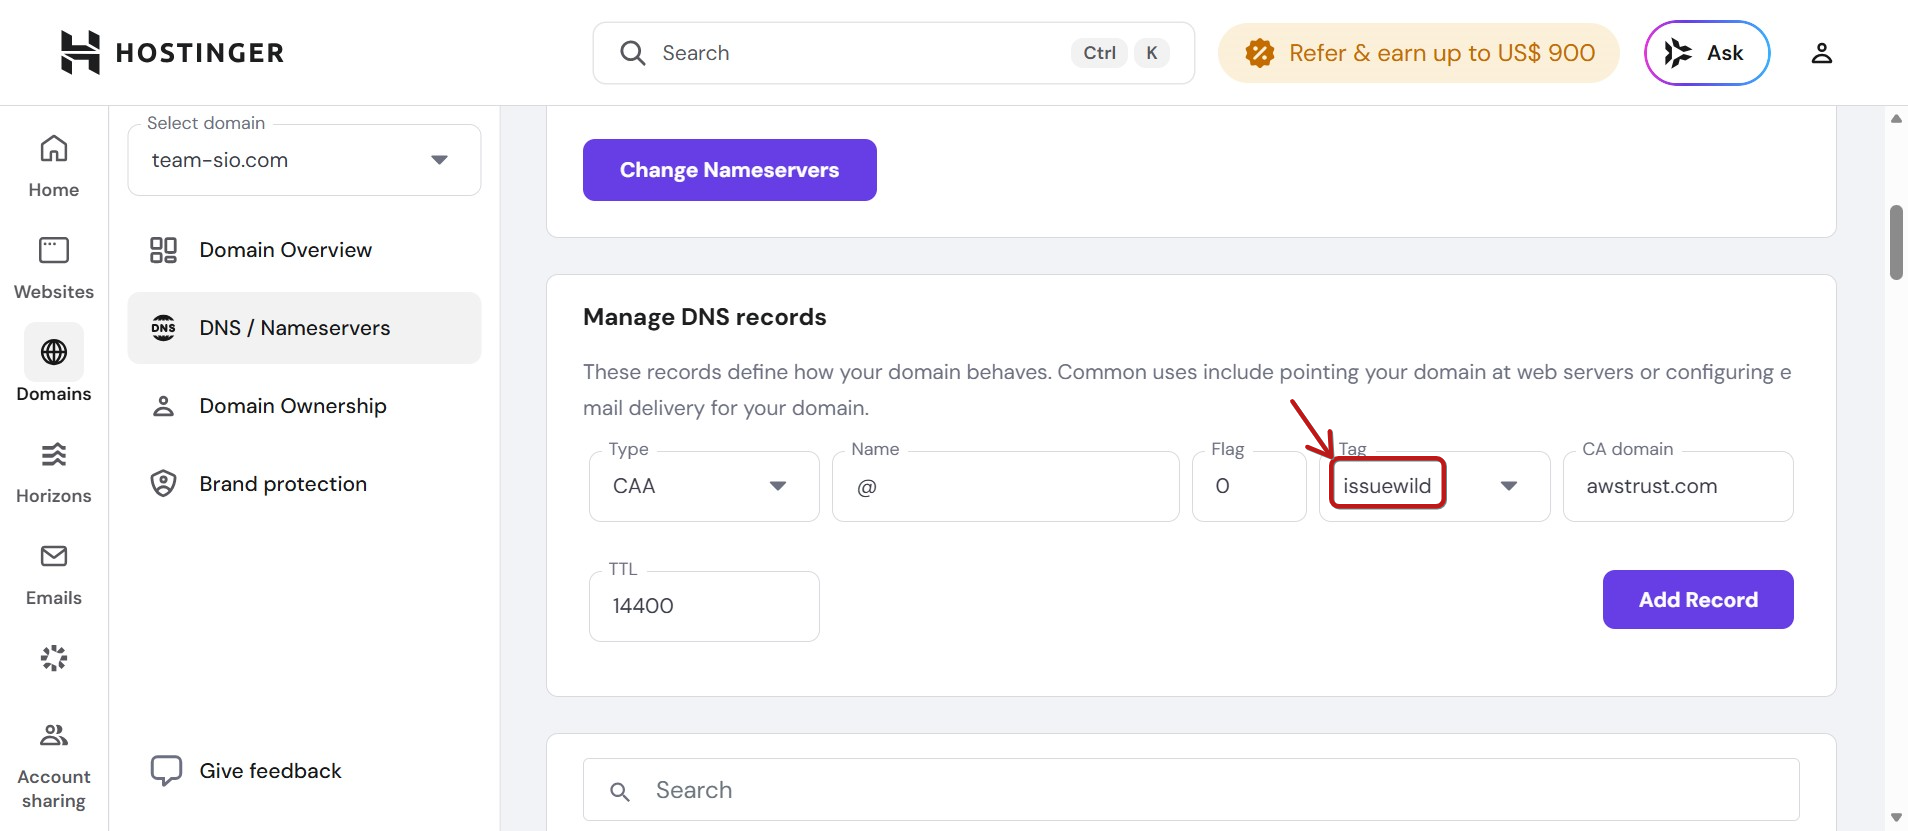
6. Add the "Issuewild" record for the CA domain "awstrust.com"
- Type: CAA
- Name: @
- Flag: 0
- Tag: issuewild
- CA Domain: awstrust.com
- Click on Add Record
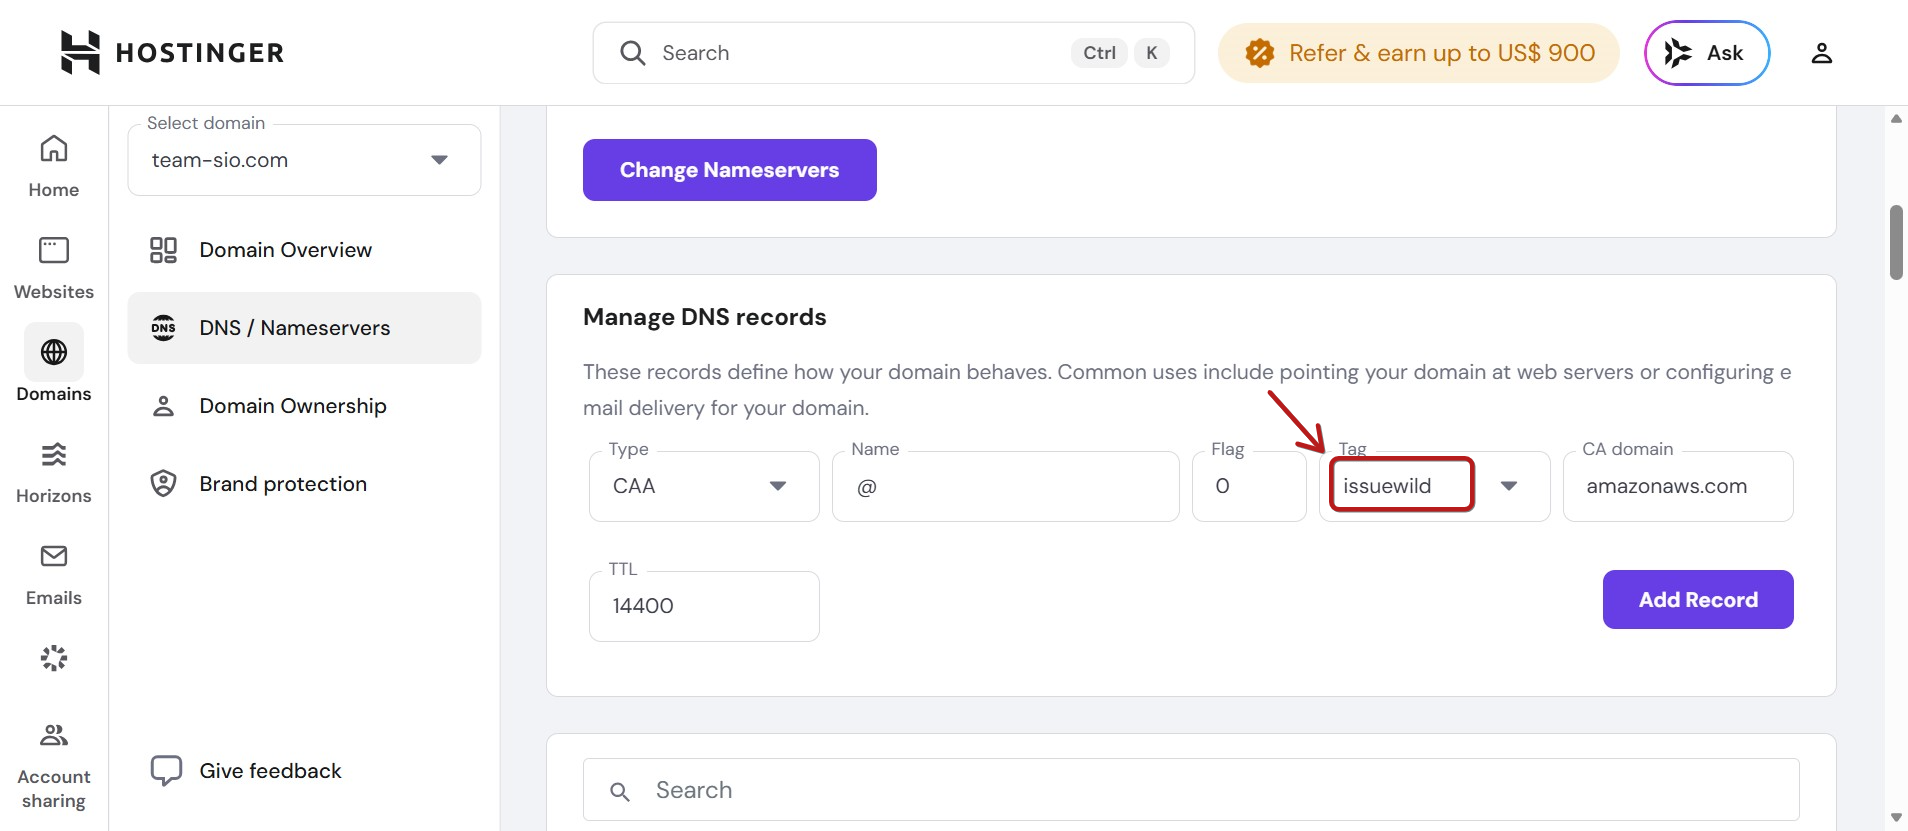
7. Add the "Issue" record for the CA domain "amazonaws.com"
- Type: CAA
- Name: @
- Flag: 0
- Tag: issue
- CA Domain: amazonaws.com
- Click on Add Record

8. Add the "Issuewild" record for the CA domain "amazonaws.com":
- Type: CAA
- Name: @
- Flag: 0
- Tag: issuewild
- CA Domain: amazonaws.com
- Click on Add Record
9. Add the "Issue" record for the CA domain "SomeCA.com":
- Type: CAA
- Name: @
- Flag: 0
- Tag: issue
- CA Domain: SomeCA.com
- Click on Add Record

10. Add the "Issuewild" record for the CA domain "SomeCA.com"
- Type: CAA
- Name: @
- Flag: 0
- Tag: issuewild
- CA Domain: SomeCA.com
- Click on Add Record

Notes:
- The TTL field is typically left at the default
14400(4 hours). - The character
@in the Name field represents the main domain (e.g., yourdomain.com). - These records are necessary to allow certain certificate authorities (CA) to issue SSL certificates for your domain.
Instructions for adding CNAMEs:
First CNAME:
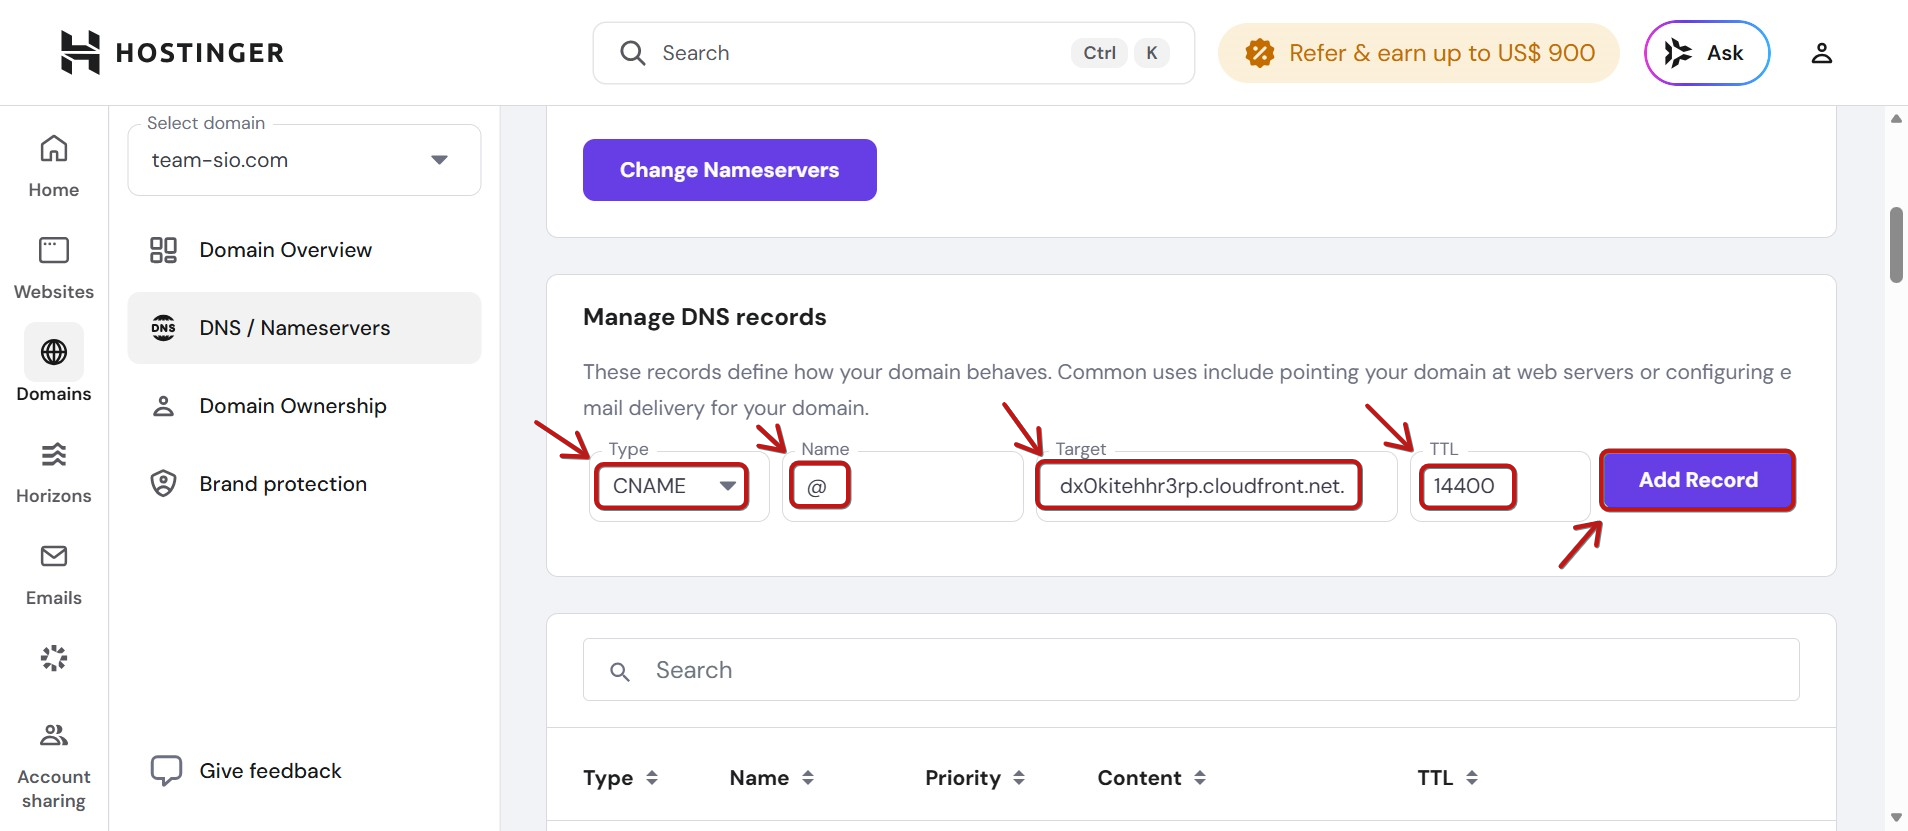
- Go to the DNS / Nameservers section of your domain name, then navigate to the Manage DNS Records section and select the record type CNAME.
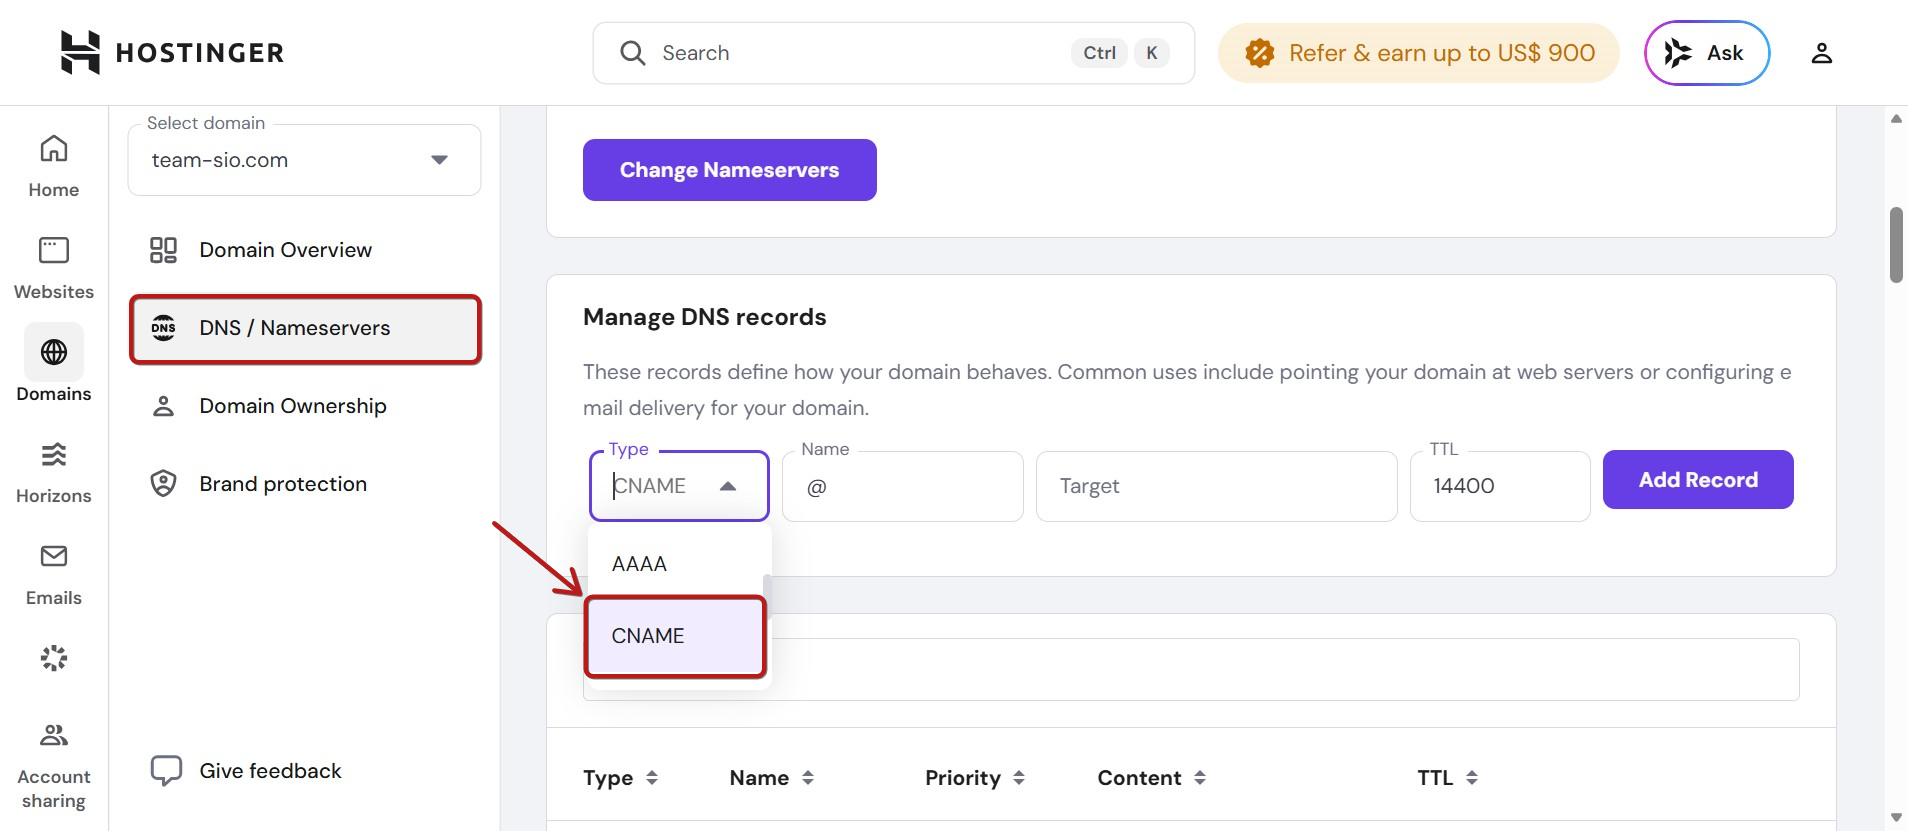
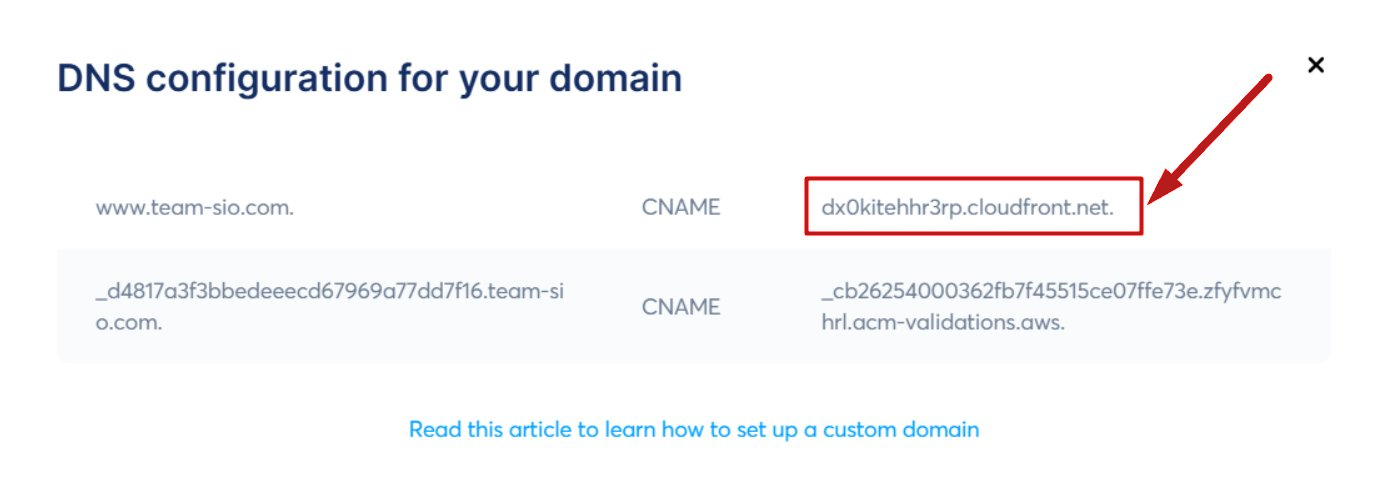
- Add www in the Name field>> then add dx0kitehhr3rp.cloudfront.net. in the Value field. Finally, click on Save to register the addition of your first CNAME.

Note: If a CNAME record with the name "www" exists, edit the target to "dx0kitehhr3rp.cloudfront.net."
Second CNAME:
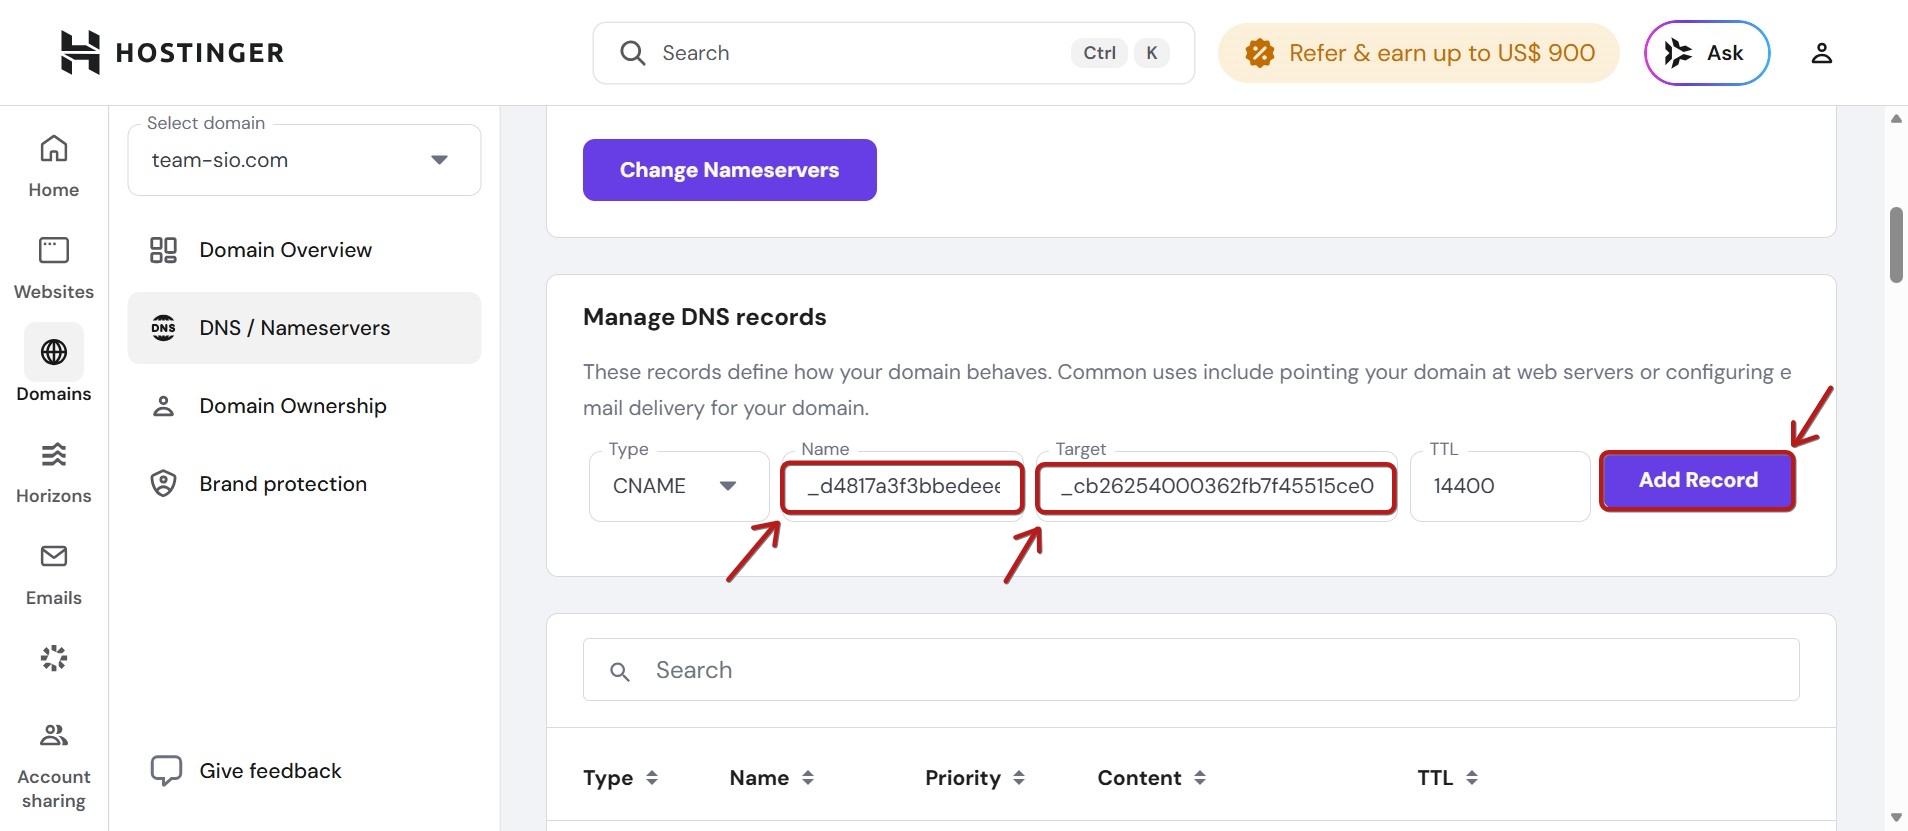
- Go to the DNS Zone section of your domain name.
- Click on Add new record >> Select the type CNAME >> add in the Name field everything that is before the domain name, which in our example is _d4817a3f3bbedeeecd67969a77dd7f16 >> then add _cb26254000362fb7f45515ce07ffe73e.zfyfvmchrl.acm-validations.aws. in the Value field. Finally, click on Save to register the addition of your second CNAME.
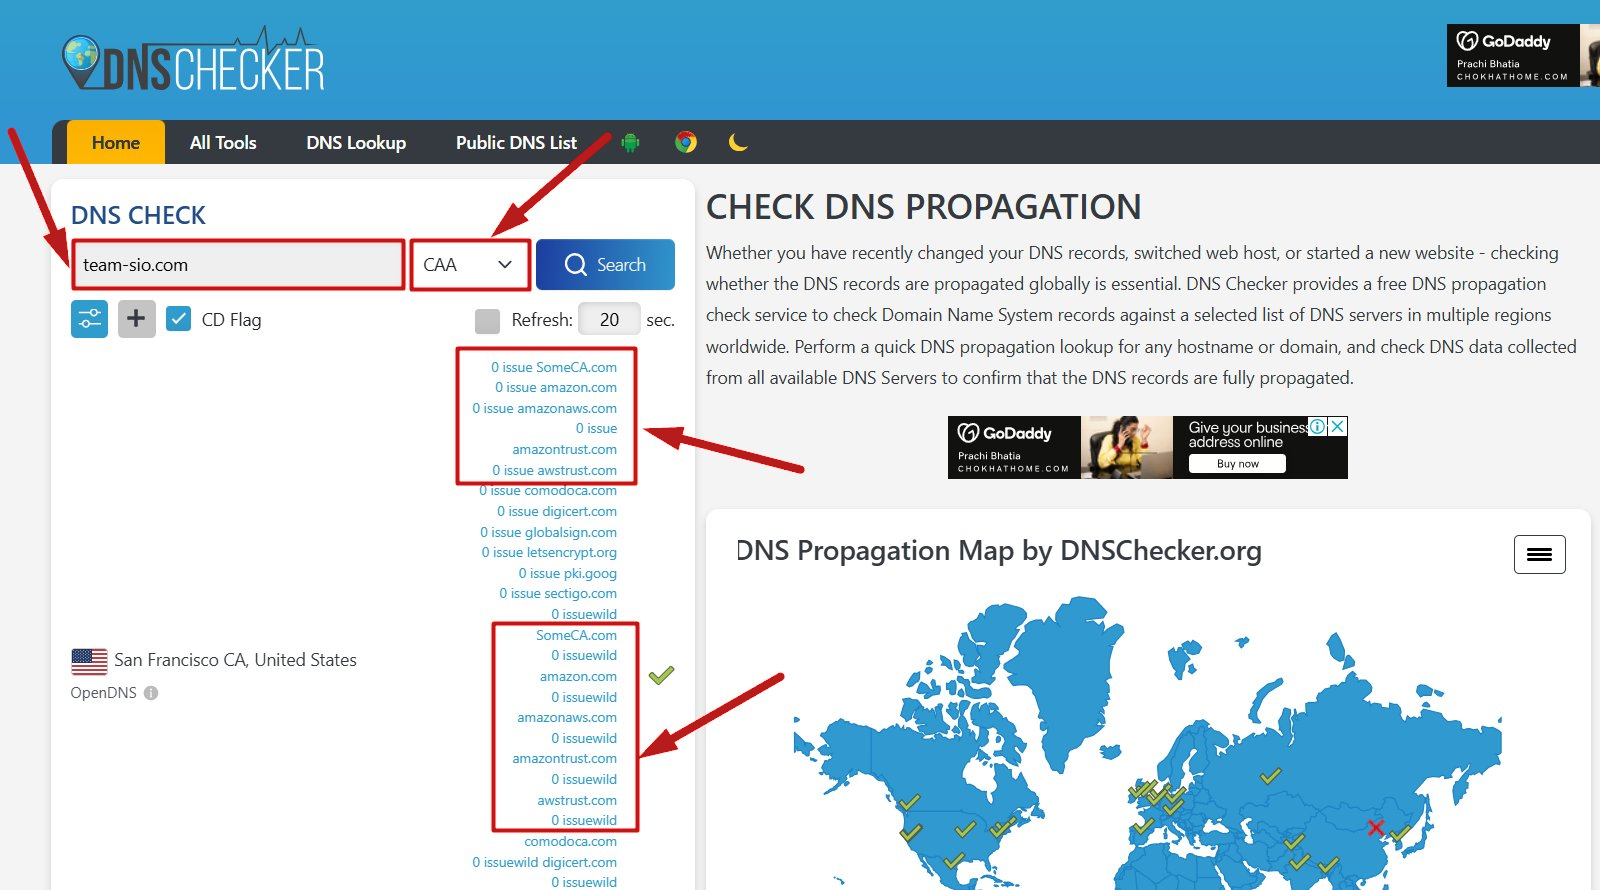
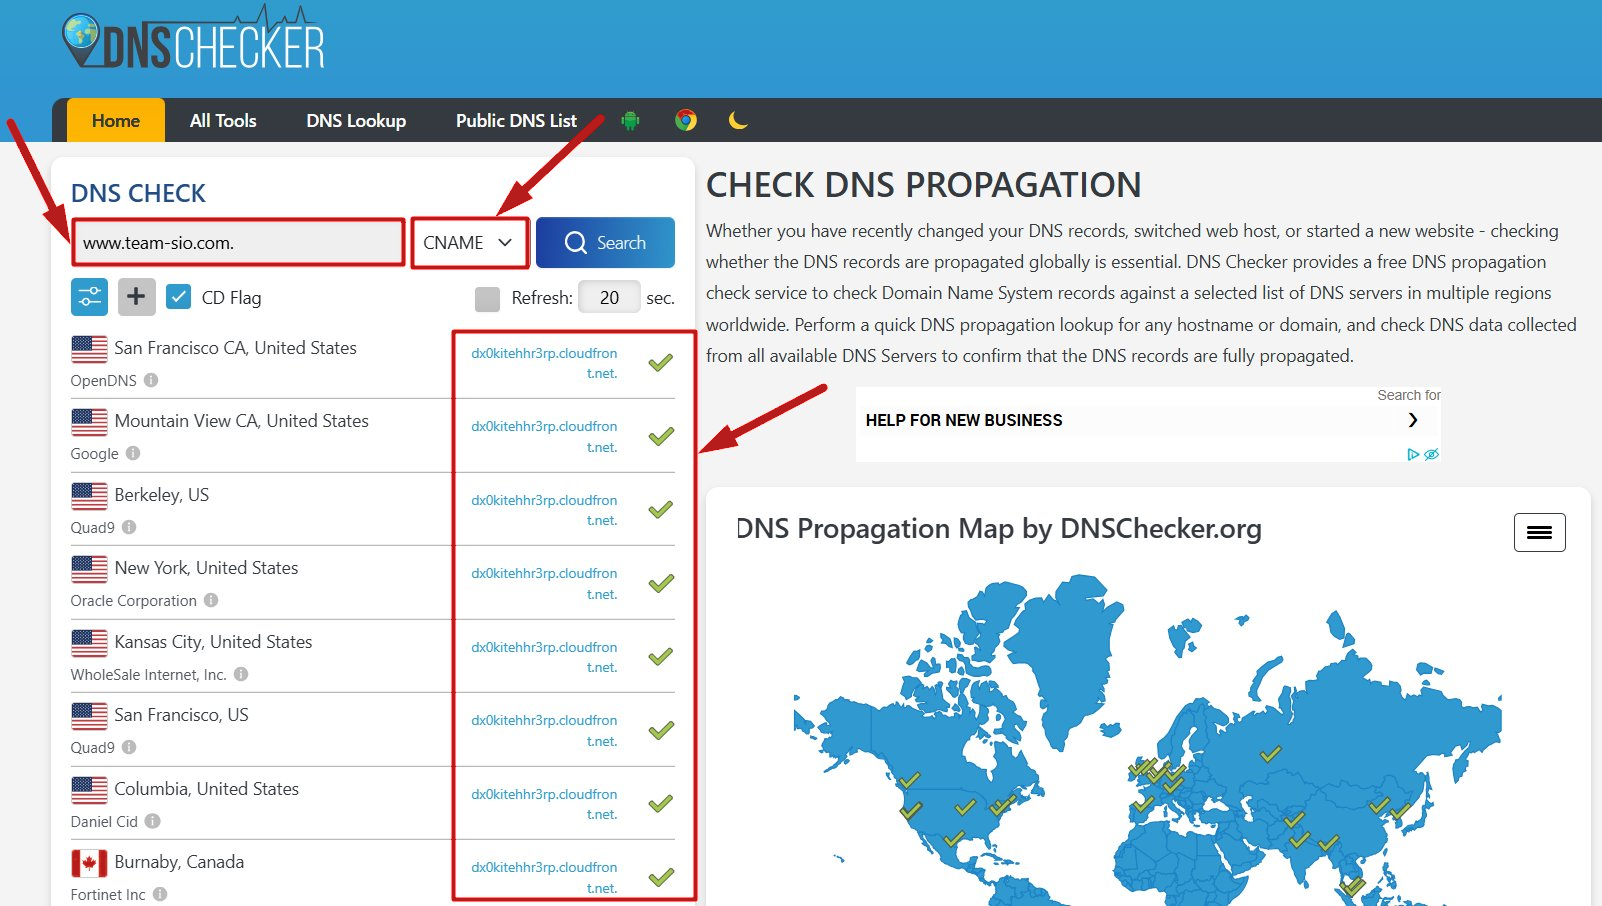
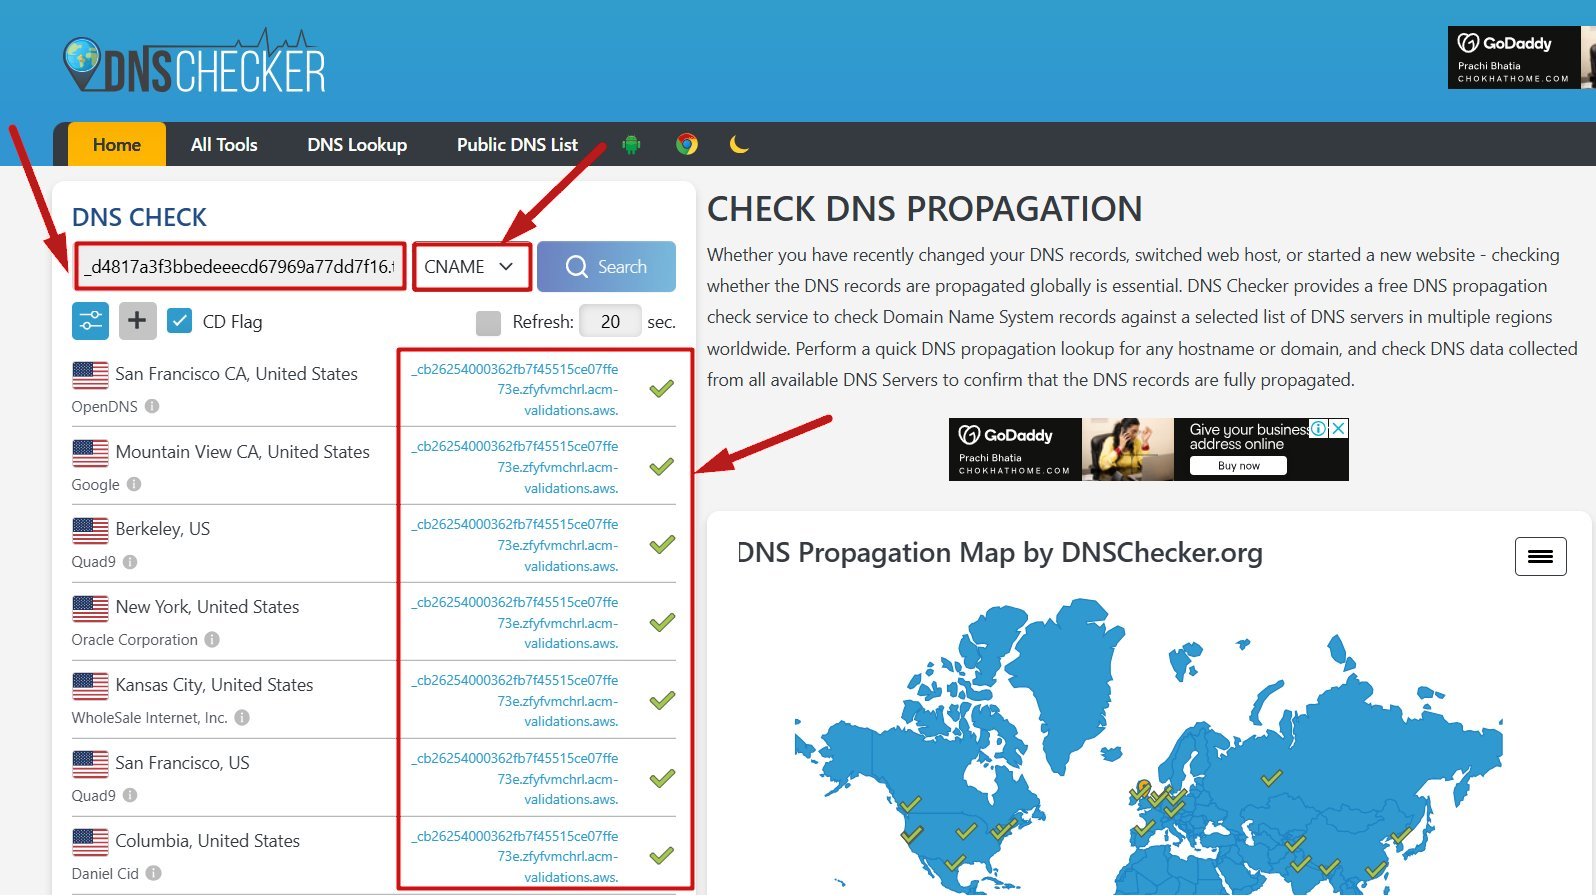
Once the 10 CAA records and the 2 CNAME records have been correctly added to your host, you can check their functionality on the following site:
Note: To check your records, you must enter the full CNAME name (including your domain name) into the search bar.
Checking the 10 CAA:
Checking CNAME 1:
Checking CNAME 2:
Add a redirect rule:
To redirect your root domain (e.g., domain.com) to the 'www' version (www.domain.com), you will need to create an ALIAS record from the root to the same destination used for the first CNAME record for your domain integration:
First, please select the type CNAME, then add @ in the Name field, then add dx0kitehhr3rp.cloudfront.net. in the Target field. Finally, click onAdd record to save the redirection.
Notes:
- It can sometimes take 24 to 48 hours for DNS records to fully propagate.
- Sometimes your host may not be able to register your CNAMEs due to a conflict with other DNS records. This usually occurs when adding the first CNAME. If you encounter a record conflict, contact Hostinger support to determine if existing records are necessary or if they can be safely removed.