How to integrate Google Calendar with systeme.io
In this article, you will learn how to integrate your Google Calendar account with systeme.io.
What you need to know:
Systeme.io makes managing your schedule easier with its integration with Google Calendar.
- No need to go through external tools to schedule your appointments or events.
- You can directly create, synchronise, and integrate Google Calendar events into your forms or emails from your systeme.io account.
How to Set Up the Integration with Google Calendar
The setup is quick and simple. In just a few steps, you can connect your Google account and start managing your calendar from Google Calendar on systeme.io.
1. Click on your profile picture, then go to Settings.

2. Scroll down the left menu to the Integrations, then click on it.
3. Click on Google Calendar among the various available integrations to add a Google account to your systeme.io account.

4. In the popup window, click on Connect to start the integration of your Google Calendar.

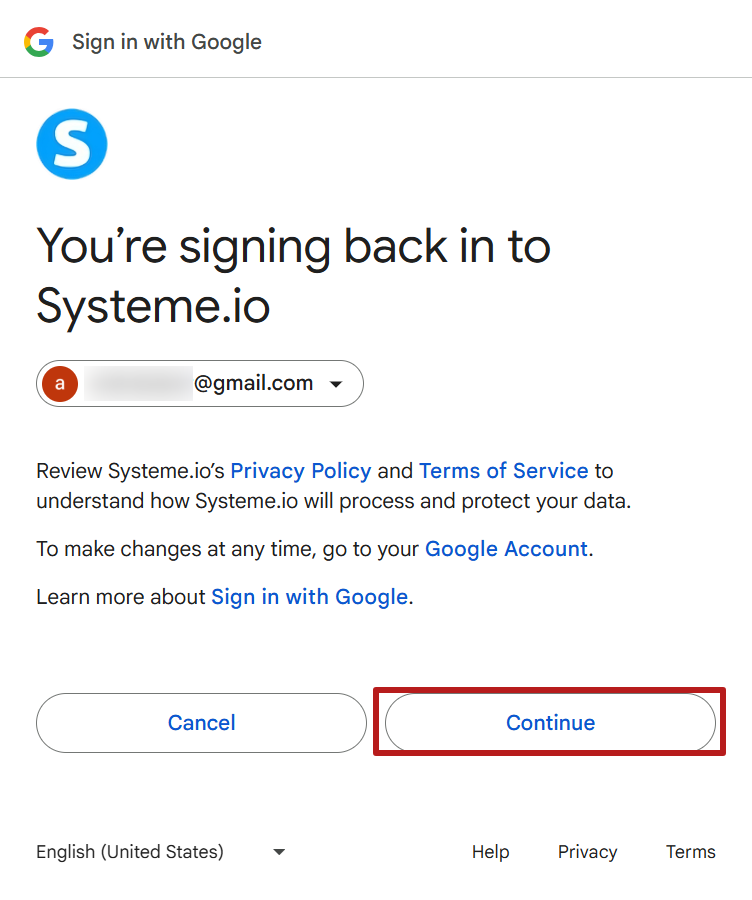
5. A second popup will appear where you need to select the Google account you want to add.

6. Click on Continue so that Google allows systeme.io to access your information.
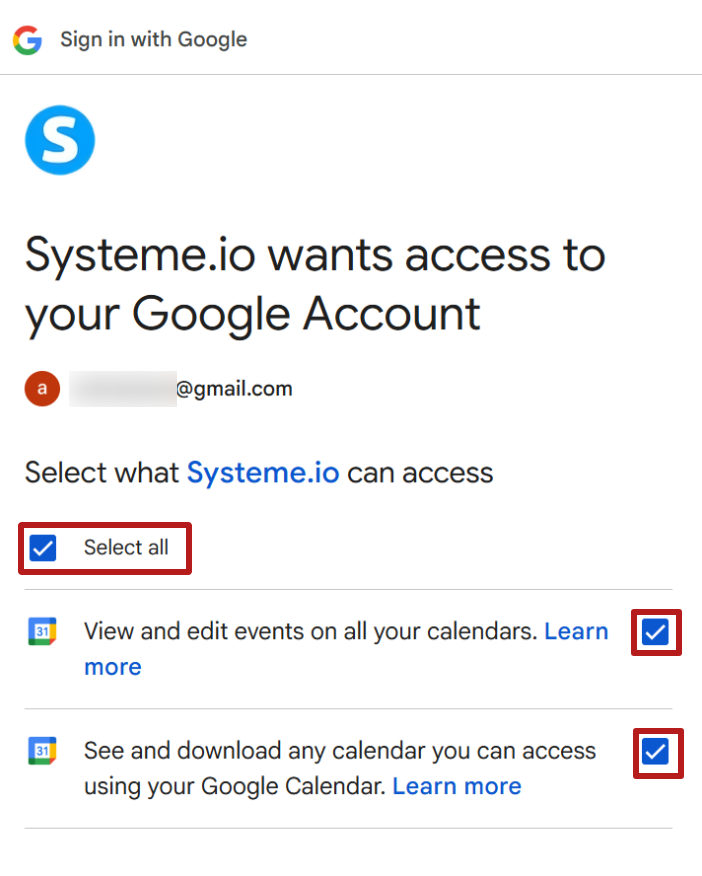
7. A window will open with a permission request from systeme.io to access your Google Calendar. Simply check the box Select All during the permission request, which activates access to view, modify, and manage all your calendars. This allows systeme.io to automatically synchronise your events, particularly for appointment scheduling or calendar-related automations.
8. Finally, you will find that the Google Calendar integration is now connected to your systeme.io account.
Note: Google Meet will be connected by default to your systeme.io account following the Google Calendar integration.
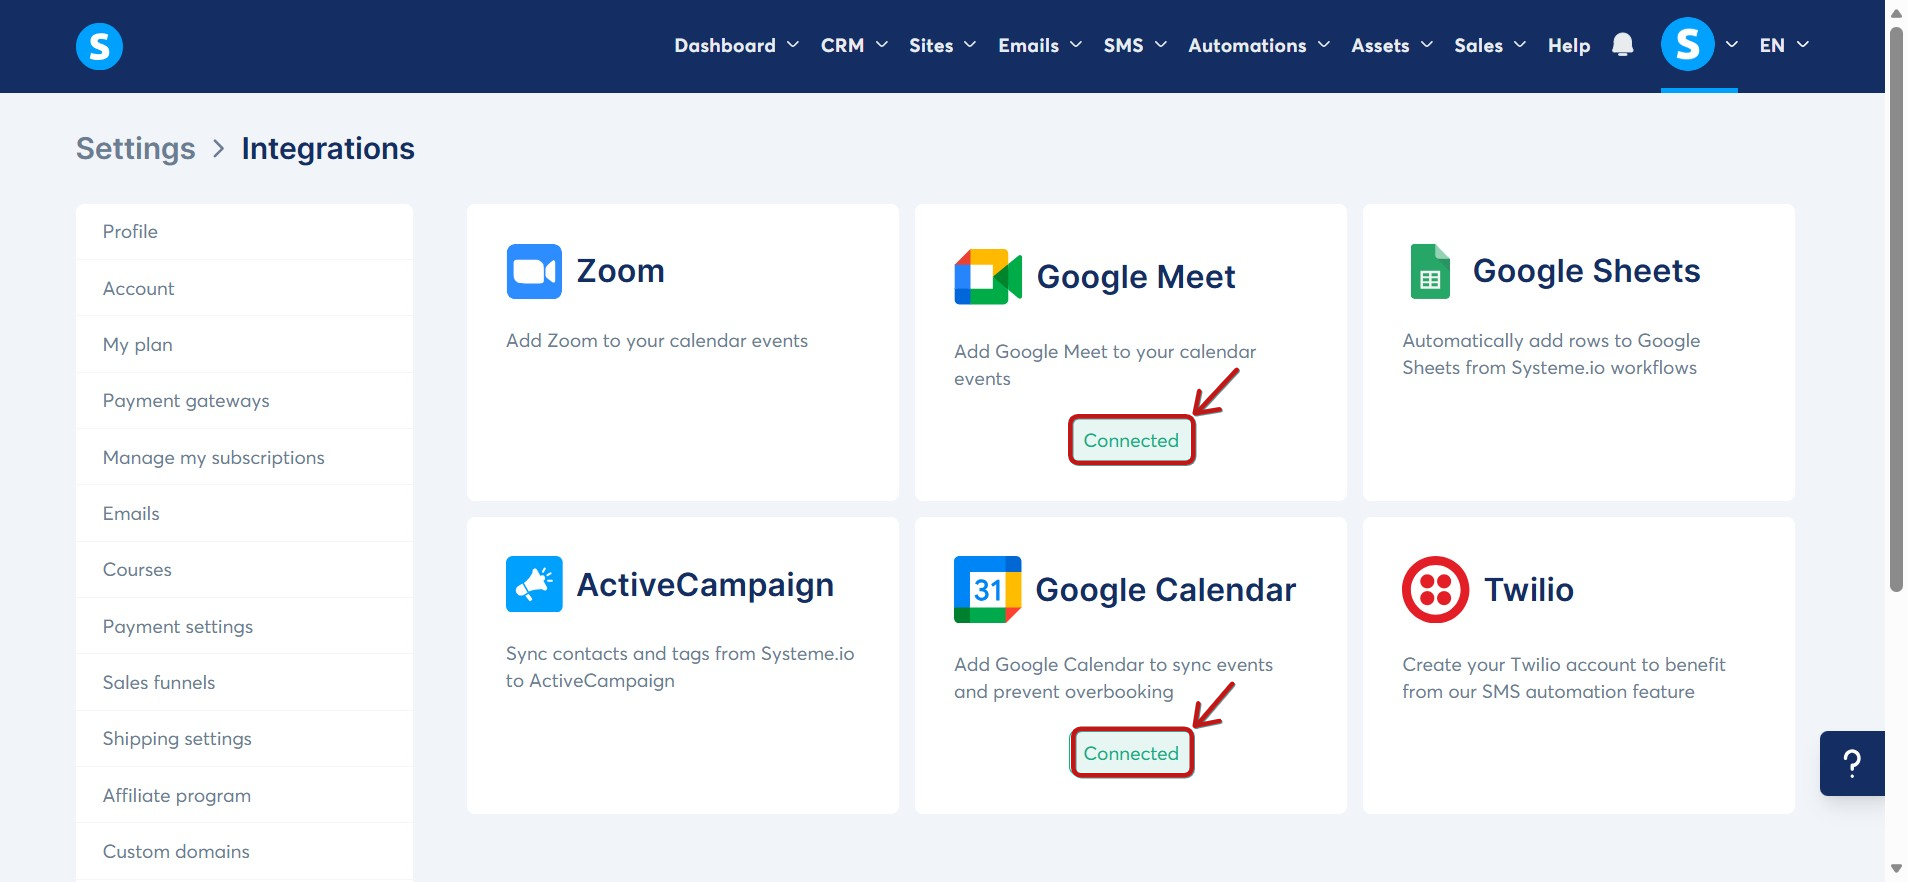
9. Click the Connected button to view account details, disconnect the account, or add another account.
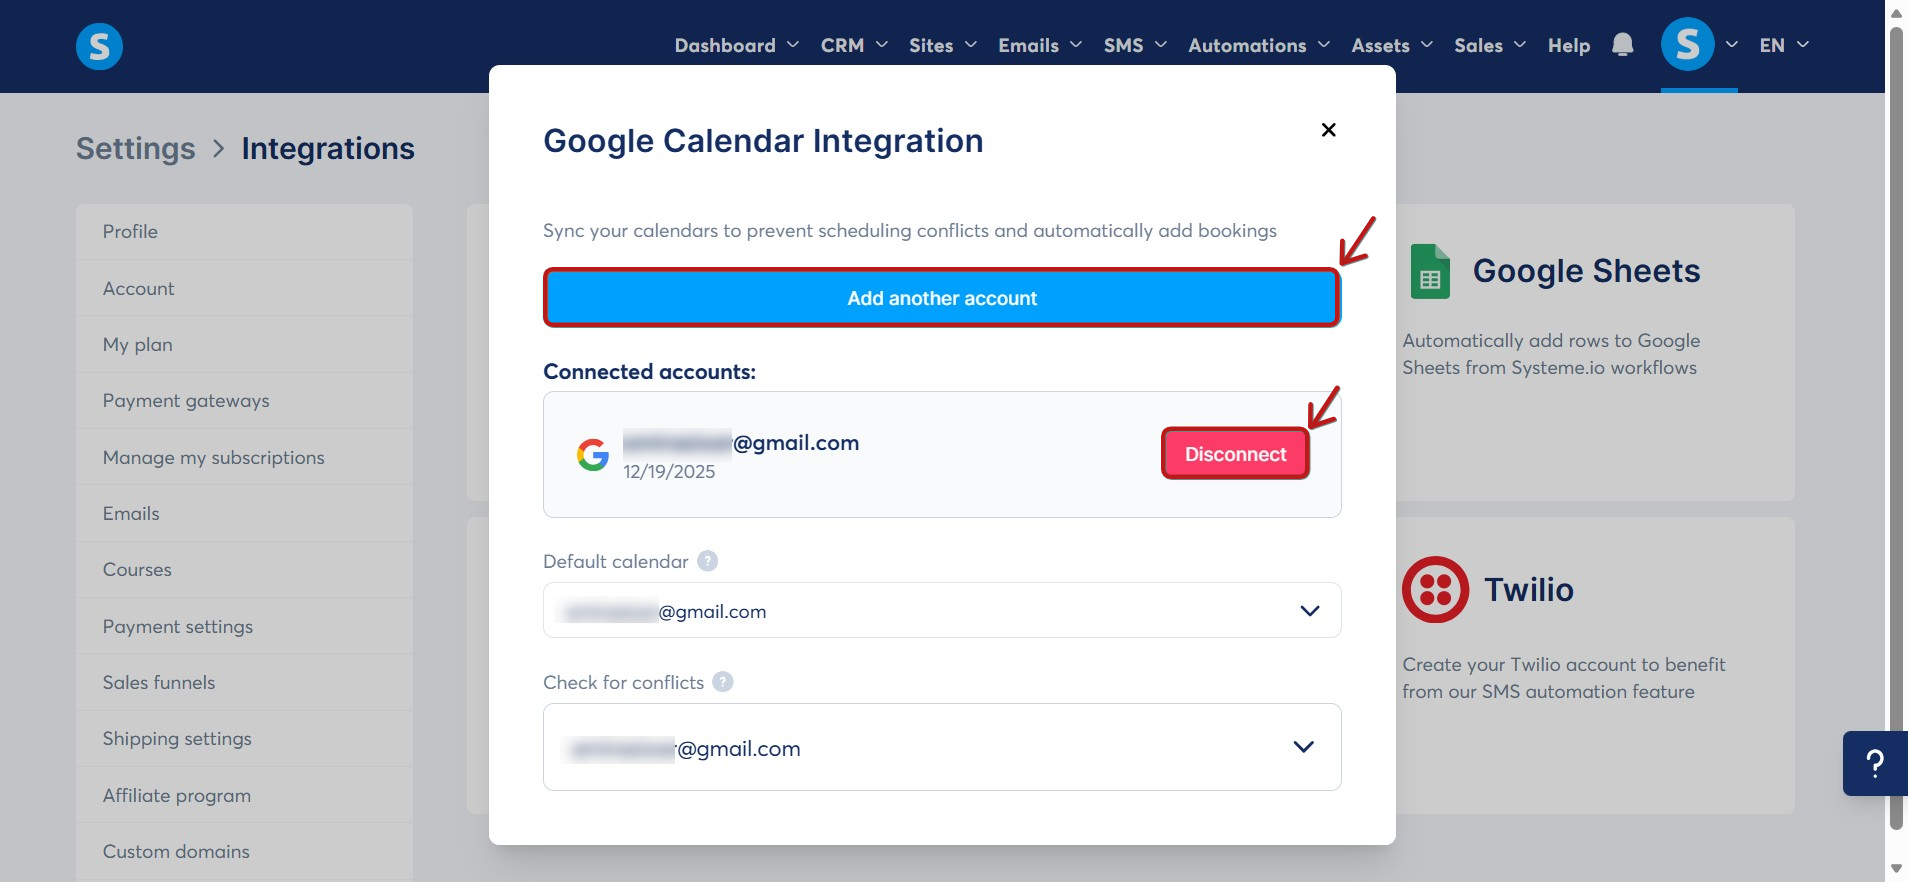
10. In the Google Calendar integration of systeme.io, the default calendar is the one where all events created from your pages, forms, or automations will be automatically added.
It serves as the main calendar to centralise your appointments. The Check for Conflicts option helps to avoid overlaps by analysing your connected calendars before confirming a booking.
This ensures better organization and prevents double-scheduling in the case of integrating multiple Google Calendar accounts.

Features Available with the Google Calendar Integration
- Automatic creation of Google Calendar events: when a user schedules an appointment via a systeme.io calendar, an event is automatically created in your Google Calendar account.
- Adding event details to emails: appointment information (date, time, subject…) is automatically included in confirmation, reminder, or follow-up emails sent to participants.
- Two-way synchronisation: any updates or cancellations made on systeme.io are automatically reflected in Google Calendar, and vice versa.
- Centralised schedule management: all appointments scheduled via systeme.io appear in Google Calendar, allowing you to view and manage your schedule in one place.
- Automatic notifications: participants receive reminders before the appointment thanks to alerts configured in Google Calendar.
Notification Emails:
Notifications are sent to the event owner and the guest who made the booking in the following cases:
- Booking Confirmation: Confirmation emails are sent to both parties to indicate that the booking was successful.
- Rescheduling: In the event of rescheduling, notification emails are sent to both parties with the new booking details.
- Cancellation: If either party cancels a booking, cancellation emails are sent to each of them.
Important: It is worth noting that the emails sent to guests contain a Cancel button that redirects them to a confirmation page. Once confirmation is completed, the cancellation is processed, and the corresponding cancellation emails are sent.
Notes:
- You can integrate multiple Google Calendar accounts into your systeme.io account.
- Creating and editing Google Actions for Workspace assistants is disabled. Only the account owner can perform these actions, thus ensuring better security for integrations and exclusive control over their use.