How to authenticate your domain name for email sending
In this article, you will learn how to authenticate your domain name for email sending.
You will need:
- A systeme.io account
- A domain name
Step 1: Access your Domain Settings
Hover over your profile picture and click on Settings (1). In the settings menu, click Emails (2).
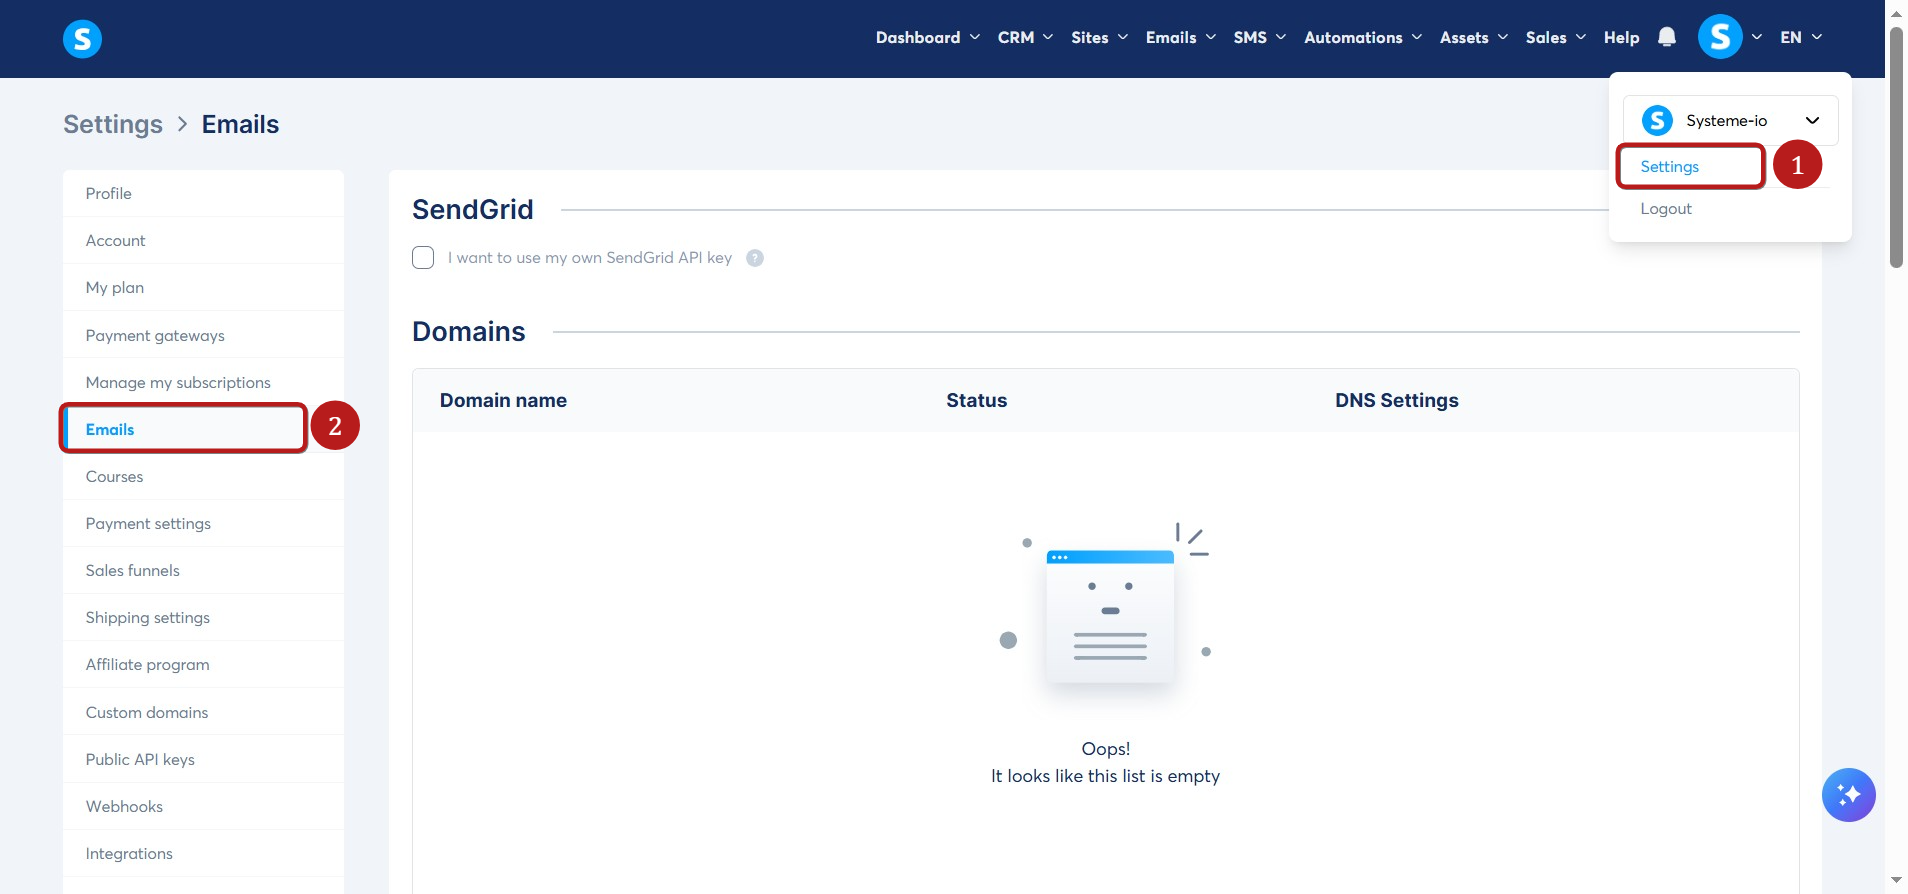
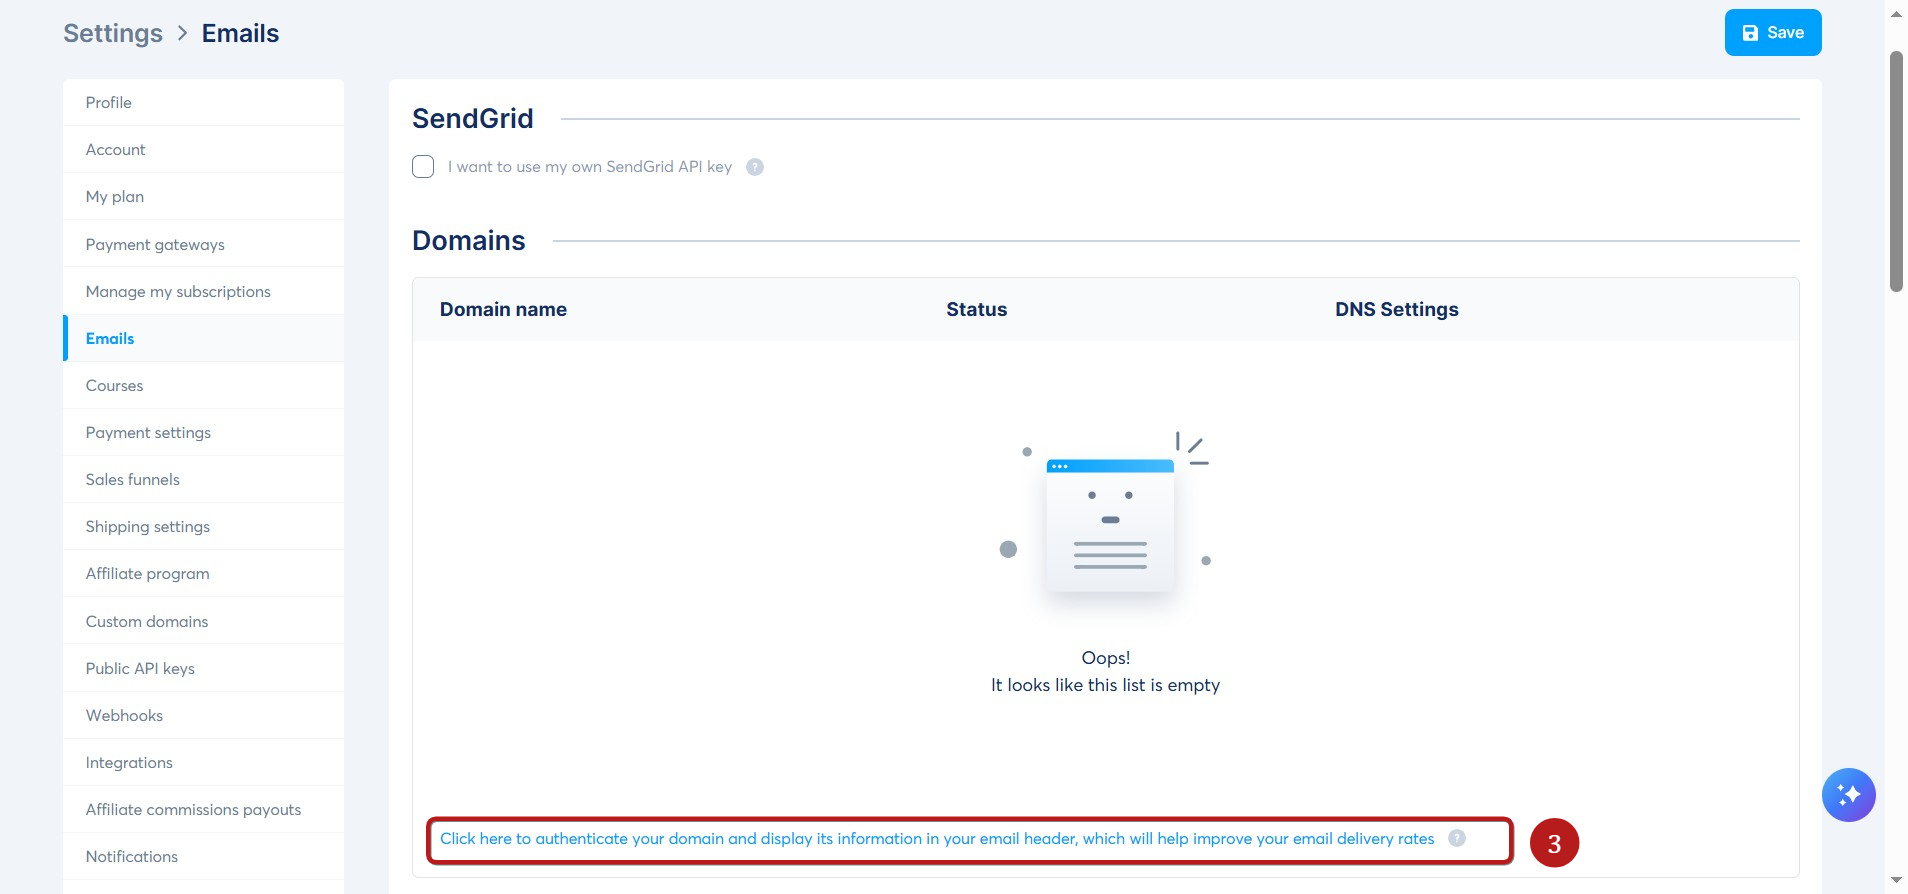
Go to the Domains section, then click the link labeled Click here to authenticate your domain and display its information in your email header, which will help improve your email delivery rates (3).
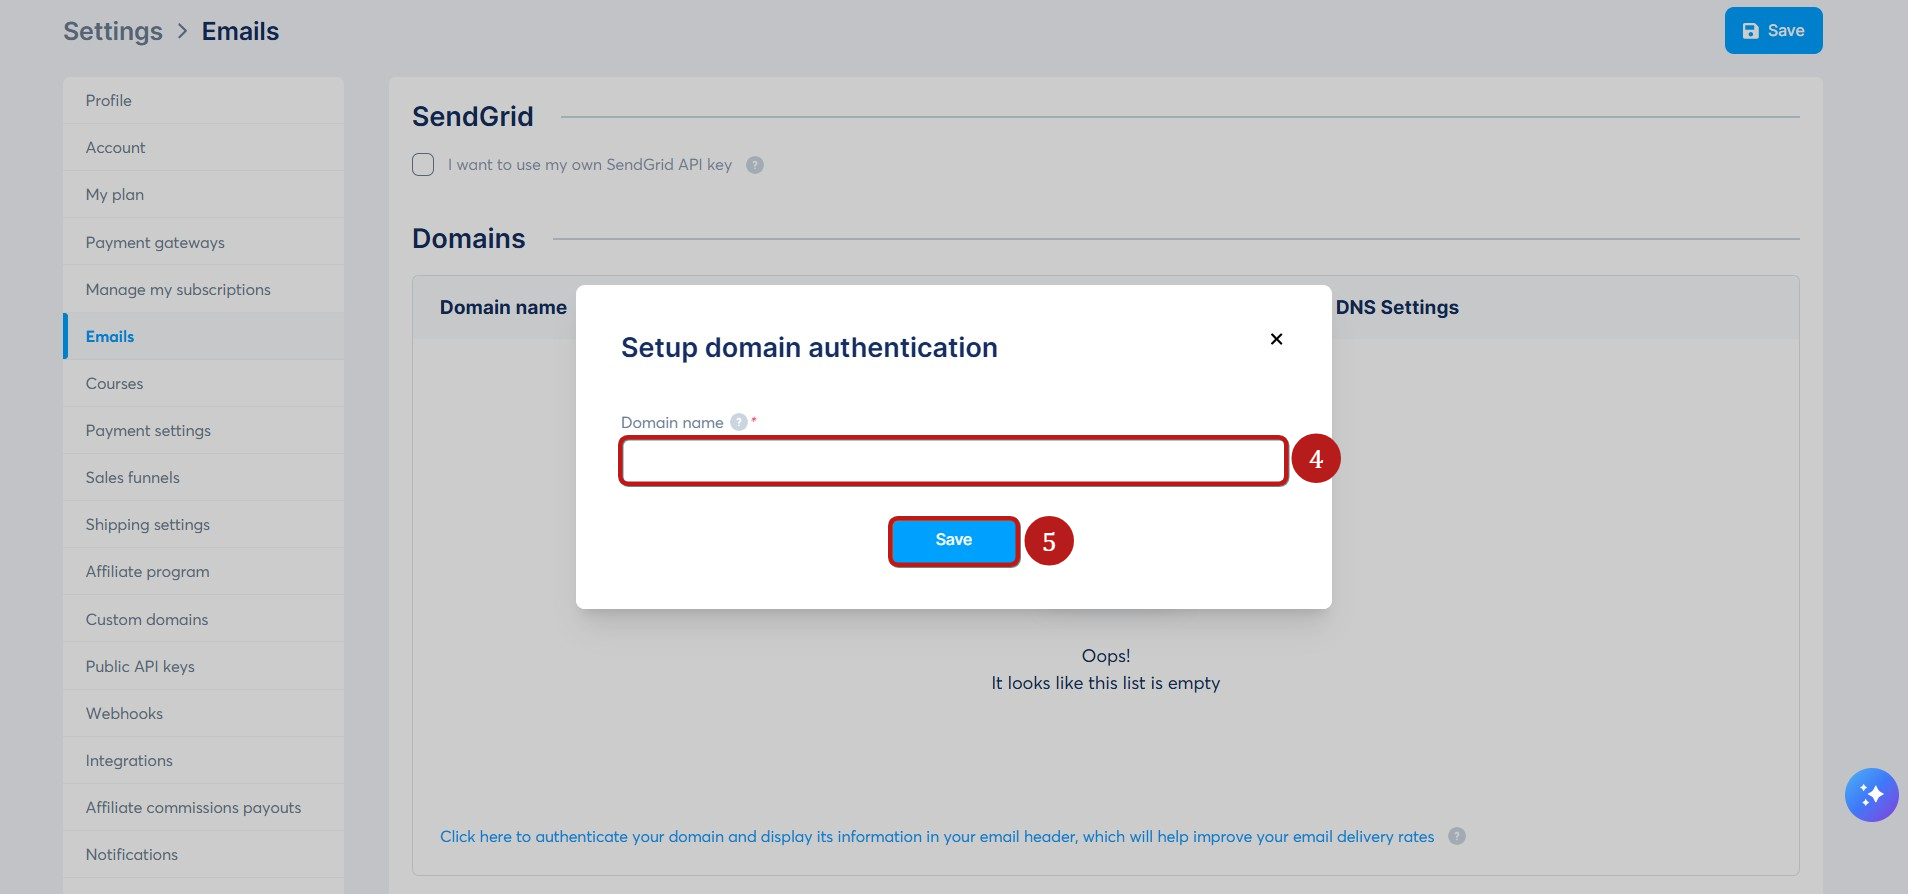
In the popup that appears, enter your domain name (without the "www") (4).
Next, click Save (5) to generate the three CNAME records to be integrated into the DNS settings of your domain host.
Important: A domain can only be authenticated in one systeme.io account or sub-account. Once a domain is successfully authenticated, it becomes exclusively linked to that specific account and will be automatically removed from any other accounts where its status was still pending. If you attempt to add a domain that is already authenticated elsewhere, the system will not allow it and display an error message.
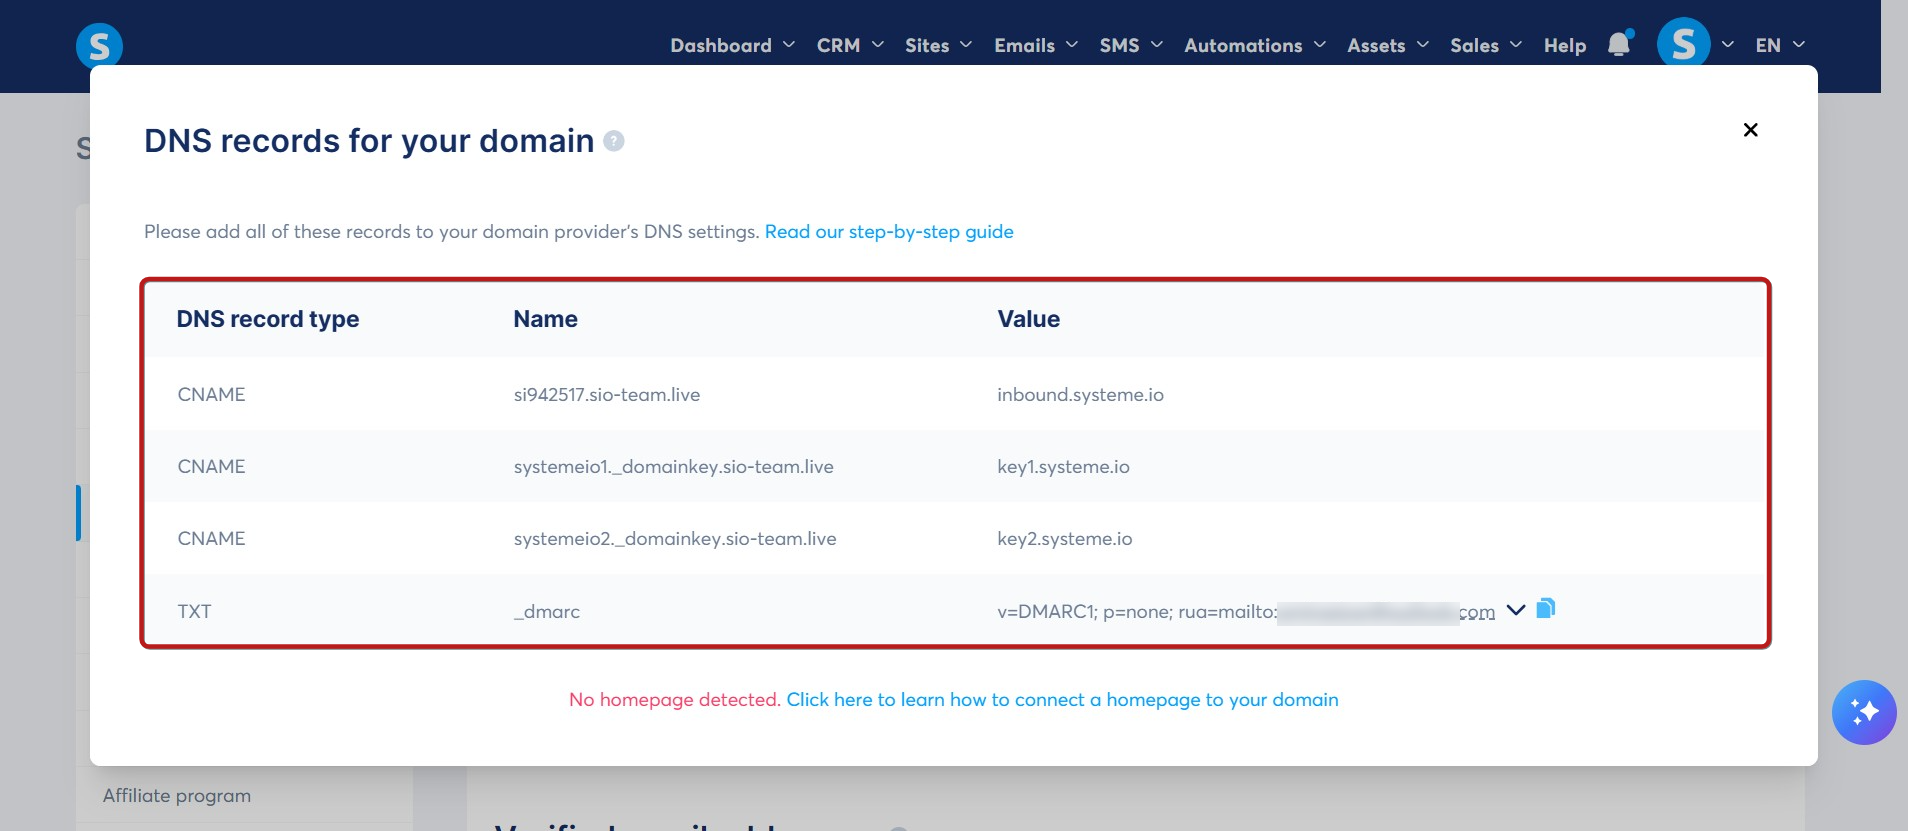
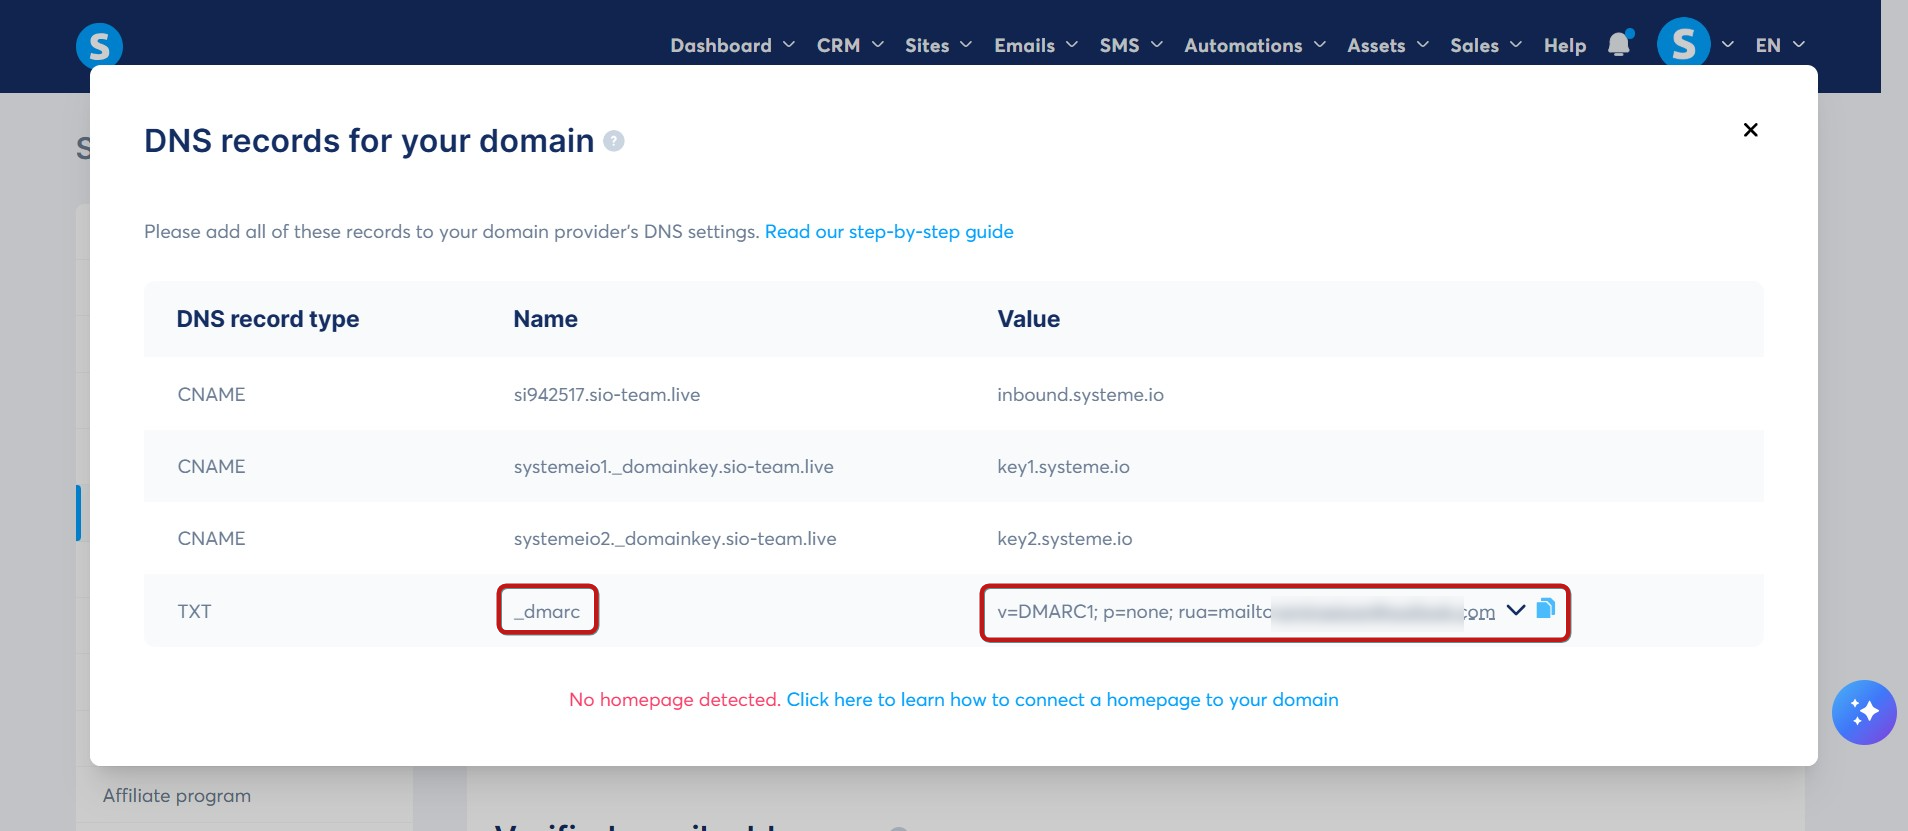
In this example, we entered sio-team.live to generate the three CNAMEs.
The list of three CNAME records will appear in a table, along with a DMARC record. Both must be added to your host for authentication. To learn more about how to add a DMARC record, click here.
IMPORTANT:
1) Authentication of a domain name is mandatory to send emails from systeme.io.
2) The domain you want to authenticate must have an active website linked to it. If the domain leads to a 404 error page, email providers may block your emails.
Example: The site sio-team.live must be functional; otherwise, when you send emails with the email address of this domain name (example: info@sio-team.live), your contacts may not receive your emails due to server blocking.
3) You cannot authenticate domains from personal email providers (e.g., Gmail, Yahoo, ProtonMail). Only custom domains can be authenticated.
Step 2: Log in to your domain host
First, start by accessing your domain host account.
Next, add the provided CNAME records to your domain's DNS zone.
Note: If you encounter any difficulties, please contact your host's support team for guidance.
In this article, we will be using GoDaddy as an example:
Note: While we use GoDaddy for this example, the process is similar across most hosts. If you are using a different provider, you can find specific step-by-step instructions in the related articles section at the bottom of this page for some other hosts.
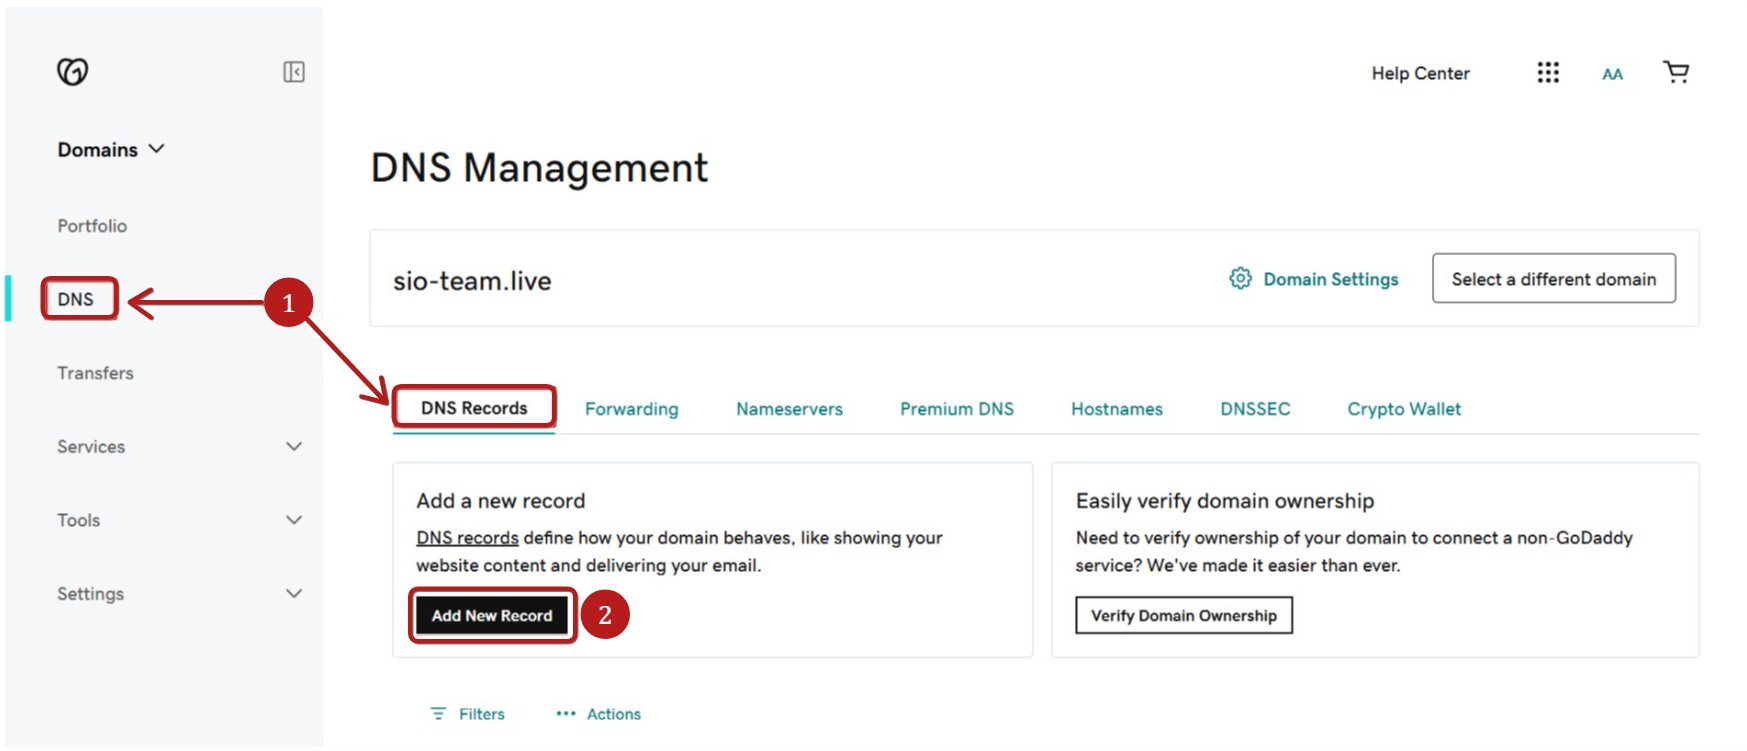
- Once logged in, navigate to the domain you want to authenticate, then click on DNS records (1) and then click on Add new record (2).
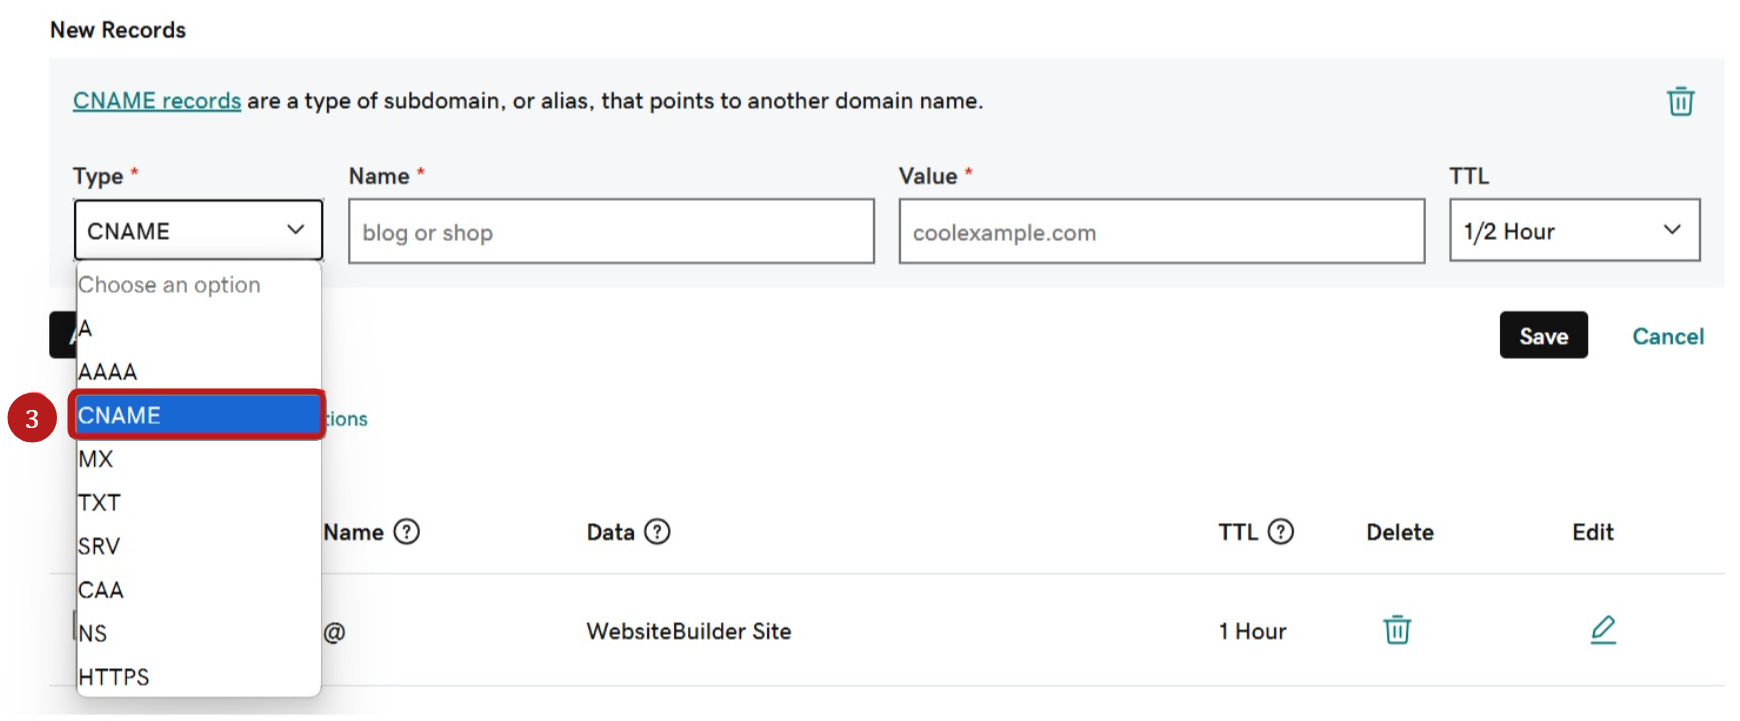
- Select the CNAME option for adding the first 3 records (3).
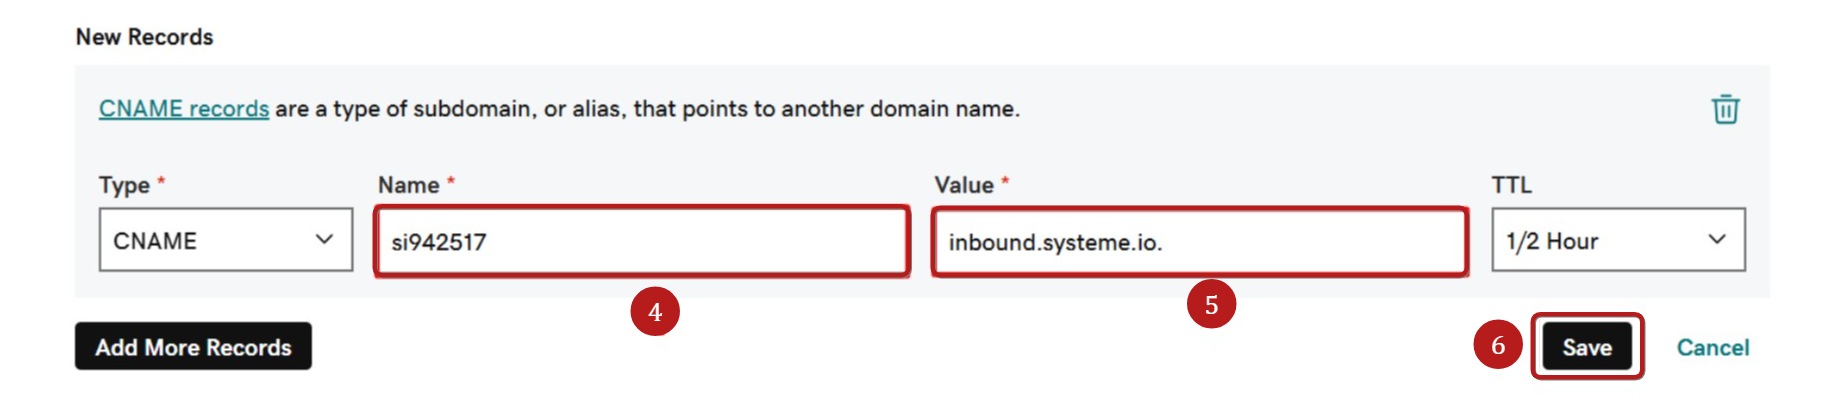
You will have form fields to fill out:
- Return to the CNAME records generated in your systeme.io account to copy what is shown in the screenshot below.
- In your host's Name field, paste the value from systeme.io.
- Important: Enter only the part before your domain name (e.g., if the value is si942517.sio-team.live, enter only si942517).
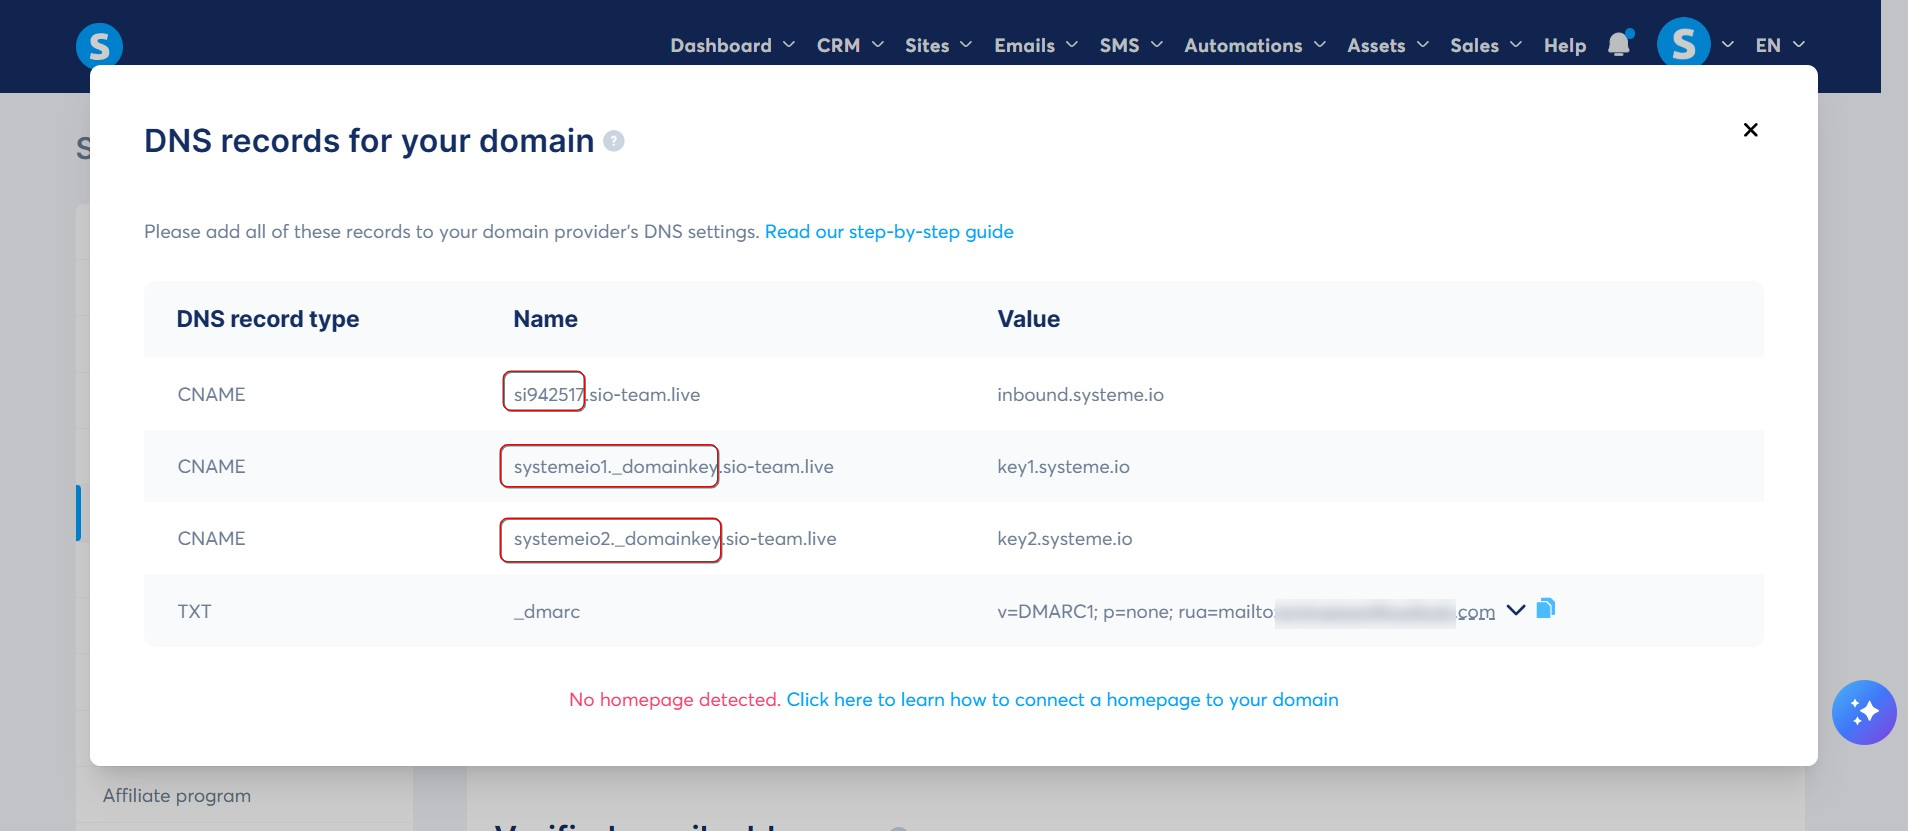
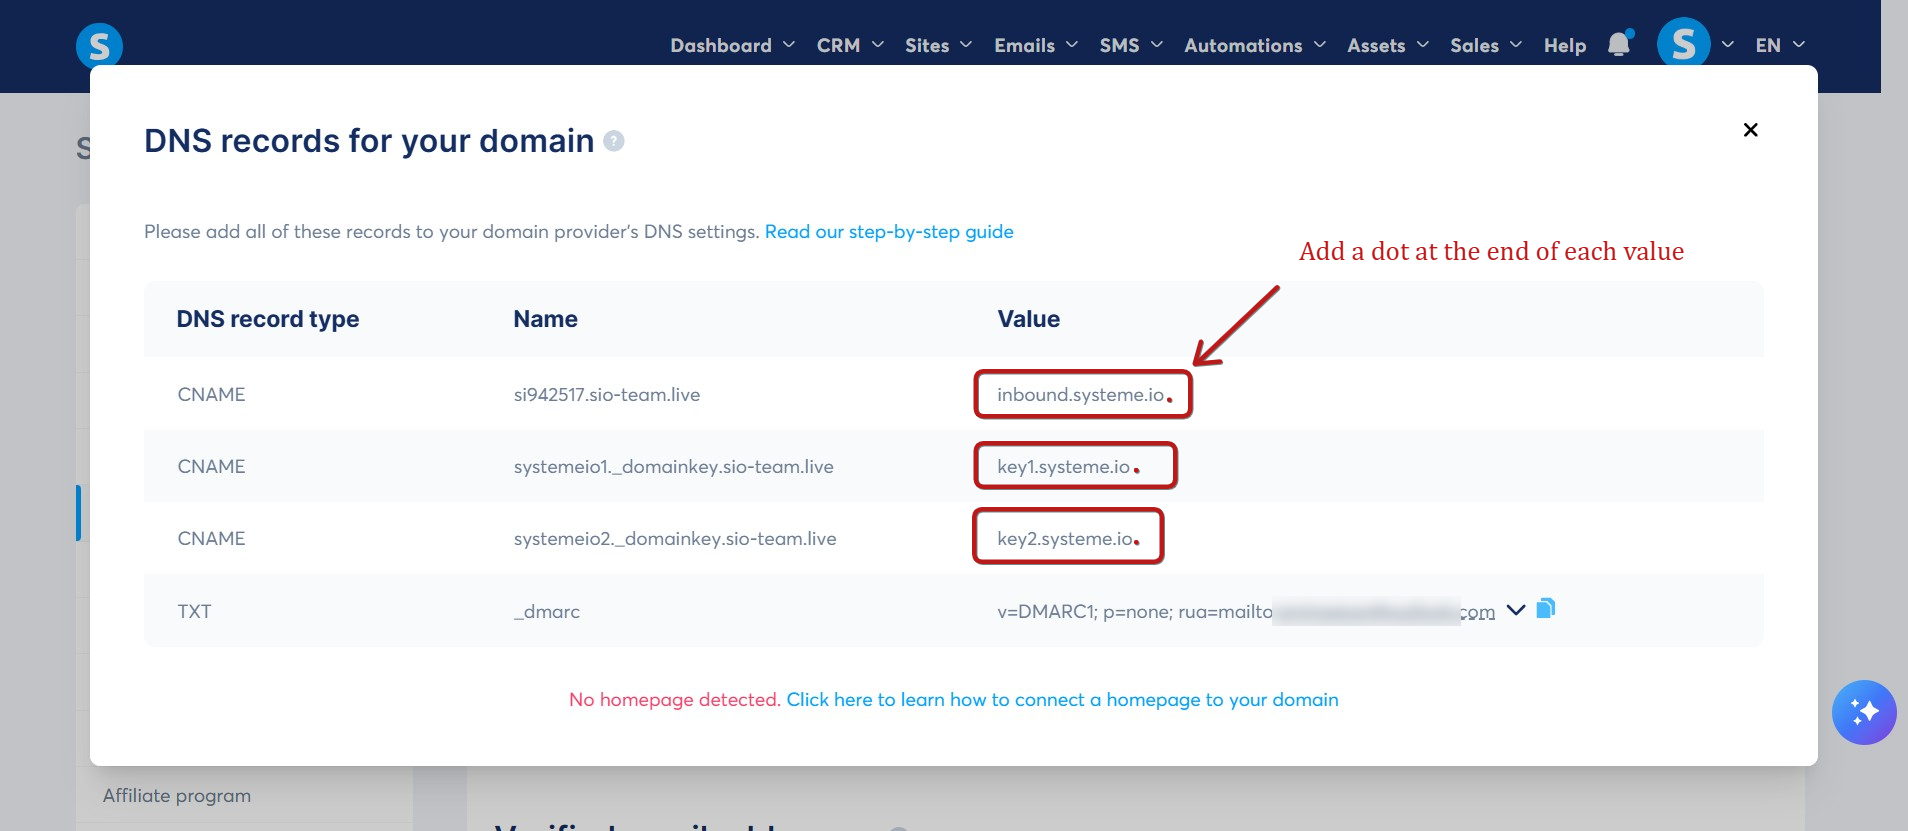
- In the Value field, paste the value provided by systeme.io.
- Note: Add a period (.) at the end of the value.
In our example, we need to enter "inbound.systeme.io."
Here is how the records should look in your provider's DNS zone (these values are examples):
NAME (host): si942517 (4) VALUE: inbound.systeme.io. (5)
NAME (host): systemeio1._domainkey VALUE: key1.systeme.io.
NAME (host): systemeio2._domainkey VALUE: key2.systeme.io.
- Click on Save to validate (6).
Note: You must repeat this process for all three CNAME records.
- Select the TXT option for adding the DMARC.
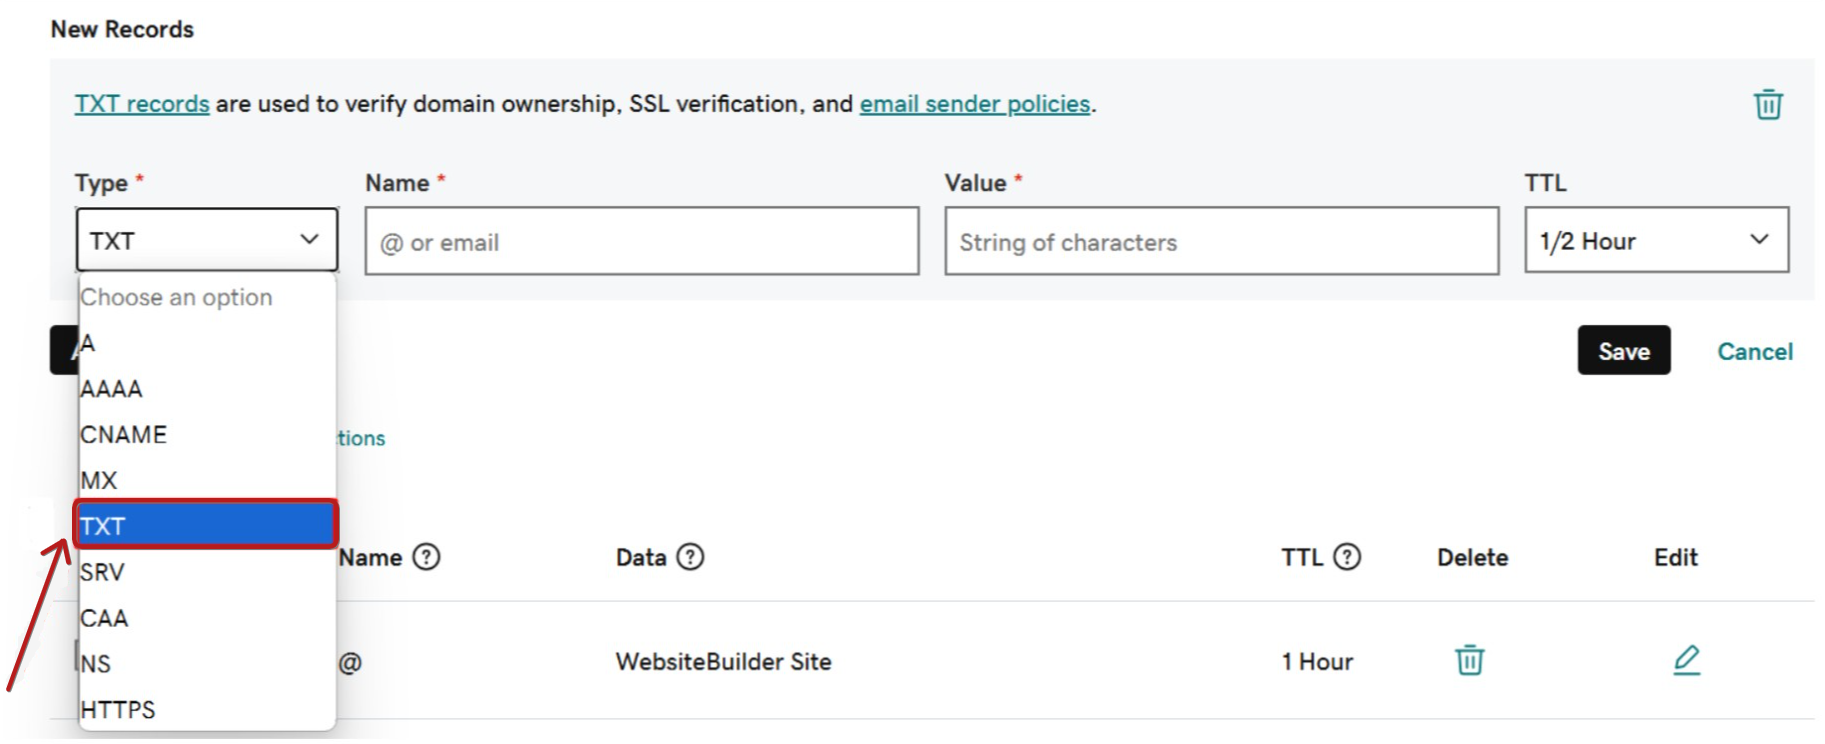
- Return to the list of records to copy and add the generated TXT from your systeme.io account.
Here is how each line must be added to your host's DNS zone (these values are examples):
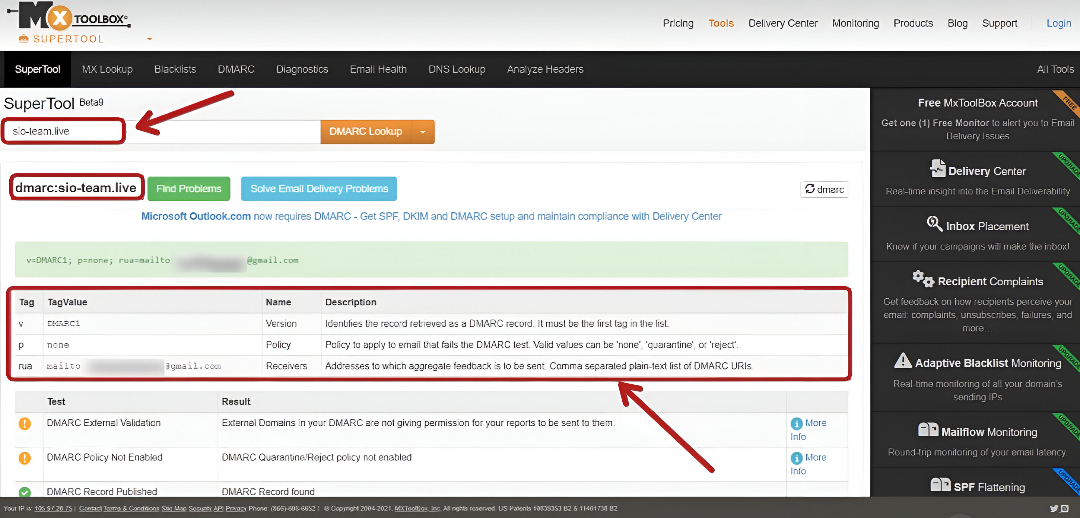
Name: _dmarc (7)
Value: v=DMARC1; p=none; rua=mailto:example@gmail.com (8)
- Click on Save to validate (9).

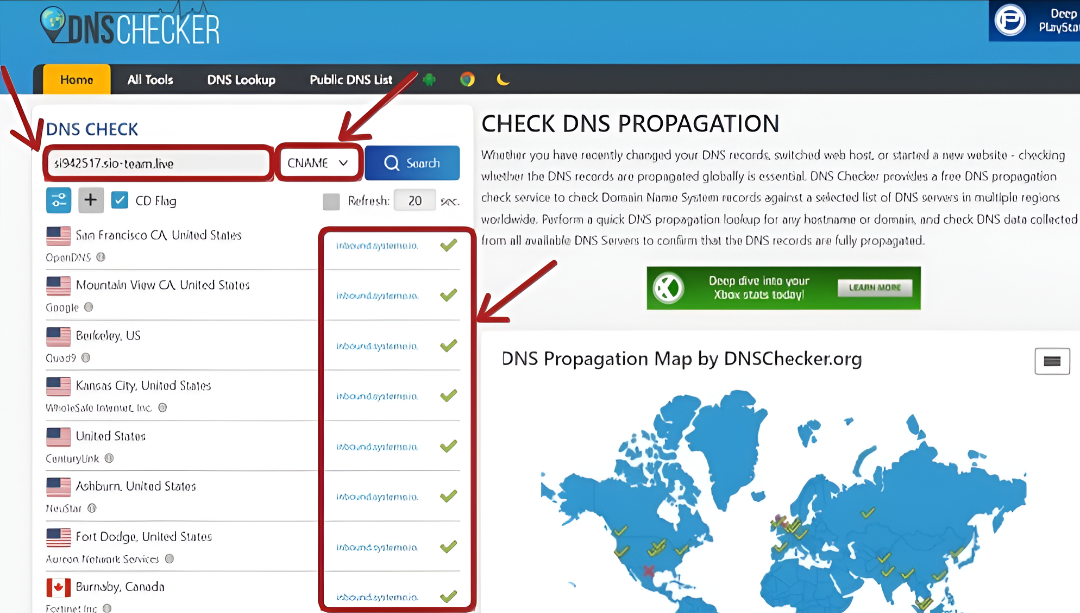
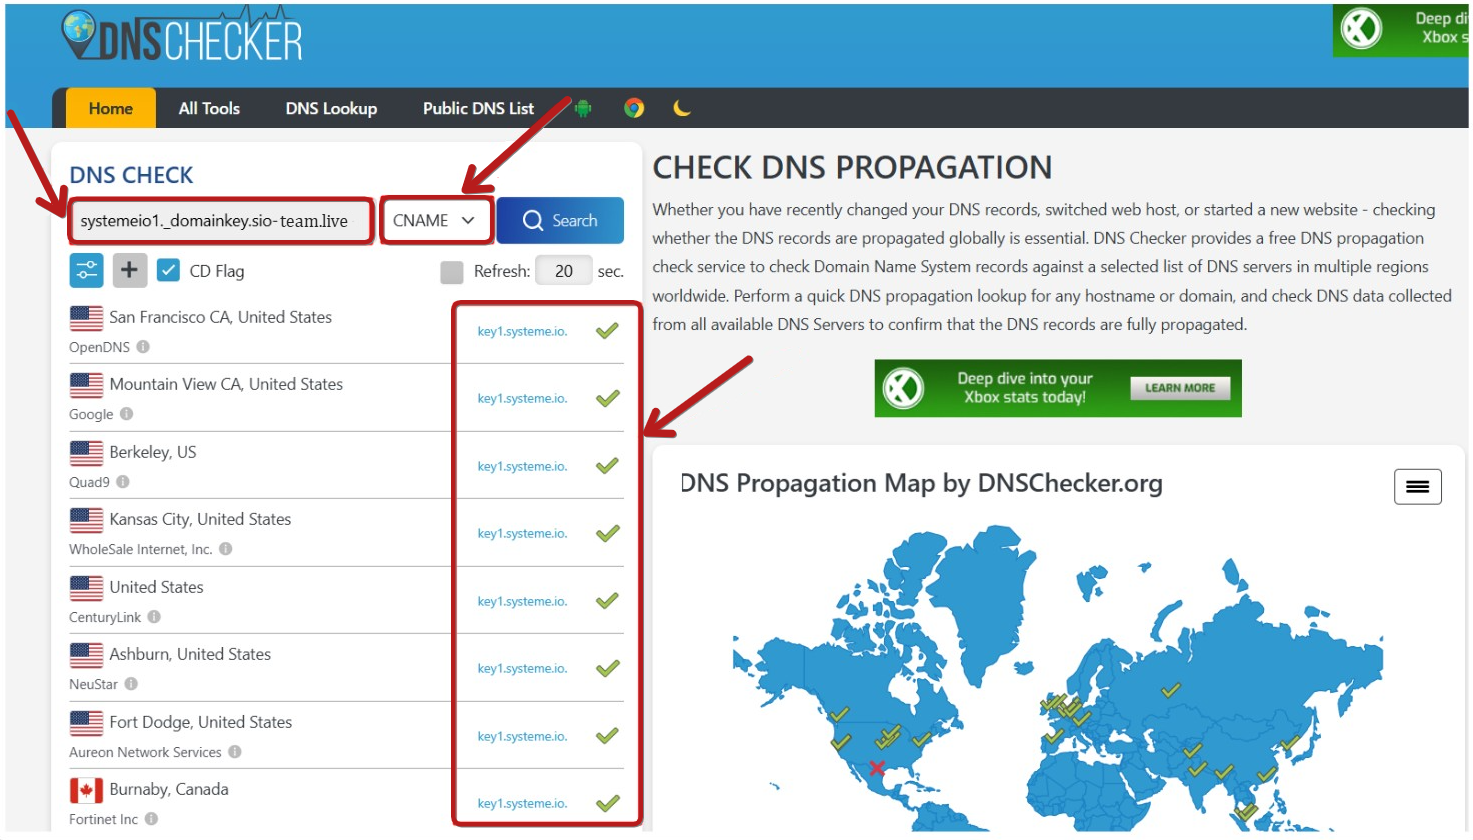
- Check that your CNAME records are correctly configured using this site: DNS checker
Note: To check your records, you must enter the full CNAME name (including your domain name) into the search bar.
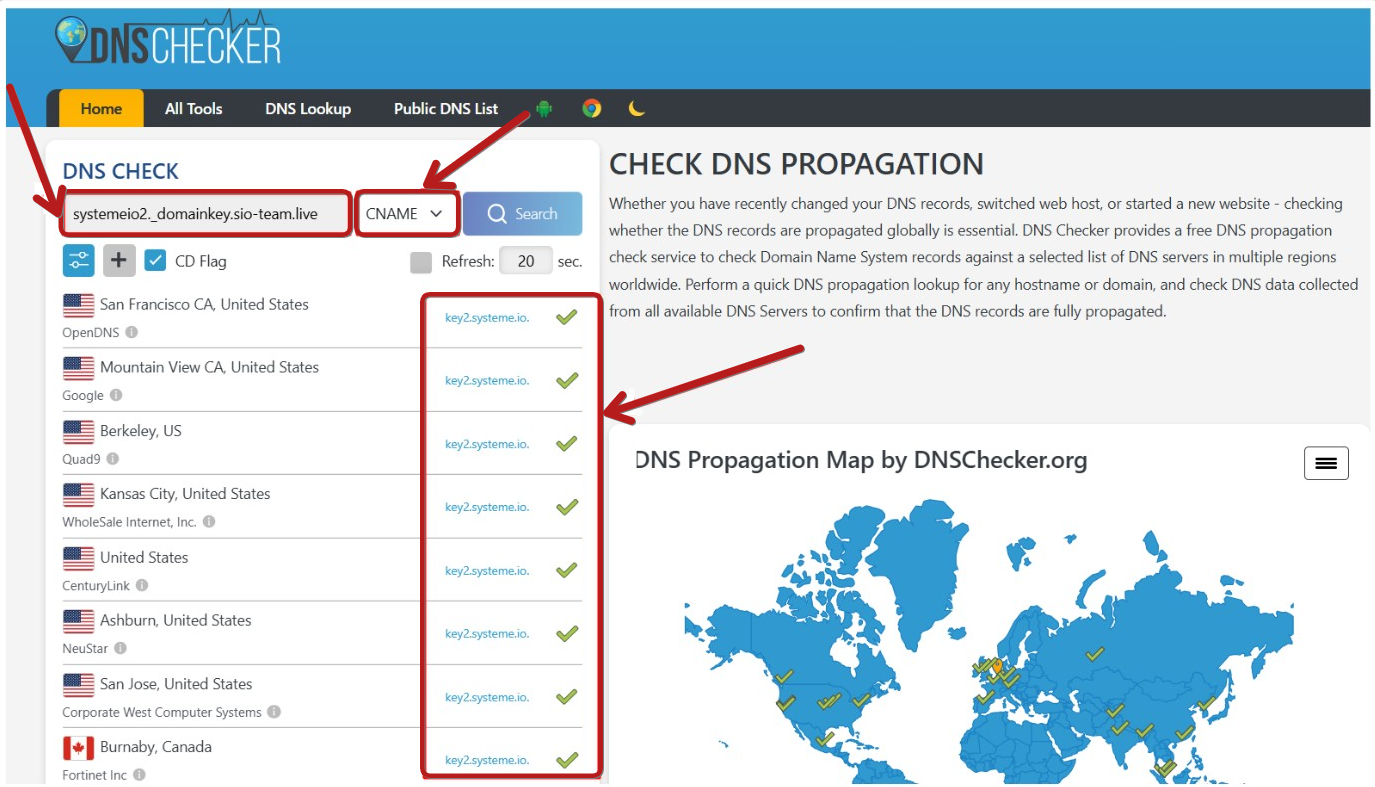
If you see a green check next to the exact value for your three CNAME records, it means that your domain name has been successfully authenticated. If you want, you can also contact the support team here for a verification on their end.
CNAME verification 01:
CNAME verification 02:
CNAME verification 03:
However, if any CNAME records appear in red, check your DNS settings for errors. If you cannot resolve the issue, please contact support and include a screenshot of your DNS records.
Note: In any case, you must contact support here after performing the action.
- Check that your DMARC record has been added by searching with your domain name using this site: DMARC checker
IMPORTANT: To send emails using your authenticated domain, you must confirm the sender email address associated with that domain following the steps outlined in the article "How to confirm your email sender address".