How to sell an online course
In this article, you will learn how to sell an online course using systeme.io.
You will need:
- A course created in systeme.io (Learn how to create a course using systeme.io)
- A sales funnel (Learn how to create a new funnel)
- An order form (Learn how to create an order form/payment page)
Configuring your order form
In your sales funnel, first click on your order form. Then, once you are on this page, you will add the course that you have created.
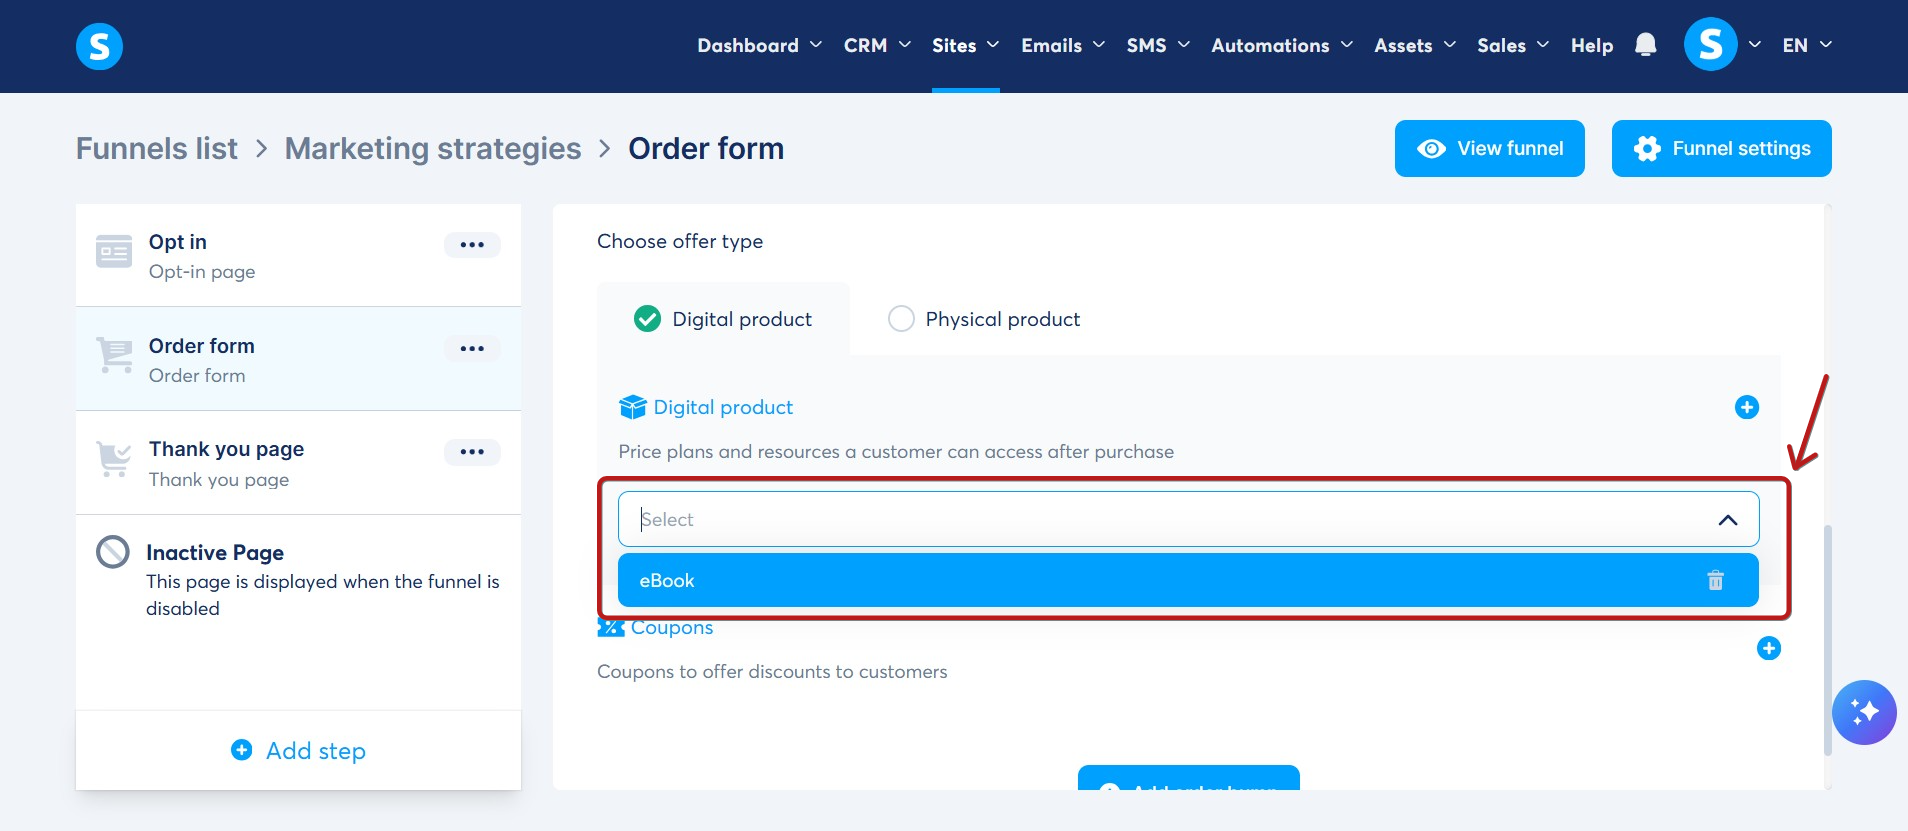
To do this, select Digital product (1) from the offer types on your payment page
Then, click on the + (2) icon on the right side of the Digital Product section to create a new digital product.

After creating a new digital product, you need to name it (3). Then, click the + icon to add a resource to your offer, select Courses, and choose the course you want to sell (4).
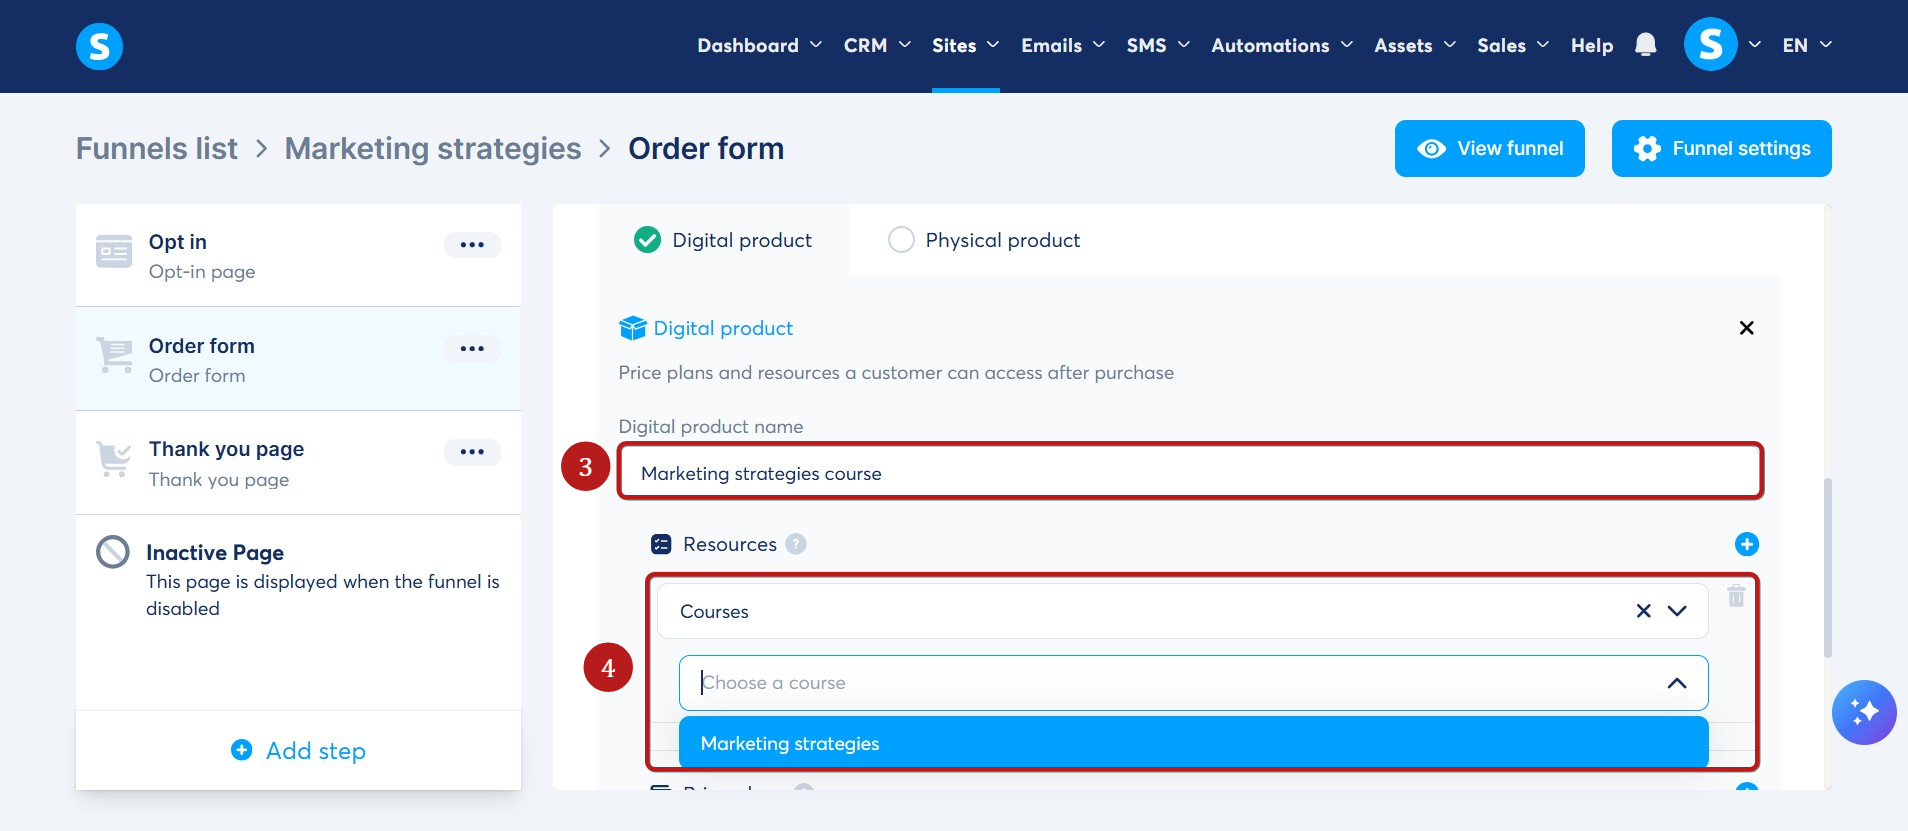
Next, select the course access type (5).
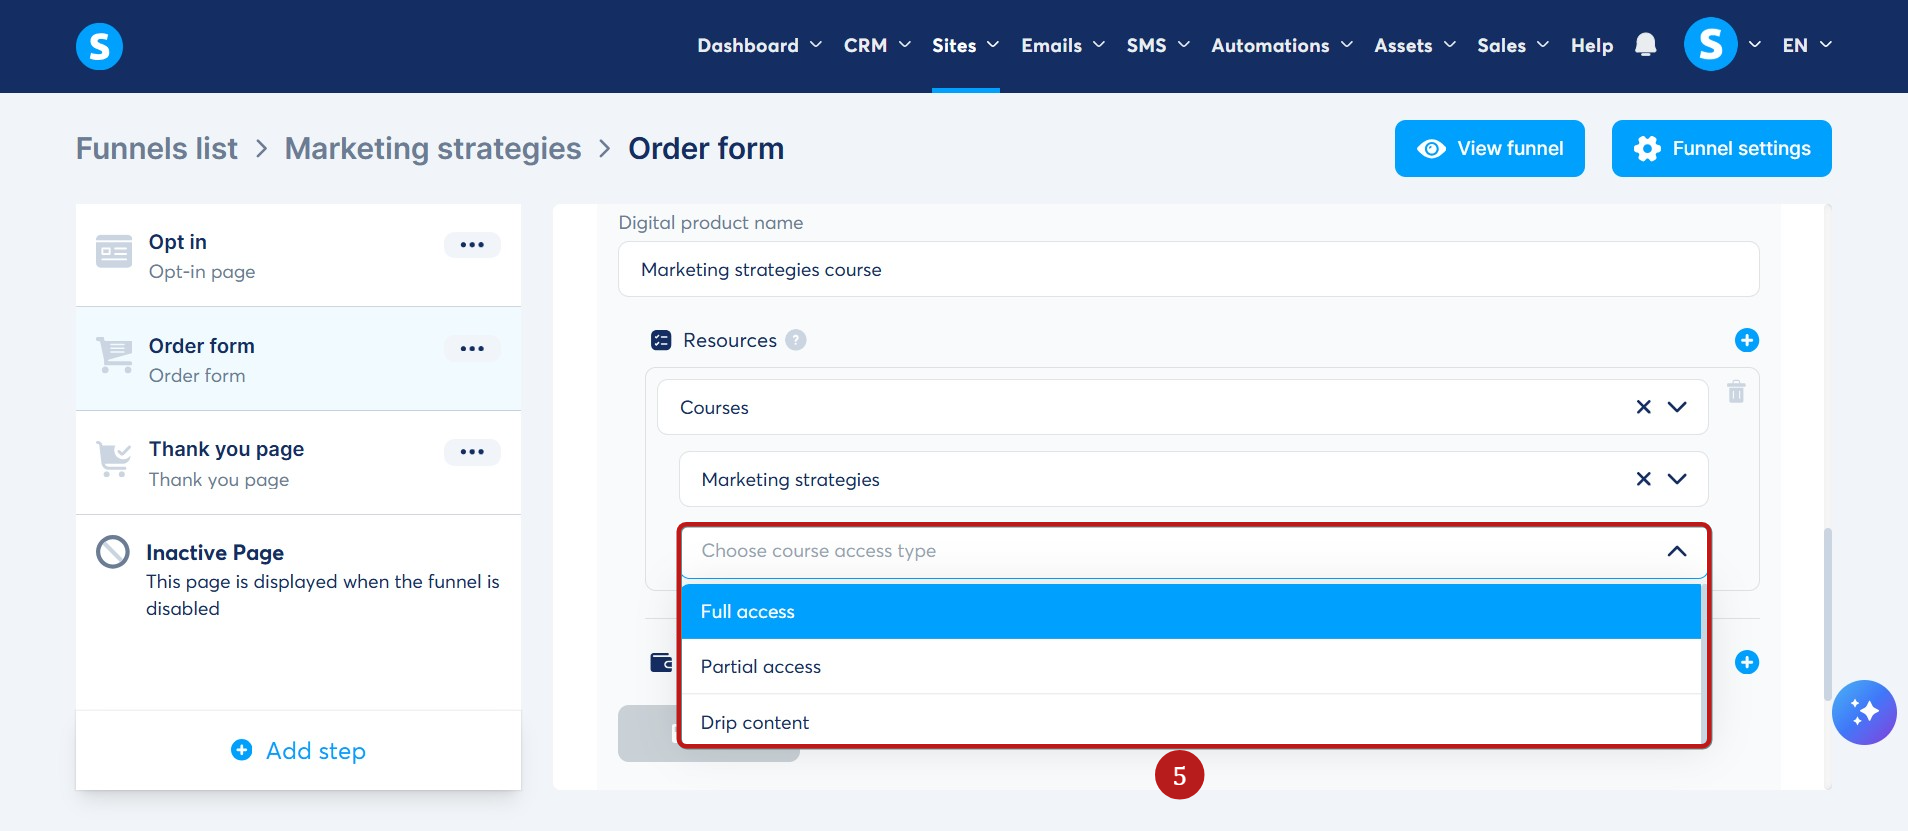
The following options are available depending on how the student should have access to the course:
A. Full access: Students gain complete access upon initial payment.
B. Partial access: Students will be able to access specific modules selected by the instructor.
C. Drip content: Students access course lectures gradually based on the delay set by the instructor. Example: Every week (every 7 days), the customer will have access to a new lecture.
Click here to learn more about the differences between these two access types.
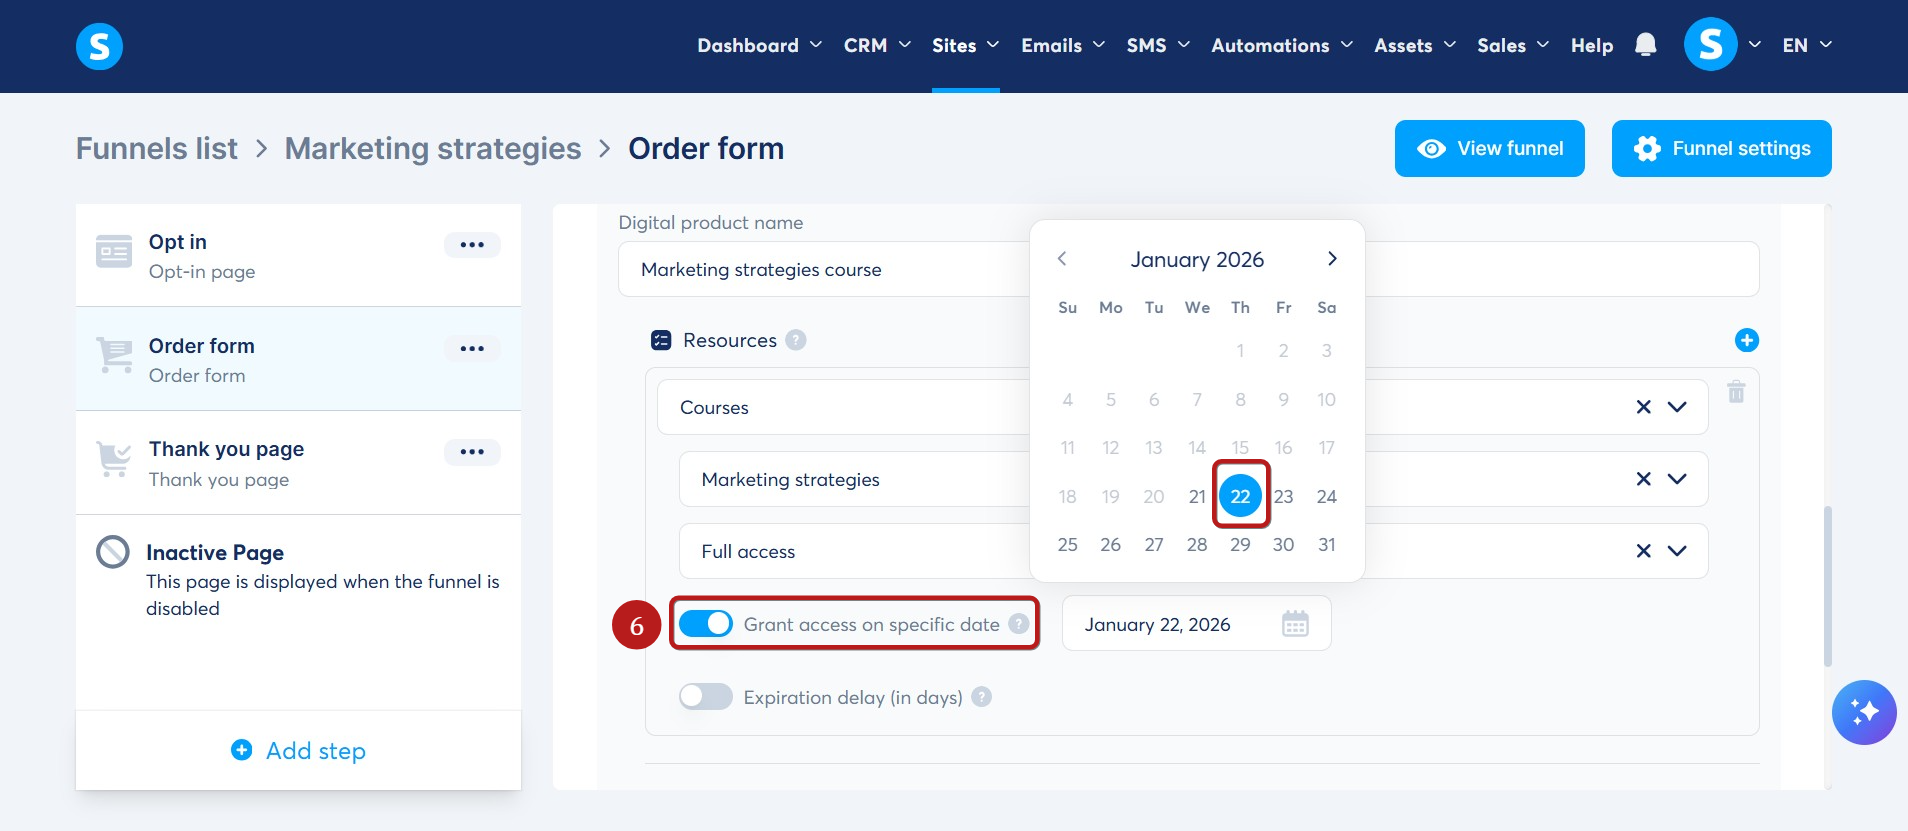
You can also choose to grant access to your courses on a specific date by activating this feature and selecting a date (6).
Example: If the customer enrolled in the course on January 20, 2026, but we specified the access date to be January 22, 2026, they will only have access to it starting on January 22, 2026.
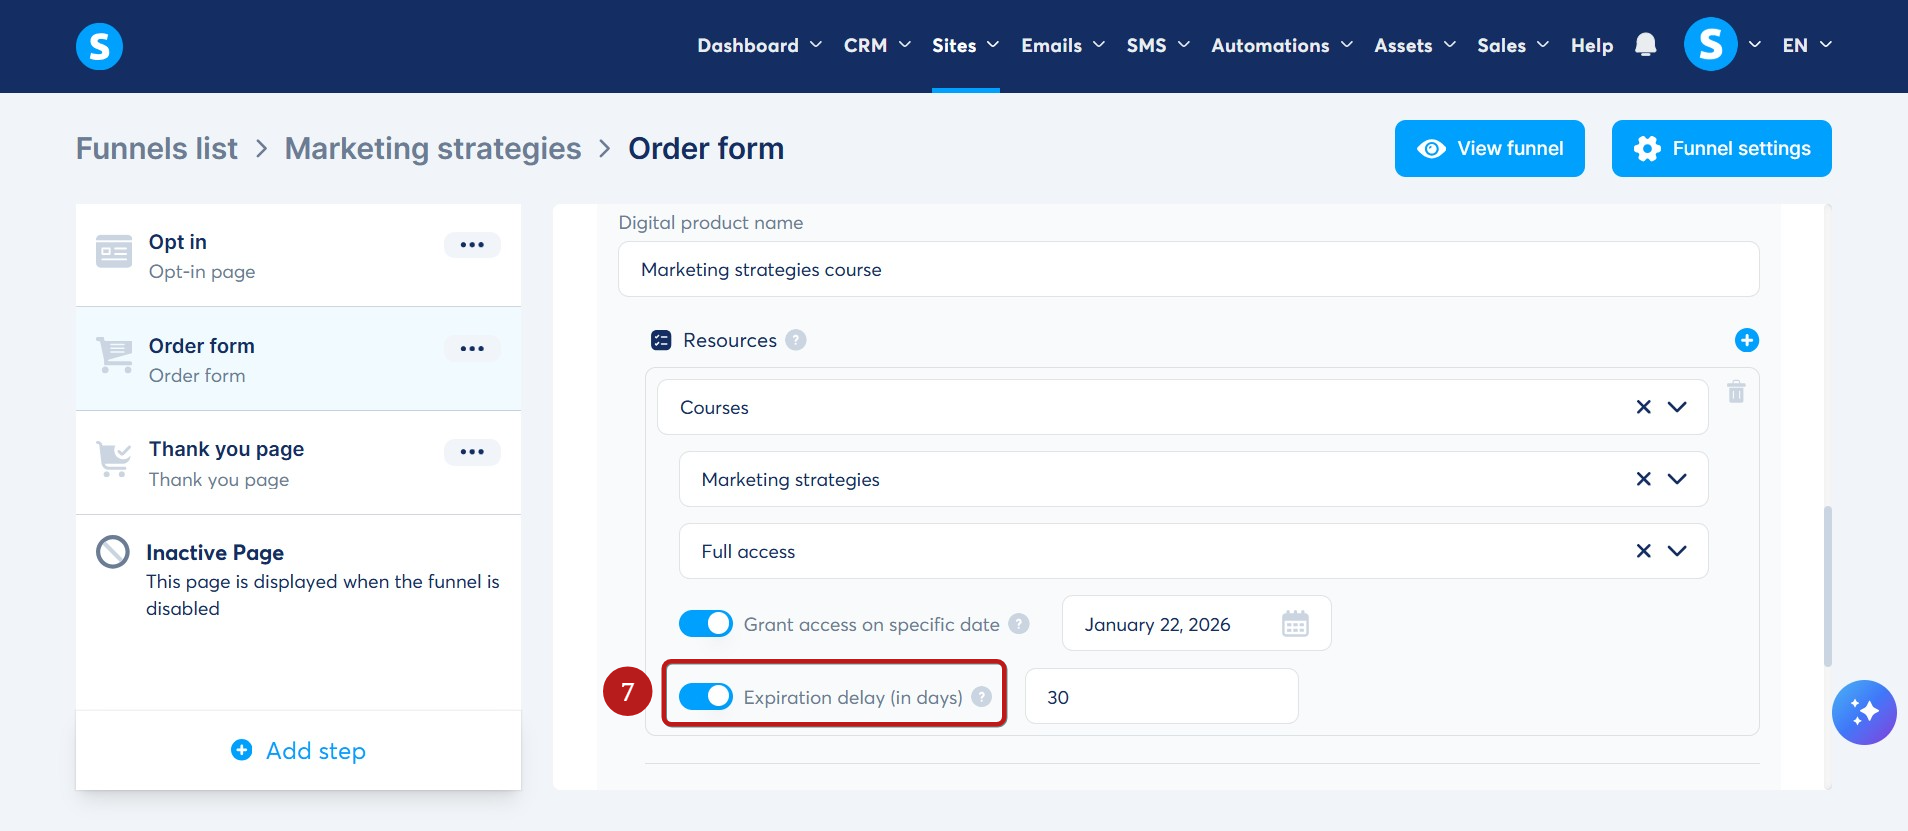
You can also choose to set an expiration delay (in days) for your course (7).
Example: If you were to set an expiration delay of 30 days:
- If a specific access date is set, the course will no longer be available 30 days after it has been unlocked.
- If no access date is specified, the course will no longer be available 30 days after purchase.
Notes:
- This option is only available for courses with full or partial access.
- The date and time displayed for course access automatically follow the format and timezone configured in your main account settings.
After adding a resource to your order form, you need to create a price for your offer by clicking on the + icon (8) to the right of the section Price plans to add a new price.
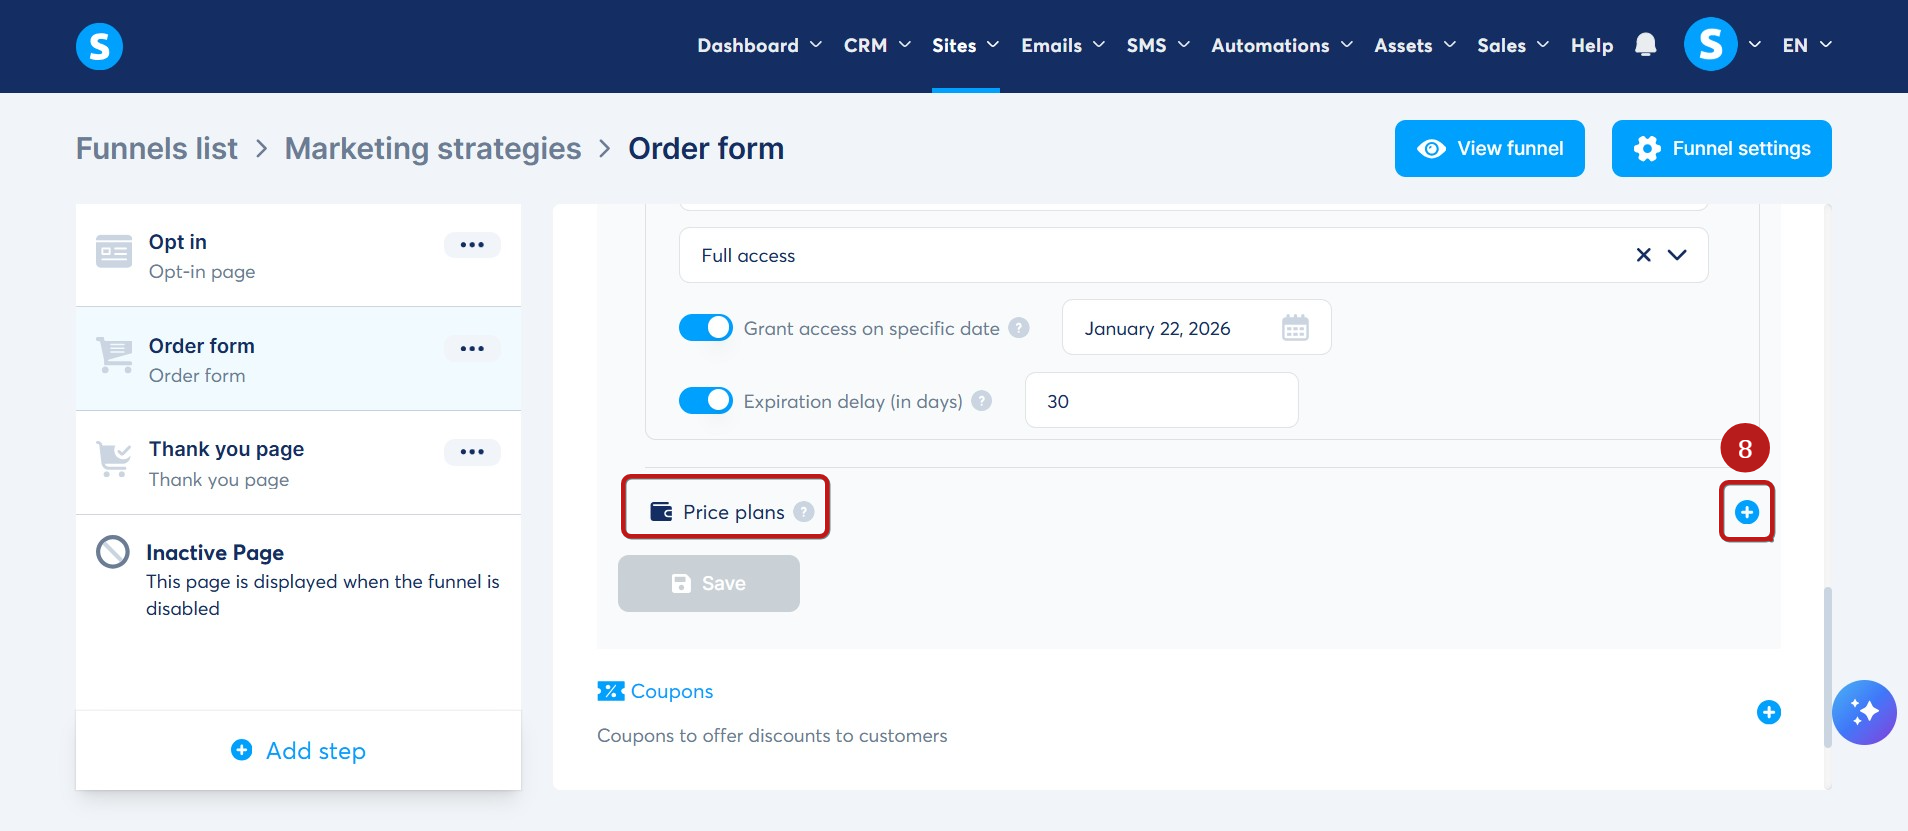
Click here to learn more about creating a price plan.
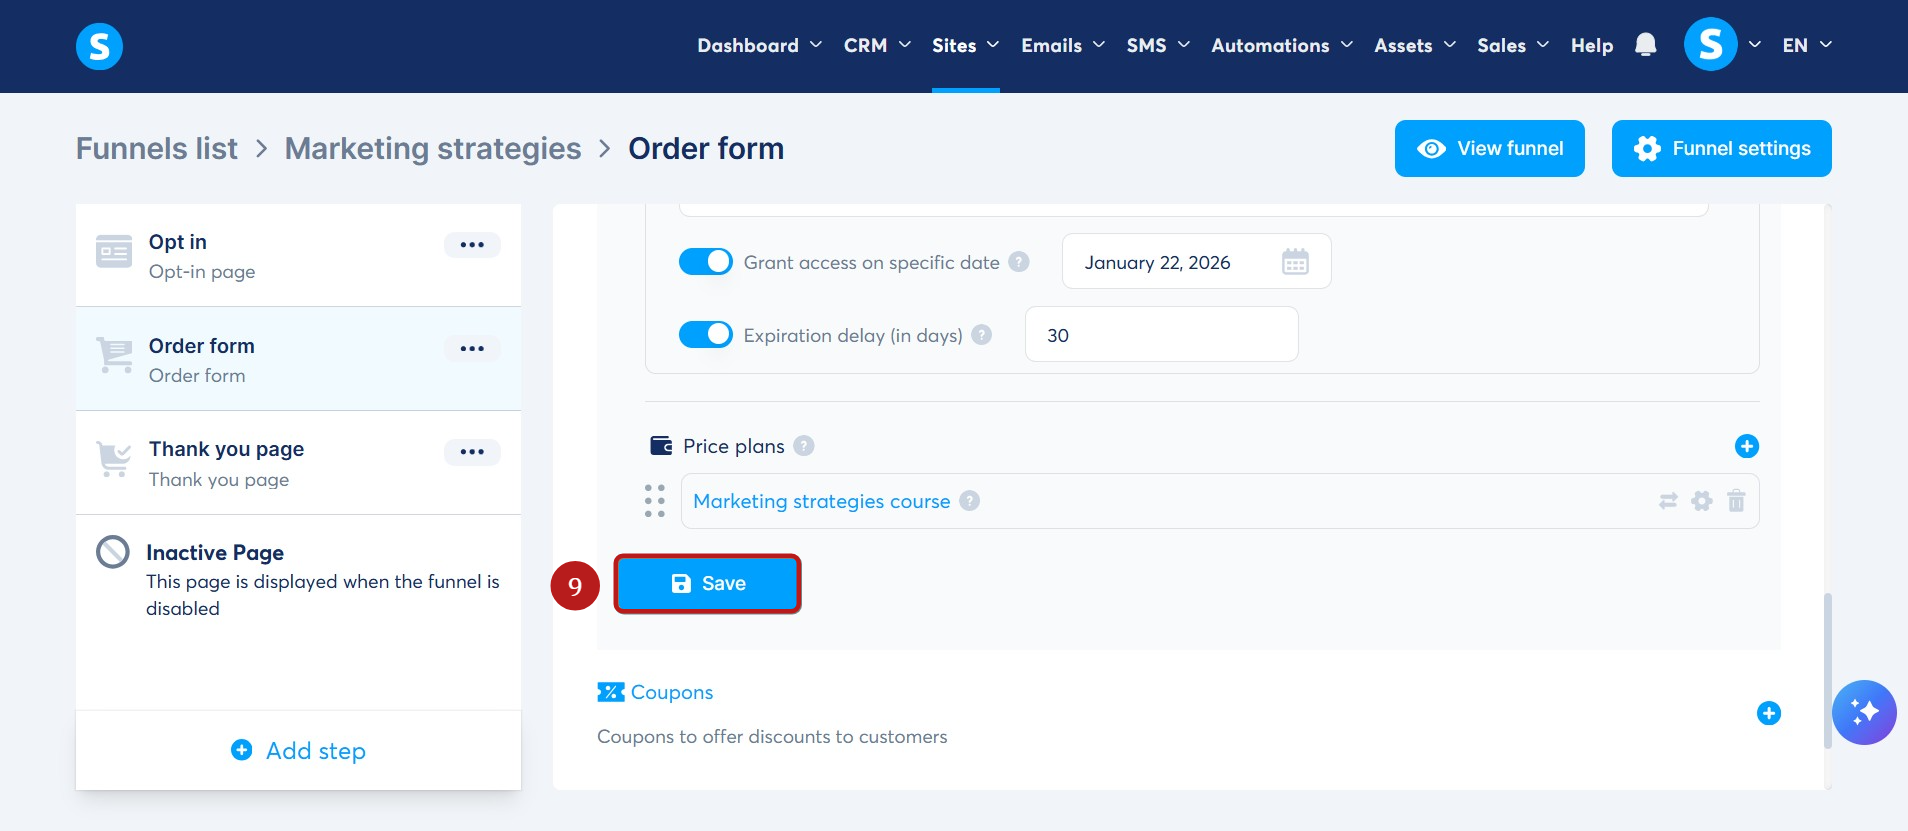
Note: It is essential to define a price plan to save your digital product by clicking on Save (9). Otherwise, the Save button will remain grayed out, and you won't be able to save the product to the payment page.
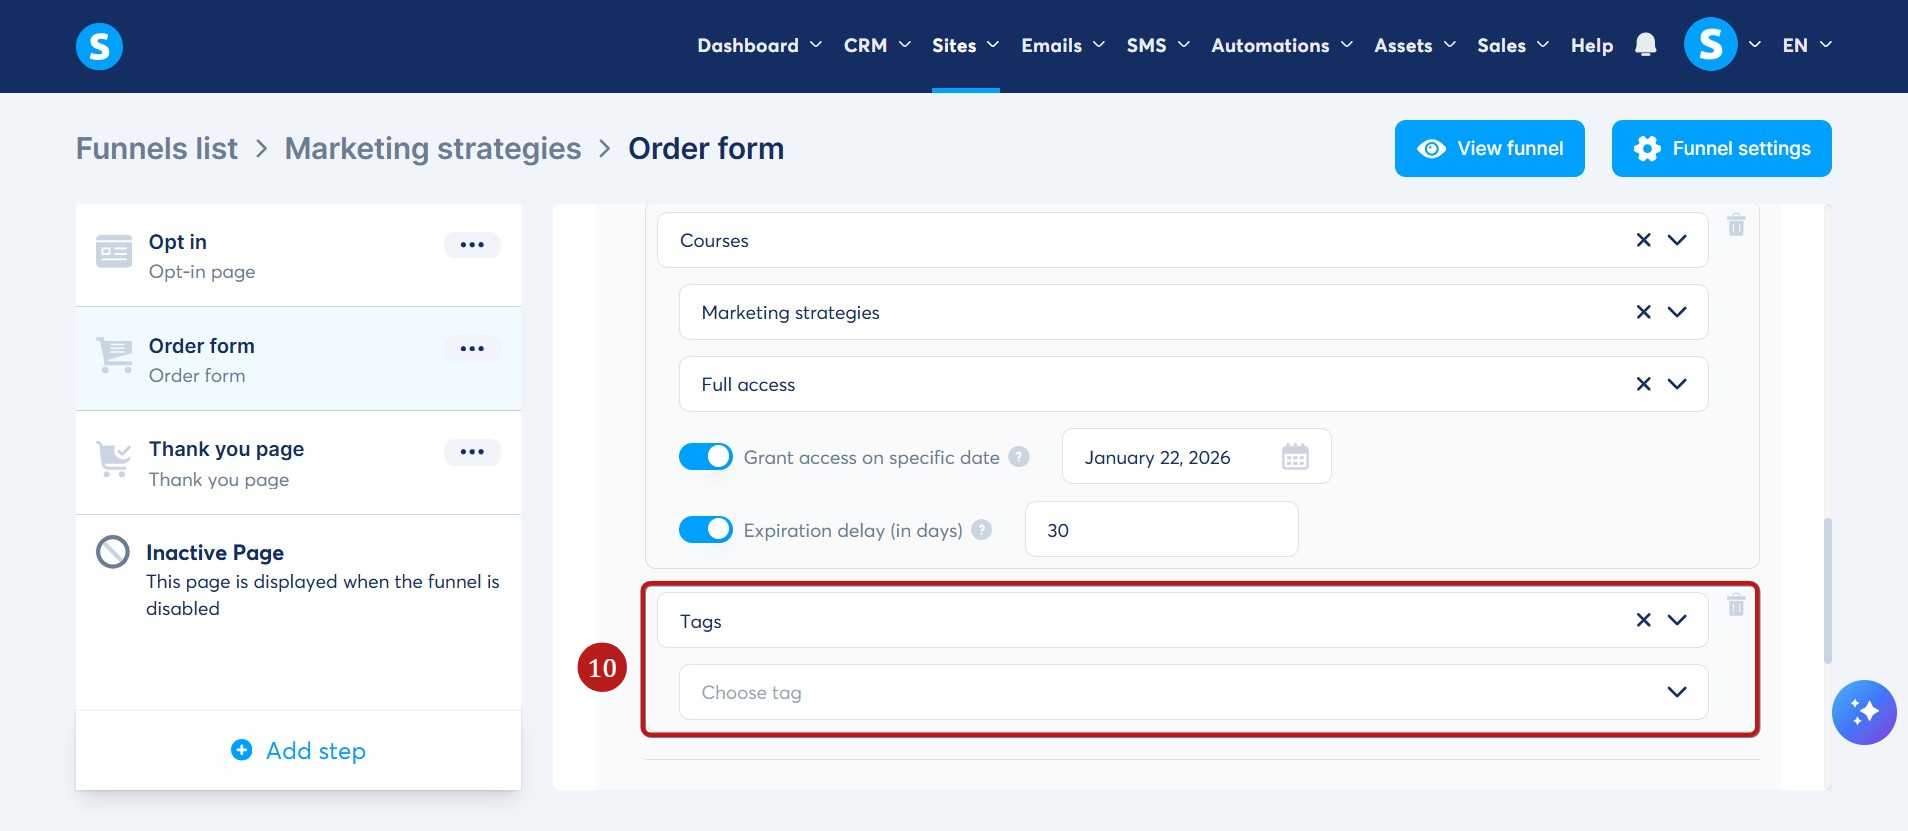
It is recommended to add a tag in the resources to easily segment your customers from your other contacts (10).
Upon completing these configuration steps, you're now ready to sell your courses.
When they are enrolled, your customers will automatically receive an email with instructions on how to set a password to access the course's membership area.
Note: To provide a seamless experience, when a student clicks their course access link, they will be taken straight to that specific course immediately after logging in or creating their account. If a user tries to log in but does not actually have access to the course, they will simply be redirected to their standard student dashboard.
If you already have a digital product and want to use it again, simply search for it among the existing digital products by clicking on Select and choosing one of the products on the list.
FAQ:
- Question: Can we customize the course access email sent to students?
- Answer: No, the automated enrollment email cannot be customized within systeme.io at this time.