How to create a blog post
This guide will walk you through creating a blog post using systeme.io.
You will need:
- A systeme.io account
- A blog
Navigate to the Blogs on the Sites tab (1). Next, click on the title of your blog (2).

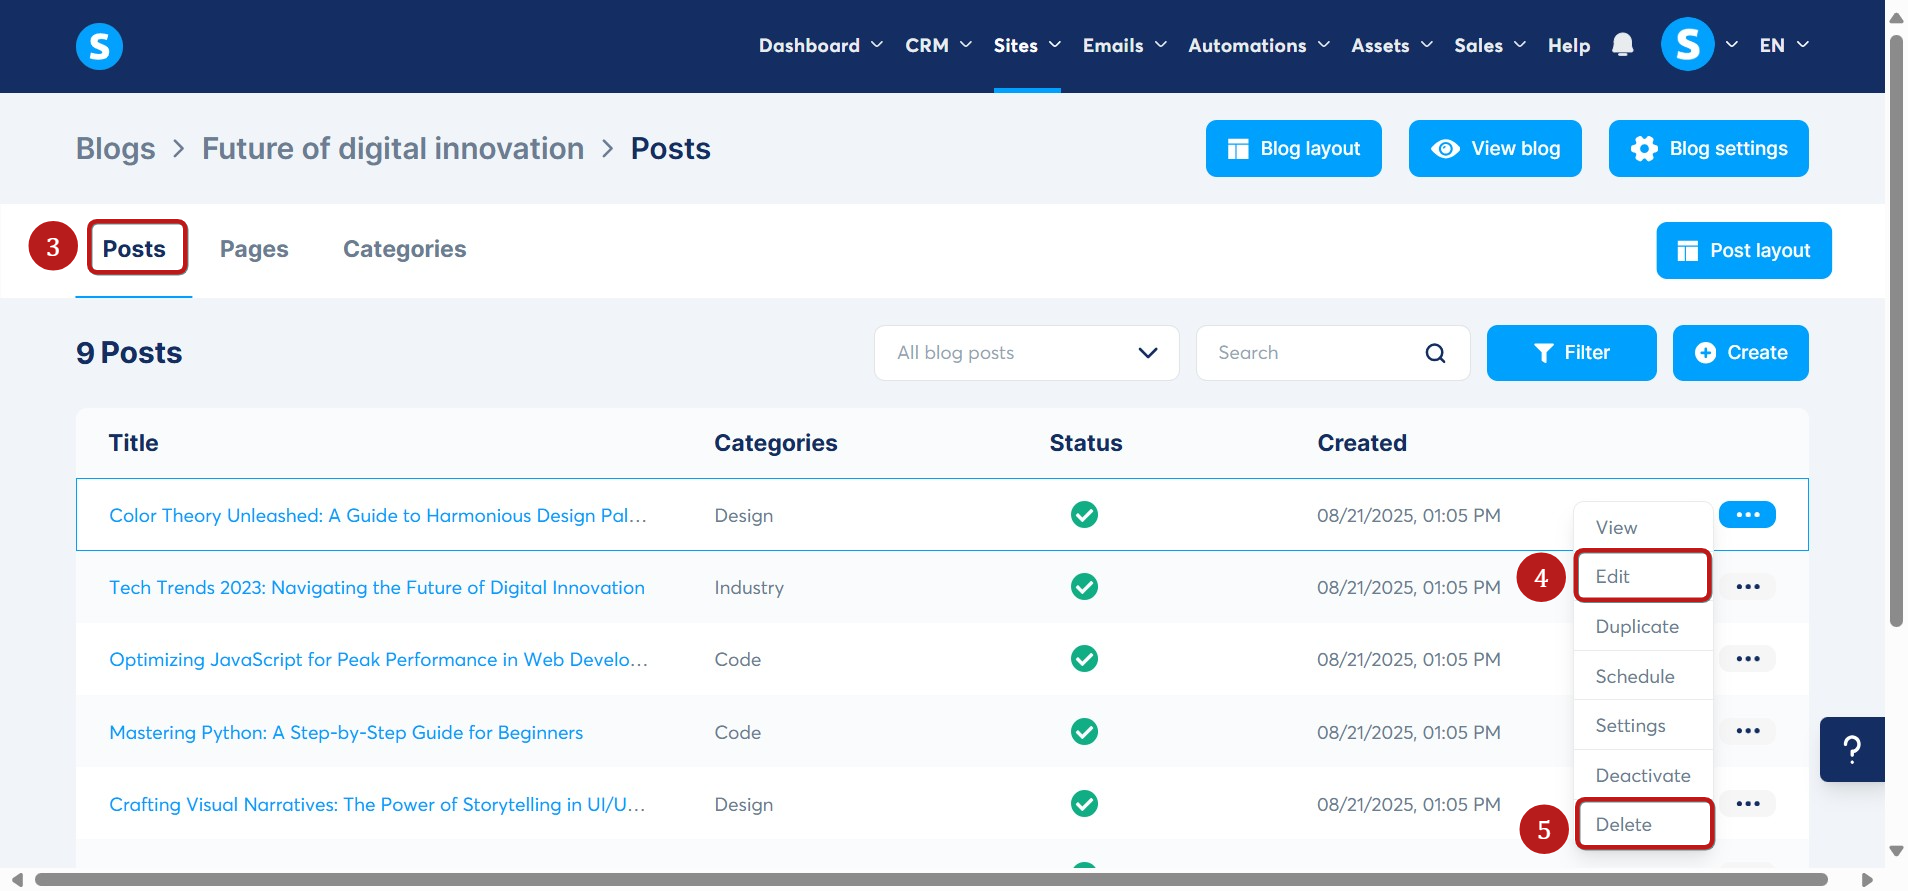
Once you're on your blog, go to the Posts section (3). You'll notice that some default posts were created when you initially set up your blog.
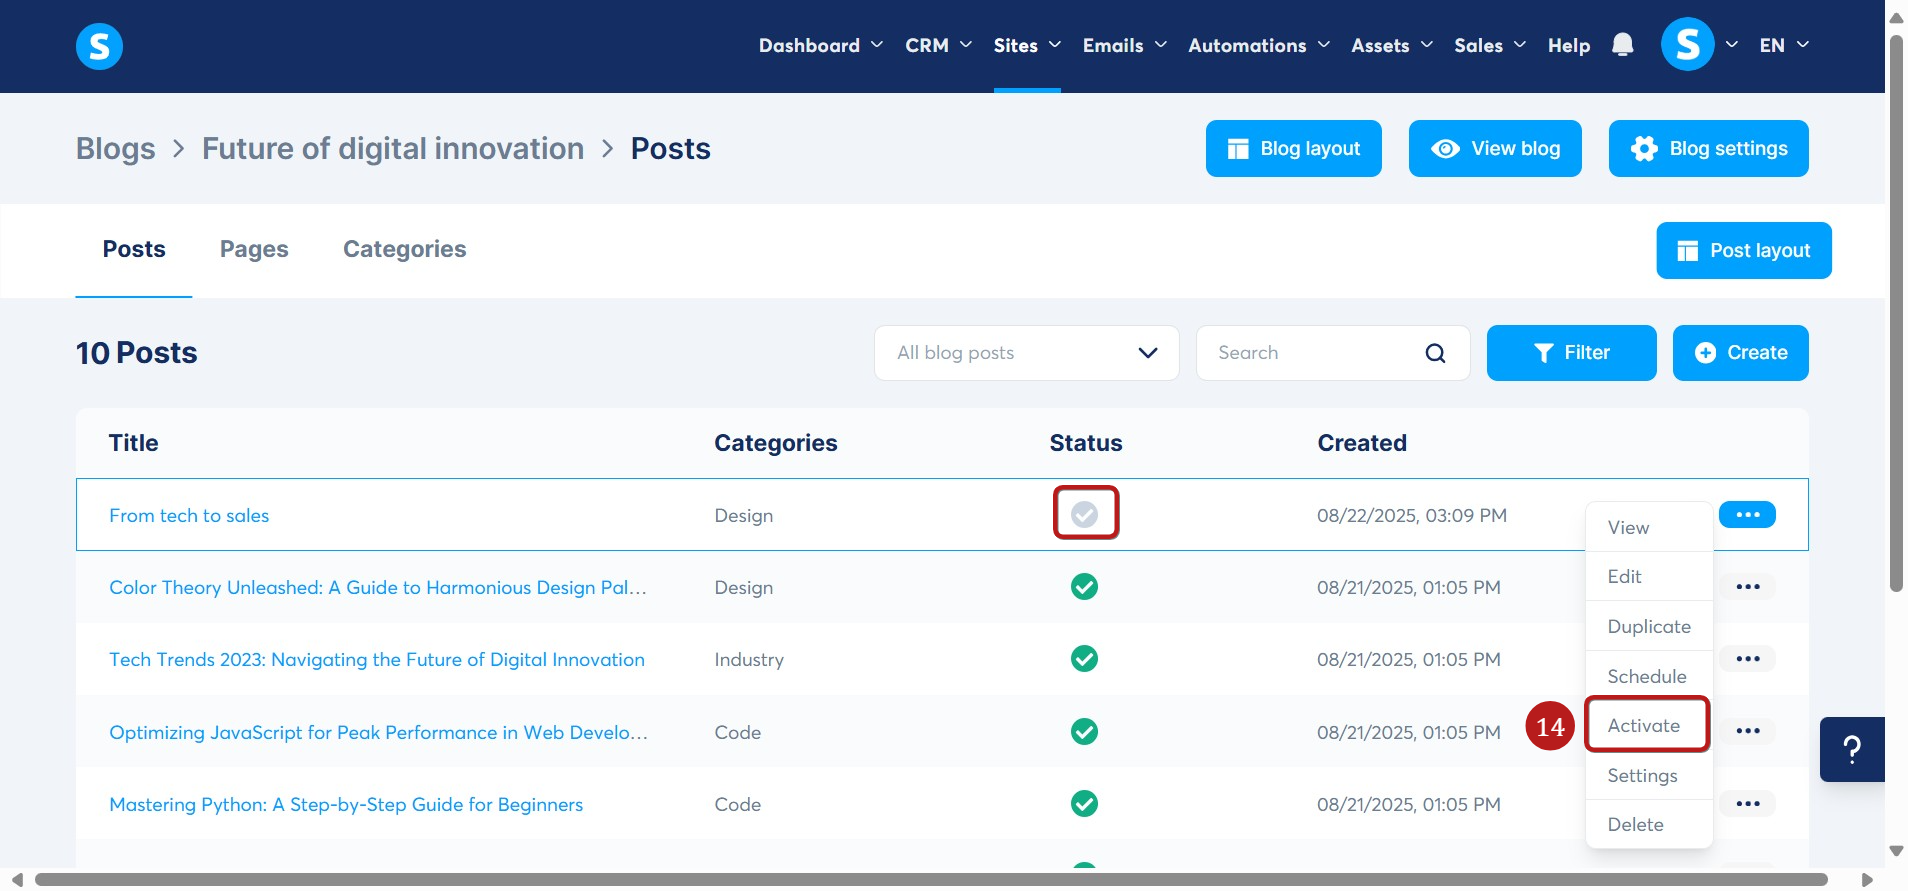
To modify these posts, click on the three dots and select Edit (4), or click the post title directly, and you can delete them by clicking on delete (5).
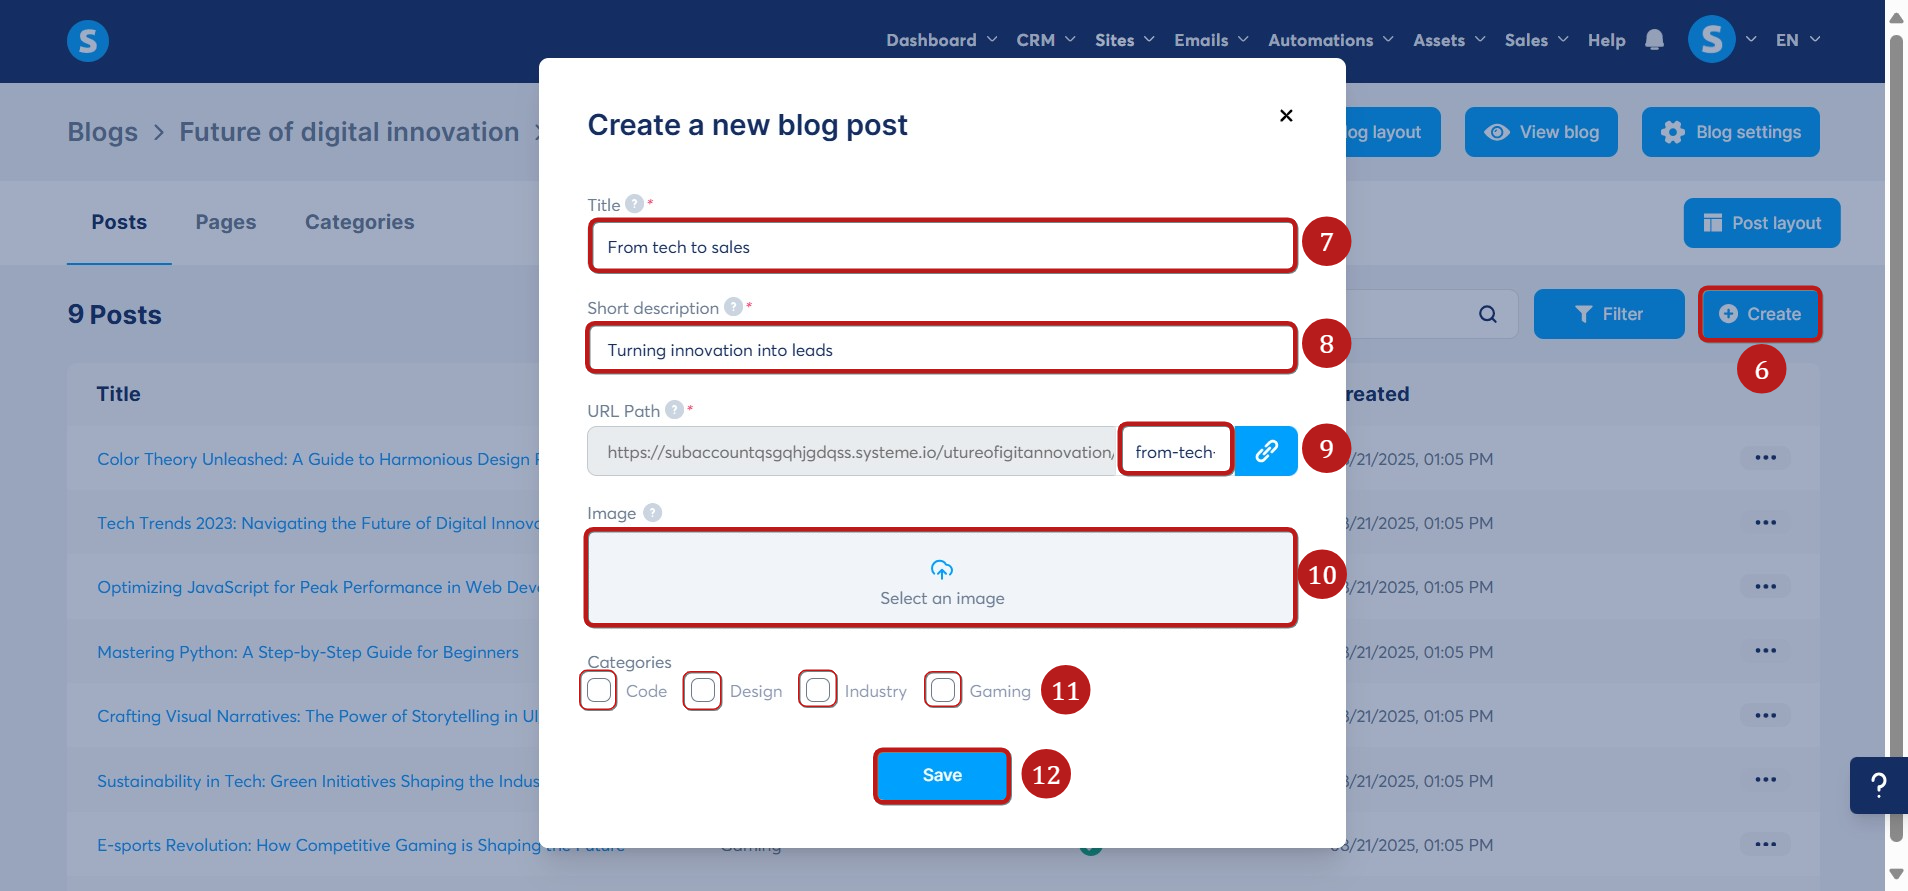
To create a new blog post, click on Create (6). A pop-up will appear, and you must fill in the input fields as follows:
- Title (7): Enter the title of your post; this will appear as the post’s header.
- Short description (8): Provide a brief description that will be shown on blog listing pages.
- URL Path (9): Define the URL for your post.
- Image (10): Upload or select an image to serve as the main photo for the post (it will also appear on the listing pages).
- Categories (11): Select one or more categories to organize your blog post.
- Save (12): Click this button to save your settings and create the new post.
After saving, your blog post will be displayed. The settings you have just defined can be changed later if you wish.
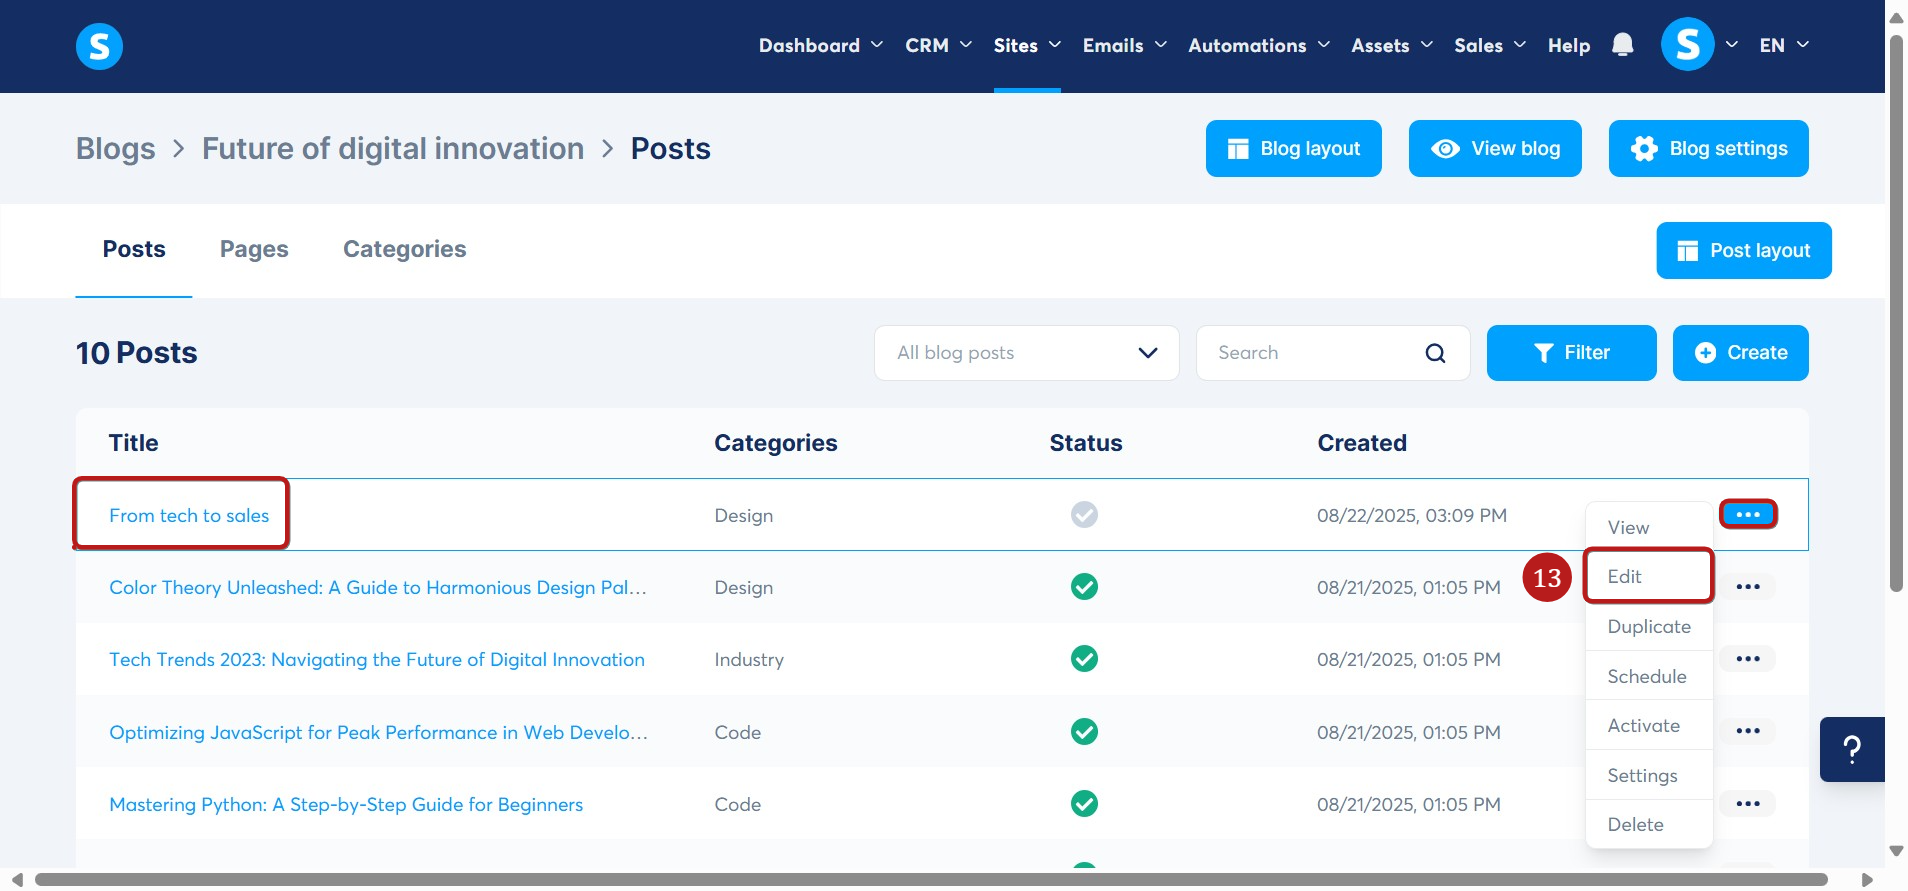
To customize the content of the new post, click on the three dots and then select Edit (13) or click on the name of the post.