How to create a blog menu
This guide will walk you through how to create and customize a menu for your blog.
You will need:
- a systeme.io account
- a blog
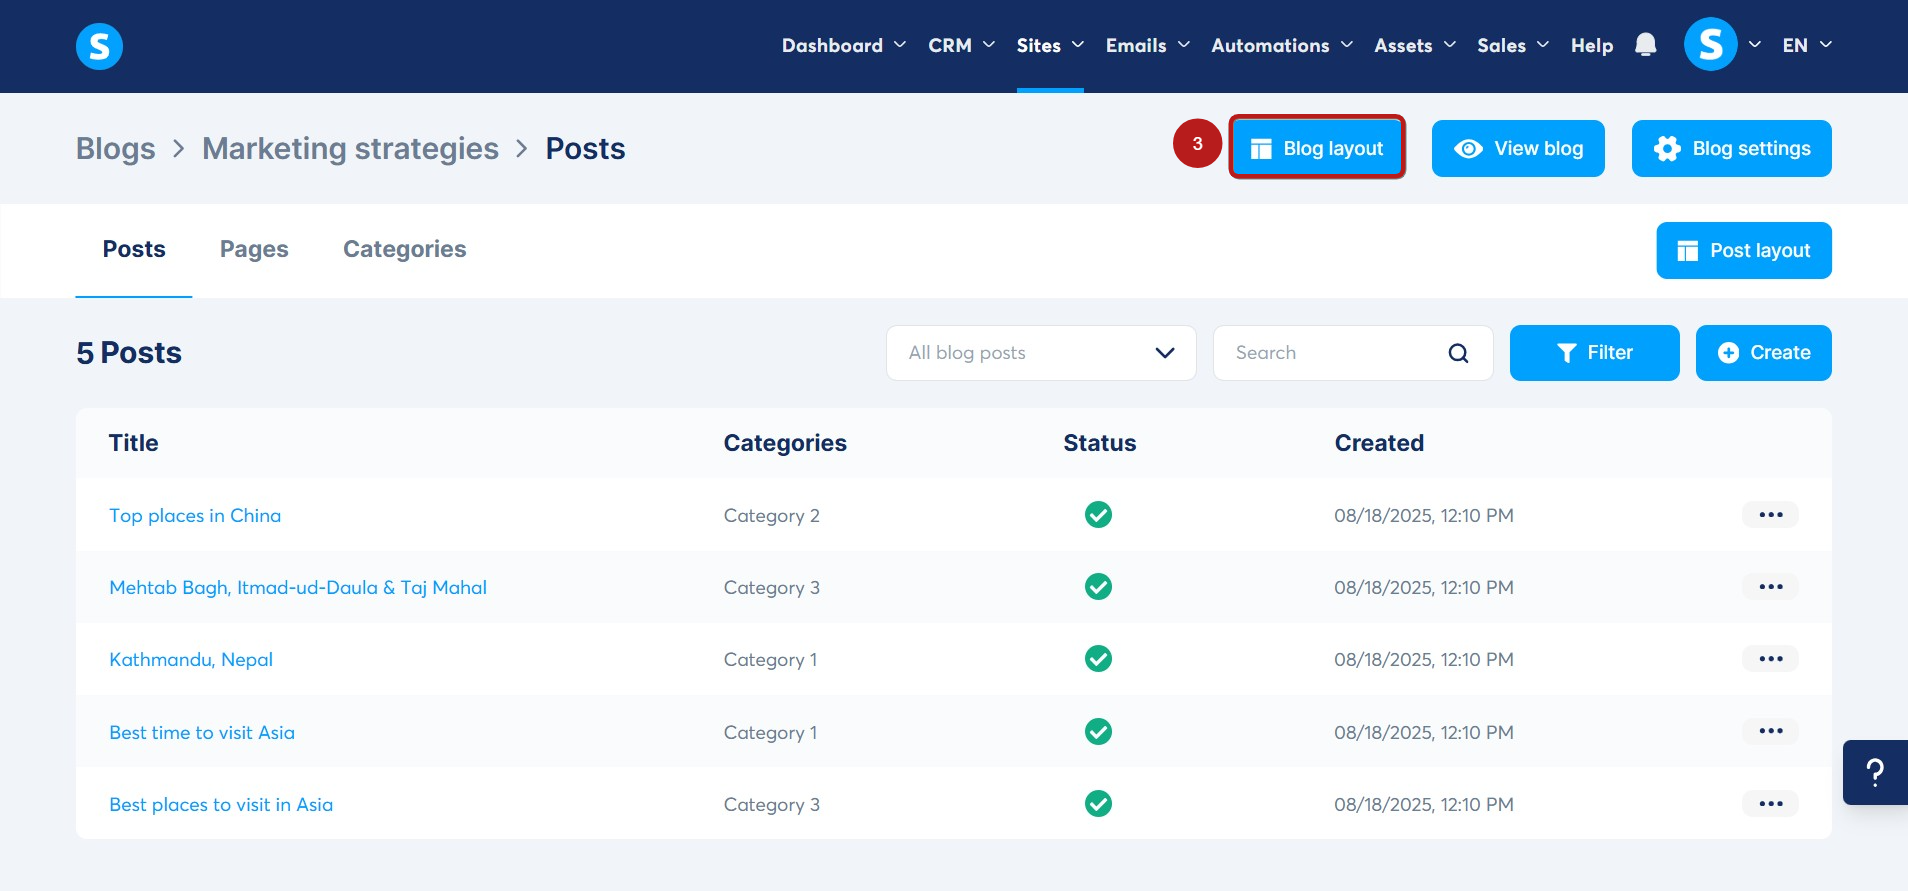
Navigate to the Sites tab and select Blogs (1), then click on the title of your blog (2).

Once you're on your blog's menu, click on the Blog Layout button (3).
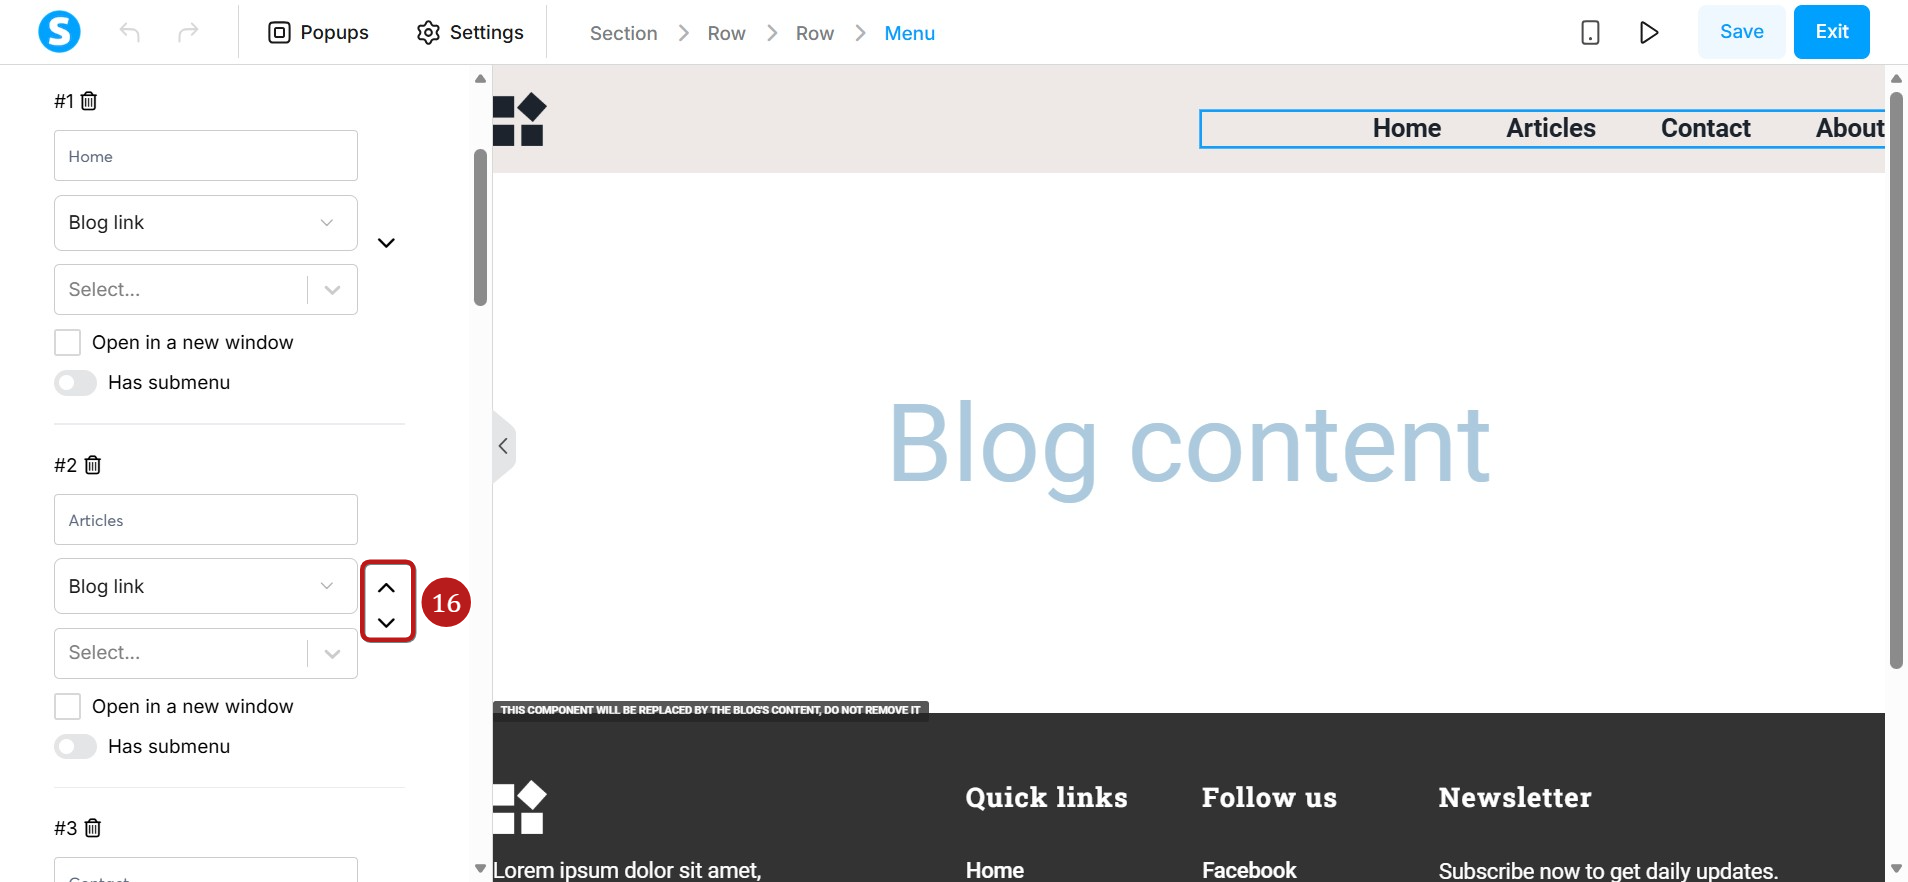
The blog layout editor page will open. Here, click on the Menu (4) element to access its settings. All Menu items (5) will appear.

You can add and customize your menu items using the following options:
- Title (6): Enter the name of your menu item (e.g., Contact).
- Type of link (7): Choose between Blog link or Custom URL.
- Menu item link (8):
- If you select Blog link, choose an existing blog page from the dropdown list.
- If you select Custom URL, type the URL directly in the field.
- Open in a new window (9): Check this box if you want the link to open in a new tab/window.
- Delete (10): Removes the menu item from both the settings and the page.
- Has submenu (11): A toggle that lets you enable or disable a submenu for this item.
- Open (12): Displays the submenu items within the editor, so you can preview and edit how they look.
- Submenu settings (13): Submenu items use the same options as main menu items.
- Add submenu item (14): Use this to add new submenu items.
- Add menu item (15): Click this button to create a new main menu item.

- Move menu item (16): Use the arrows to reorder your menu items.
- Clicking the up arrow swaps the item with the one above it.
- Clicking the down arrow swaps the item with the one below it.
Note: The menu you define in your blog layout will be consistent across all pages and posts on your blog.